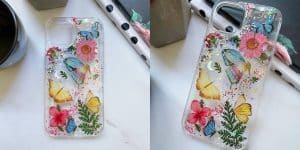
DIY Epoxy Resin Cell Phone Case
Keep your phone safe and customize it to fit your style by creating your own DIY resin phone case in a few simple steps!
Materials
- Promise Table Top Epoxy Resin (4 - 8 oz, depending on the size of your case)
- Star and moon glitter
- Various colors of fine glitter
- Dried flowers and plants
- Stickers of your choice
- Graduated mixing cups
- Stir sticks
- Nitrile gloves
- Safety glasses
- Clear phone case
- Tweezers
Instructions
- Before you start working with epoxy resin, make sure that you're wearing protective eyewear and gloves, cover your workspace (or use a silicone mat), and work in a well-ventilated space. Gather everything you need in your work area!
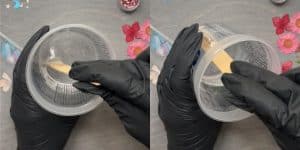
- Measure and pour equal amounts Promise Table Top Epoxy Resin by volume. Slowly and thoroughly combine the two parts of the epoxy resin until there are no swirls and minimal bubbles. Scrape the sides as you go to ensure that all the resin is incorporated. Slowly stir and fold for 3–5 minutes.
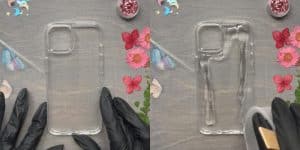
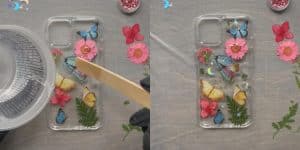
- Set up your clear phone case with the back facing you. Pour the prepared resin in a thin stream along the edges of your case and then into the center. You should have some remaining for later applications.
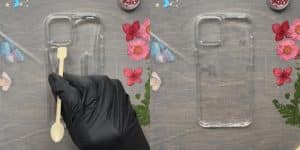
- Although the resin is self-leveling, it helps to have a tool of some kind to evenly coat the case. Use this utensil to evenly disibute the resin to coat the back of the phone case.
- Take your tweezers and use them to apply several of your stickers to the resin. Gently pat down your decorations as you place them so that the resin can help hold them in place. Eventually, you’ll coat all the decorations with another layer of resin. Add dry or fake flowers accordingly.

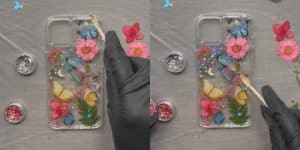
- Use a popsicle stick to drizzle some resin onto what you’ve added and incorporate the star and moon glitter. Don’t be afraid to move your décor around while the resin remains uncured to help arrange your design.
- Sprinkle the fine glitter in a two diagonal lines across the case. A line of silver glitter toward the top and a line of dark pink near the bottom.
- Layer more fine glitter on top of that. Blue over the silver and light pink over dark pink.

- Use a popsicle stick to drip a final resin coat over your design and let it cure for around 72 hours.
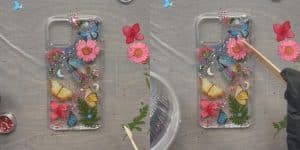
- Enjoy your brand new DIY resin phone case!