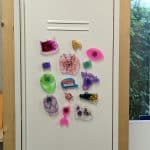
Resin Magnets
Use epoxy resin and a variety of additives to make the cutest custom magnets to decorate your space!
Materials
- Alumilite Amazing Clear Cast Epoxy
- Magnets
- Molds of choice
- Additives and colorants of choice
- Optional: Paint markers
- Optional: Stickers
- Measuring cups
- Stir sticks
- Nitrile gloves
- Safety glasses
- Optional: Small paintbrush
- Optional: Blow torch or heat gun
Instructions
- Before you start working with epoxy, make sure that you're wearing protective eyewear and gloves, cover your workspace (or use a silicone mat), and work in a well-ventilated space. Assemble all of your tools in your workspace!
- Measure and mix your epoxy resin. We created these magnets in batches, but they don't need a ton of resin individually.
- If you aren't sure how much resin to mix up, begin by pouring water into your mold. Then pour the water into a measuring cup to see how much is needed. Split that amount in half and that will be how much of each part you need!
- After measuring, mix the Promise Table Top Epoxy according to package directions. Pour equal parts resin and hardener into a mixing cup. Stir the mixture together slowly with a stir stick for 2—3 minutes. If there are streaks in the resin, keep mixing until it becomes clear.
- When approaching how you want to decorate your magnet, jump to the appropriate section in this article. We use a lot of different techniques, from flower encapsulation to mica powders, alcohol inks, and glow-in-the-dark powder.
- Once your resin has been prepared with colorants and additives, pour it into the mold.
- Set aside your magnet mold and allow it to cure for around 24 hours before demolding. You'll know if your epoxy resin magnets are cured once the surface is not tacky or sticky.
- After you demold your resin, all you need to do is attach a magnet to the back using any glue you're comfortable with. When you're gluing on a magnet, make sure to use a glue that dries clear. Some of your custom magnets might be translucent or completely clear, so you might be able to see the glue if it doesn't dry clear.
- Allow the glue to dry properly and your magnet will be ready to go! Display your new creations proudly.
