
Pressed Flower Wood & Resin Tray
Learn how to create a unique and beautiful floral wood and resin tray with MAS Epoxies Table Top Pro epoxy resin! This piece will leave your friends and family drooling and wanting one of their own!
Materials
- MAS Epoxies 18x12x4 Silicone Tray Mold
- 108 oz MAS Epoxies Table Top Pro (roughly)
- MAS Epoxies Penetrating Epoxy
- MAS Epoxies mixing cups
- MAS Epoxies Mixing Sticks
- MAS Epoxies Plastic Spreader
- Color Creator Premier Gift Pack mica powder, alcohol ink, and glitter
- Wood slab
- Pressed/dried flowers and leaves
- Tray handles
- Torch
- Bosch palm sander and drill
Instructions
- Seal Wood Slab with MAS Penetrating Epoxy to prevent bubbles. Place into mold and weigh it down with a heavy object(s).
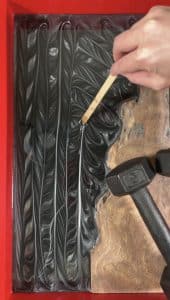
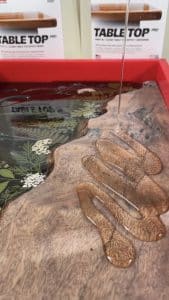
- Once you have your sealed piece of wood nestled into the mold and weighted down, it’s now time to pour in the first layer of tinted epoxy. Mix equal parts MAS Epoxies Table Top Pro Resin and Hardener and add Color Creator’s silver metallic mica powder, black glitter, and black alcohol ink into the epoxy resin. Pour this mixture into your mold until it is about 1/8” deep.
- Run a popsicle stick through the epoxy to form a pattern of your choosing, if desired. Allow to cure for about 4 hours.
- Mix up another batch of MAS Table Top Pro as above and lightly tint it with the same black alcohol ink that we used in the previous step. Pour this transparent black epoxy onto the first layer to slightly mute and blur the design.

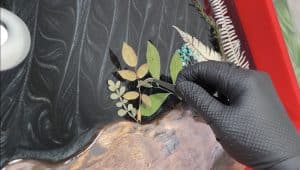
- Before the epoxy resin has fully cured (it should still be quite sticky), start placing your dried flowers and leaves. For this first layer of florals, I tried to use to tallest and biggest flowers and leaves I had available. Since these will be behind another layer of florals, I wanted them to still be seen and not be totally covered by the top layer of flowers. Once you have your florals placed exactly where you want them; let the epoxy cure completely before moving onto the next step.
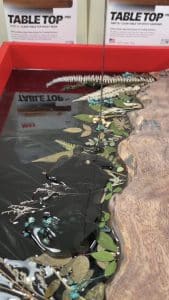
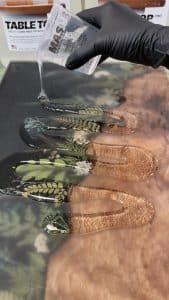
- To add even more depth to this tray, let’s make it look like the first layer of florals is deeper down (further back) than it really is! Mix up another batch of MAS Table Top Pro and lightly tint it with the black alcohol ink. Remember to only use a few drops of ink at first, mix, and keep adding a little more at a time. You want it dark enough to “smoke out” the floral layer, but light enough that you can still see the flowers and leaves through the tinted epoxy. Allow to cure for about 4 hours.
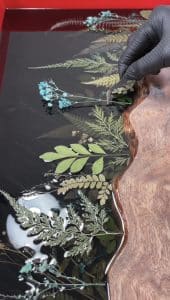
- Mix up yet another batch of clear MAS Table Top Pro and pour it onto the surface. Let it firm up just a bit until it’s at its gel state and start placing your last layer of florals.
- Once your epoxy has cured for about 4 hours, add another layer of clear MAS Table Top Pro to level off the entire surface and cover the wood. Let this layer cure FULLY before moving on to the next step.
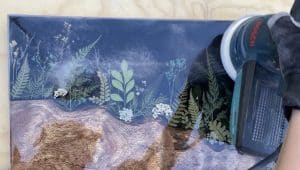
- With MAS Epoxies reusable mold, your project will slip right out with ease! Demold the tray. My wood piece was not perfectly flat, so I had some epoxy seep under my piece and a few flecks of dust on the top so I decided to sand it.
- After I sanded both the back and the front, I added the final layer of epoxy to both sides. Make sure to let your tray cure fully before adding the finishing touches.
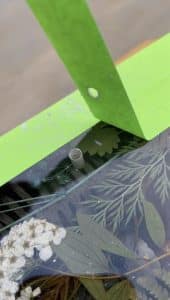
- Now it’s time to put your handles on! After measuring, drill out the holes and attach the handles with the provided screws. I also added little cork feet to the bottom of the tray to protect your table surface and the tray itself.
Notes
Each layer is roughly an average of 15 ounces. Some layers (like the base layer) had more and some layers (like the final top coat and back coat) had less.