
DIY Floral Resin Garden Markers
Learn how to create Springtime, floral Resin Garden Markers with Alumilite’s epoxy resin and silicone mold maker! You won’t be able to make just one…seriously, we tried. They’re just too cute, easy, and fun to make just one
Print
Pin
Materials
- Alumilite Amazing Mold Maker
- Alumilite Molding & Casting Trays
- Alumilite Amazing Clear Cast+ Plus
- Alumilite Amazing Casting Resin
- Color Creator mica powder, alcohol ink and glitter
- Pressed/dried flowers
- Disposable gloves and safety glasses
- Mixing cups and stir sticks
- Garden marker master
- Hot glue
- Vinyl stickers
Instructions
Making the Mold
- Hot glue the object that you want to make a mold of (in this case, it’s a garden marker), onto the bottom of your Molding & Casting Tray. Mix and pour Alumilite’s Amazing Mold Maker into the tray until it covers your object completely. Let this cure for about 30 minutes before removing the silicone from the tray and your object from the mold. You can find a full tutorial on using Amazing Mold Maker here.
How to Create Epoxy Garden Markers
- Mix and pour a VERY small amount of Amazing Clear Cast+ Plus into the bottom of your garden marker mold. For this step, you’ll need just enough epoxy resin to cover the entire bottom of the mold. Mist the epoxy with isopropyl alcohol to pop any bubbles that might have appeared.
- After the bubbles have been removed, carefully place your dried flowers (face down) into the epoxy. Gently press the flowers into the epoxy to avoiding trapping any air bubbles under the petals. During this time, you can add gold leaf, glitter, charms, or anything else you desire to be encased in the garden marker. Let this fully cure before moving on.
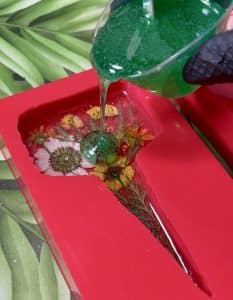
- To add a bit of pizzazz to these garden markers, how about we add some color to the background?! After the first layer is cured (about 24 hours), mix up some more ACC+ and color with alcohol inks, glitter, and mica powder from Color Creator. Pour a thin layer of this colored epoxy on top of the floral layer and let cure (about another 24 hours).
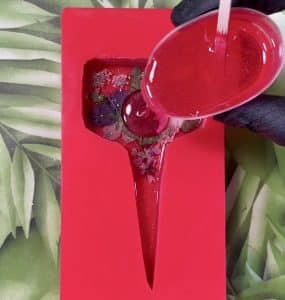
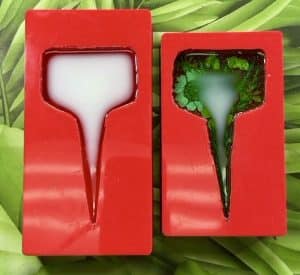
- Mix and pour Alumilite Amazing Casting Resin into the mold and wait for the magic to happen. In minutes you will see the clear liquid bloom into a brilliant white color while it’s hardening and then you can demold the garden marker in about 10-15 minutes.
- To customize your garden markers even further, you can add vinyl stickers or hand painted writing to the front of the markers (e.g., Grown with Love, It Takes Thyme, Basil, Lavender, etc.). After personalizing the markers, I would suggest adding a protective layer of Alumilite’s Amazing Clear Cast +Plus to seal everything in.