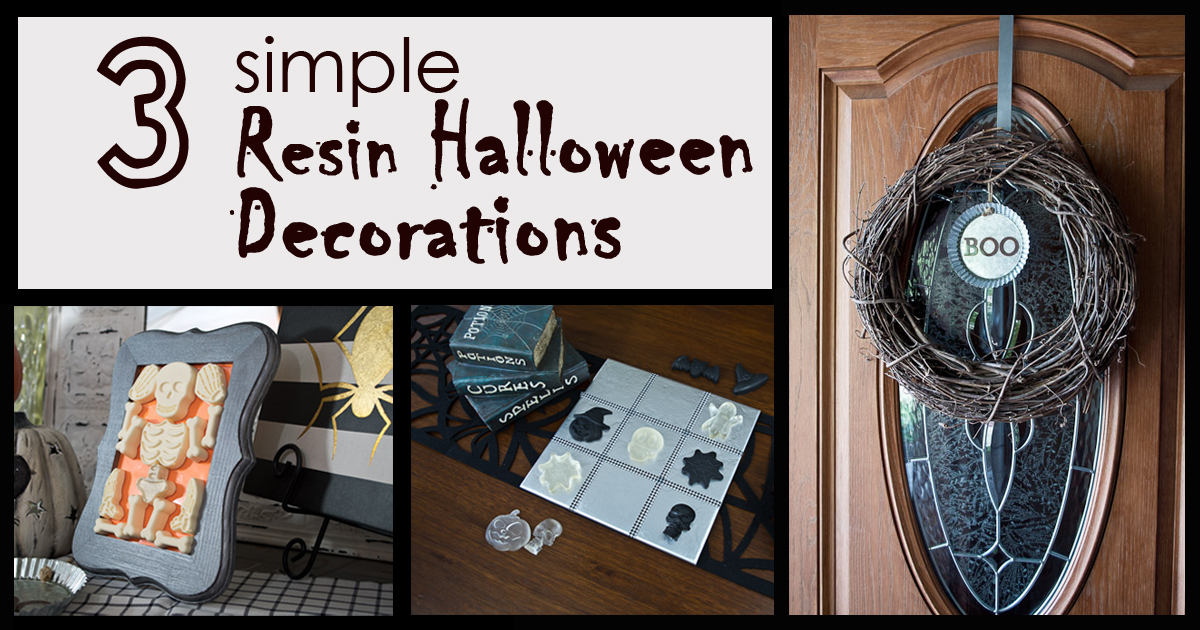
Halloween is such a fun time of year, from carving pumpkins and dressing in costume to decorating with all sorts of spooky themed decorations. Today I am bringing you three Resin Halloween Decorations that I made using products from ETI. These projects are easy to make and add a little fun to your Halloween decorations.
I don’t have an overall supply list for these projects, but I will list the supplies for each one before I tell you how I made them. Since this post is compiling a few different projects, I will also be linking to other posts that have in-depth tutorials on how to use the product for that decoration.
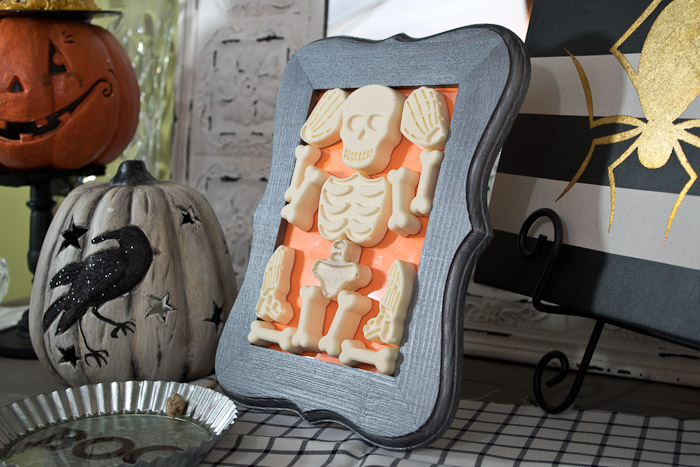
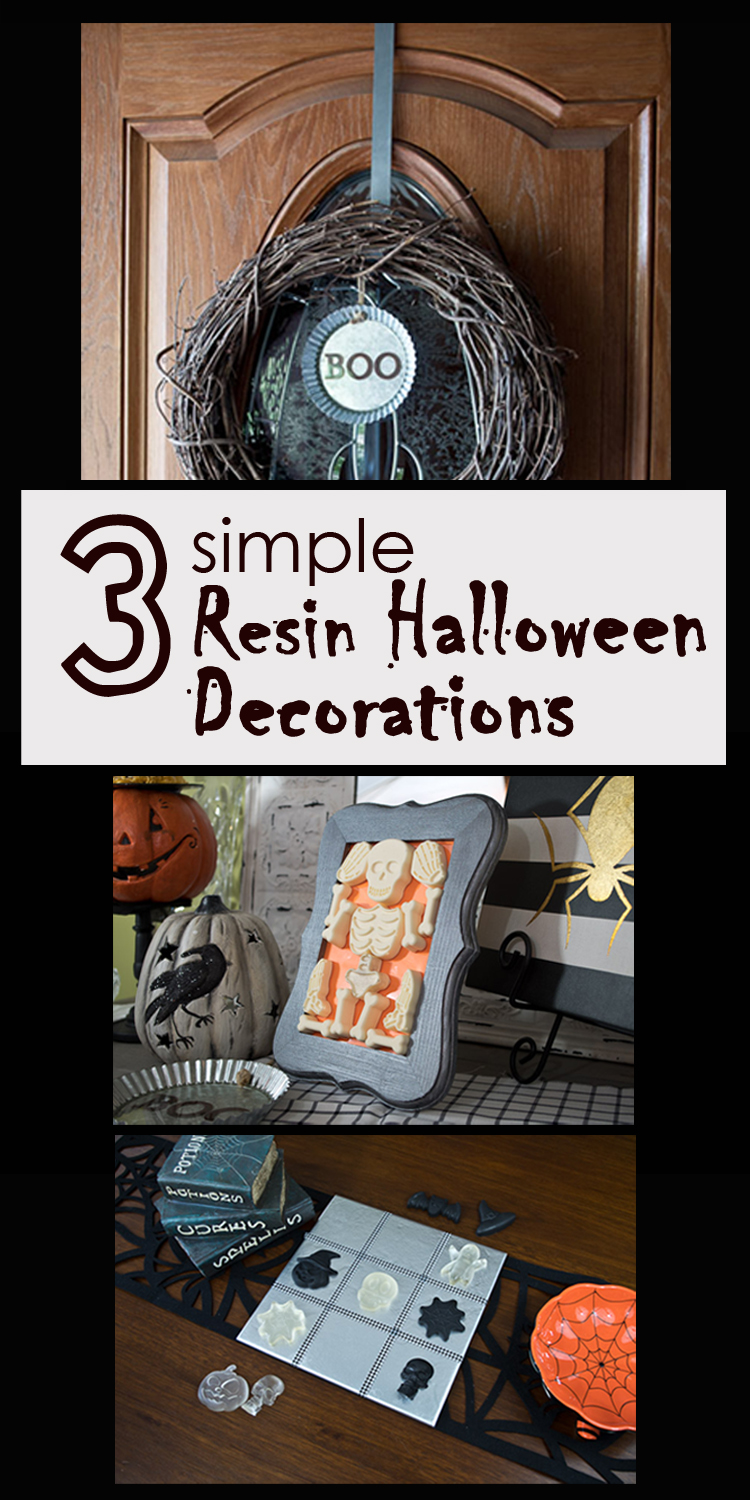
“Framed” Skeleton
Supplies:
- Skeleton silicone mold
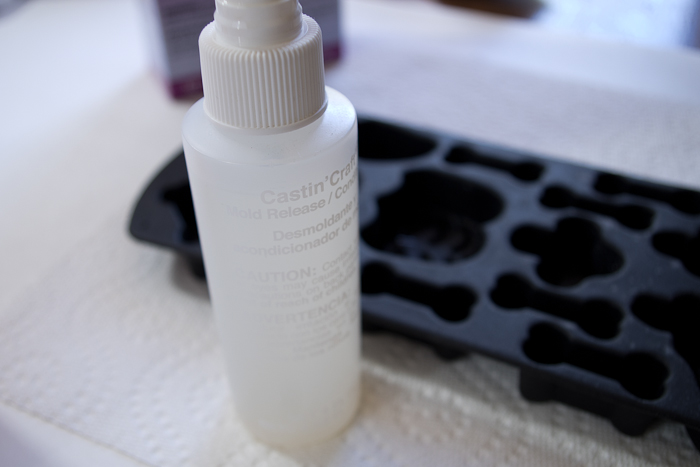
- Mold Release and Conditioning Spray
- FastCast Urethane Casting Resin
- Mixing cups
- Wooden Stir Stick
- Old frame
- Tape or adhesive
The first thing you need to do is spray your mold with the Mold Release and Conditioning Spray so that your casting won’t get stuck in the mold after it cures. I recommend applying two coats of mold release and letting it dry completely. This takes a little extra time, but is a step that will make your life easier in the end.
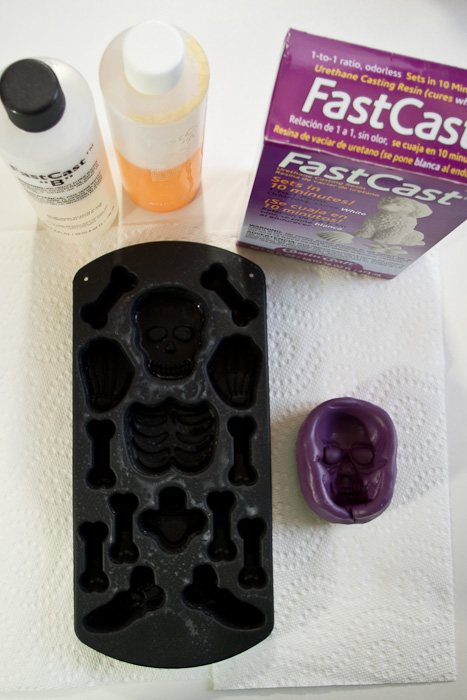
Once your spray dries, get your FastCast out. There are two parts that you will mix together. The biggest factor to be aware of with FastCast is that you have a very short working time with this product once it is mixed. You will combine equal amounts of Part A and B in a cup, then mix them quickly but thoroughly, for 30-45 seconds at most, then quickly pour them into your mold. If you feel the cup getting warm when you mix then that is a sign you need to pour it quickly.
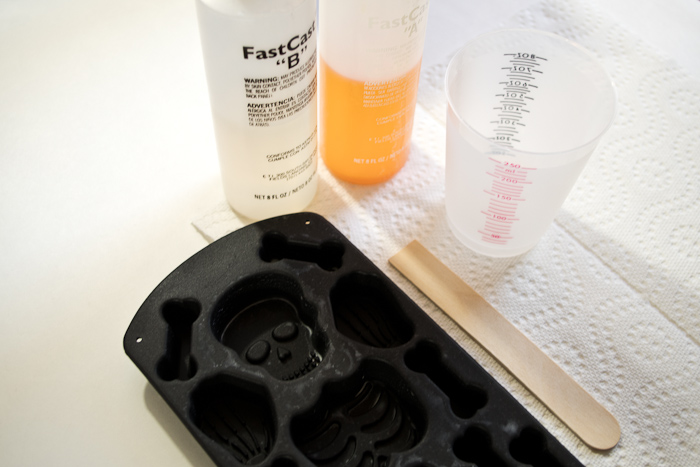
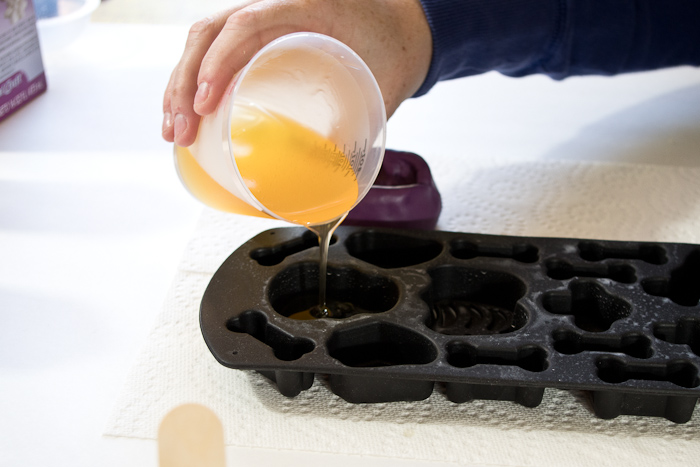
The resin will begin to cure after a few minutes and it will start to turn white. After 10 minutes it will be completely white and cured. 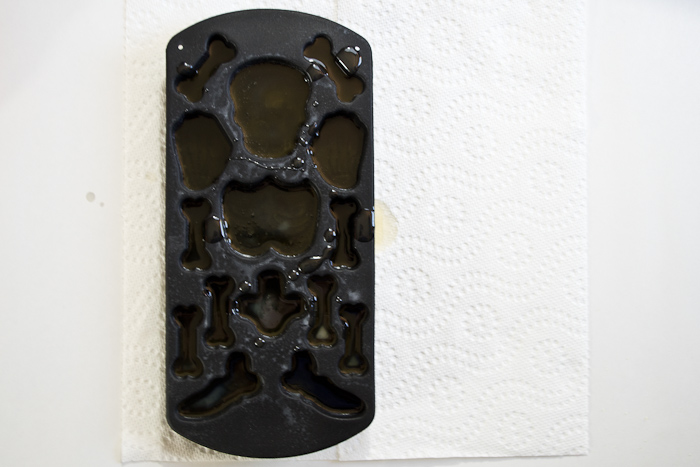
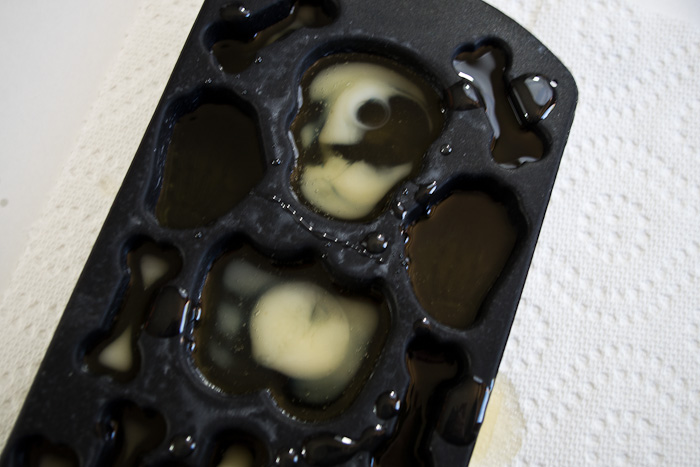
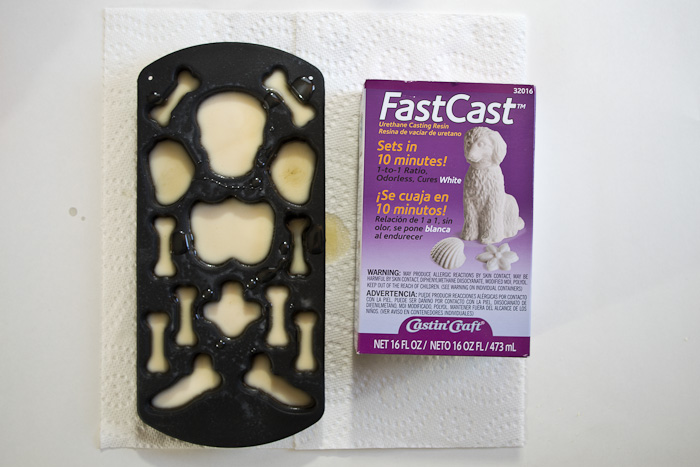
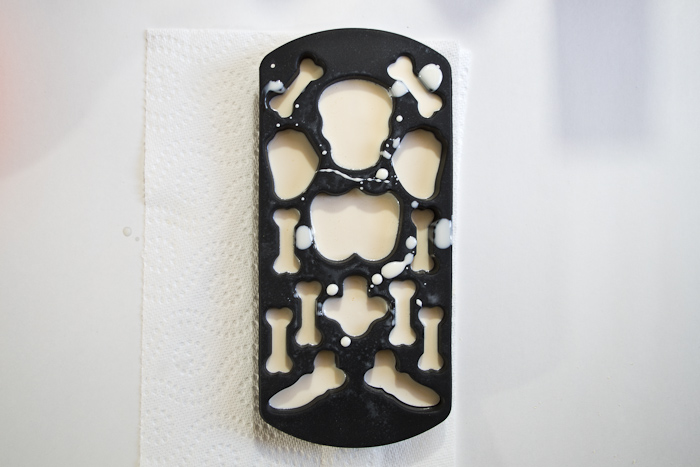
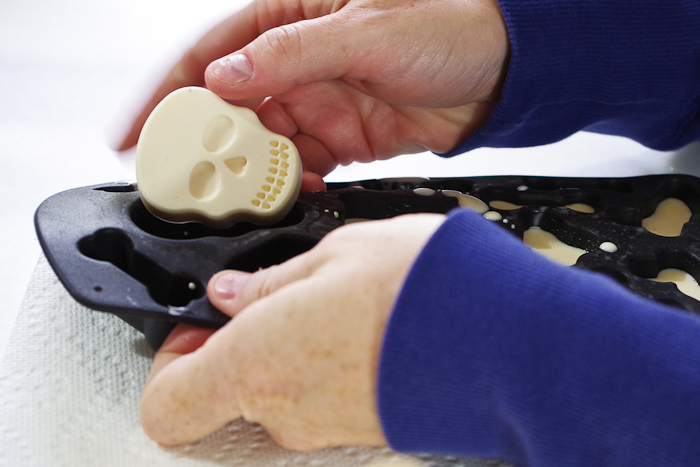
Remove your castings from the mold!
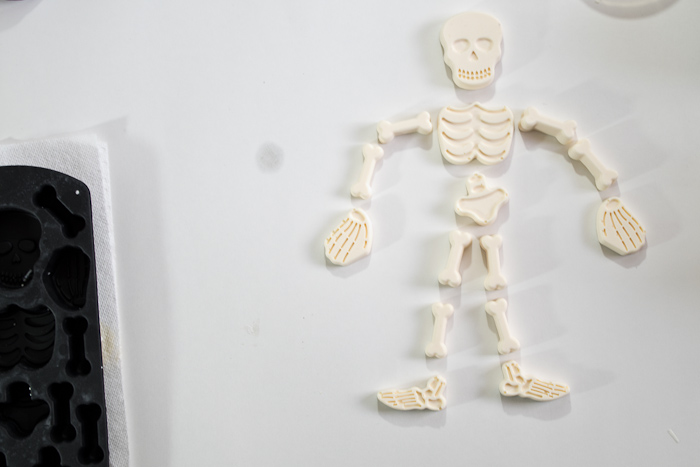
I then arranged the pieces within my painted frame and secured them with double-sided mounting tape. And there you have it, a “Framed” Skeleton!
**Another project using FastCast with full tutorial is Resin Seashell Wall Art using FastCast. Check that tutorial if you want more details on how FastCast works. Also, always read the instructions within the package before starting.**
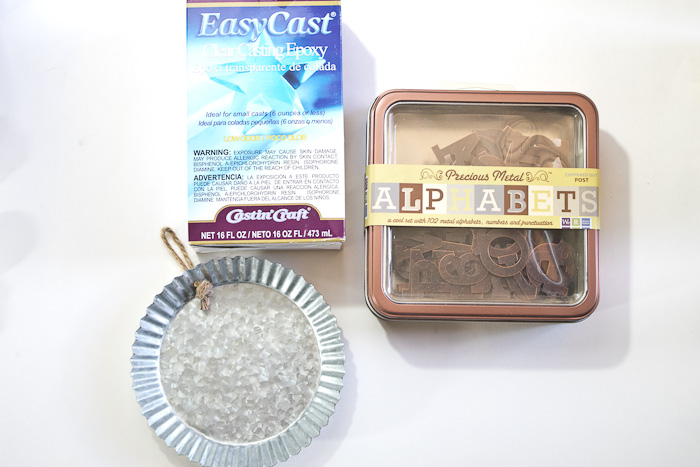
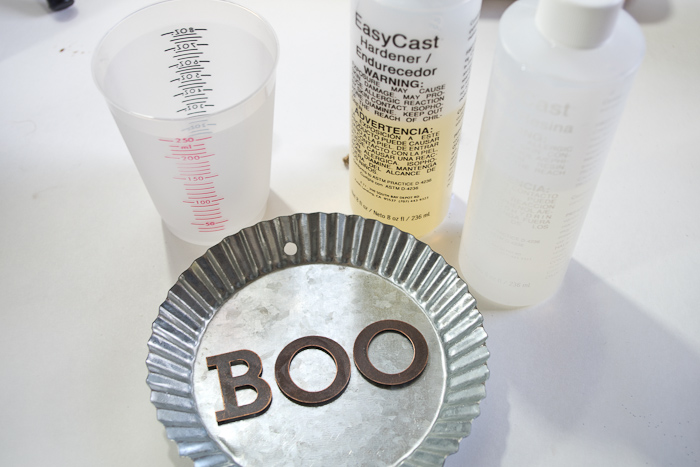
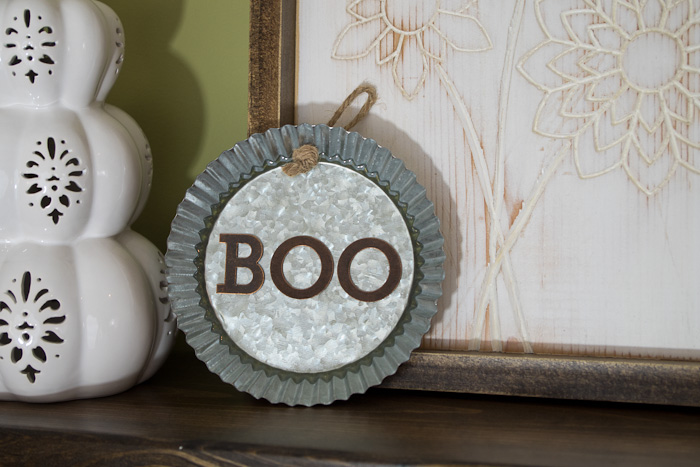
“Boo” Decorative Galvanized Hanging Tin
Supplies:
- Hanging Galvanized Tin
- EasyCast Clear Casting Epoxy
- Metal Letters B-O-O
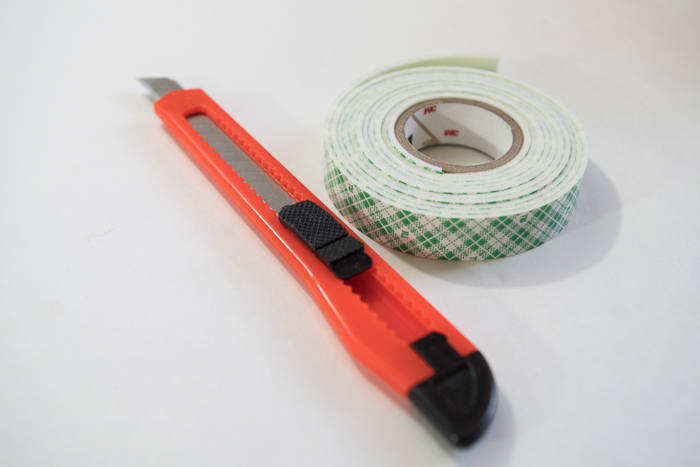
- Double-Sided Mounting Tape
- Two Mixing Cups
- Two Wooden Stir Sticks
- Micro Butane Torch
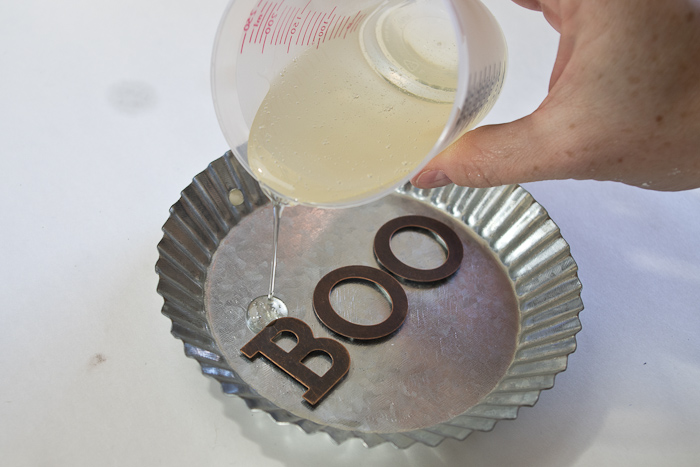
Gather your letter and apply small pieces of mounting tape on the back of them.
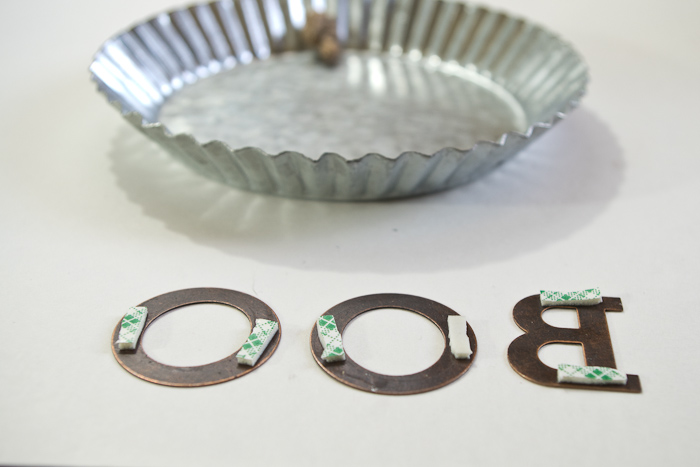
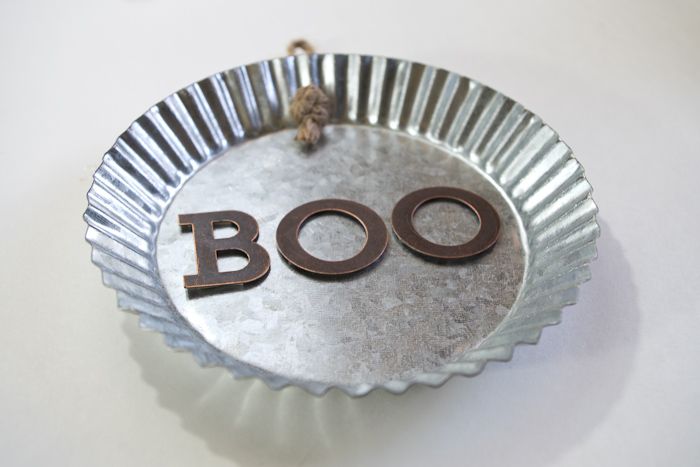
Arrange them where you want them in the tin, remove paper backing from the mounting tape and adhere them in place.
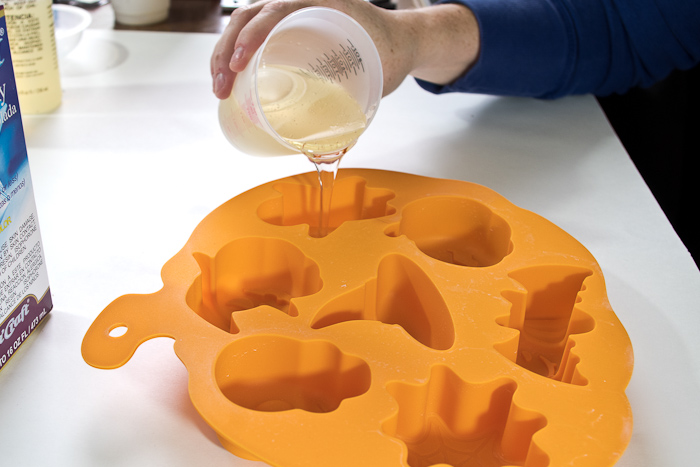
Mix EasyCast according to instructions. You have a lot more working time with EasyCast, so you won’t need to rush this time.
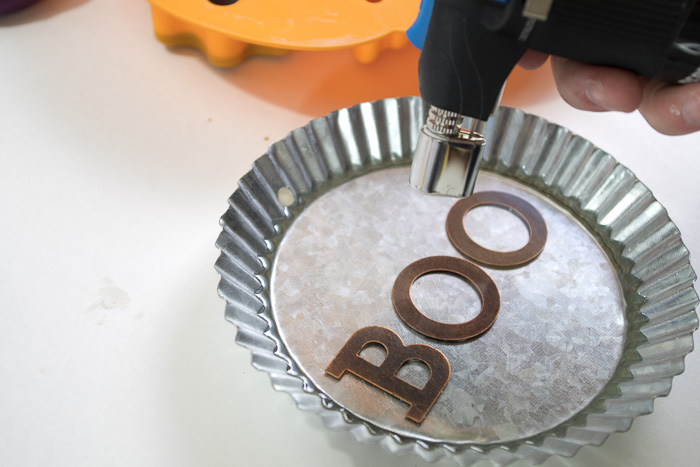
Mix equal amounts of Part A and Part B into a mixing cup. Stir together thoroughly. Pour into second clean cup and stir with a clean stir stick. Once thoroughly mixed, pour into your tin. After a few minutes of allowing the bubbles to arise to the surface, use your micro butane torch to pop the bubbles. You can also just exhale over the piece, but the torch is much faster. Just be sure to move it quickly just above the surface and not to let it scorch the resin.
Allow to cure for 24-48 hours (depending on temp and depth of pour.) 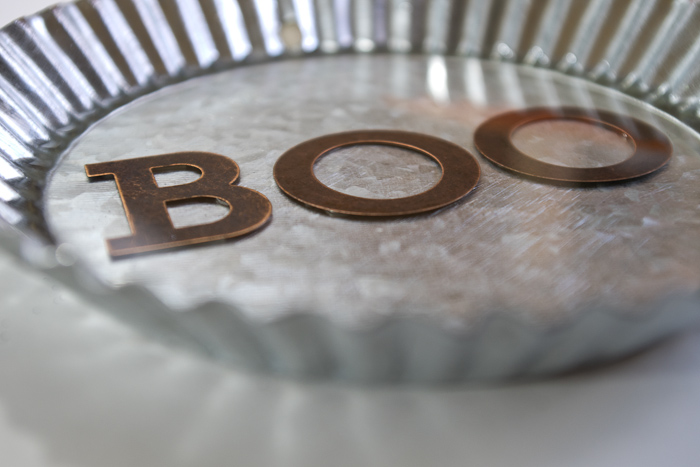
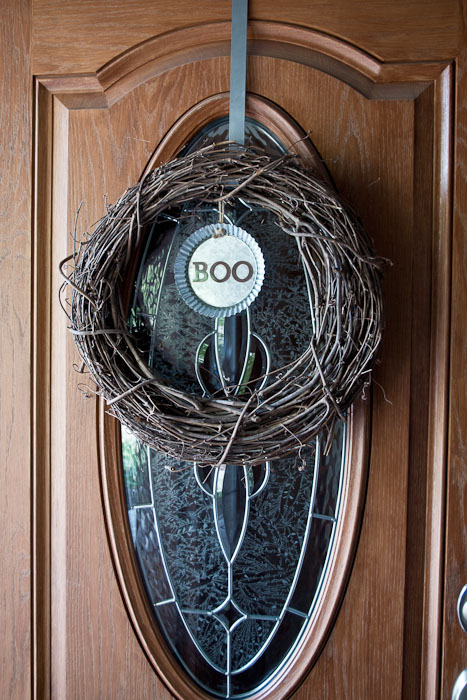
Once cured, hang it in a fun place to display for Halloween. I tried a few different options. This would be perfect for someone with simple rustic decor in their home!
**Another project using EasyCast with full mixing instructions is Wood and Resin Pendant using EasyCast.**
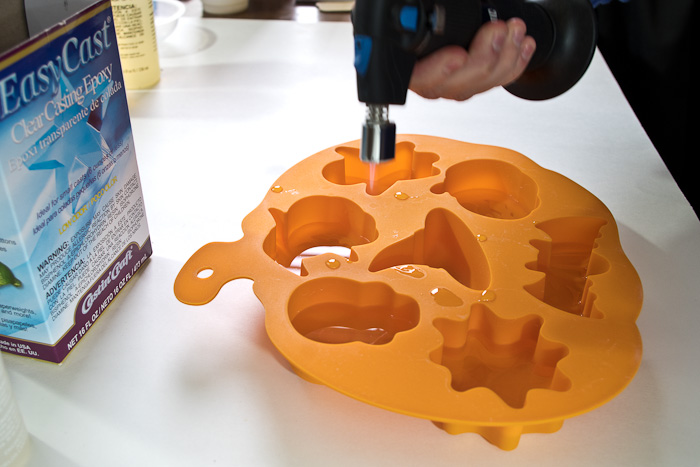
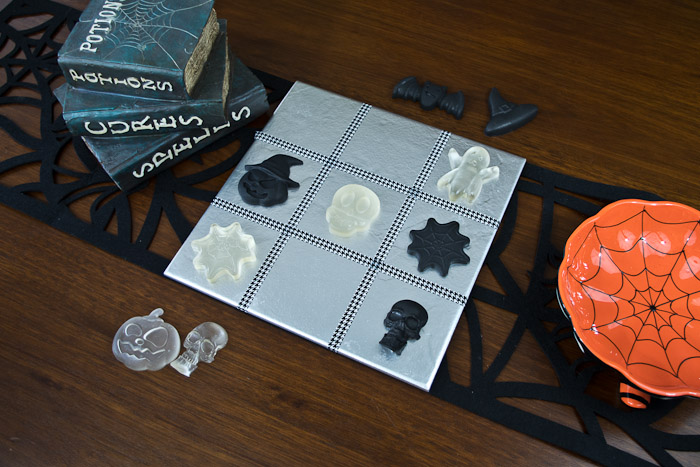
Halloween “Tic-Tac-Toe” Game
Supplies:
- Halloween shapes silicone mold
- Mold Release and Conditioning Spray
- EasyCast Clear Casting Epoxy
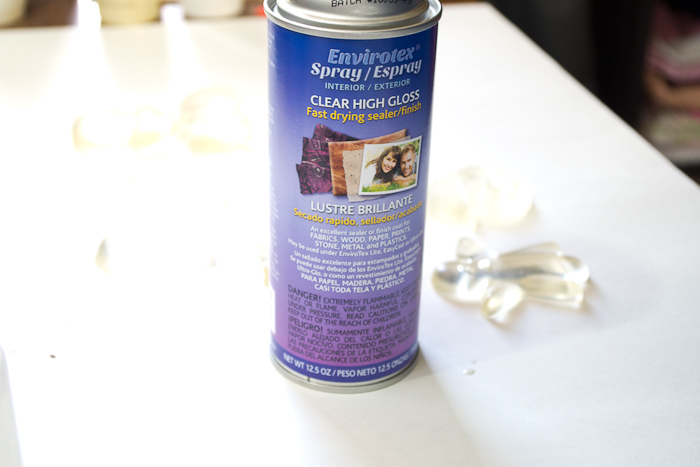
- Glossy Resin Spray Sealer
- Black Paint
- Large Tile
- Metallic Silver Spray Paint
- Washi Tape
- Felt fabric for back of tile
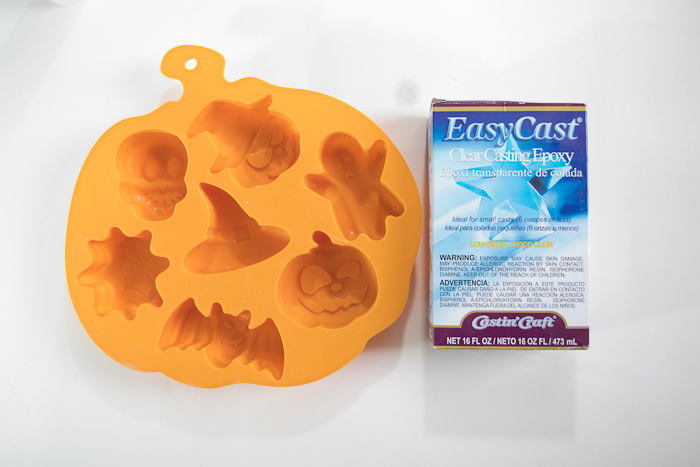
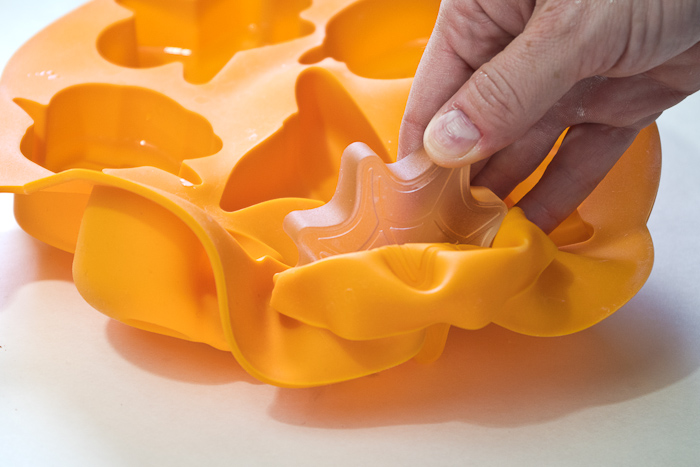
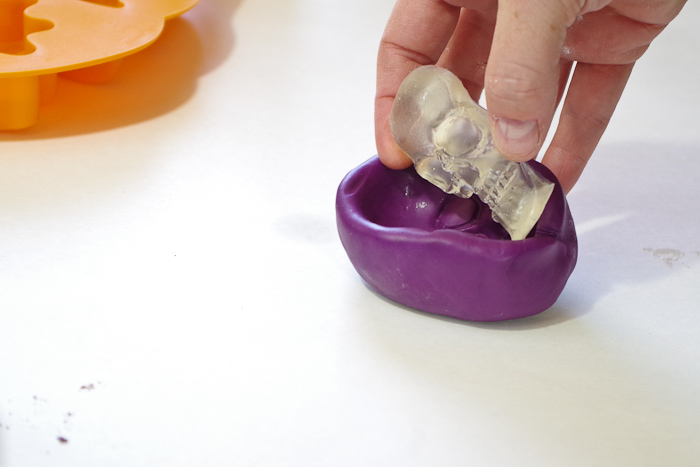
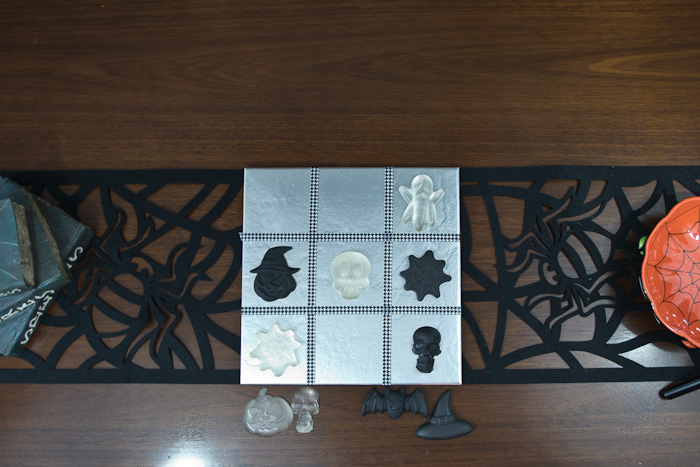
For this project you’ll follow the same steps for mixing EasyCast in order to make TEN game pieces. First, be sure that you applied two coats of mold release and conditioning spray to your mold. Then mix the EasyCast parts as instructed above. For some of the pieces, I used my previously made Skull Mold as well.
Once mixed, let the pieces cure for at least 24 hours, perhaps longer. Remove the castings from the mold when it has cured.
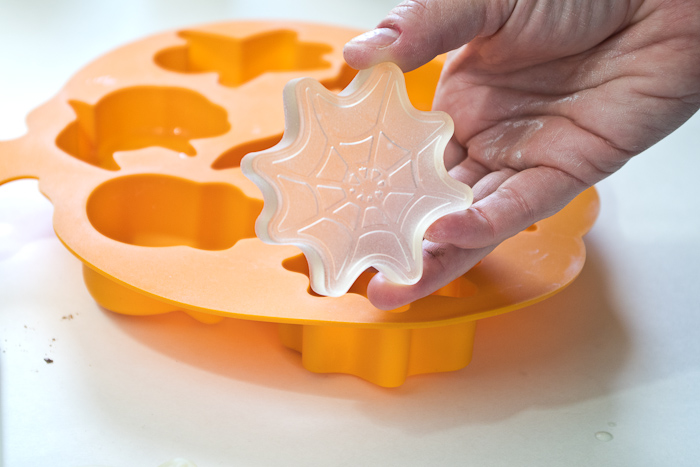
Spray five of the pieces with Resin Spray Sealer. Paint the other five pieces with black paint.
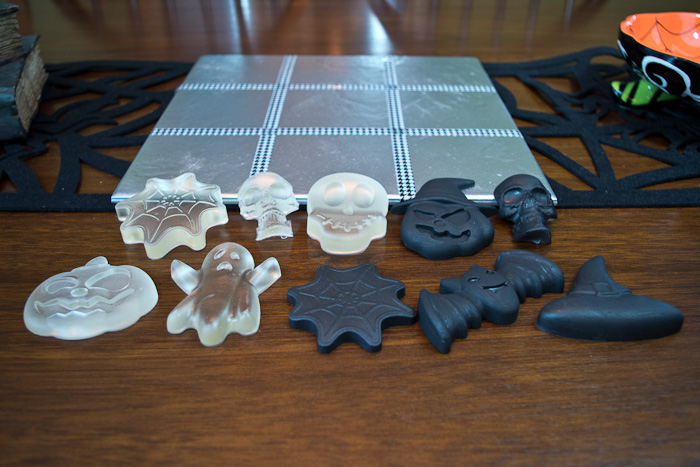
Spray paint the 12″x12″ tile with metallic silver spray paint. Use washi tape to create your grid. There you have it! A fun Halloween themed game for your coffee table that is both decorative and fun to play! Instead of X’s and O’s you have black and clear game pieces. So much fun!
**Another EasyCast project with full tutorial can be found here: Resin Map Pendant using EasyCast.
I hope you enjoyed these three quick Resin Halloween Decorations! I had so much fun making them and have had many compliments. What do you think?
If you like these projects, please pin this image to Pinterest!
Thanks for stopping by!
~~Sheri
SaveSave
Sheri is a Maker and DIY blogger at Hazel + Gold Designs. She is usually in the middle of multiple projects at once and finds great satisfaction and joy in creating something new. She is constantly learning new skills, putting them to the test, and sharing her experience and knowledge with others. Her favorite hobbies are crafting, painting, crocheting and basic woodworking. Her goal is to inspire others to step out of their comfort zone, learn a new skill and have the confidence to make their life a little more beautiful!


These are all really fun! That skeleton art is too cute.