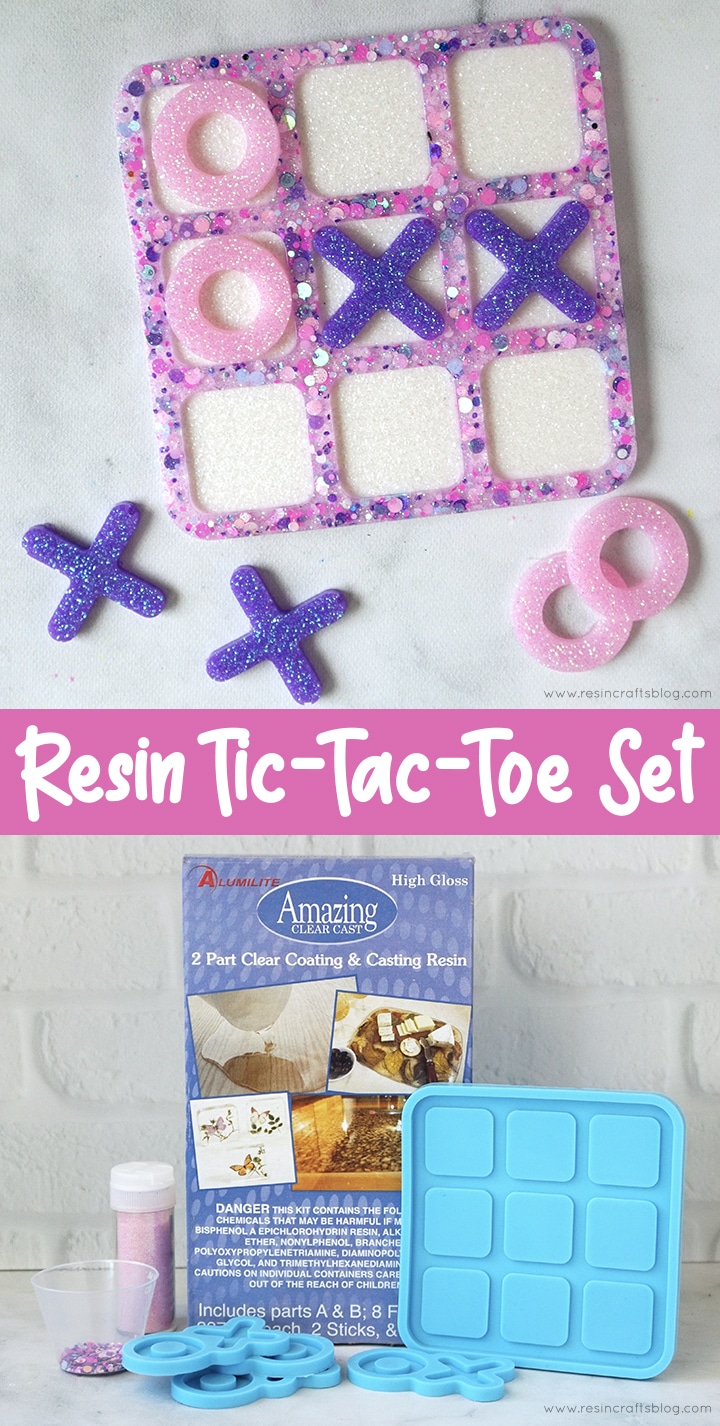
Make your own colorful Tic-Tac-Toe Game Set to play with using Alumilite Amazing Clear Cast resin and your favorite glitters!

Hello, Resin Crafters! Lindsay from Artsy-Fartsy Mama here with *sparkling* new resin project for you to try. My niece’s birthday is coming up, so I decided to make her this custom Tic-Tac-Toe game set using colorful glitters (in her favorite colors) and Alumilite Amazing Clear Cast Resin. I had a lot of fun making this set for her, and am so excited to see her face when she opens it up. Resin crafters of any skill level can easily complete this project with confidence, and kids of any age will have hours of fun playing this classic game!
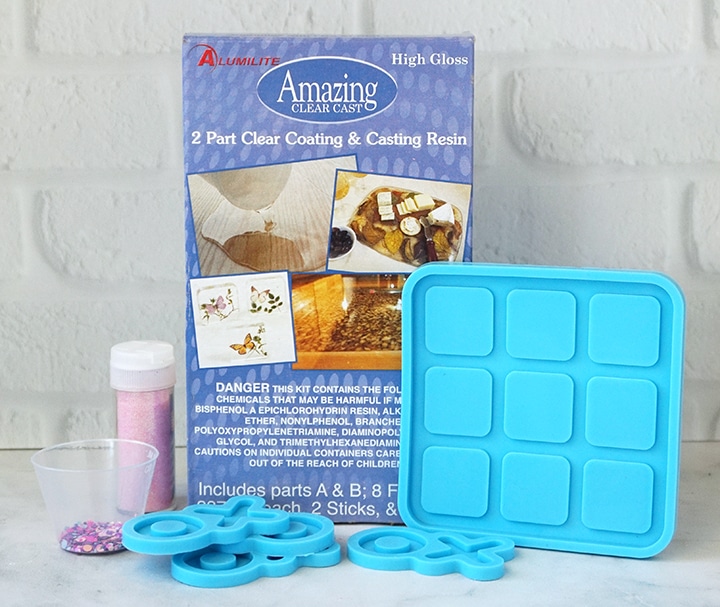
TO MAKE YOUR OWN RESIN TIC-TAC-TOE GAME SET, YOU WILL NEED THESE SUPPLIES:
- 2 oz Alumilite Amazing Clear Cast Resin
- Mold Conditioner and Release Spray
- Mixing Cups
- Stirring Sticks
- Disposable Gloves
- Resin Glitter
- PolyColor Resin Powders – Diamond Dust Metallic
- Castin’ Craft Opaque Pigment – White
- Silicone Tic-Tac-Toe Game Set Mold
Safety first! Before you start working with resin, make sure that you’re wearing disposable gloves & protective eyewear, and that your work surface is covered and that you are working in a well ventilated area.
STEP 1:
For best results, prep your silicone molds with Mold Conditioner and Release Spray and let them dry completely. This will help to make sure your projects come out perfectly every time and will also extend the life of the molds.
STEP 2:
Prepare 1 ounce of Alumilite Amazing Clear Cast Resin* according to package directions and follow all safety guidelines. Pour in equal parts resin and hardener to the mixing cup. Stir the resin mixture together SLOWLY with a stir stick for 3-5 minutes, and then pour the resin into a clean mixing cup. Stir the resin again for another 2 minutes with a clean stir stick. If the resin still has streaks running through it, keep mixing until it becomes clear.
*Amazing Clear Cast is the perfect type of resin to use for this tic-tac-toe game set. The resin mixes easily with minimal bubbling, and cures crystal clear so that the glitter is the star of the show. Because it cures overnight into a durable plastic, I can confidently give this gift to my niece, knowing that it is sure to last for years.
STEP 3:
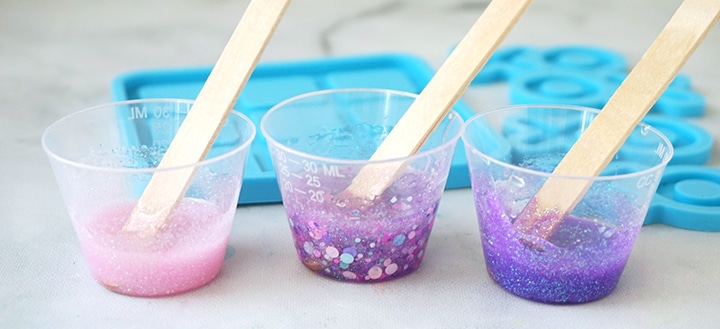
Split the resin into 3 separate mixing cups, about 10 ml each. I used 3 different types of glitter: an iridescent purple and pink fine/chunky glitter mix, fine iridescent pink glitter, and fine iridescent purple glitter. Add a generous amount of each glitter into the three separate resin cups and mix them together well until the glitter is completely combined.
STEP 4:
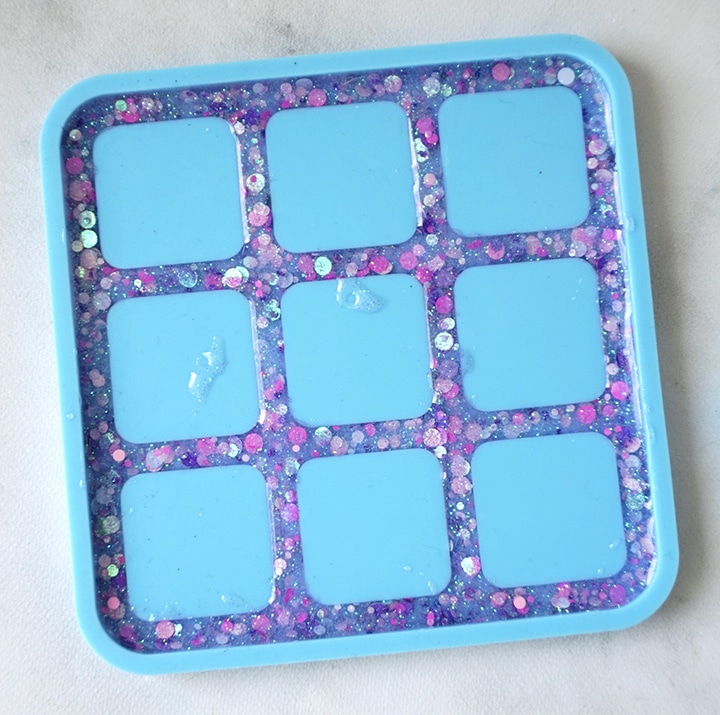
Use the stir stick to carefully fill the bottom section of the tic-tac-toe board mold with the resin and chunky glitter mixture. Be careful not to fill the mold too full. If you have any drips on the open squares, try to clean them off using a toothpick or a small piece of paper towel dipped in alcohol.
STEP 5:
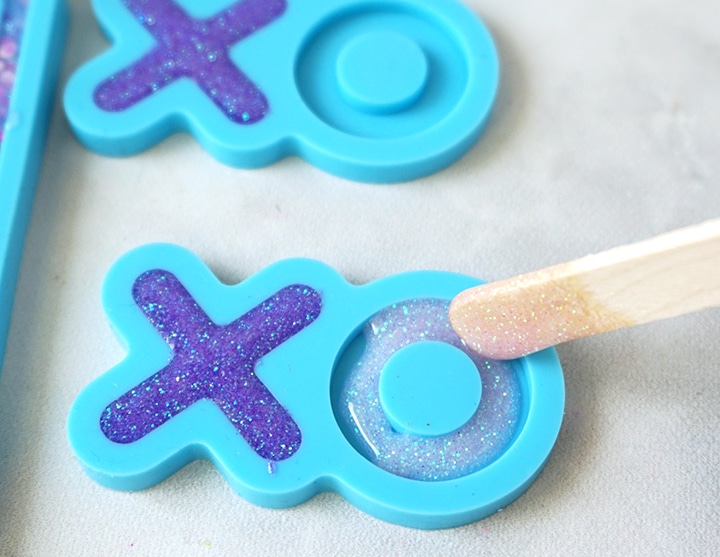
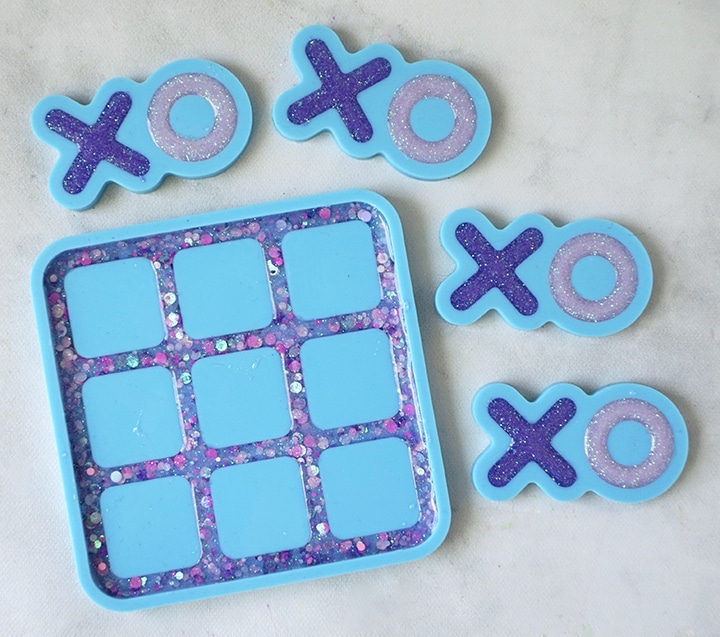
Decide which colors you want the X’s and O’s to be. Use the stir sticks to carefully fill the X and O game piece molds to the top with the pink and purple glitter mixtures.
STEP 5:
Wait a few minutes for the bubbles to rise to the top, and then blow through a straw or spritz the resin with alcohol to remove surface bubbles. Let the resin sit, undisturbed, for at least 2 hours.
STEP 6:
Prepare 1 ounce of Alumilite Amazing Clear Cast resin according to package directions and follow all safety guidelines. Pour in equal parts resin and hardener to the mixing cup. Stir the resin mixture together SLOWLY with a stir stick for 3 – 5 minutes, and then pour the resin into a clean mixing cup. Stir the resin again for another 2 minutes with a clean stir stick. If the resin still has streaks running through it, keep mixing until it becomes clear.
STEP 7:
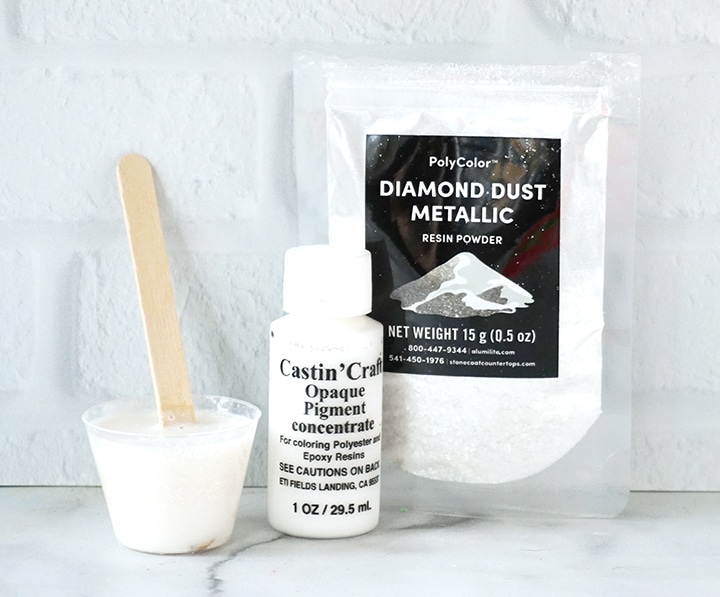
Add in a little bit of white Castin’ Craft Opaque Pigment and a generous amount of Diamond Dust Metallic resin powder to the resin. Stir the mixture well to combine the pigment and powder. The pigment makes the resin bright white, while the powder adds a shimmery finish. Pour the white resin mixture into the tic-tac-toe game board mold until it reaches the top. Be careful not to overfill. Wait a few minutes for the bubbles to rise to the top, and then blow through a straw or spritz the resin with alcohol to remove surface bubbles.
STEP 8:
Leave the resin to cure in an undisturbed area for 24 – 48 hours. You will know that the resin is cured and ready to be removed from the mold when the surface is no longer tacky and pulls away from the mold edges.
STEP 9:
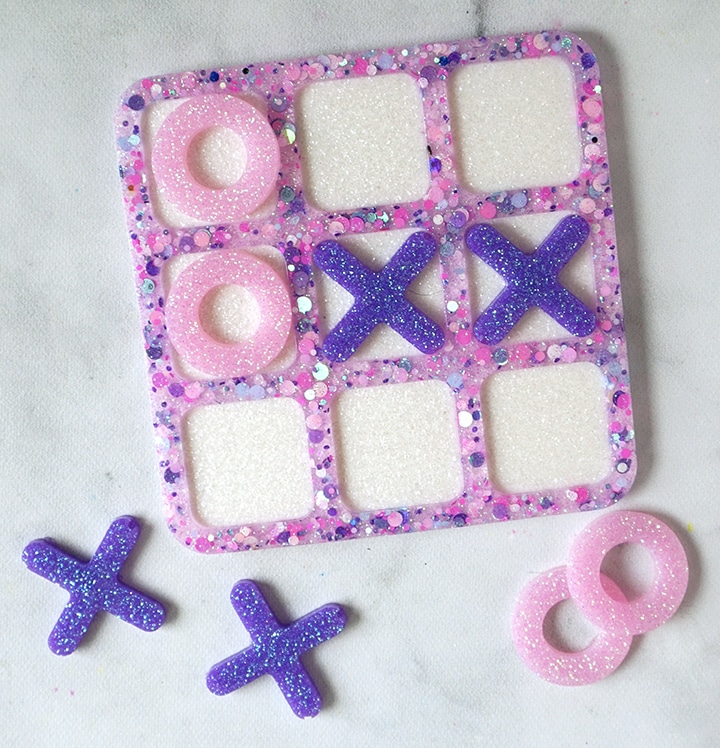
Carefully remove the game board and pieces from the molds. Cut away any over-poured resin using scissors, and sand any rough edges if necessary. The process of “demolding” is my favorite step of the entire resin crafting process. Every project is unique, and it’s so exciting to see the results of a colorful resin pour!
If the resin still feels a little flexible, it may just need more time to cure. This is totally normal, and you will just need to let the project sit in a warm, flat area to cure for a few hours (or days).
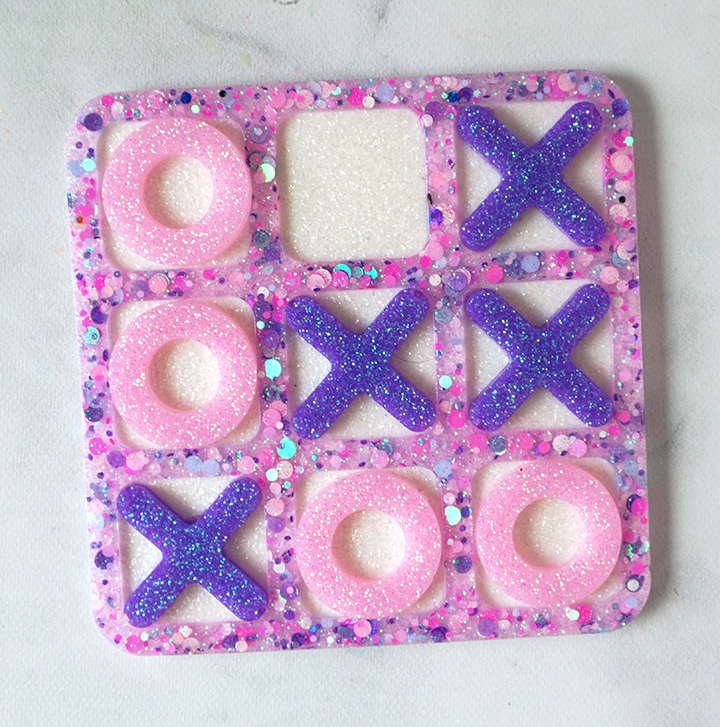
As always, I would love to hear what you think about this Resin Tic-Tac-Toe Game Set made with Alumilite Amazing Clear Cast! I absolutely love how it turned out, and can’t wait to give it to my niece next week. This set is the perfect size to keep on a dresser or shelf, and can easily be taken with you for traveling. This is such a fun and incredibly simple project for resin crafters of ANY level. Be sure to check out these other resin glitter project tutorials for more inspiration, and share your own creative resin projects in the ETI Facebook Group!
Don’t forget to Pin, Like, and Share!
Lindsay is a crafter, graphic designer, and glitter enthusiast from Utah. She’s passionate about homeschooling her creative daughter, traveling, and spending time in the craft room. Lindsay shares DIY project tutorials, printables, recipes, kids crafts, and more on her blog, ArtsyFartsyMama.com, where she inspires readers to live a creative life.




Leave a Reply