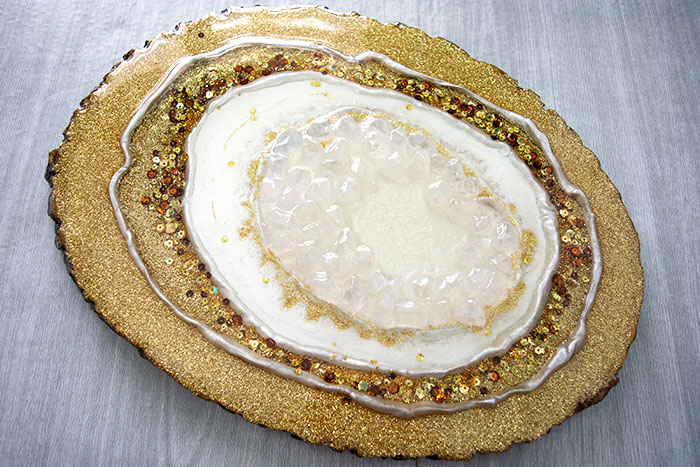
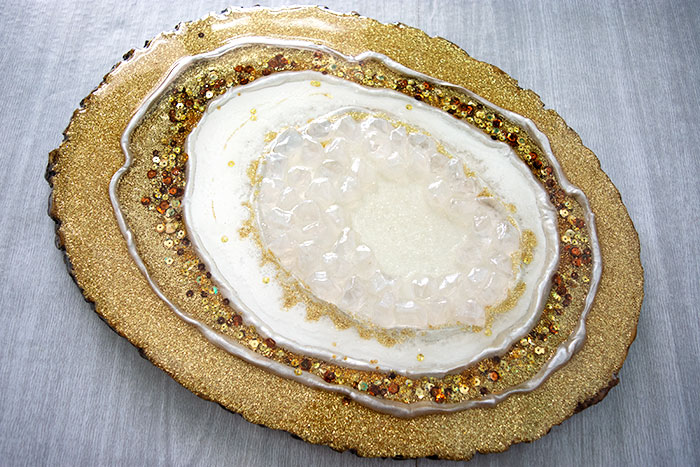
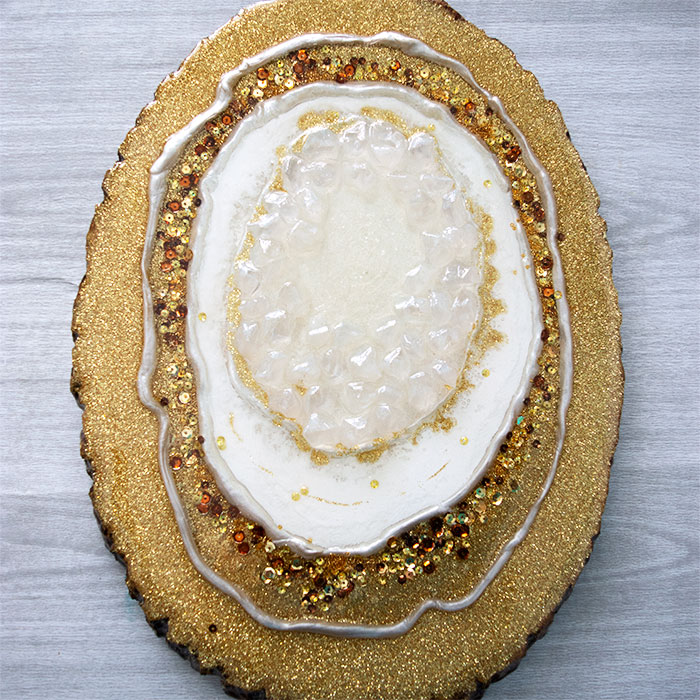
Hello Resin Crafters! I’m excited to share a fun new project with you today. Have you ever seen those large geode slices? They’re so beautiful! And so unaffordable. I love the sparkle they have, and I wanted to add one to my decor but who can afford those prices?! I’m going to share with you how I made a beautiful large faux geode slice using Envirotex Lite Pour-On Epoxy and a wood slice in just a few simple steps! Once you’ve got the method down, you could expand this process to make giant geodes on large boards, or smaller size geodes on coasters. The possibilities are endless!
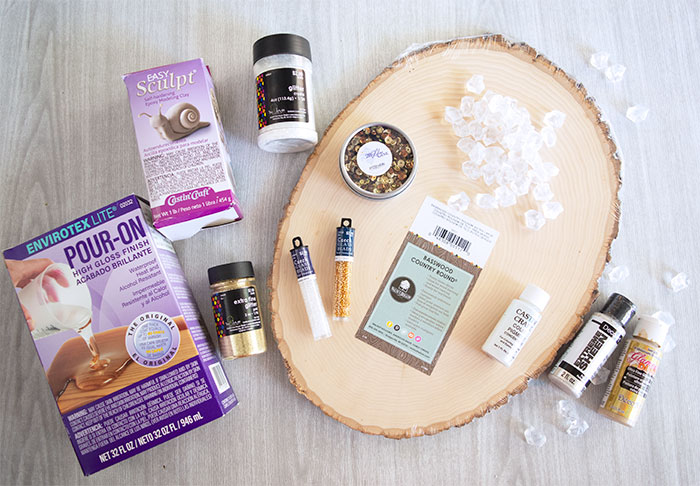
Geode Supply list:
- Envirotex Lite Pour-On Epoxy
- Wood Slice
- Easy Sculpt Epoxy Modeling Clay
- Paint
- Glitter
- Plastic or Glass Gems
- Sequins, or small beads
- Mixing Cups
- Stir Sticks
- Gloves and safety eyewear
- Wax Paper
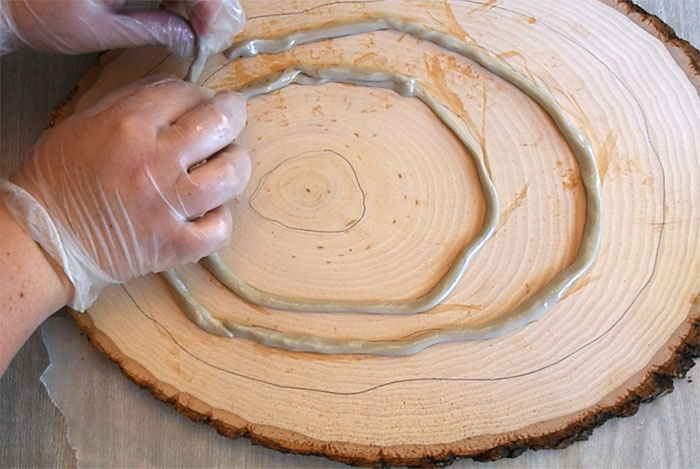
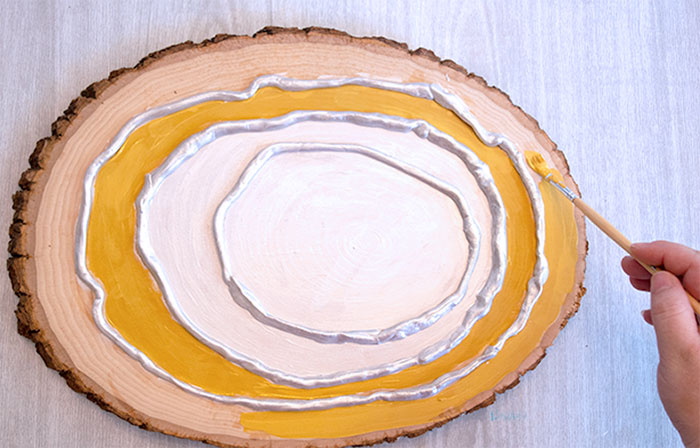
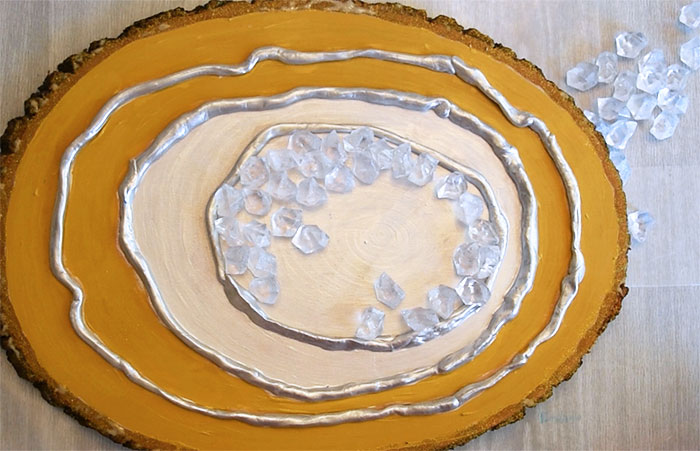
The first step is to prepare your wood slice. Mix a small amount of the Easy Sculpt Epoxy Modeling clay and roll into a long rope. Lay the rope on the wood slice to divide up the rings of your geode. Allow the clay to air dry completely. I left mine overnight. This is a great video from ETI detailing how best to work with the Easy Sculpt clay. I found the Talcum powder tip especially helpful as the clay was quite sticky to work with! Vegetable oil also helped. Once cured, I painted the clay rings a metallic pearl color with acrylic craft paint.
Next, paint the wood slice. I did not want any wood color to show through the epoxy layers when it was finished, so I painted a base coat onto the wood slice using acrylic craft paint in the colors I had chosen for my geode.
When the basecoat is dry, start in the middle of the faux geode slice. Place the larger plastic crystals in the center ring. There was no need to glue these crystals in place before pouring the epoxy. The Epoxy clay ring you’ve put on the wood slice keeps the crystals in the center when you pour the Envirotex Lite.
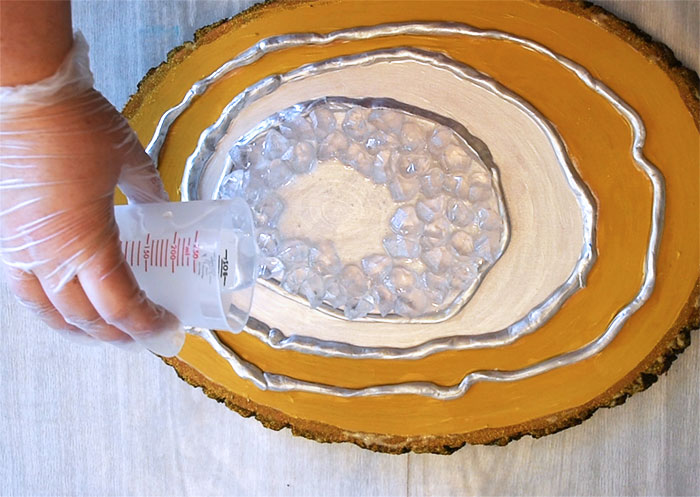
Mix several ounces of clear Envirotex Lite Pour-On Epoxy following the directions on the box. Be sure to wear gloves, and protect your work surface. After mixing the two components together, and using the two cup method, pour the epoxy into the center of the crystals. The first pour will flood through the crystals, and bleed over the rings and outward. That’s ok! This is just the first layer.
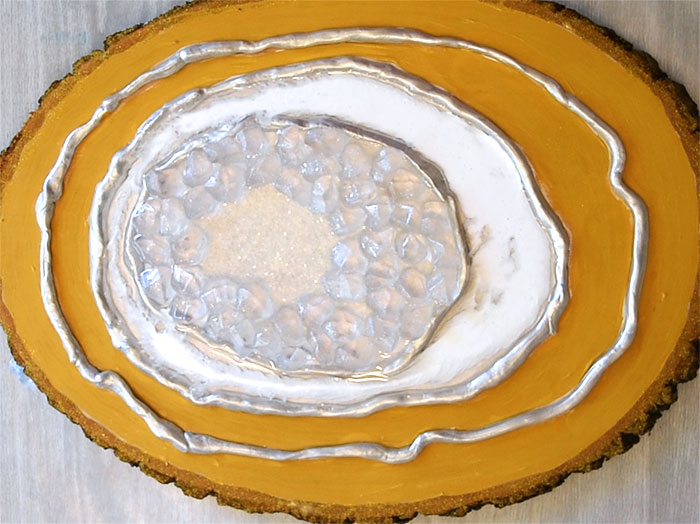
Mix another few ounces of Epoxy, and add your first color to it. I choose to use white and added Opalescent opaque pigment to the white epoxy. Pour the first colored epoxy into the next ring. Allow each layer to cure several hours before adding another layer.
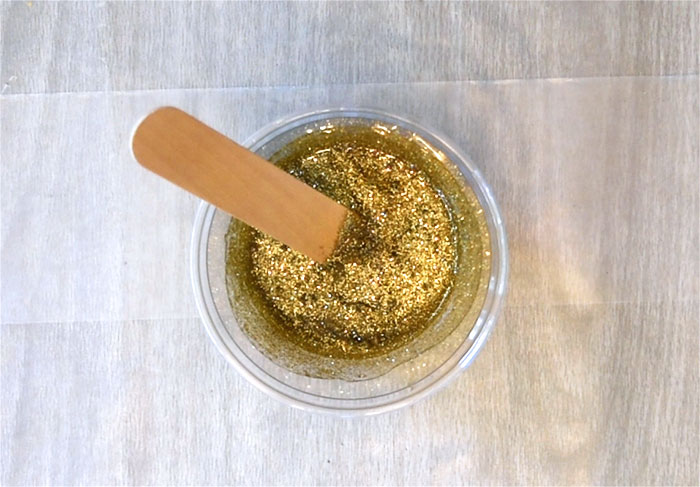
Continue mixing small batches of Epoxy, adding color to each, and filling in each ring. I added gold glitter to my outside rings. You can mix in the glitter directly into the epoxy before pouring.
Add other embellishments as you go. Before the epoxy cures, I added small glass beads, sequins, and glitter throughout my geode rings.
Once all of the rings are filled, allow them to cure fully. Mix one larger batch of clear Pour-On Epoxy and cover the entire geode, pouring from the middle out. I used 6oz of clear epoxy for my final covering. Scrape any drips that form on the bottom of your wood slice before they cure, cover and allow to cure overnight.
The sparkle and depth is unbelievable, and while you can tell it’s not a real geode, the representation of the geode is beautiful artwork you can still enjoy! What colors will you make your geode?
After studying Culinary Arts in Portland Oregon, Kelli went back home to the sunny South West where she decided she wanted to do different kinds of Art. This busy mom of three spends all of her available free time creating in her Craft Shack “she shed” where she can be found wood burning, repurposing old stuff, crafting, and painting just about anything she can get her hands on. She loves to learn new craft techniques and frequently finds inspiration in the world around her. Her motto in life is that you should never be too busy to make something pretty!


Leave a Reply