Updated April 2026
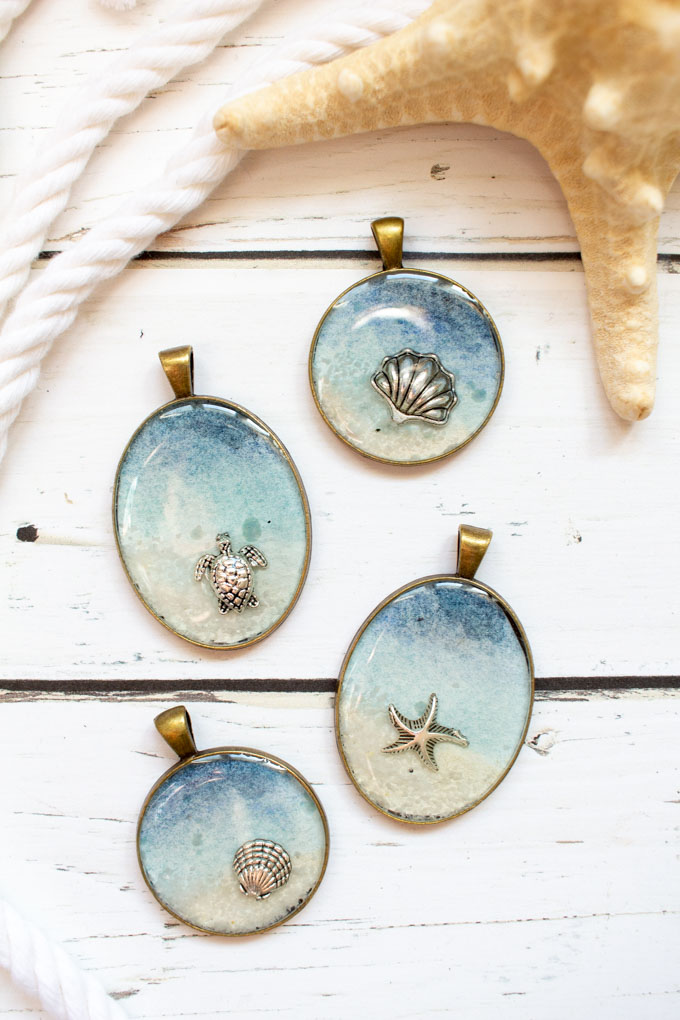
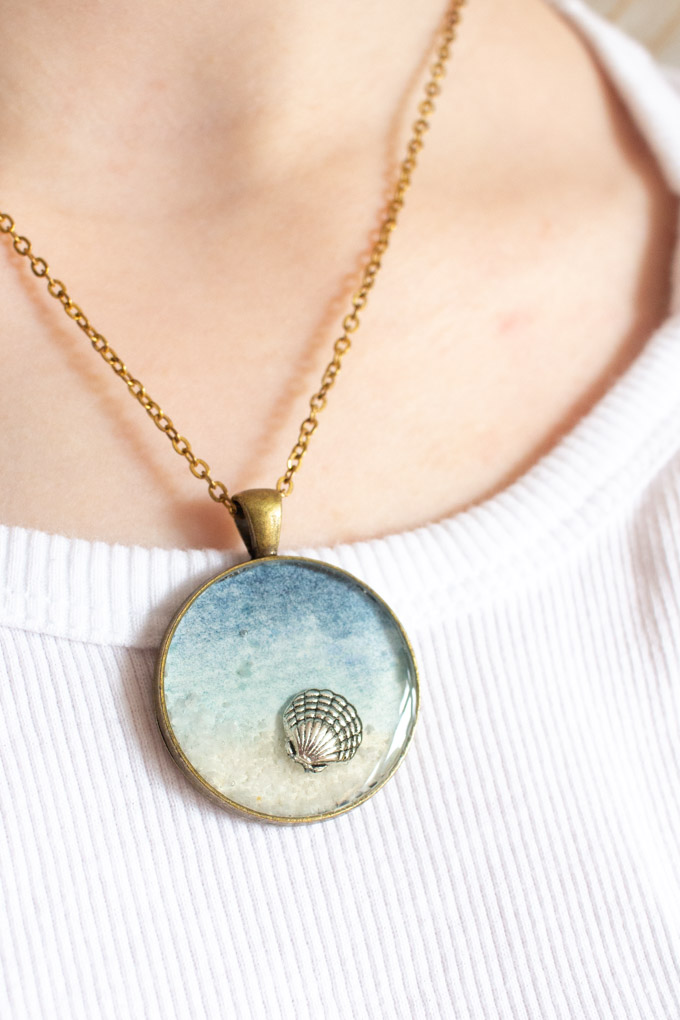
Carry a bit of the beach with you all summer long with this adorable seashore resin jewelry.
Hi crafty friend! It’s Jane again, from Sustain My Craft Habit. We sure our beach-themed crafts and this months Resin Crafts Blog project has made it on to our favourites list!
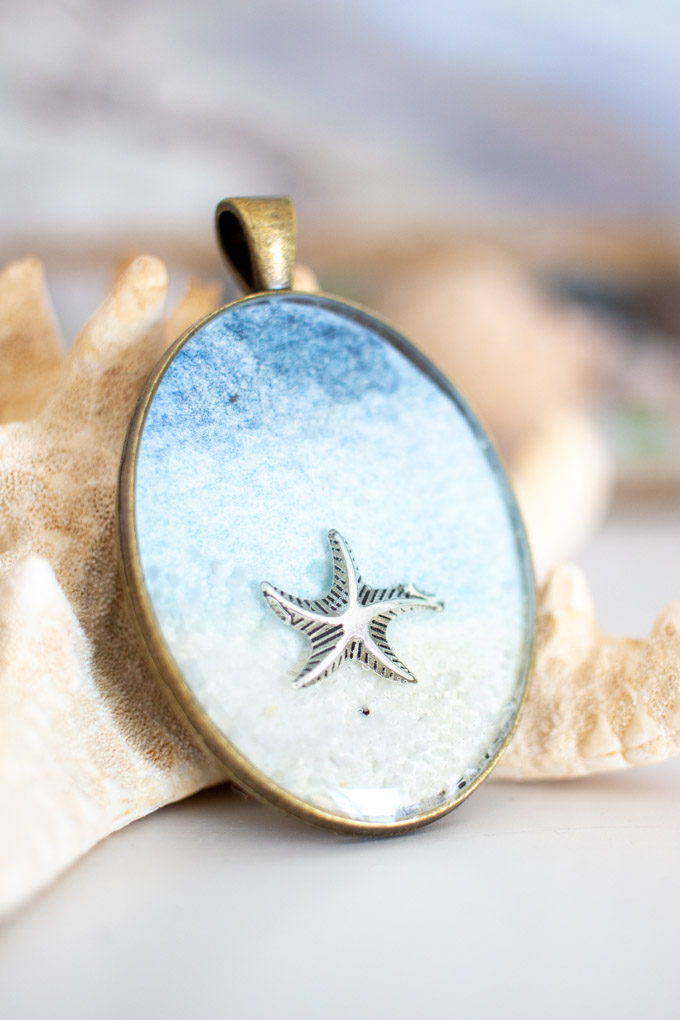
With its seashore-inspired watercolor backdrop, bitty sea creature charm, shand and glossy resin, these one-of-a-kind jewelry pieces are perfect for any summer outfit. Or attach them to a chain and lobster clip for a pretty keychain or purse charm.
And ever since making our beachy photo frame last month, we’ve been in a summertime crafting mood!
Materials needed
- Watercolor paper
- Watercolor paint and paint brush
- Oval and round jewelry bezels
- Amazing Sealer or a Water-based sealer
- Small metal sea creatures charms
- White decorative sand
- Amazing Clear Cast Epoxy
- Measuring cups, stir sticks, gloves
How to make seascape resin jewelry
Be sure to read all the instructions prior to working with any epoxy. Work in a well-ventilated area and protect your working space.
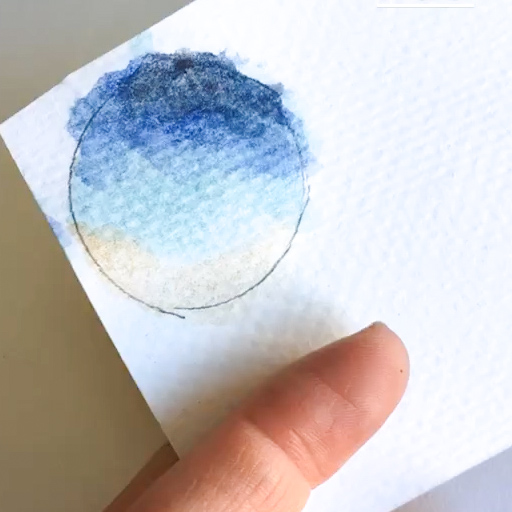
Trace your bezel onto watercolor paper with a pencil. Use various shades of blue and brown to create a shoreline effect. Let dry completely.
Cut out the watercolor paintings to fit the inside of the bezels.
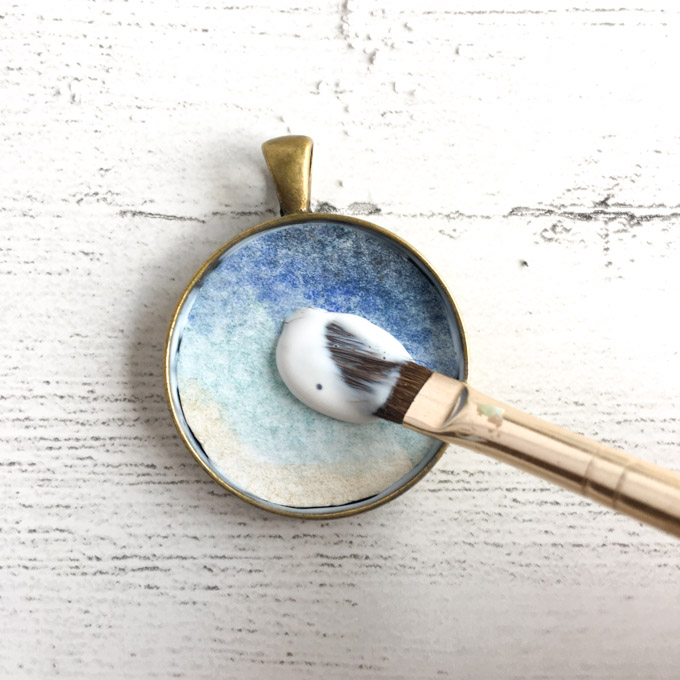
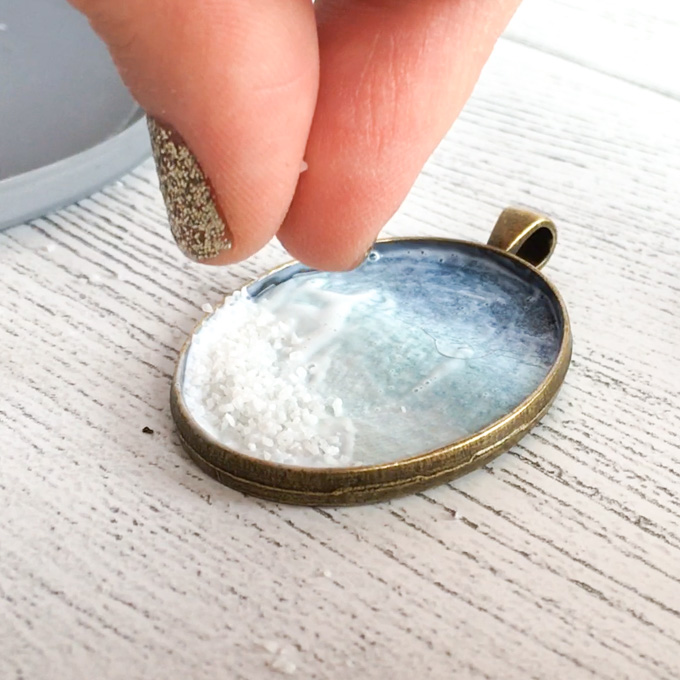
Seal the cut out into the basil using the water-based sealer. Cover the surface of the painting with the sealer as well.
Sprinkle a little bit of sand onto the shore part of the picture while the sealer is still wet.
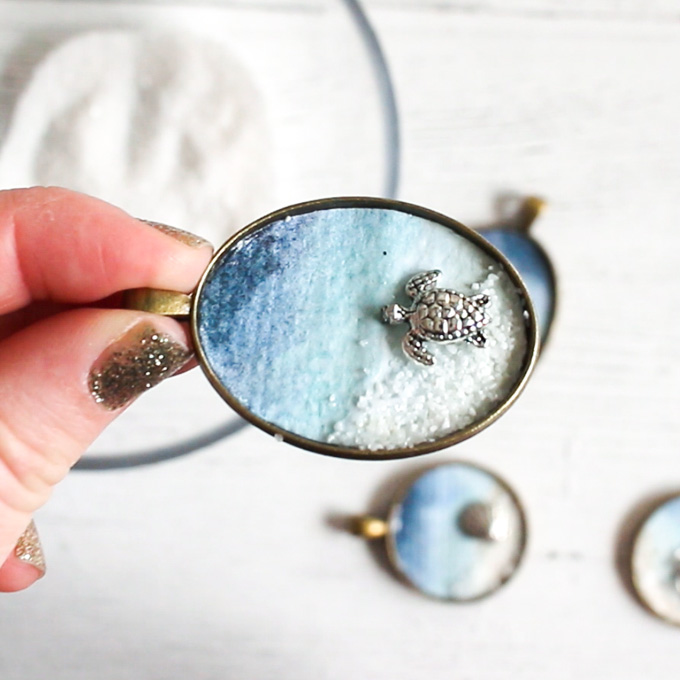
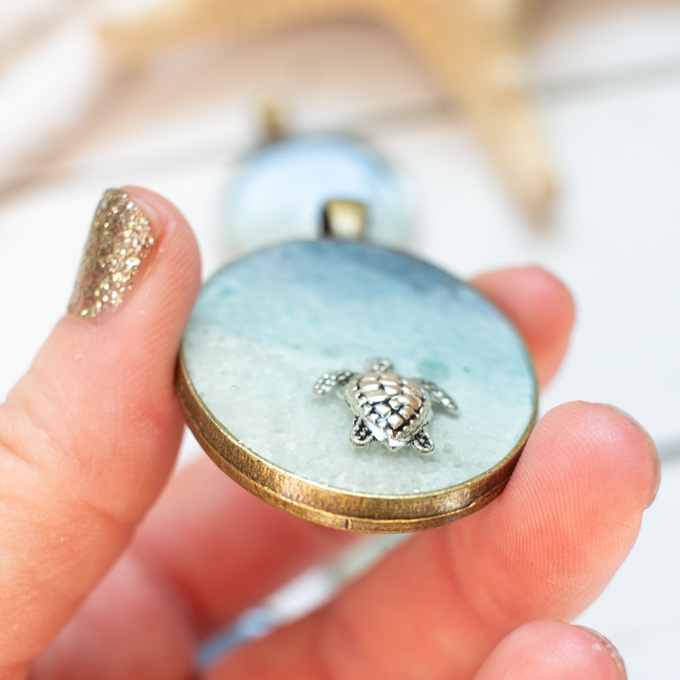
Use a generous amount of glue to place a metal charm along the “shoreline”. Let dry completely (I left mine overnight to be sure).
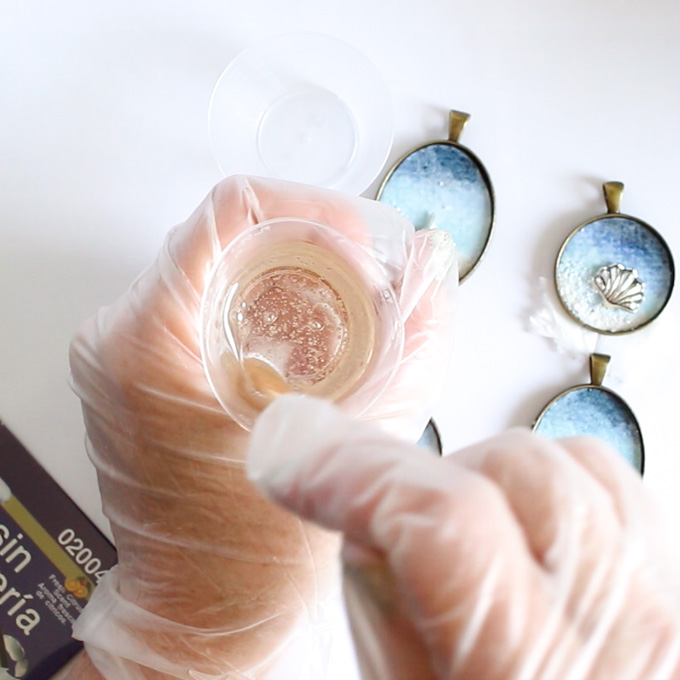
If needed, prop of one end of the bezel to ensure it is level for pouring.
Mix equal amount of resin and hardener in a small mixing cup (I had a total volume of 1oz to make four pendants). Mix for 2 minutes then pour into a second small mixing cup. Stir for another minute.
Carefully pour the resin into the bezel wells. Be careful not to over-fill, although you do want a small dome to form on the surface of the pendant.
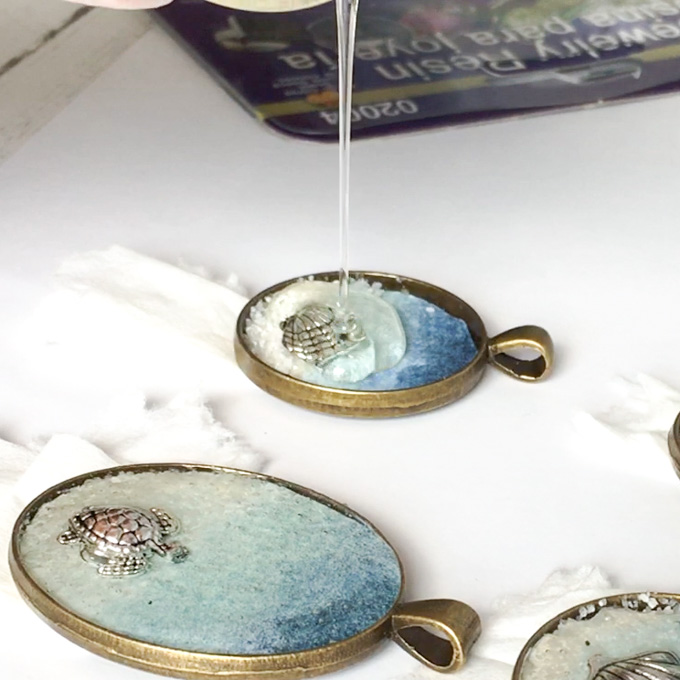
Let the poured resin rest for about 15 minutes and then blow off any bubbles arising to the surface with a small kitchen torch. Alternatively use your own breath through a straw.
Use a toothpick to pull out any larger bubbles, especially around the metal charm.
Cover and let the resin cure 24 hours.
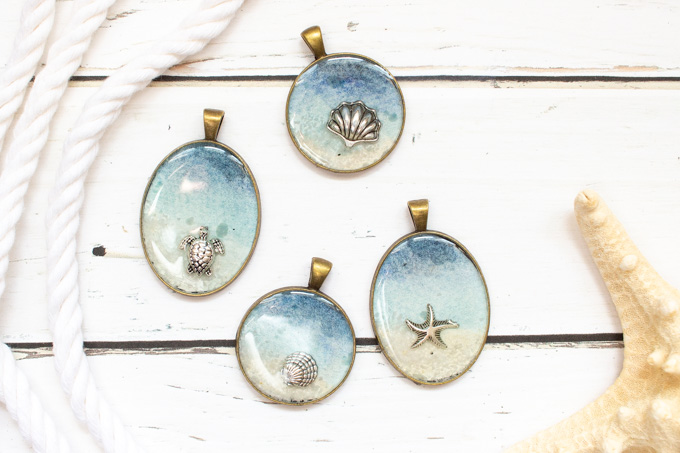
These seascape pendants turned out perfectly. The resin didn’t fully cover the turtle – but I love how it looks, like the back is poking out of the water!
There are so many beautiful and creative ways to use the jewelry resin. Here are just a few additional projects to explore:
- resin pendants with lavender;
- resin jewelry with hydrangea flowers;
- resin Christmas earrings;
- resin and alcohol ink pendants.
Jane and Sonja are sisters, moms and lifelong craft addicts both living near Toronto, Canada with their families. They share their love of creativity, nature and coastal DIY ideas on their blog Sustain My Craft Habit. They craft and decorate their homes using repurposed and upcycled items and materials found in nature.


Best way to bring a high gloss to train projects?
Hi Susan. I’m not quite sure what you are referring to? Do you mean model train projects? -Jane
Where we can get resin n hardener
Hello Sonika. You can find the EnviroTex Lite at most craft and home improvement retailers: https://resincraftsblog.com/where-to-buy/ . It is also available to order off of Amazon. -Jane
Where did you get the little turtle starfish etc. so cute?
Hi Kathy!
We ordered them off of Amazon. Just search for turtle charms and you should find them. I should have noted that I took off the little loops on each with pliers.
Jane
Where do you find those adorable little metal pieces? Are they charms with the loop cut off?
I have so many bezels in my supplies, if love to make these!
Hi Amy,
Yes, exactly! I ordered them off of Amazon – just search for turtle charms and you should find them!
Regards,
Jane
Hi! I’m new to resin and already obsessed! Your instructions are wonderful!
Where did you purchase the bezels pictured in this article?
Thanks! Joan
Hi Joan!
I’m so happy you’re trying out resin crafting and enjoy it. It’s definitely addictive!
I picked them up off of Amazon – just search for oval jewelry bezel.
Kind regards,
Jane
Where did you get the bezel settings? Thanks for the tutorial — these are really pretty!
Hi Rita,
You can find them on Amazon! Enjoy!