How to Make Resin Grapes: Retro Craft DIY
Hi Resin Craft friends, it’s Natalie from Doodlecraft sharing an especially fun retro resin craft: Resin Grapes! Have you seen resin grapes before? This was a fairly common craft that ladies would get together to make in the 1960’s…sometimes called Lucite Grapes. My mother-in-law has a cluster of purple grapes in her house, so I thought I’d go with a green-ish bunch!
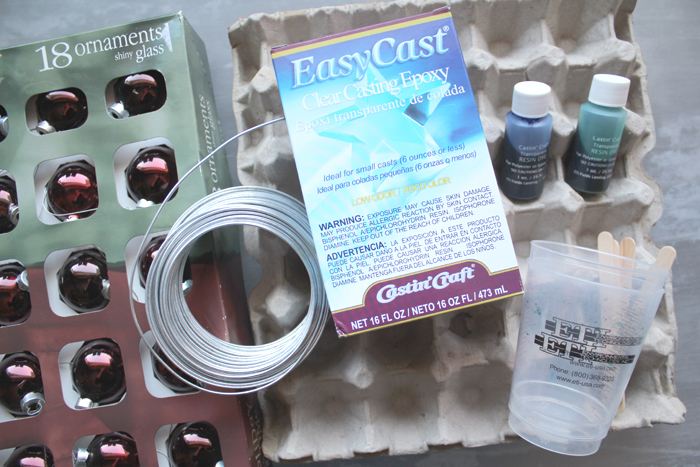
Supplies Needed:
- EasyCast: Clear Casting Epoxy Resin (32 oz)
- 18 Glass Ornaments (1.5″ diameter)
- Casting Craft Translucent Dyes (Blue and Green…or Blue and Red)
- Mold Release Spray
- Egg Carton Tray
- 16 Gauge Soft Wire/Wire Cutters
- Super Glue
- 12″ Tree Branch about 1″ diameter
- Drill/Bit
- Grinder (however optional)
- Disposable Work Surface/Gloves/Mixing Cups/Stirring Sticks
Directions
Begin by pulling the ornament hardware out of the ornaments. Place them with the openings up in the egg carton tray. I used ornaments that have a metallic leafing inside the glass…so when I peeled my glass off, some of the silver leafing stayed behind. 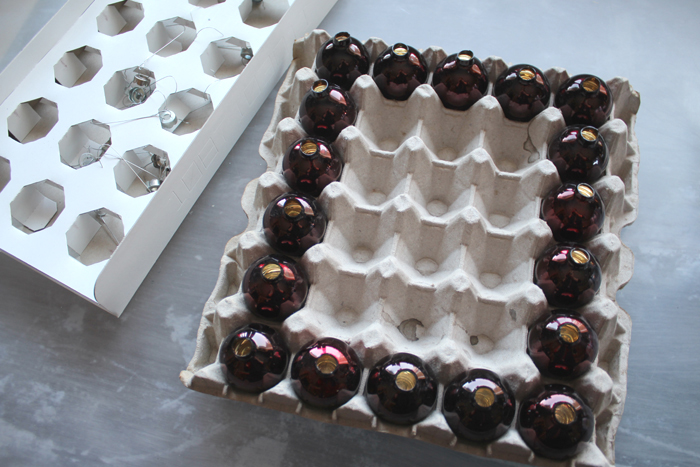
Use clear glass if you don’t like the silver effect. Spray one spritz of mold release inside each ornament and work it around the inside.
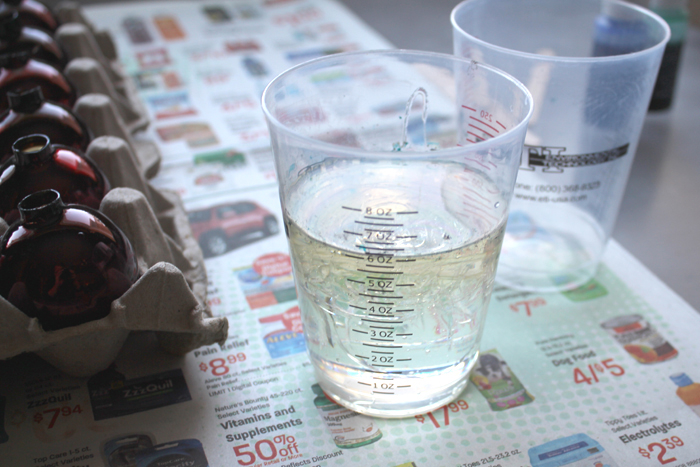
Fill one ornament with water and pour it out into a measured cup…that will let you know how much liquid each ball holds. Mine were just over 1 ounce each. I mixed up about 6 ounces of resin at a time so I could mix a variety of colors. Be especially sure to work over a disposable surface, read the resin directions and wear gloves.
Next, add a few drops of green and one or 2 of blue. I did some mixes darker and some lighter…some more green and some more blue. The variety of the colors in my bunch of grapes is surprisingly pleasing. Mix the color in thoroughly before pouring.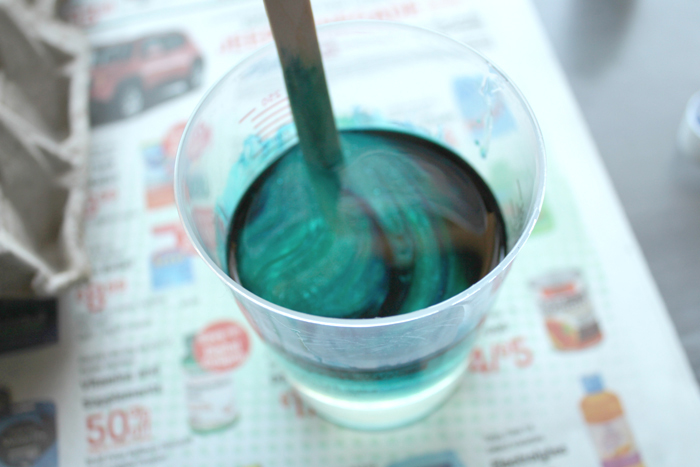
After mixing, carefully pour the resin into each ornament. Then pour slowly and try to get the resin all the way full in the ball but not in the neck part…or it will take the grinder to remove them later.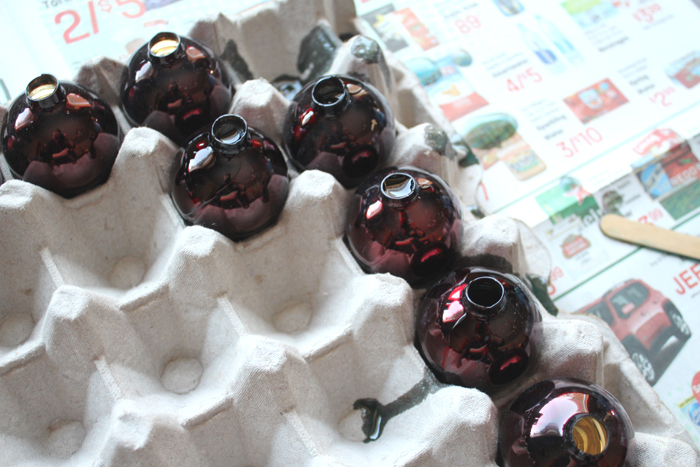
Continue filling the ornaments with colored resin in the same fashion. Then let them sit undisturbed for 24 hours.
The next day clank 2 ornaments together deep inside a box. Again: wear gloves, some eye protection and work outside or in a garage. The glass these ornaments will shatter into shards as pictured below.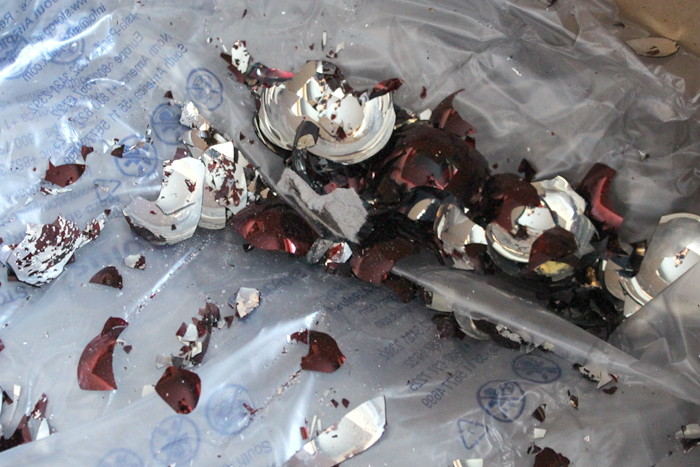
By hitting the ornaments into themselves, they break and the glass peels off significantly easier. Although, I had a few tough spots that I had to scrape with a small spatula. Then clean them all in warm, soapy water.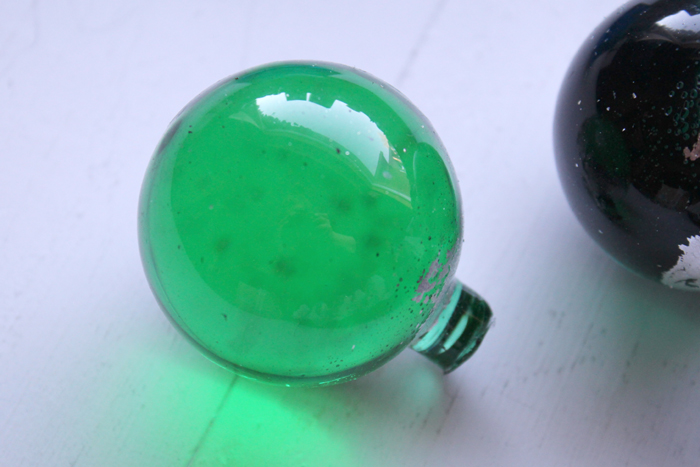
See how much silver leafing stayed behind as a result? Regardless, I did not know this would happen until I tried it…but I love the effect too! Next, I sent my son out to the garage to sand off the nubs and drill a 1 inch hole in each ball for 6 inches of wire. Then push in some wire and then add a couple drops of super glue. 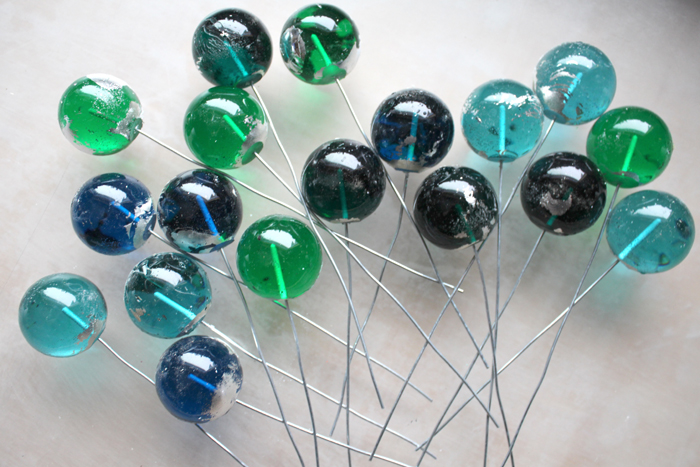
Now drill holes about 1/2-1 inch apart in the tree branch.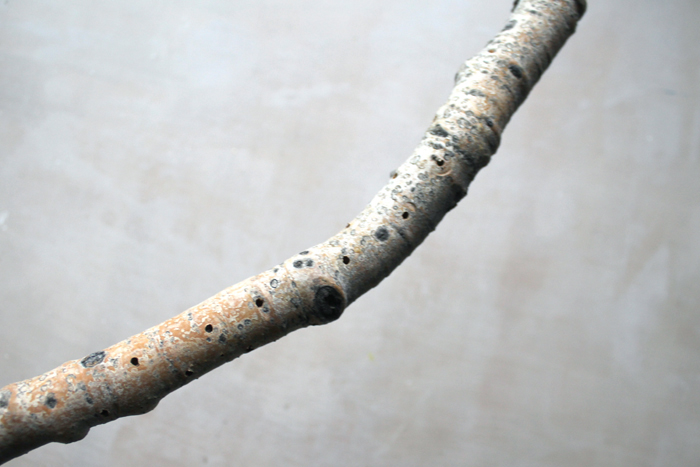
Then push a wire through the hole and wrap the remaining wire tightly around the branch.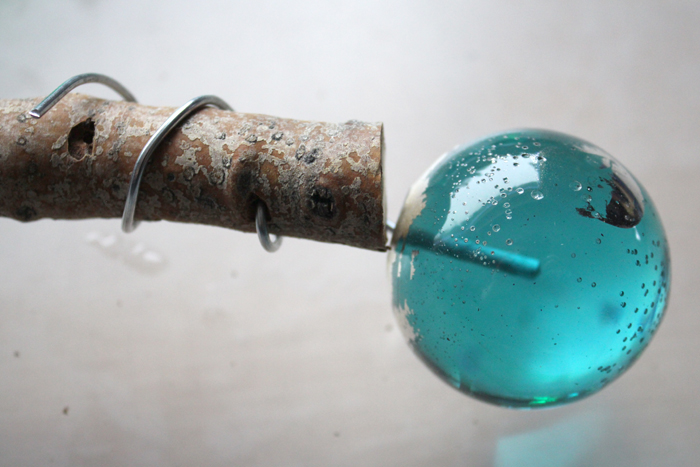
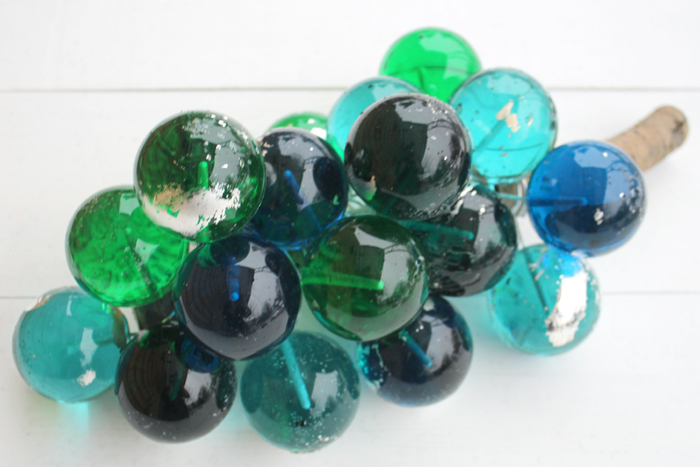
Now, drill holes as needed and keep adding resin balls. Ultimately, tuck the wire around the grapes as you work.
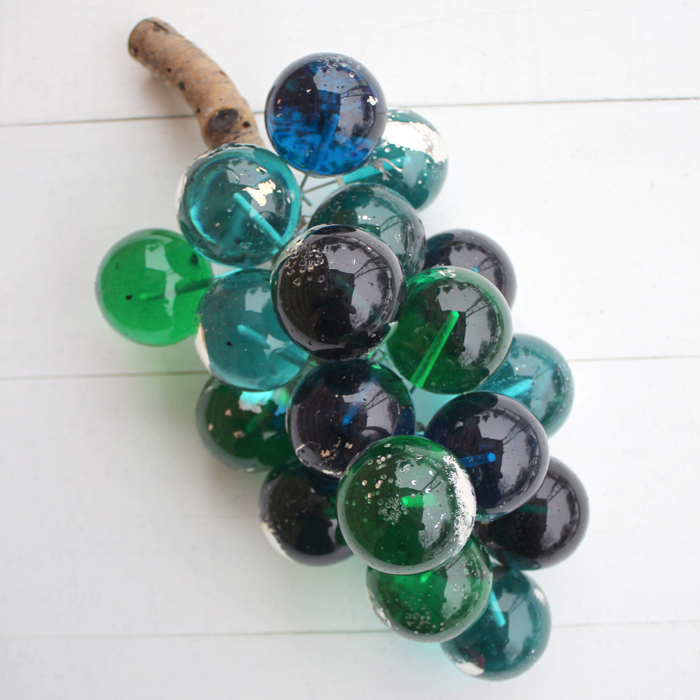
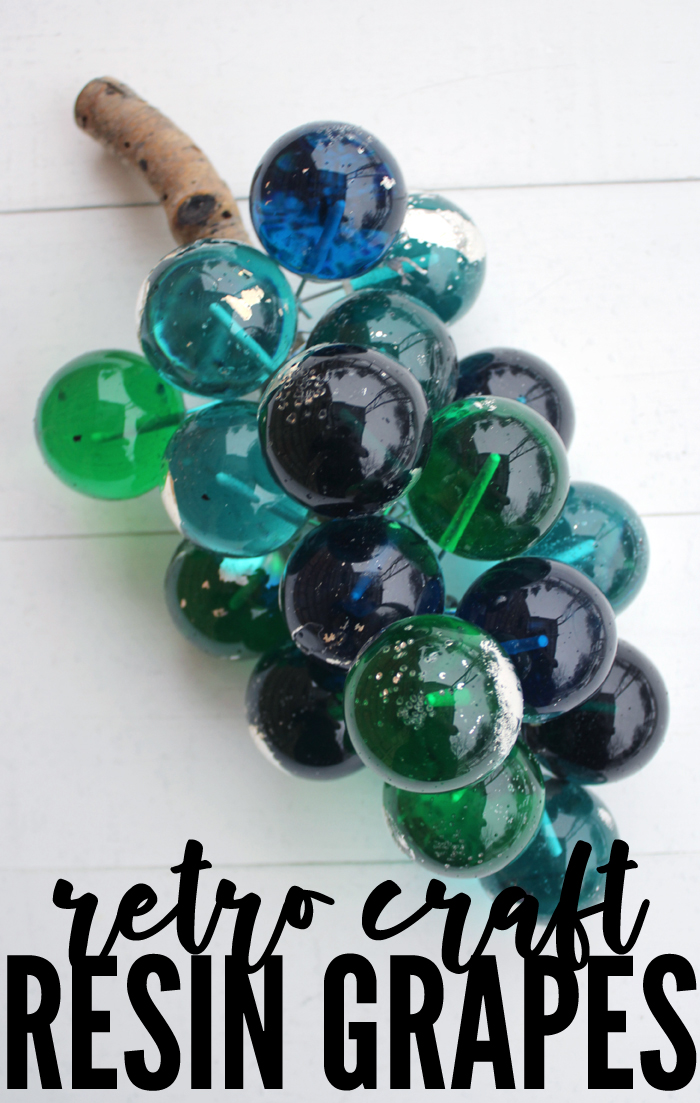
Next, fill in gaps too by adding colorful resin balls. Keep the resin grapes as close to the stick as possible at the end and gradually further away as you work your way up…giving it an obviously distinct grape cluster look.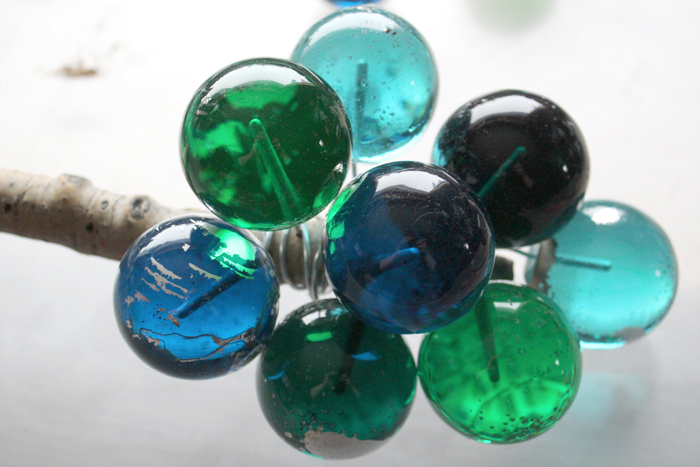
The range of colors is uniquely stunning–I love the bright pops of aqua!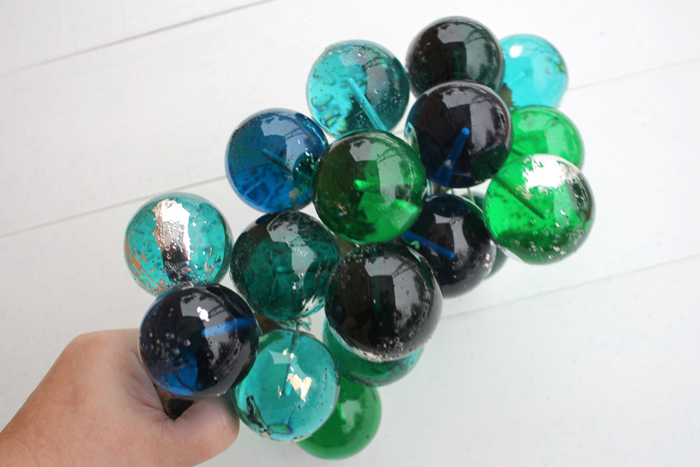
Reviving this fun retro craft becomes the perfect conversation starter on the coffee table or hanging on the wall.
By all means, Save and Pin for later!
Natalie Shaw is a Craft/DIY blogger at Doodlecraftblog.com. She loves sci-fi, fantasy and video game geekery and that comes out in many of her projects. She posts budget conscious DIY’s, crafts, jewelry, kid friendly projects, upcycled treasures and other fun on her blog 5 days a week.


Love all the proyects with resin
OMG took me way back in time, loved the ones my mom had. I may have to give this a try. Thank you.
These are just stunning Natalie! So creative.
LOVE these! I’ve been looking for these on eBay and now I can make my own with my own colors! Thank you so much!
I’ve very excited about this project. I’ve wanted to make some for years like my Grandmother had. One question, why do you not leave the wire in will the resin in hardening and avoid the drilling?
You could leave the wire in, I just knew it would be a hassle trying to keep the wire in the center during the drying process. Awesome idea, hope yours turn out great!
I have made a bunch of grapes for myself and several family members. They turn out beautiful. I use clear polyester casting resin by Castin Craft and their catalyst. For the color I use Stardust mics powder in green jade or purple. The powder colors are pearlized and opaque so the wire can not be seen. I use Darice 50mms clear Christmas balls. I insert the wire into the poured resin in the balls about 35 minutes after pouring. The resin is about the consistency of Jello when I insert the wire about 1 1/2 inches into the center. It will stay in place without sinking or tilling. It sets up tight and I have never had one come out. I do no drilling. You only need to pour the resin in the balls not into the neck of the ball, they fit in the grape vine better.