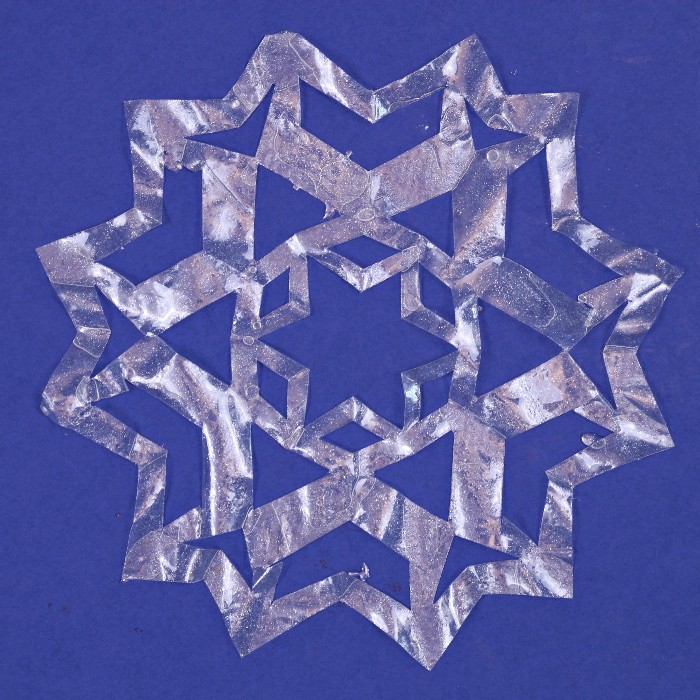
Cutting out paper snowflakes is a cherished tradition for children. I wondered if there was a way to preserve delicate paper snowflakes so they could be saved from year to year. After some experimentation, I discovered a way to make resin-coated coffee filter snowflakes that are a beautiful addition to any Christmas tree or winter decor. The resin makes the cut paper snowflakes nearly transparent giving them a stunning, crystal quality.
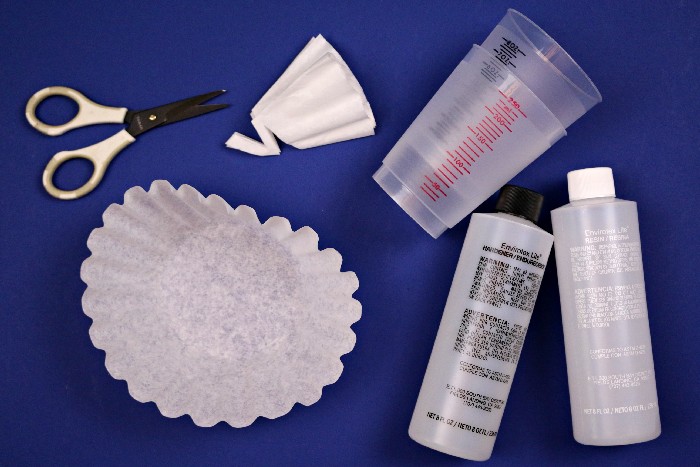
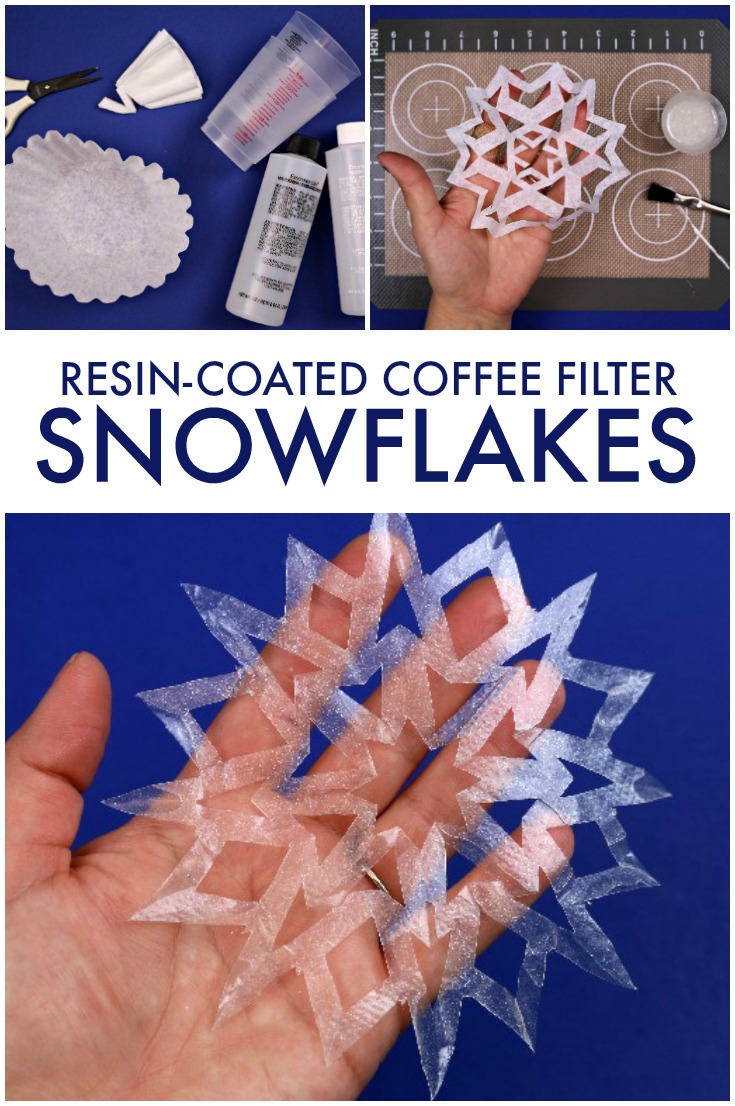
Supplies:
- EnviroTex Lite
- Pearl resin pigment (optional)
- Mixing cups
- Stir sticks
- Paintbrushes
- Coffee filters
- Scissors
- 2 silicone mats

Resin-Coated Coffee Filter Snowflakes
First, you will need to break out your grade school paper snowflake skills. Fold the coffee filters into fourths, sixths, or eighths. Then cut shapes out of the folded filters before unfolding them to reveal your finished snowflakes. The first few snowflakes you create will probably look a little janky until you remember how the process works. Don’t worry about it! Coffee filters are cheap, so make several. You can choose your favorite finished snowflakes to turn into translucent ornaments.

Next, mix up a small amount of EnviroTex Lite resin. You will probably need less than an ounce of mixed resin total, so don’t mix up too much! Begin by putting on a pair of gloves to protect your hands. Remember to mix together equal parts of resin and hardener in one cup for two minutes, then transfer the mixture to another cup and stir for another minute. If you would like, you can add a tiny amount of pearl resin pigment to the mixture as well.
Lay one snowflake on your first silicone mat. Paint the resin onto the coffee filter snowflake until it is fully covered. The snowflake will turn from white to clear wherever it has absorbed the resin. After you coat the snowflake, carefully move it to the second silicone mat to cure. Repeat this process for all of your snowflakes.
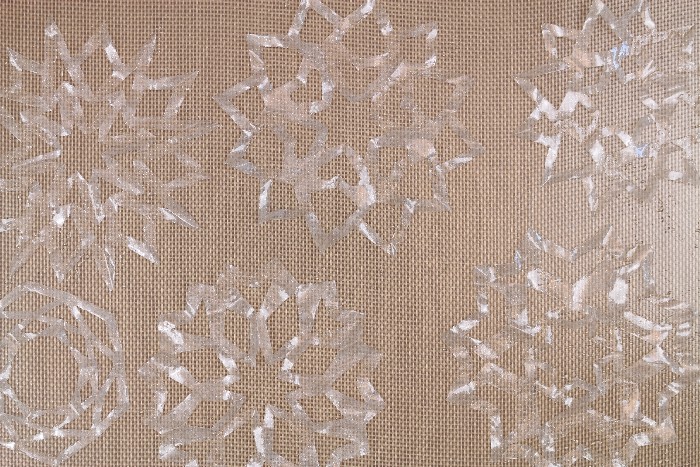
It is important to transfer the snowflakes from one silicone mat to the other so that the open spaces within the snowflakes do not fill up with resin. Once the snowflakes are on the second mat, LEAVE THEM ALONE until they fully cure. The uncured snowflakes are very thin and very sticky. Once they are fully cured, you will be able to easily peel them off of the silicone mat. Do not try to mess with them before they are cured or you risk them ripping or doubling over on themselves. If you have removed the cured resin snowflakes from the mat, you can peel or scrape any residual resin off of the mats and discard it.
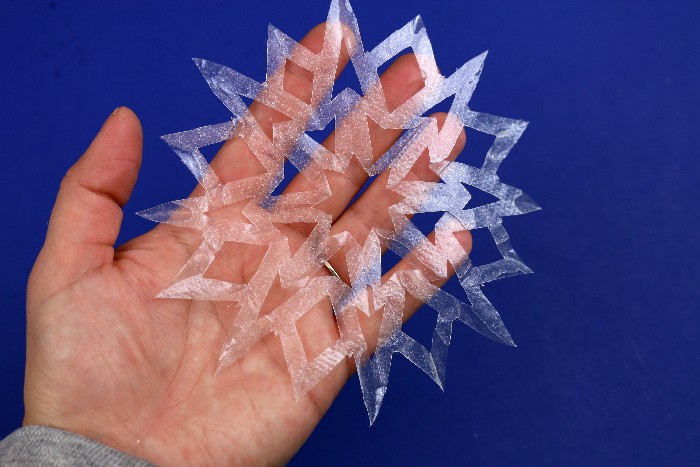
These crystal clear snowflakes look icy and delicate but are actually quite durable. The resin-coated paper should last quite a while, so these are ornaments you can enjoy from year to year.
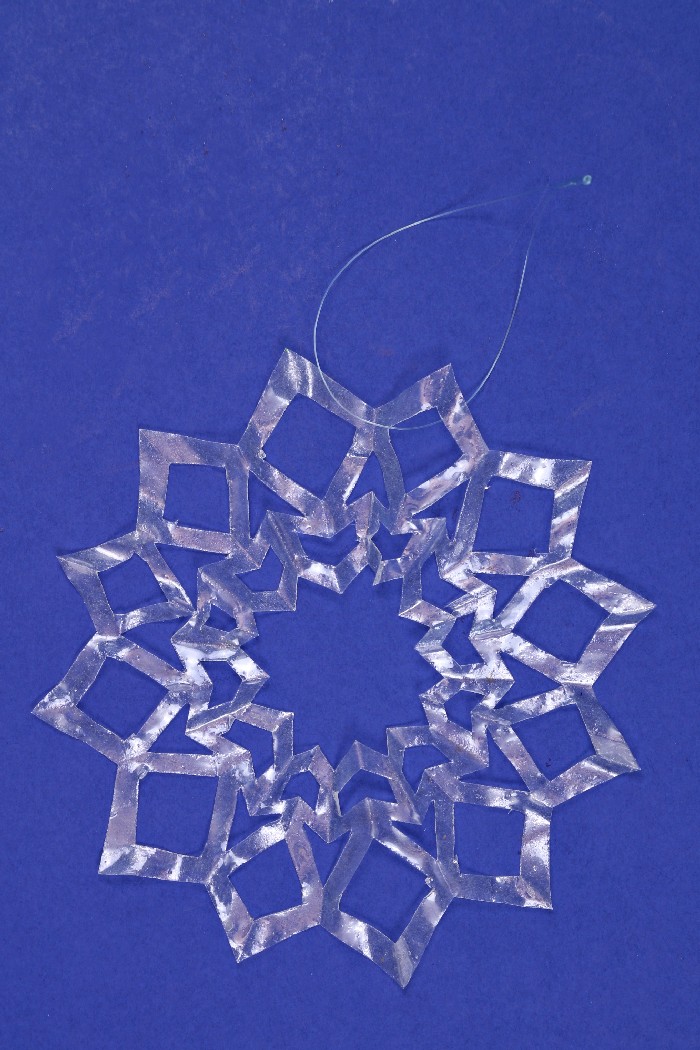
I suggest using a bit of monofilament to hang the snowflakes to add to the illusion of transparency.

These snowflakes are so fun to make that you may find yourself making dozens of them. This is also a great way to preserve snowflakes that your children have created!
![]()
I created a few snowflakes with the pearl pigment and a few without it. I made the snowflake on the left without the pigment, and the one on the right with the pigment. You can just barely see the extra sparkle that the pigment adds to that snowflake.

Jessica Hill is the creative mind behind the blog, Mad in Crafts. For nearly 9 years, Jessica has shared crazy good creativity from her Mad House to yours. When she’s not creating, Jessica loves the Detroit Tigers, craft beer, and spending time with her family and rescue dog.


What a great idea! How did you come up with such a great idea? I WILL do this project with my 8 year old grandson during Thanksgiving week. I love your technique. TY
Thank you so much!
This project came out fantastically! I made two sets of snowflakes with two grandsons. The more glitter we added, the more the boys liked them. I wish I could send you pictures of our successes. We cut the coffee filters down by 1” in diameter so we could get more on the tree.
Beautiful idea. Can you add glitter or fake snow to the resin?
Glitter would definitely work, but I am not sure how the resin would react to fake snow. Maybe sprinkle some on the snowflakes while the resin is still tacky>
Is there anything I can use in place of silicone mats?
I wouldn’t recommend it because the resin will stick to most everything else.
Wonderful idea – quick ?? Did you coat both sides of the snowflake or does the resin just soak through the filter to the other side?
Yes, both sides. 🙂
Love!! I’m going to make seriously dozens so I can hang all over the house. How long do these take to cure?
Hi Brandy! They will take 24 – 48 hours depending on the temperature where they cure.
Your method is beautiful and something I might can actually do…
I would like to make snowflakes closer to. Foot in diameter… can you recommend an alternative to the coffee filters?
Thank you… for sharing your talents to inspire others…
Amanda
Hi Amanda! For that size your best best would be either tissue paper or a thin card stock.
I use UV resin would this technique work for that as well?
Hi Teresa! We’ve never used it so can’t say for sure. Sorry about that!
I love this!!! I make a bunch of these every year. I put a lot of work into them and they are very delicate and detailed…. I’ve expanded on my grade school skills 😉 Thank you so much for the great idea!