Updated March 2026.
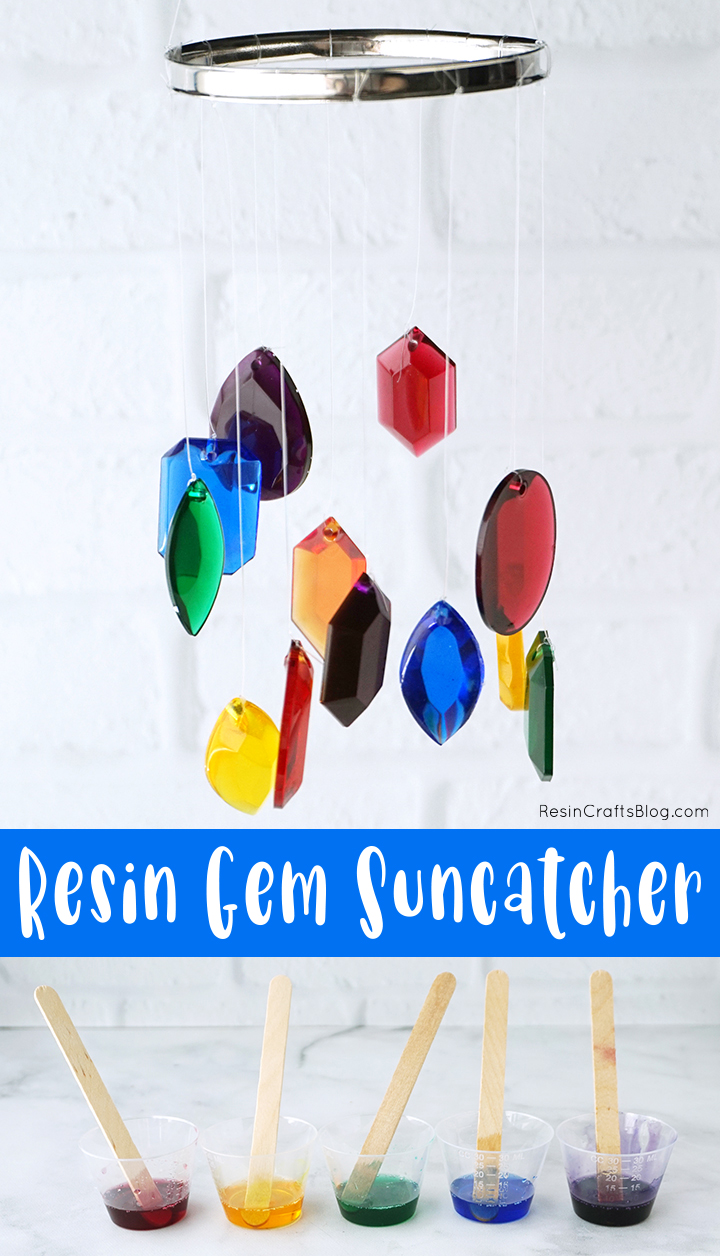
Use epoxy to create a gorgeous Resin Gem Suncatcher to hang in your window!
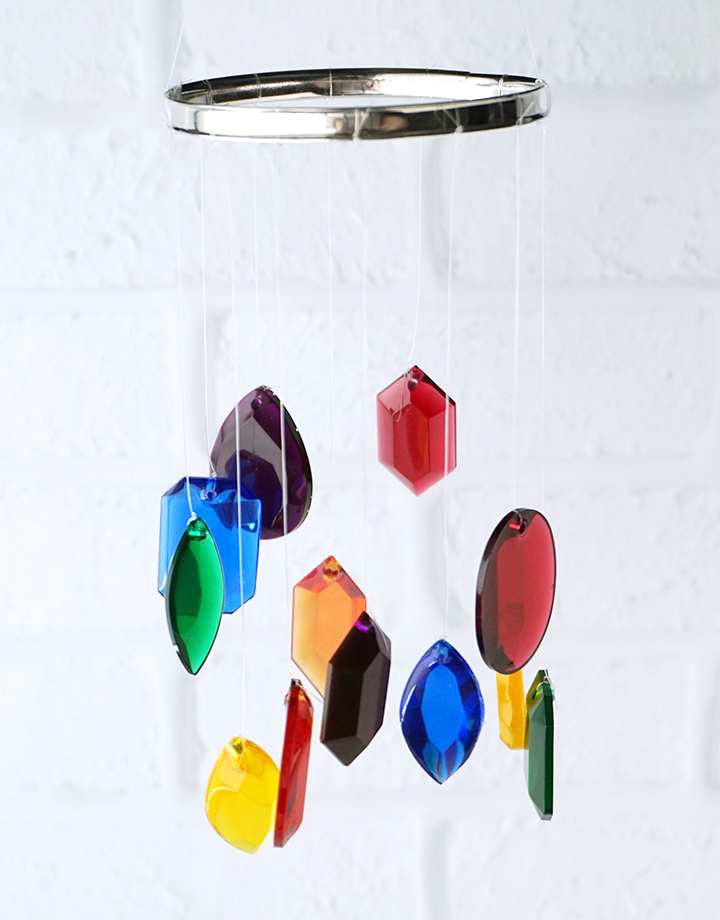
Hey Resin Crafters! Lindsay from Artsy-Fartsy Mama here, and I’m so excited to share this colorful resin craft with you! If you are looking for a creative way to add some extra color to a room, this is the project for you! This Resin Gem Suncatcher is made with Amazing Clear Cast epoxy, and looks amazing when placed near a window for the light to shine through. The project requires few materials, which makes this such a fun and simple project for resin beginners.
SUPPLIES NEEDED FOR A RESIN GEM SUNCATCHER:
- Amazign Clear Cast Epoxy
- Alumilite dyes
- Measuring Cups
- Stirring Sticks
- Disposable Gloves
- Jewelry Mold
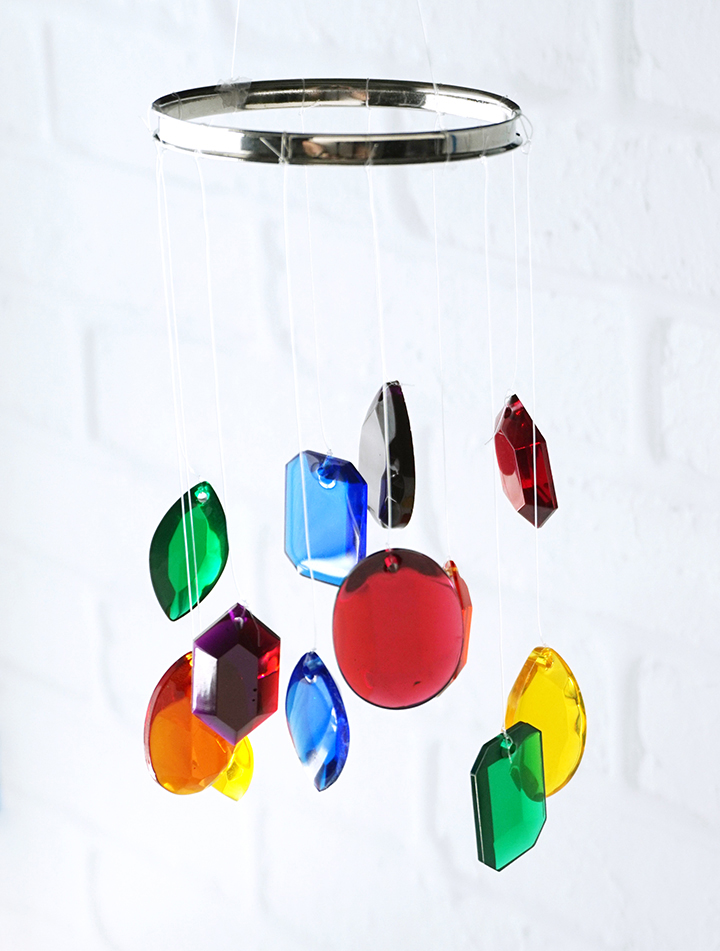
- 3-4″ Metal Hoop (I used a bracelet)
- Clear Illusion Cord
Safety first! Before you start working with resin, make sure that your work surface is covered, you’re wearing disposable gloves, protective eyewear, and that you’re working in a well ventilated area.

STEP 1:
Prepare 25 ml/cc of Amazing Clear Cast according to package directions and follow all safety guidelines. Pour in equal parts resin and hardener to the mixing cup. Stir the resin mixture together SLOWLY with a stir stick for two minutes, and then pour the resin into a clean mixing cup. Stir the resin again for another minute or two with a clean stir stick. If the resin still has streaks running through it, keep mixing until it becomes clear.
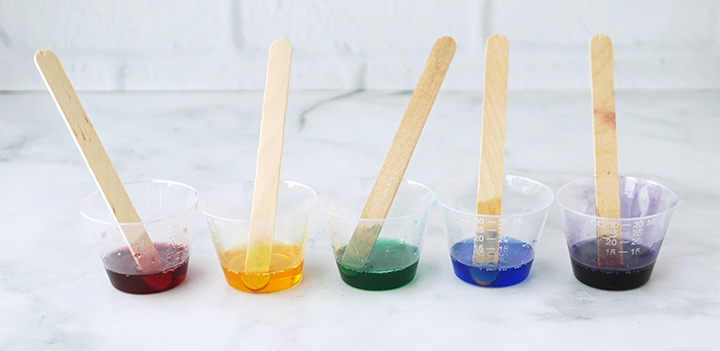
Split the resin into 5 separate mixing cups, 5 ml each.
STEP 2:
Add a drop or two of transparent dye into each of the cups: red, yellow, green, and blue. Combine a 1:2 ratio of drops to make orange (red:yellow) and/or purple (blue:red). Stir each cup of resin with a stir stick until the dye and resin are combined.
STEP 3:
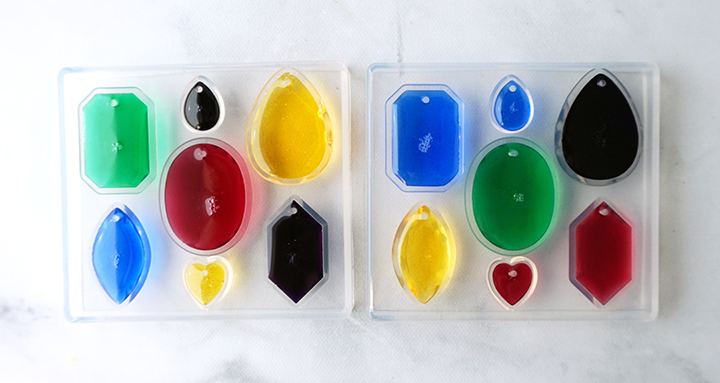
Carefully pour the colored resins into a jewelry mold or another shape mold. I would recommend a mold used for jewelry, because they will already create a hole in the resin piece so you don’t have to drill one yourself.
Pop any bubbles that rise to the top using a heat gun, by blowing through a straw, or lightly spritzing with alcohol. Leave the resin to cure in an undisturbed area for at least 24 hours. You will know that the resin is completely cured when it is no longer tacky.
STEP 4:
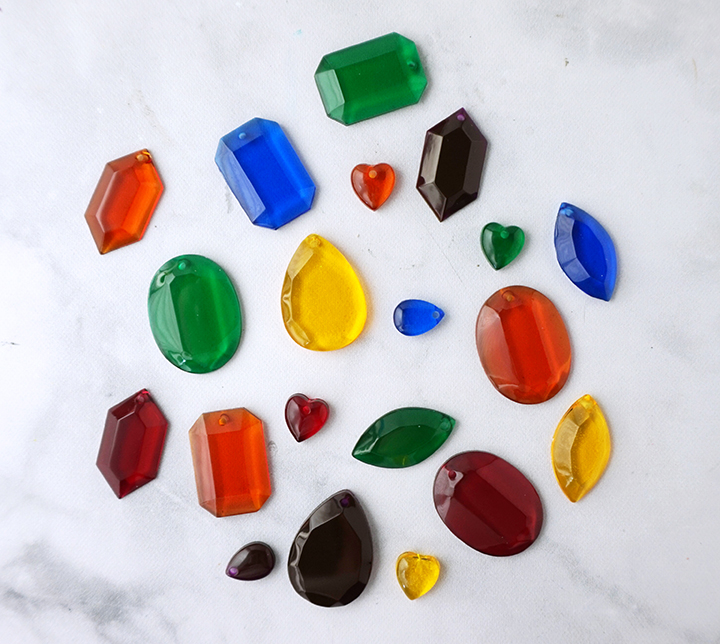
Carefully remove the resin pieces from the mold. If you over-poured any resin, you can trim the excess away using a craft knife or scissors.
If the resin still feels a little flexible, it may just need more time to cure. Let it sit in a warm, flat area to cure for a few hours (or days).

STEP 5:
Cut a length of clear illusion cord and tie one end through the hole in the resin piece. Make sure to tie a double knot to make sure it doesn’t come undone.
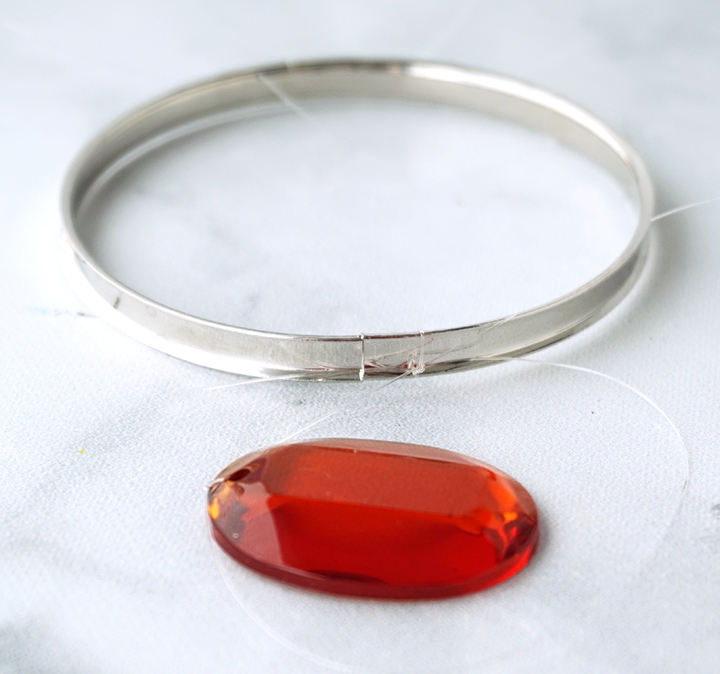
STEP 6:
Tie the other end of the cord to the metal hoop. Again, be sure to double knot it to make sure it doesn’t come undone.
STEP 7:
Repeat the tying process for the rest of the jewels, but vary the lengths of the cord to make them hang at different levels. Tie another length of cord across the top of the hoop to use as a hanger.
Hang the suncatcher near a window and enjoy the brilliant colors with the light shining through! However, be careful not to hang the suncatcher in direct sunlight because the heat can affect the resin and can ruin the project.
As always, I would love to hear what you think about this Resin Gem Suncatcher made with Amazing Clear Cast epoxy! Be sure to check out these other resin suncatcher craft tutorials for more inspiration!
Don’t forget to Pin, Like, and Share!
Lindsay is a crafter, graphic designer, and glitter enthusiast from Utah. She’s passionate about homeschooling her creative daughter, traveling, and spending time in the craft room. Lindsay shares DIY project tutorials, printables, recipes, kids crafts, and more on her blog, ArtsyFartsyMama.com, where she inspires readers to live a creative life.


Leave a Reply