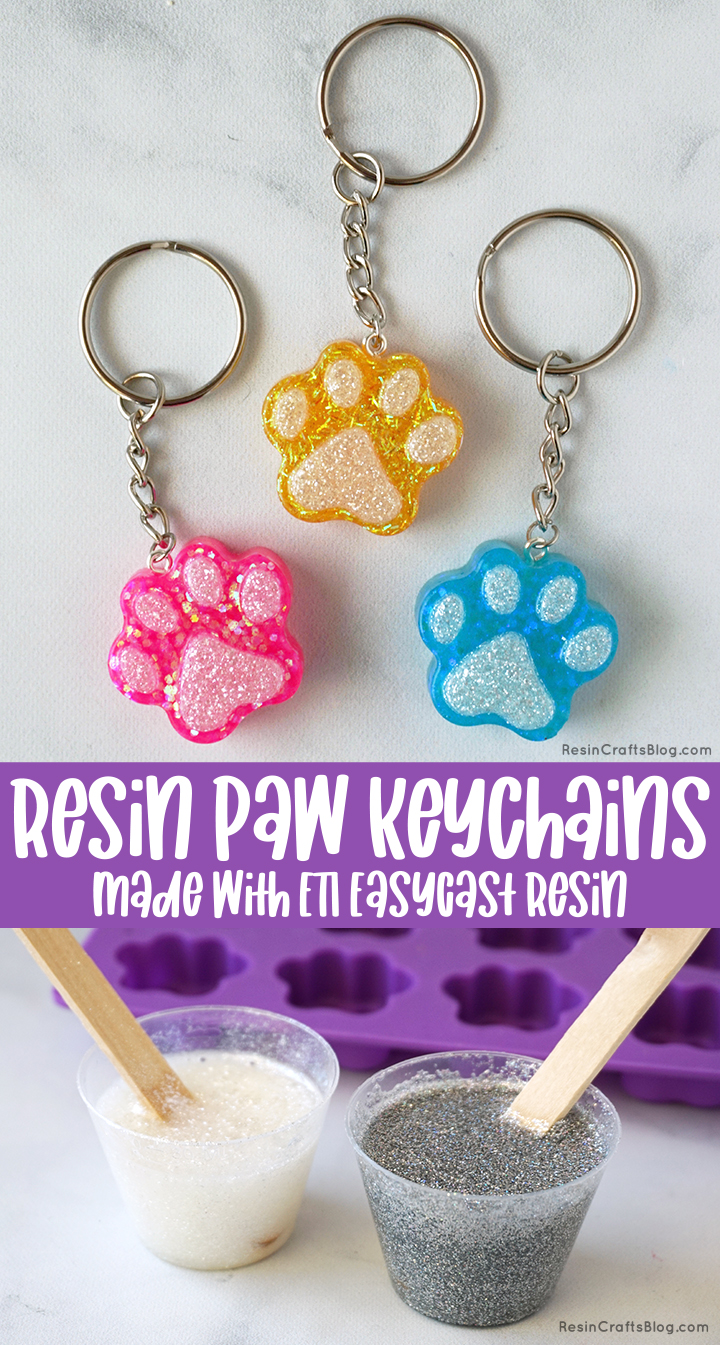
These Resin Paw Keychains made with colorful EasyCast resin are a fun way to display your love for a favorite pet!
Hey Resin Crafters! Lindsay from Artsy-Fartsy Mama here, and I’m so excited to share this colorful resin craft with you! My daughter LOVES dogs, so I decided to create a set of Paw Keychains for her to attach to her backpack and to share with a few of her friends. These Resin Paw Keychains are made with EasyCast, which makes this such a fun and simple project for resin beginners to start with. You can also replace some of the materials to create a custom Paw Keychain in memorial of your own pet!
TO MAKE YOUR OWN RESIN PAW KEYCHAINS, YOU WILL NEED THESE SUPPLIES:
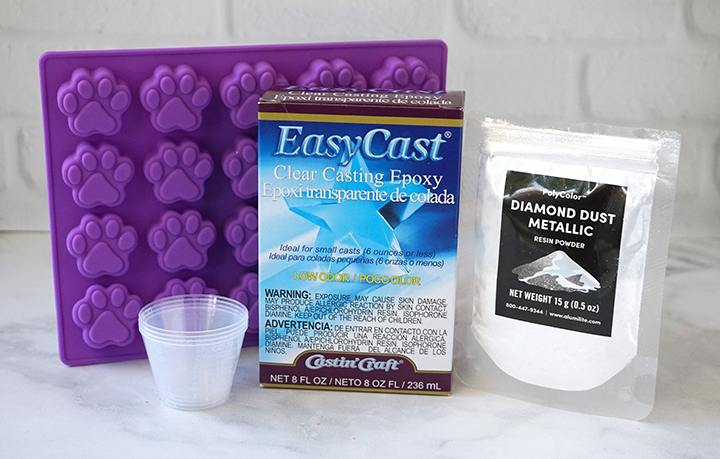
- EasyCast Clear Casting Epoxy
- Mold Conditioner and Release Spray
- Measuring Cups
- Stirring Sticks
- Disposable Gloves
- Paw Silicone Mold(s) – I used a purple dog paw mold, and a pink cat paw mold
- PolyColor Resin Powder – White Metallic
- Colorful Glitters or Pigments – I used Holographic/Silver, Pink, Blue, Yellow, Green, Purple
- Eye Screws, Keychain Supplies
Memorial Idea:
If you would like to make a Resin Paw Keychain made with EasyCast in memorial of a pet, you can replace the initial glitter/powder of the paws with pet ashes or replace the colorful glitter/pigment in the paws with your pet’s fur. This would encase the ashes or fur inside the resin, making it a bittersweet memorialization of your pet that you can carry around with you wherever you go.
STEP 1:
Prepare 1/2 oz of EasyCast Clear Casting Epoxy according to package directions. Be sure to work in a well-ventilated area and wear disposable gloves. Working with resin can get a little messy, so lay something down to protect your work surface before getting started.
Pour in equal parts resin and hardener to the mixing cup. Stir the resin mixture together with a stir stick for two minutes, making sure to scrape the bottom and sides of the mixing cup. Pour the resin into a clean mixing cup and stir the resin again for another minute or two with a clean stir stick. To keep the bubbles down to a minimum, don’t stir too fast, and give the resin a minute or two to “rest” after mixing to let any bubbles rise to the top.
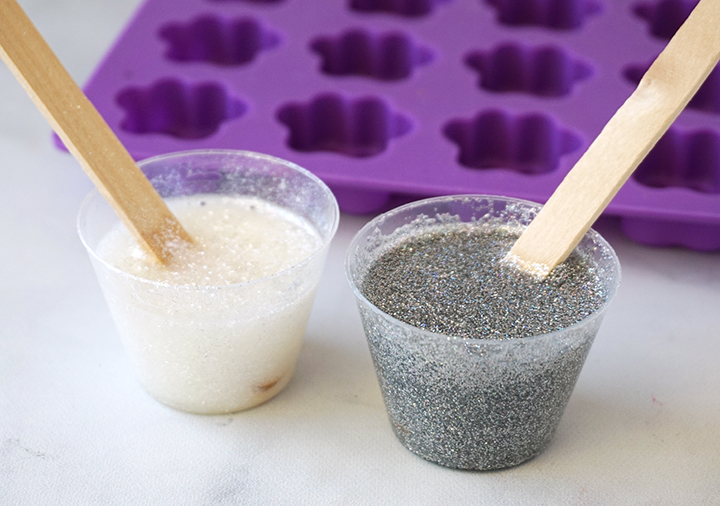
If you only want to make one color of paw, you can skip this step. I wanted to make paws in two different colors, so I split the resin into two mixing cups. In one cup, I added in a little bit of White Metallic PolyColor Resin Powder, and some holographic silver glitter to the other. Stir both resin mixtures well until the glitter and powder are fully combined.
STEP 2:
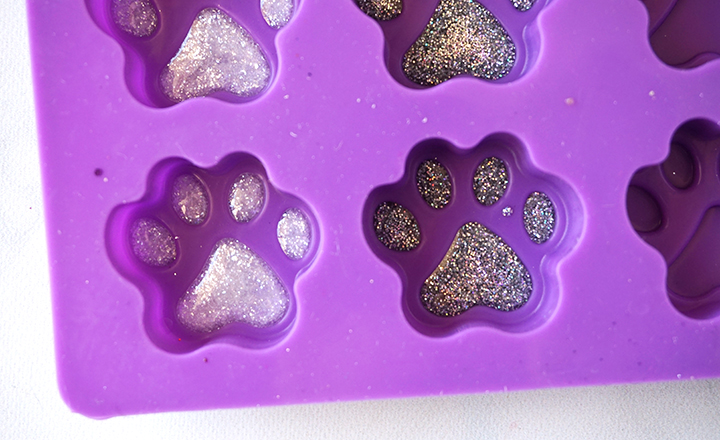
The molds have a smaller cavity area for the paw prints. Use a toothpick to fill just these small paw sections of the mold with the white or silver resin mixtures. If you accidentally drip some resin, don’t worry about cleaning it up right away. Let the resin cure for at least 2 hours before moving onto the next step.
STEP 3:
If you have any accidental drips, you can clean them up now. They should easily peel away from the mold. Be careful to NOT remove any of the poured paw prints!
Prepare 100 ml of EasyCast Clear Casting Epoxy according to package directions. Be sure to work in a well-ventilated area and wear disposable gloves. Working with resin can get a little messy, so lay something down to protect your work surface before getting started.
Pour in equal parts resin and hardener to the mixing cup. Stir the resin mixture together with a stir stick for two minutes, making sure to scrape the bottom and sides of the mixing cup. Pour the resin into a clean mixing cup and stir the resin again for another minute or two with a clean stir stick. To keep the bubbles down to a minimum, don’t stir too fast, and give the resin a minute or two to “rest” after mixing to let any bubbles rise to the top.
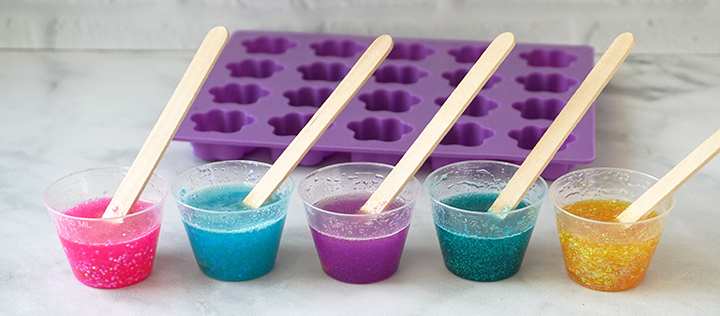
Decide how many different colors of paws you want to make (I made 5). Split the resin equally into the same amount of mixing cups. In each cup, add one color of glitter, mica powder, or pigment. For projects like this, I love to mix in different sizes and textures of a similar color of glitter, and a drop of pigment for a more vibrant color. Stir each cup of resin well to make sure the glitter and pigments are completely combined in the resin.
STEP 4:
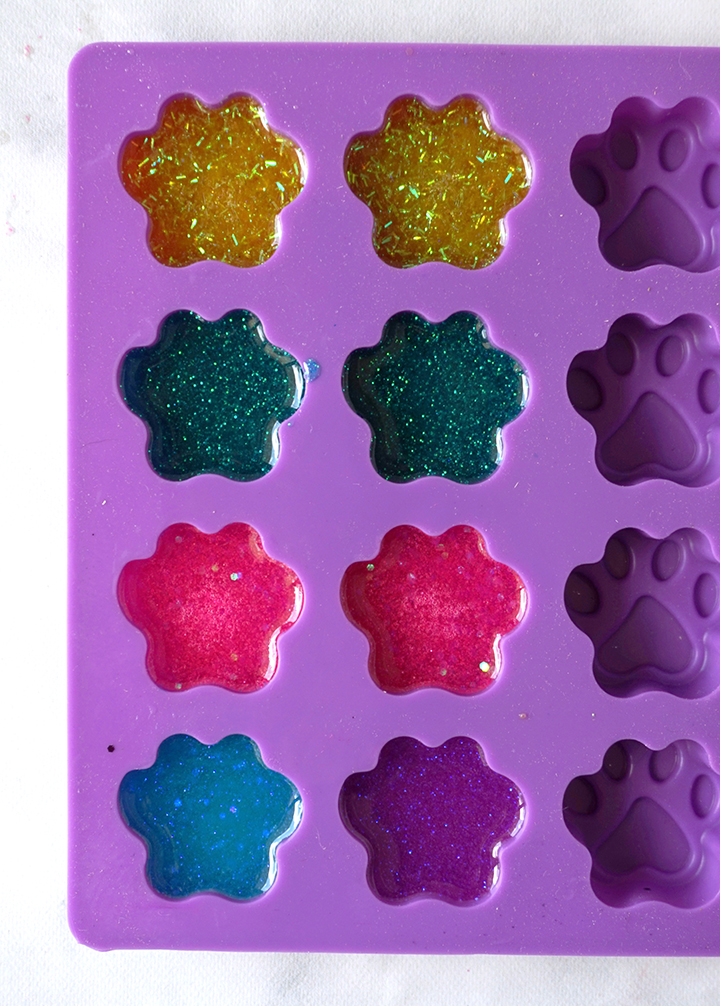
Slowly pour resin into each of the mold cavities. Depending on how thick you want them to be, you can fill the mold halfway or all the way to the top. You can also get creative and pour multiple colors of resin into one mold to make a multi-colored paw!
Pop any bubbles that rise to the top using a heat gun, by blowing through a straw, or lightly spritzing with alcohol. Leave the resin to cure in an undisturbed area for at least 24 hours. You will know that the resin is completely cured when it is no longer tacky.
STEP 5:
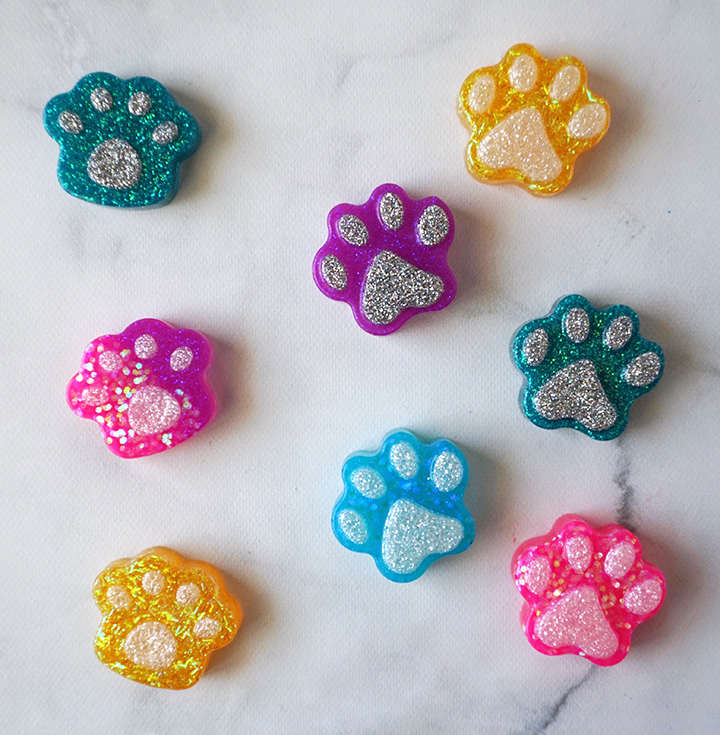
Carefully remove the paws from the molds and admire your work! One of my favorite parts of working with resin is “demolding” a project and the big reveal. The three paws on the left are from a “cat” paw mold, and the ones on the right are the purple “dog” paw mold. Slightly different, but both are so cute!
If you over-poured any resin, you can trim the excess away using a craft knife or scissors. If the resin still feels a little flexible, it may just need more time to cure. Let it sit in a warm, flat area to cure for a few hours (or days).
STEP 6:
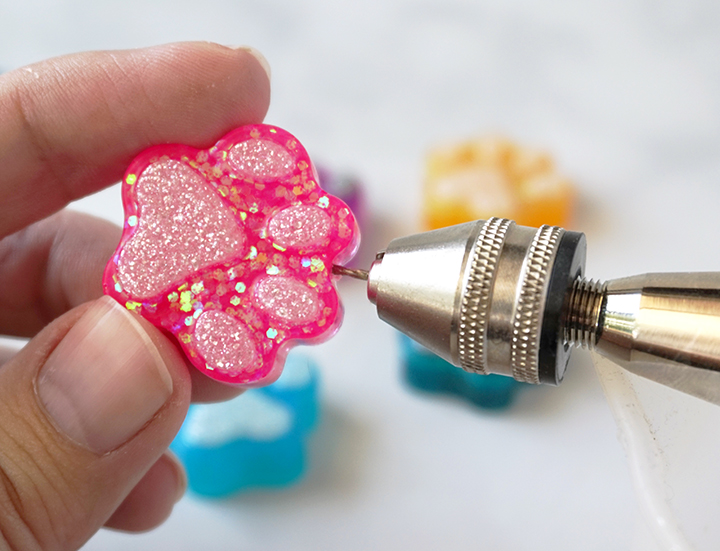
To transform the paws into a keychain, you need to make a hole in the top of the paw. I used my tiny hand drill, but you could use a Dremel or other power tool instead if you have one.
STEP 7:
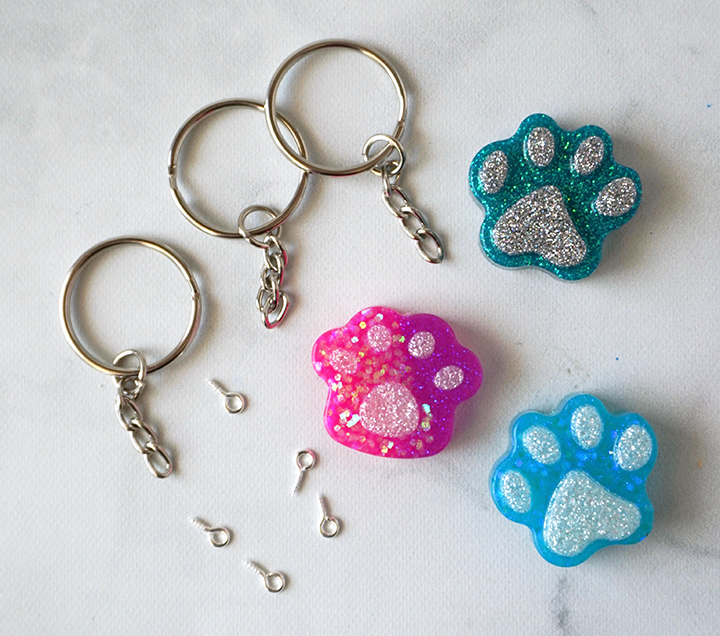
Gather your materials to make a keychain (or jewelry). You will need tiny jewelry eye screws, key rings, jump rings, and a small length of chain. I would also recommend having a pair of jewelry pliers to make assembling easier.
STEP 8.1:
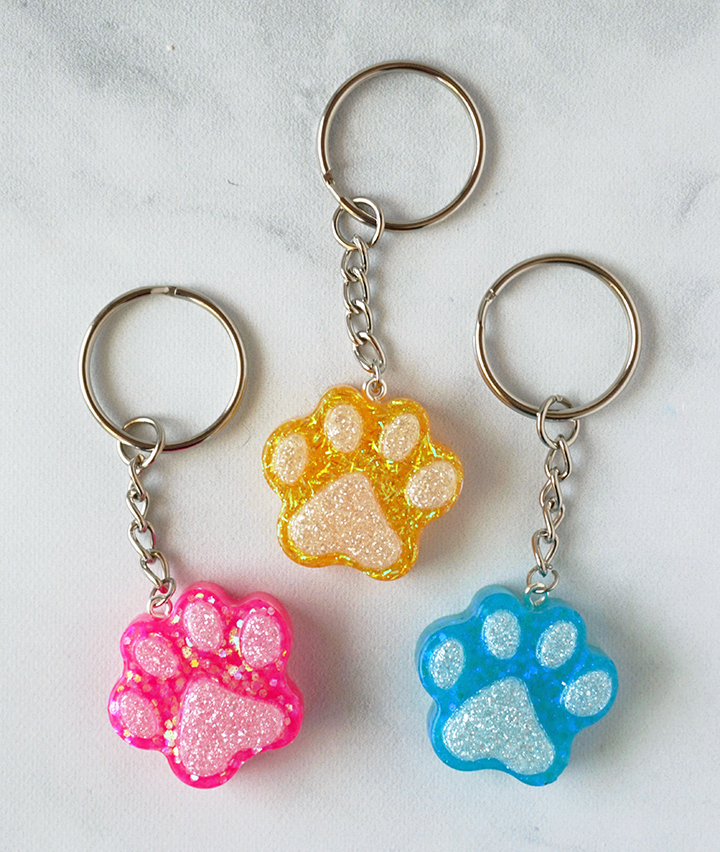
Add a little bit of strong adhesive to the screw of the eye screws, and then twist it into the hole in the paw using jewelry pliers. This will make the screw more secure, and less likely to come out later as the keychain is being used. Attach a jump ring to the eye screw, and then attach it to the chain and keyring. Once the adhesive has had time to set, the Resin Paw Keychains are ready to be used or given away as a gift!
STEP 8.2:
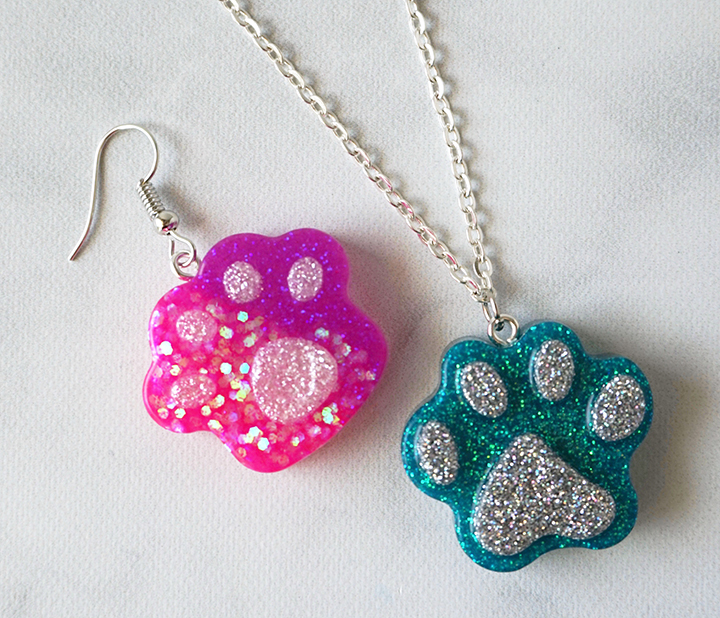
To make the paws into jewelry instead, you will need the eye screws, jump rings, and necklace chain or earring hooks. Attach the eye screw the same way as the keychains (with adhesive). Attach a jump ring or an earring hook to transform the paws into adorable necklaces and earrings!
As always, I would love to hear what you think about these Resin Paw Keychains made with EasyCast! Be sure to check out these other resin animal craft tutorials for more inspiration, and share your own creative resin projects in the ETI Facebook Group!

Don’t forget to Pin, Like, and Share!
Lindsay is a crafter, graphic designer, and glitter enthusiast from Utah. She’s passionate about homeschooling her creative daughter, traveling, and spending time in the craft room. Lindsay shares DIY project tutorials, printables, recipes, kids crafts, and more on her blog, ArtsyFartsyMama.com, where she inspires readers to live a creative life.

Where can the keyring and accessories be purchased?
Thank you!