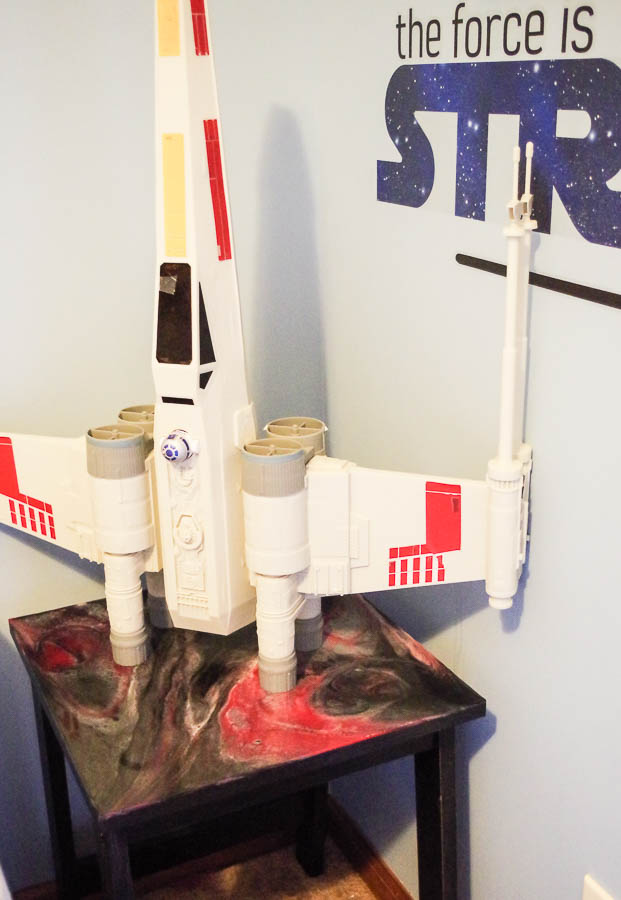
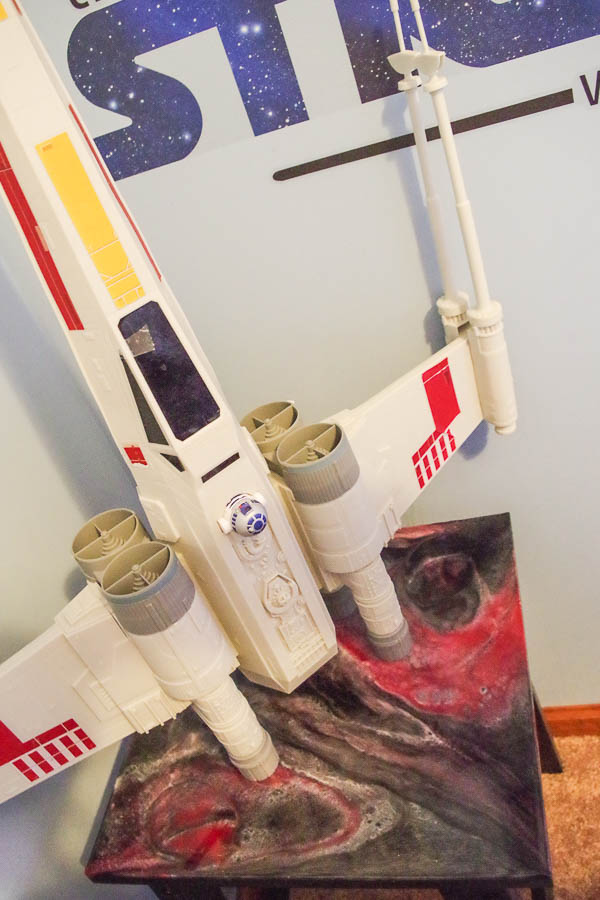
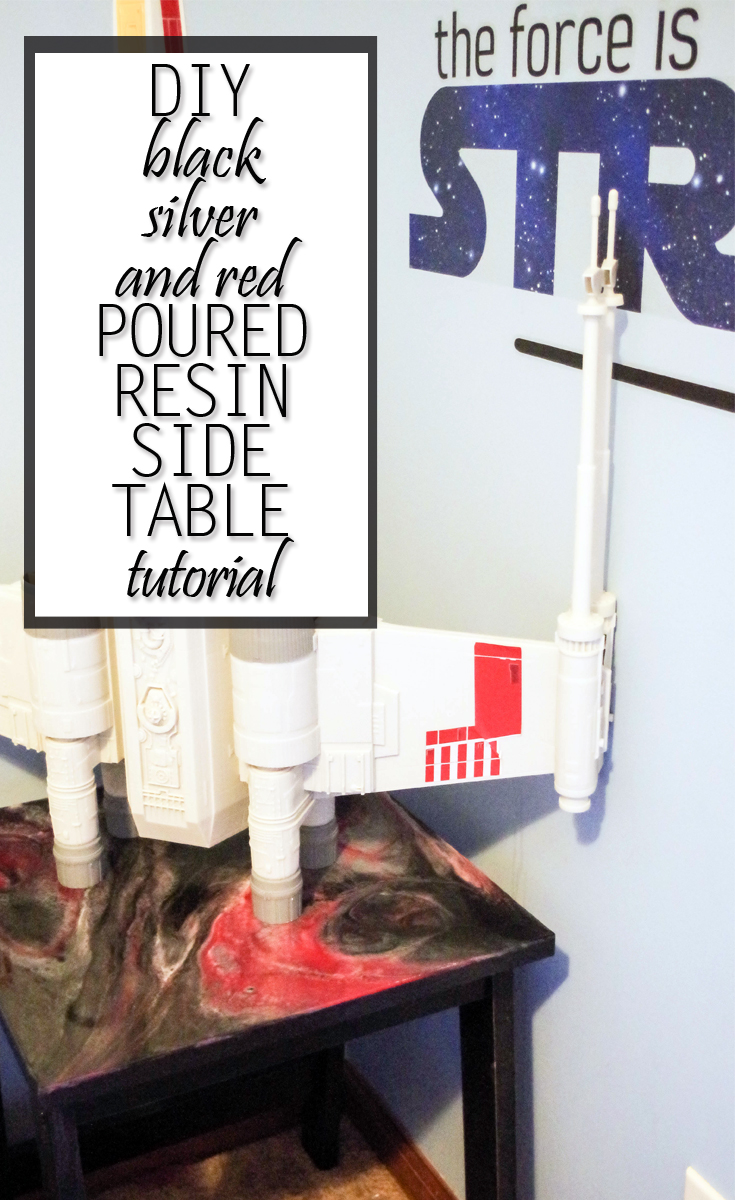
Welcome to the Resin Crafts blog! I’m Sheri from Hazel + Gold Designs and I am here to share this awesome Black, Silver and Red Poured Resin Side Table tutorial with you. My son’s room is all decked out in Star Wars themed items, and I wanted to make his old, worn and scratched bedside table into something awesome to fit into the theme. There is nothing more awesome than the gorgeous shiny finish of Envirotex Lite Pour-On High Gloss Finish, especially with sharp colors. Can’t wait to show you how I made this table! Keep reading!
Black, Silver and Red Poured Resin Side Table
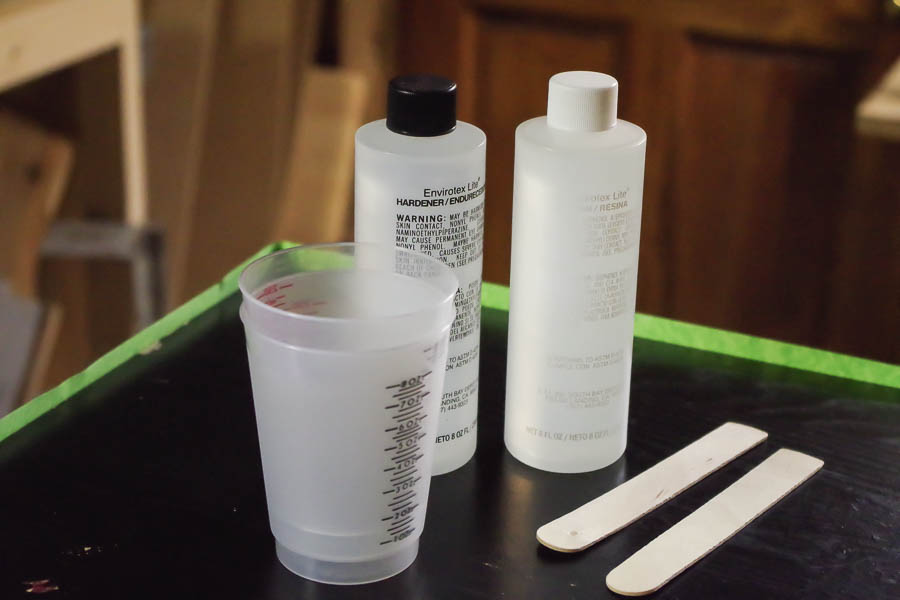
Supplies:

- Old Side Table
- Envirotex Lite Pour-On High Gloss Finish
- Measured Mixing Cups
- Wooden Stir Sticks
- Masking or Paint Tape
- DecoArt Acrylic Paints – red, silver, white, black
- Disposable Vinyl gloves
- Micro Butane Torch
Prep:
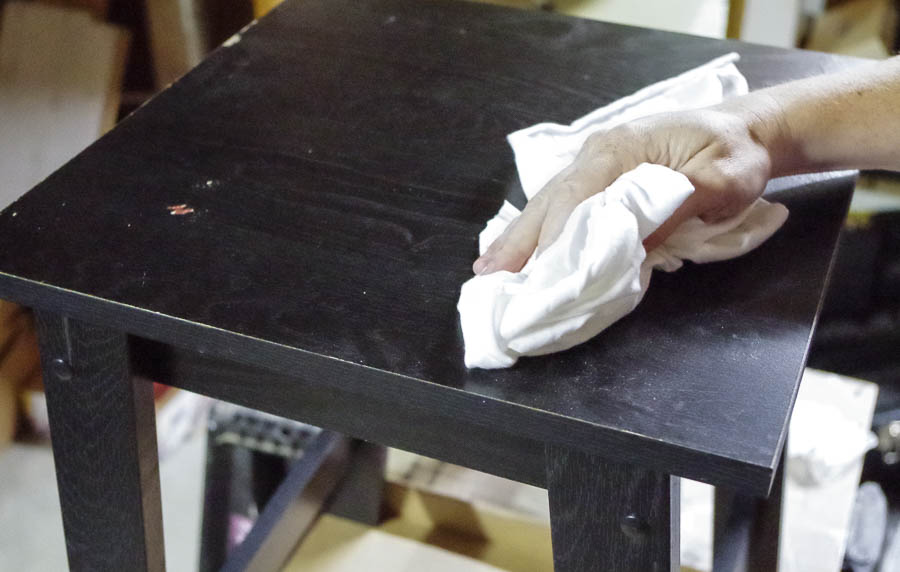
The first step for preparing your table is to use a damp rag and clean off any dust or dirty spots. (Note: my table had a smooth finish on it already, but if yours is bare wood then you want to put a skim coat of resin onto it before pouring your resin.)
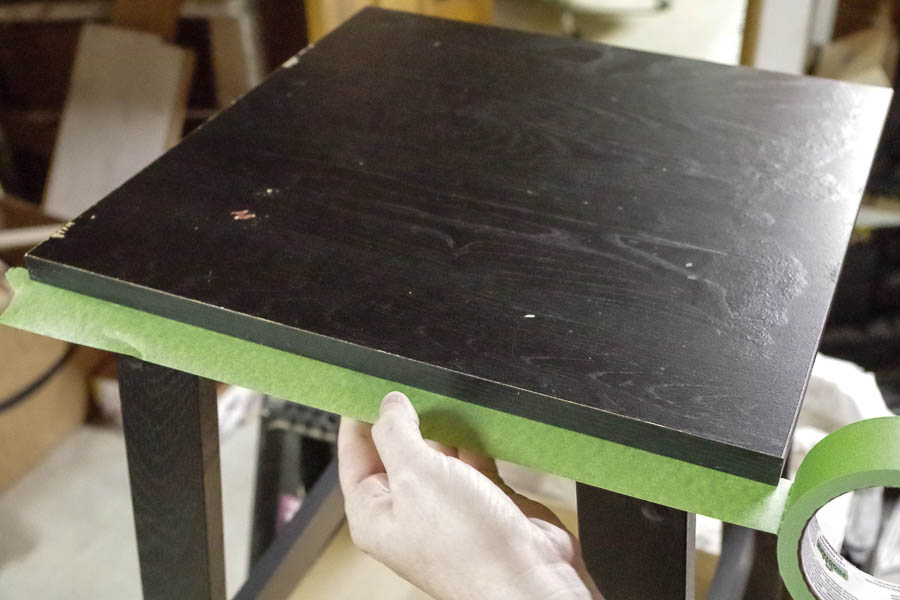
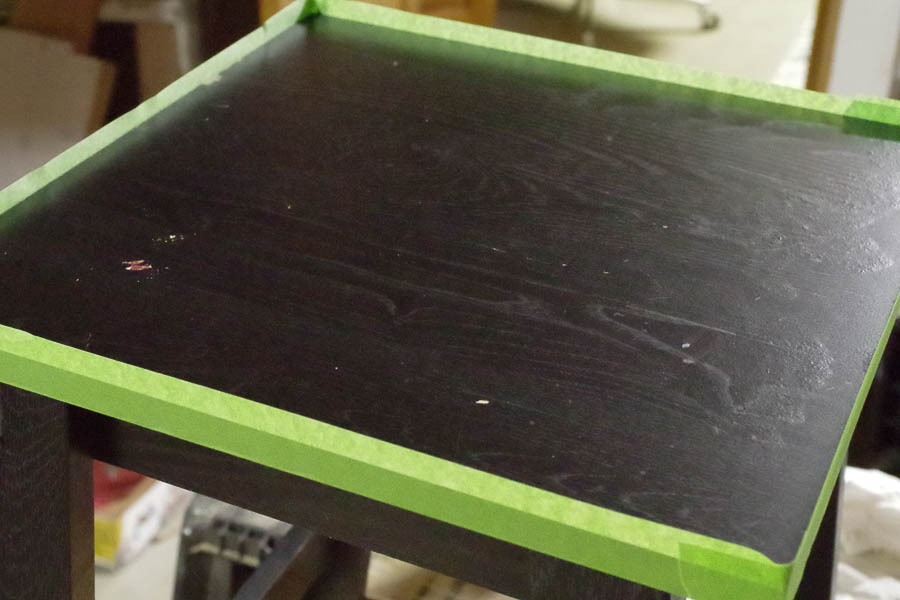
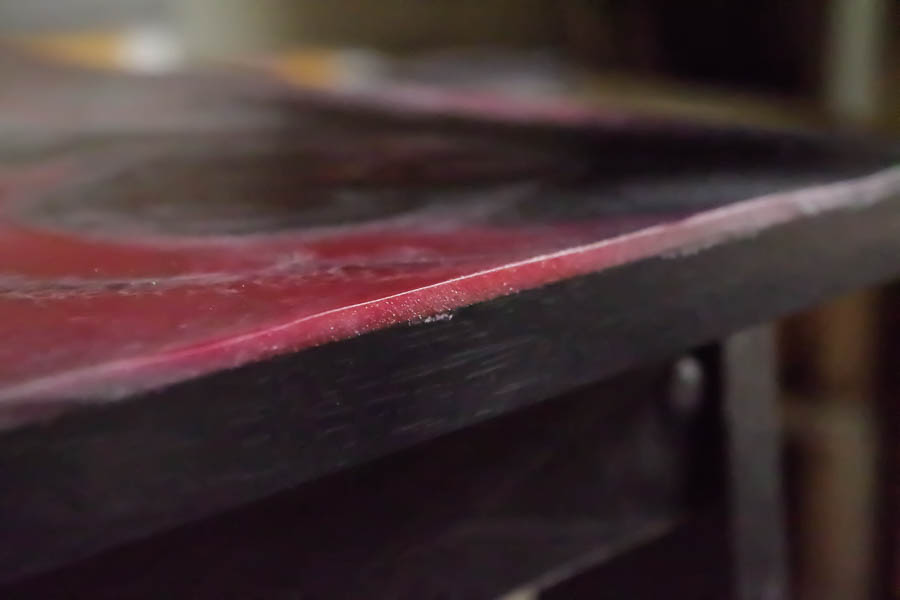
Once it is clean, use your tape and tape along each of the sides with the tape rising up above the edge of the table. This will create a wall so the resin won’t pour off the sides at all.
Put down some sort of box or surface to put your resin cups on while you work. Sometimes there are drips and it is hard to remove them from your table. I typically use a cardboard box.
Put on your vinyl gloves.
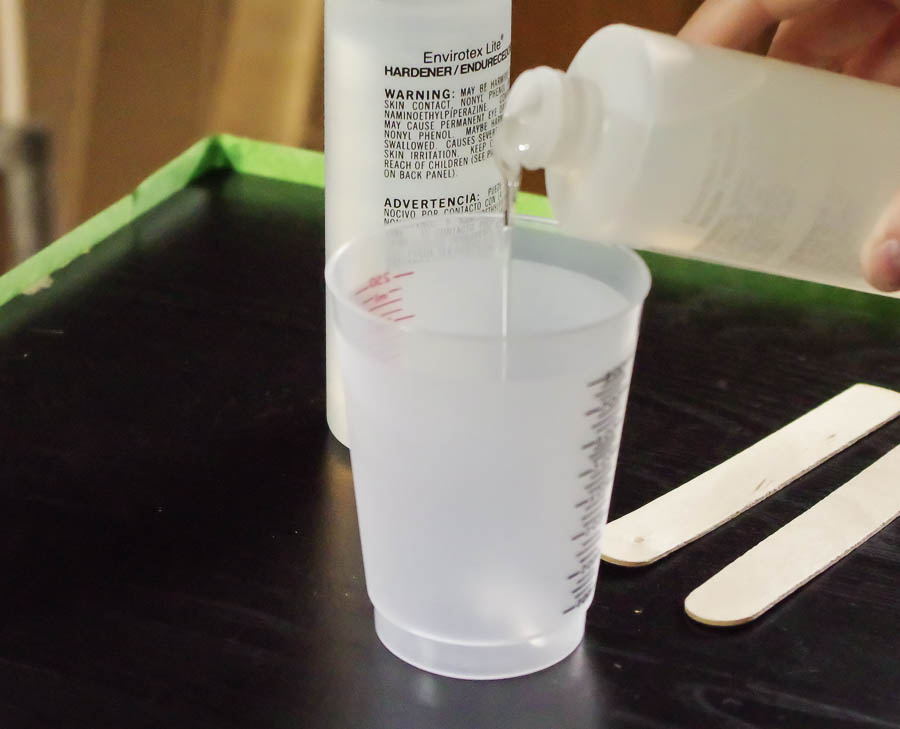
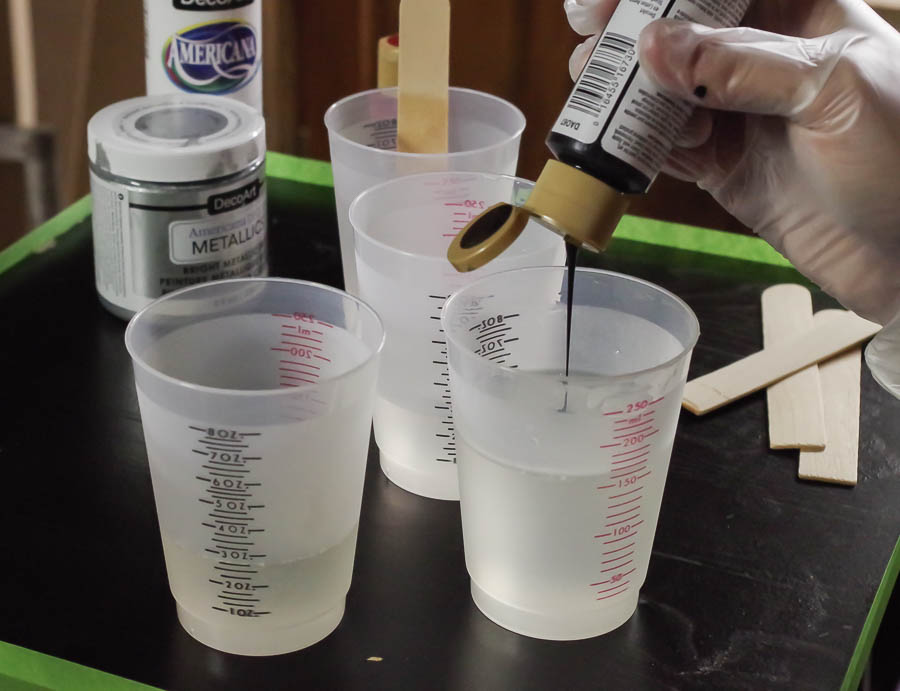
Mixing Resin:
I mixed two separate batches of resin because I was going to be using different colors and didn’t have any larger cups.
Mix equal amounts of Part A and Part B into your cups. This table is about 20″x20″ and I used 3.5 oz of each part, so both of my cups had 7 oz of mixed resin. Be sure to mix thoroughly!
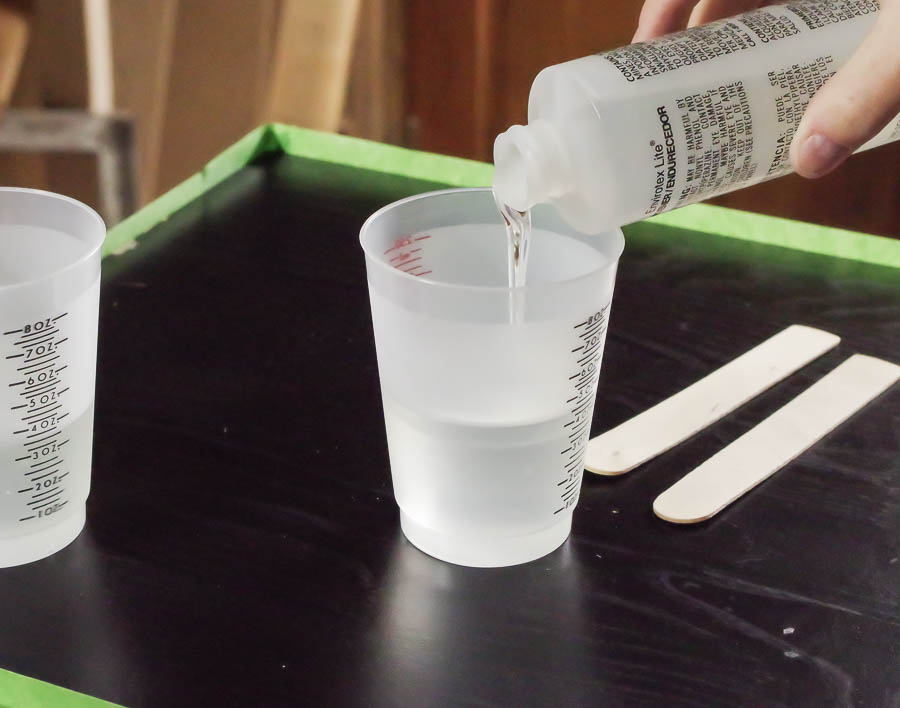
Once your resin is mixed, pour the resin into separate cups for each color.
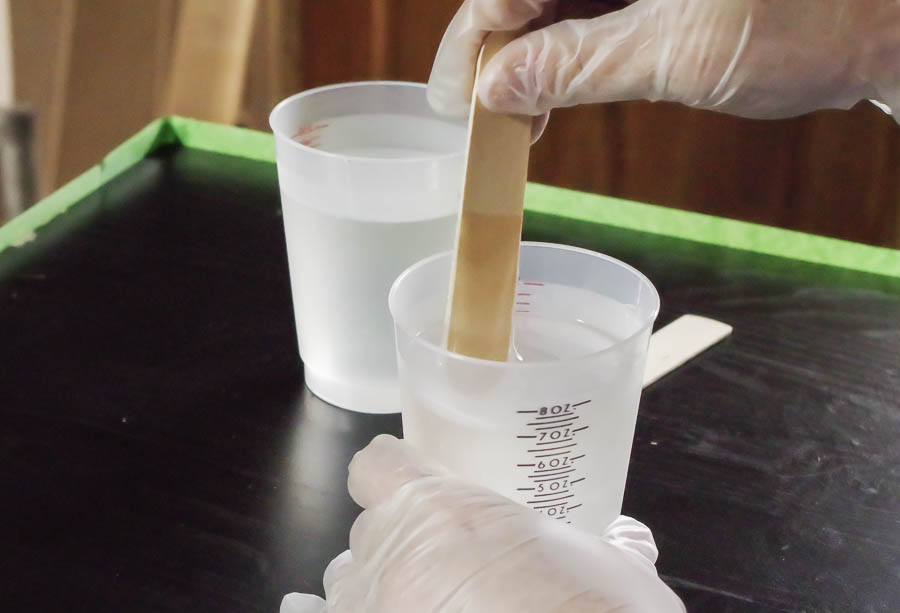
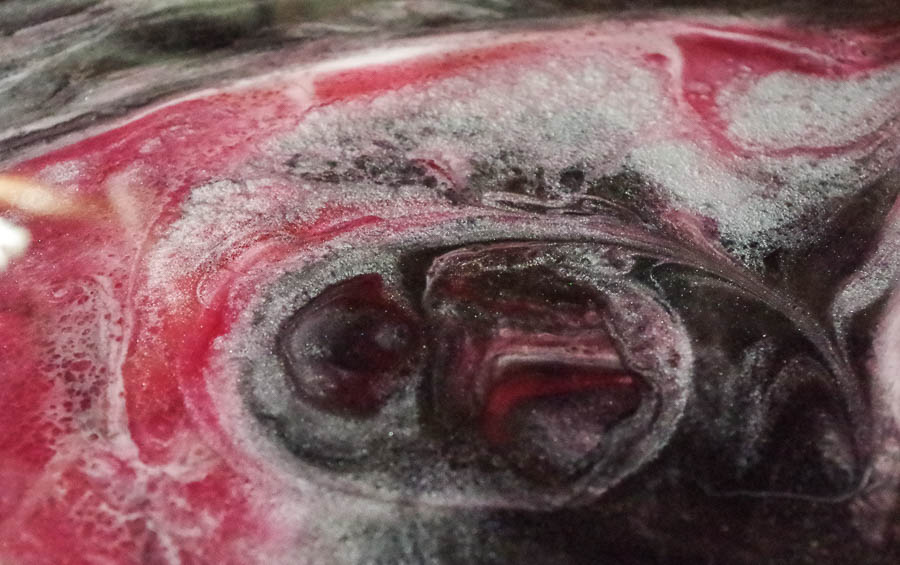
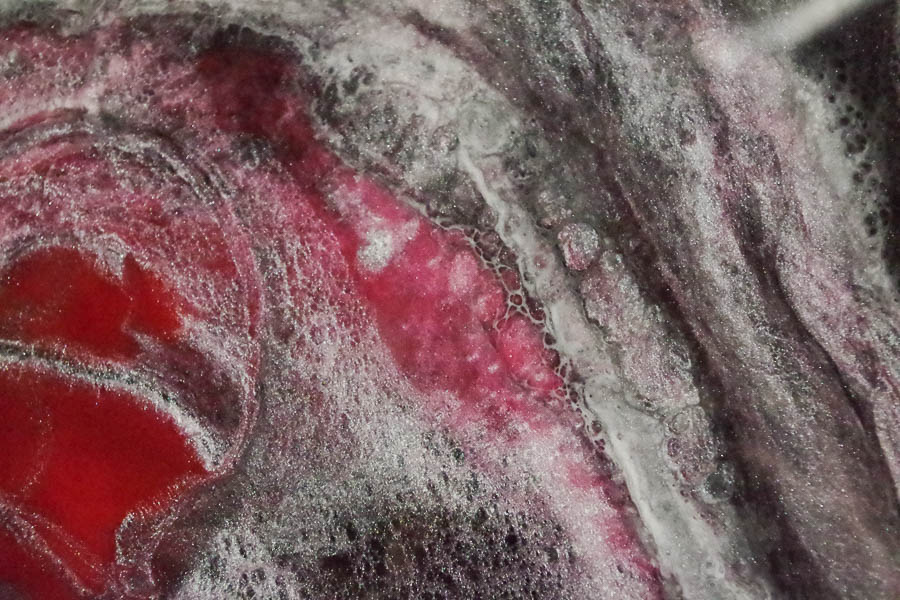
I made a small amount of red, white, silver and a large amount of black. I typically just do a small squirt of paint straight from the bottle and then just check if the color is what I want. Too much paint can be a problem when it comes to the resin curing, so just add a little at a time. For the 7 oz of black though, I’d guess I used about 1/2 oz. of paint. Hope that helps.
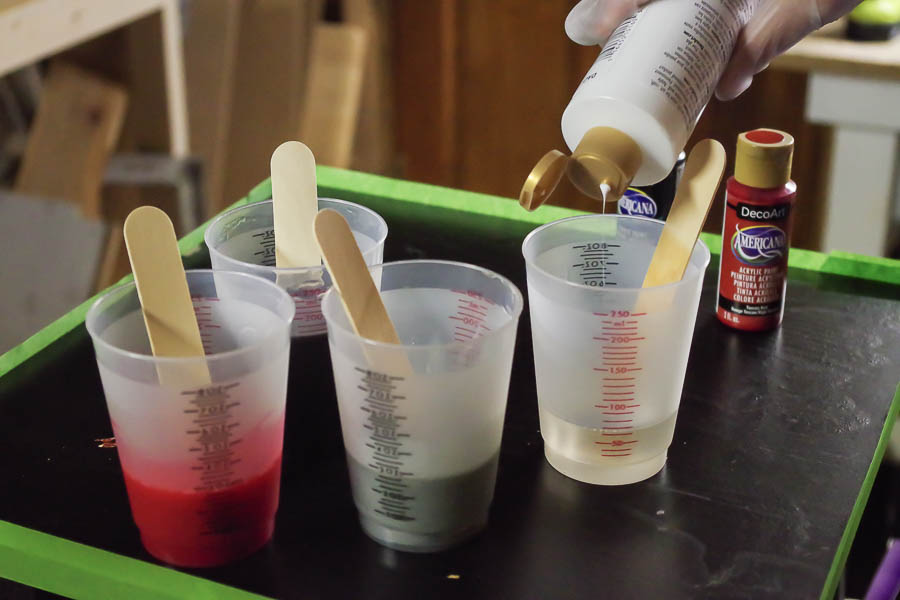
Mix the coloring in thoroughly as well and get ready to pour! Remember you only have about 20 minutes to work before the resin starts to cure and thicken. It will not spread well after that time.
Pouring Resin:
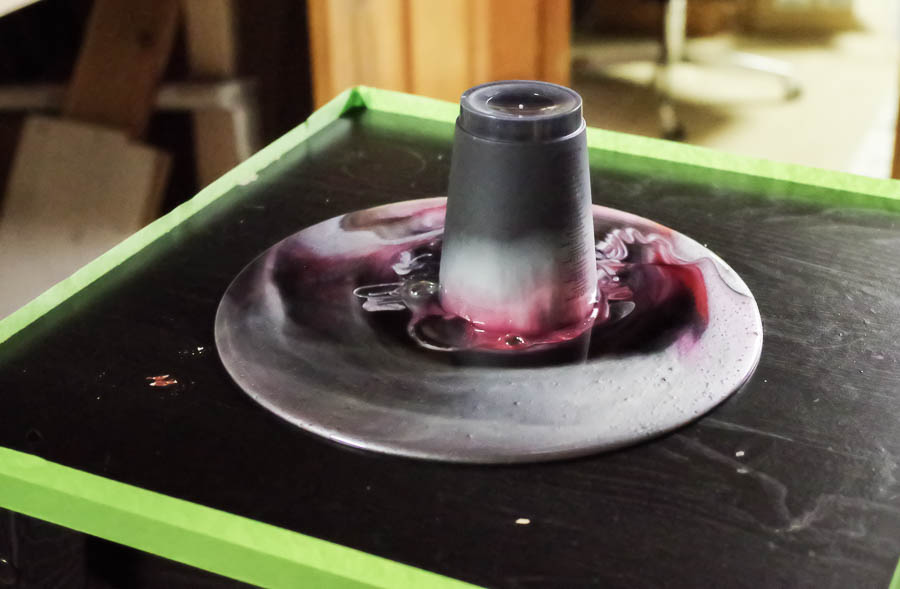
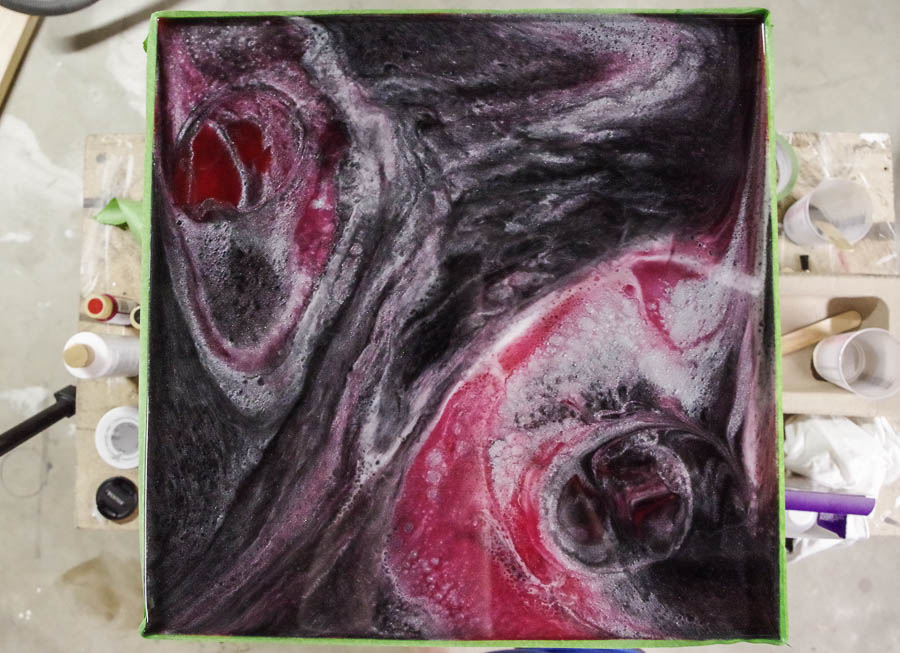
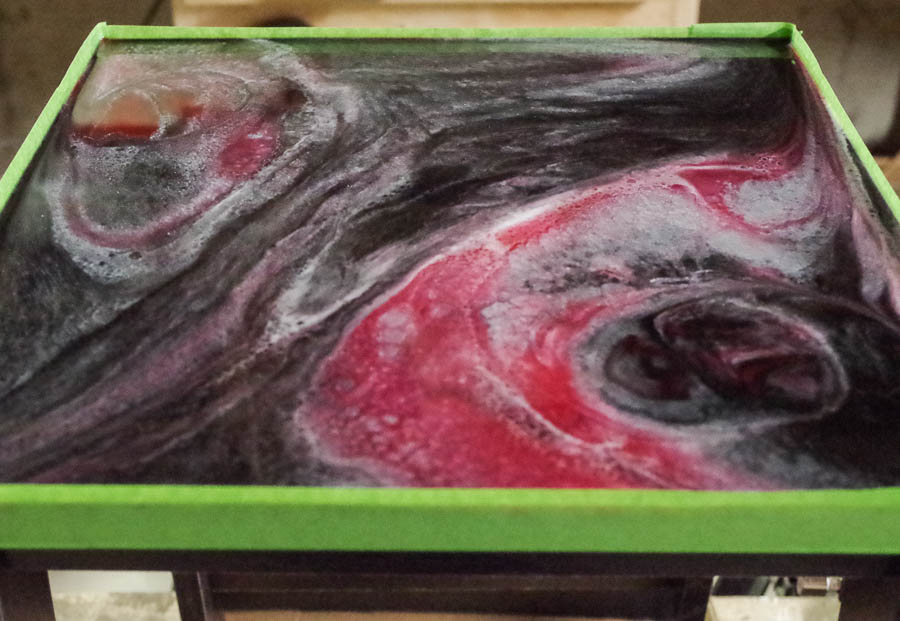
I used another cup and poured various amounts of each color in – DO NOT MIX. This is called a dirty pour. The goal is that the colors will naturally mix or stay separate. Every painting is unique. There is no rule for this, just add how much you want of each color.
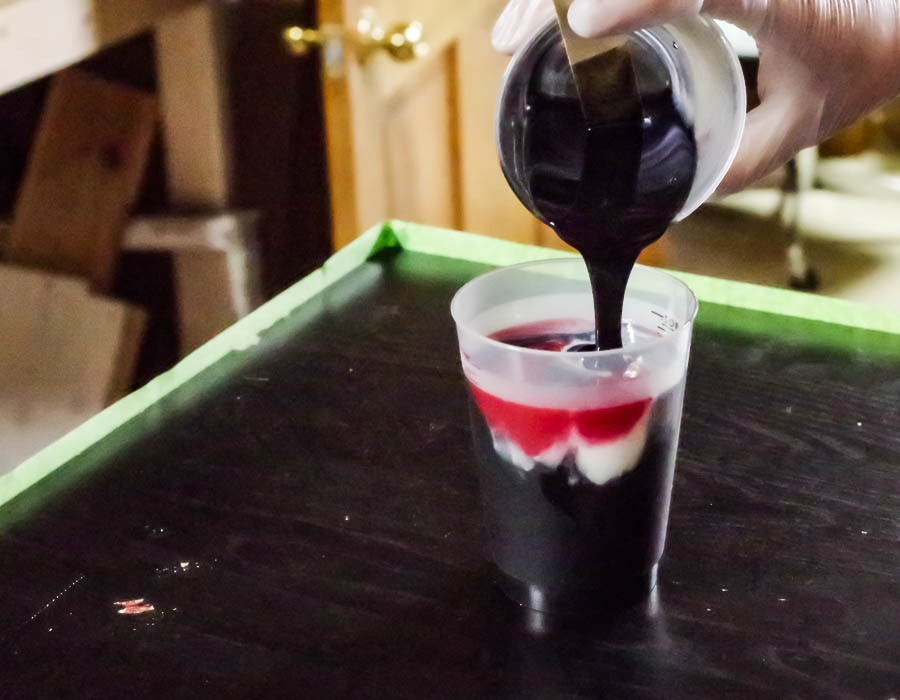
For mine I did one large initial pour, then did a second smaller pour. You can do it however you want, so if you have a larger container you can mix the colors for the dirty pour into that container and just do it all at once.
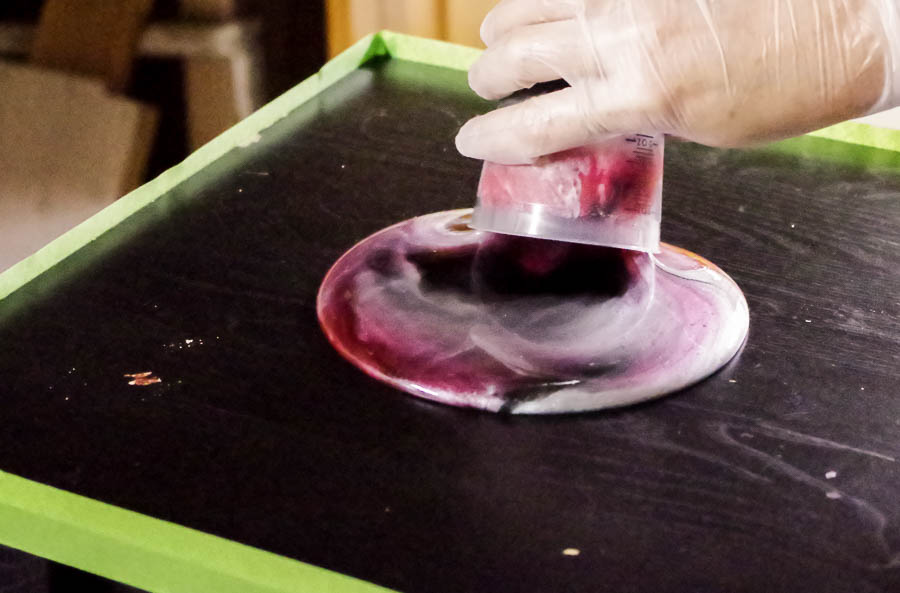
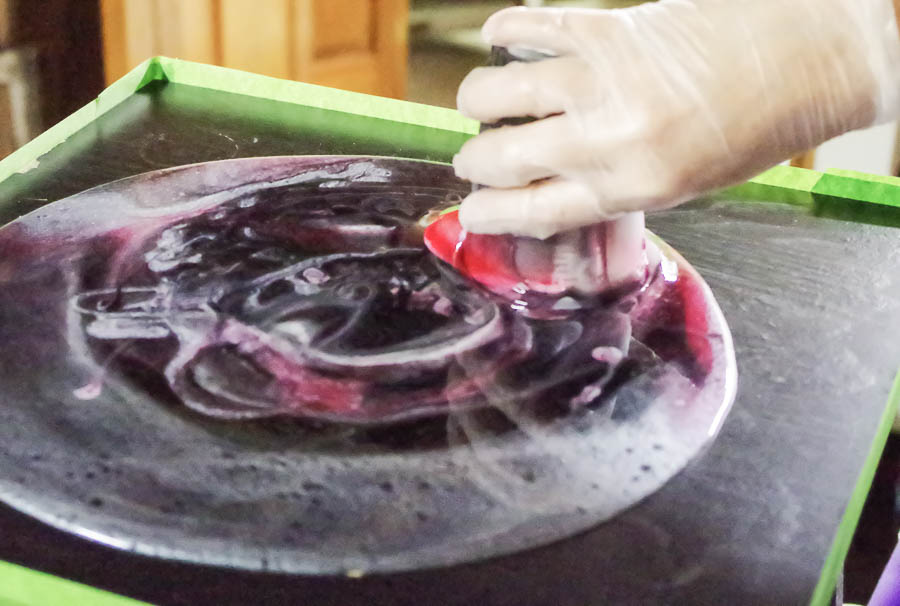
Once you have everything poured, try tipping your table to get the resin to spread into the corners if needed.
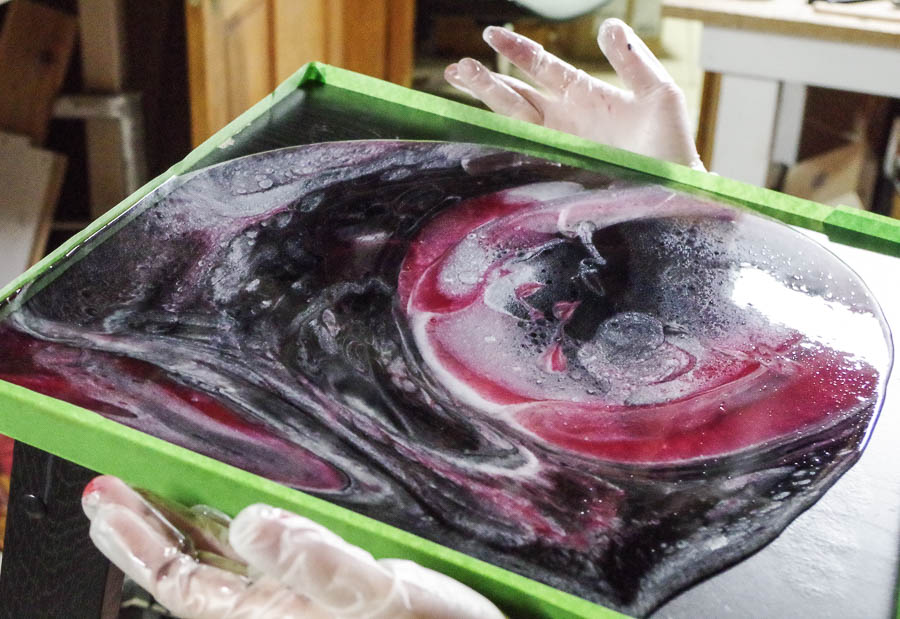
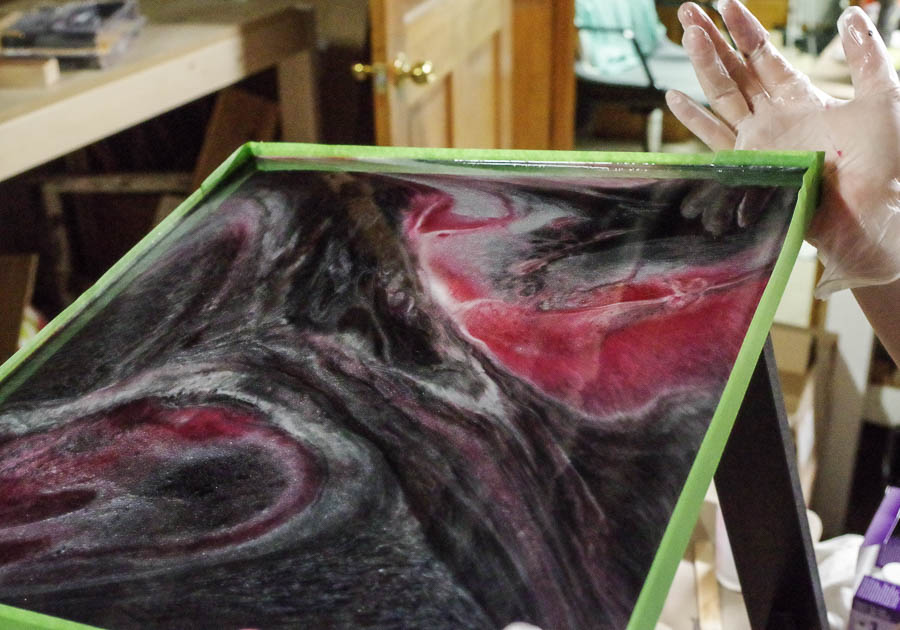
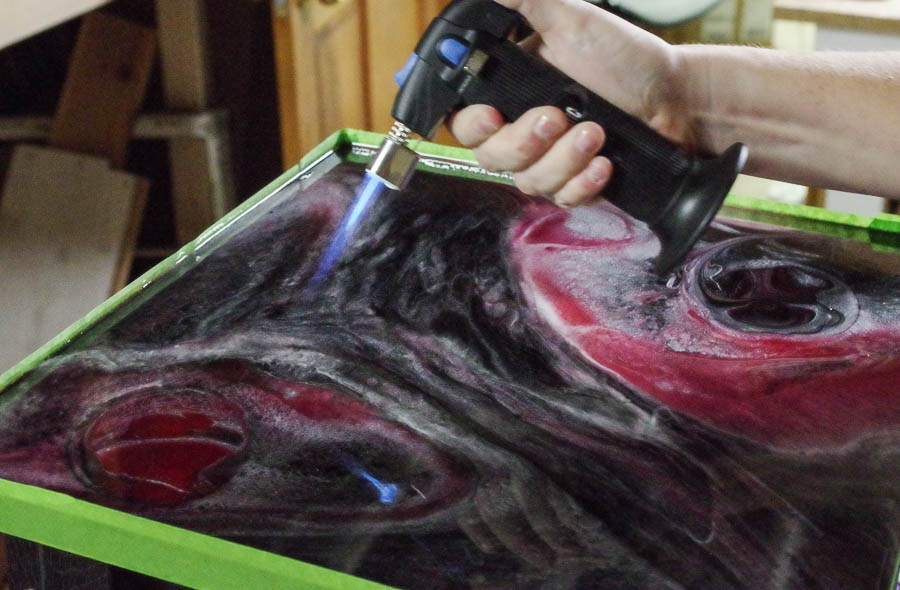
Finishing:
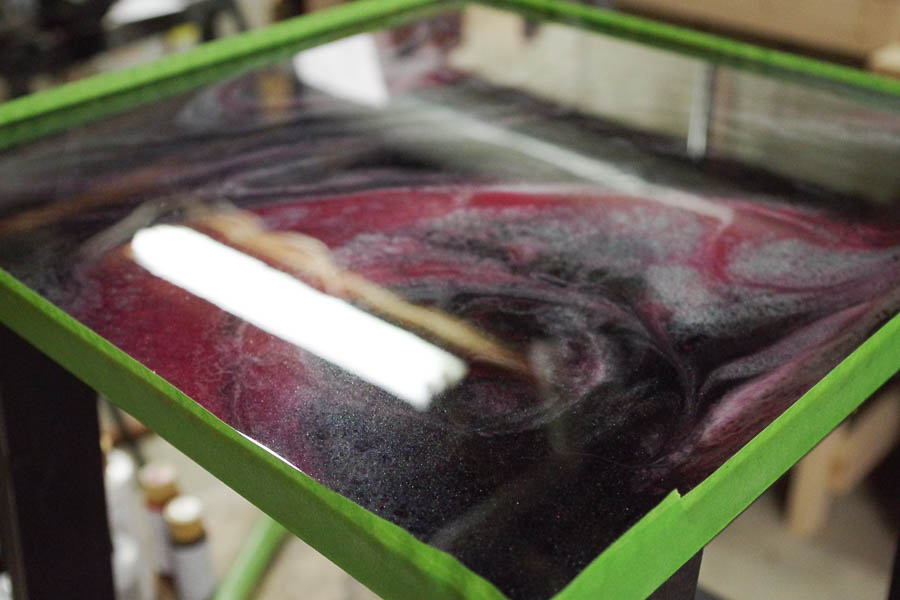
You’ll want to pop all the bubbles on the surface now, using your micro-butane torch. Just run the flame quickly over the resin and watch while the bubbles pop and it turns into a smooth glass like finish. It looks so great!
Once all the bubbles are popped, just let it sit and cure for the next 24 hours.
Remove the tape after the table is cured.
Done!

What do you think? I loved how this table turned out and hope you do too! Feel free to share questions, comments or ideas here in the comment section below.
If you love it, please share! Pin this image to Pinterest or share via FB.
Thanks again for reading! Good luck with your resin projects!
Sheri is a Maker and DIY blogger at Hazel + Gold Designs. She is usually in the middle of multiple projects at once and finds great satisfaction and joy in creating something new. She is constantly learning new skills, putting them to the test, and sharing her experience and knowledge with others. Her favorite hobbies are crafting, painting, crocheting and basic woodworking. Her goal is to inspire others to step out of their comfort zone, learn a new skill and have the confidence to make their life a little more beautiful!


This is really impressive. If I understand correctly, your one large initial pour and then one small pour technique, was done with you turning your container upside down onto the table and letting it go, then raising up the container to let the small pour out.
I’m going to try this on a small board and see if I can do it too.
Yes, that is exactly how I did it. Sorry if it wasn’t clear enough. Good luck!
Thanks for sharing this. I wondered if I could use tape around objects with no lip. Guess I can!
Yes, just make sure the press it against the side of your object really well. I did get a small amount of seepage, but a strong tape should prevent that. Thanks for reading!
So awesome! Resin is so beautiful and this tutorial looks like something I could actually follow and do. Thanks for the pictures. Do you have recommendations for a torch?
This is a beautiful project to repurpose tired furniture. I love it. Looks relatively simple to do. Thank you.