Custom Cameo Resin Pins DIY
Hi, it’s Natalie from Doodlecraft and today I’m showing how to make custom cameo pins. These cameo pins are perfect for bag or jacket flair. These custom cameos would make a great handmade gift too! This is where I let my sci-fi and fantasy geekery shine.
Supplies:
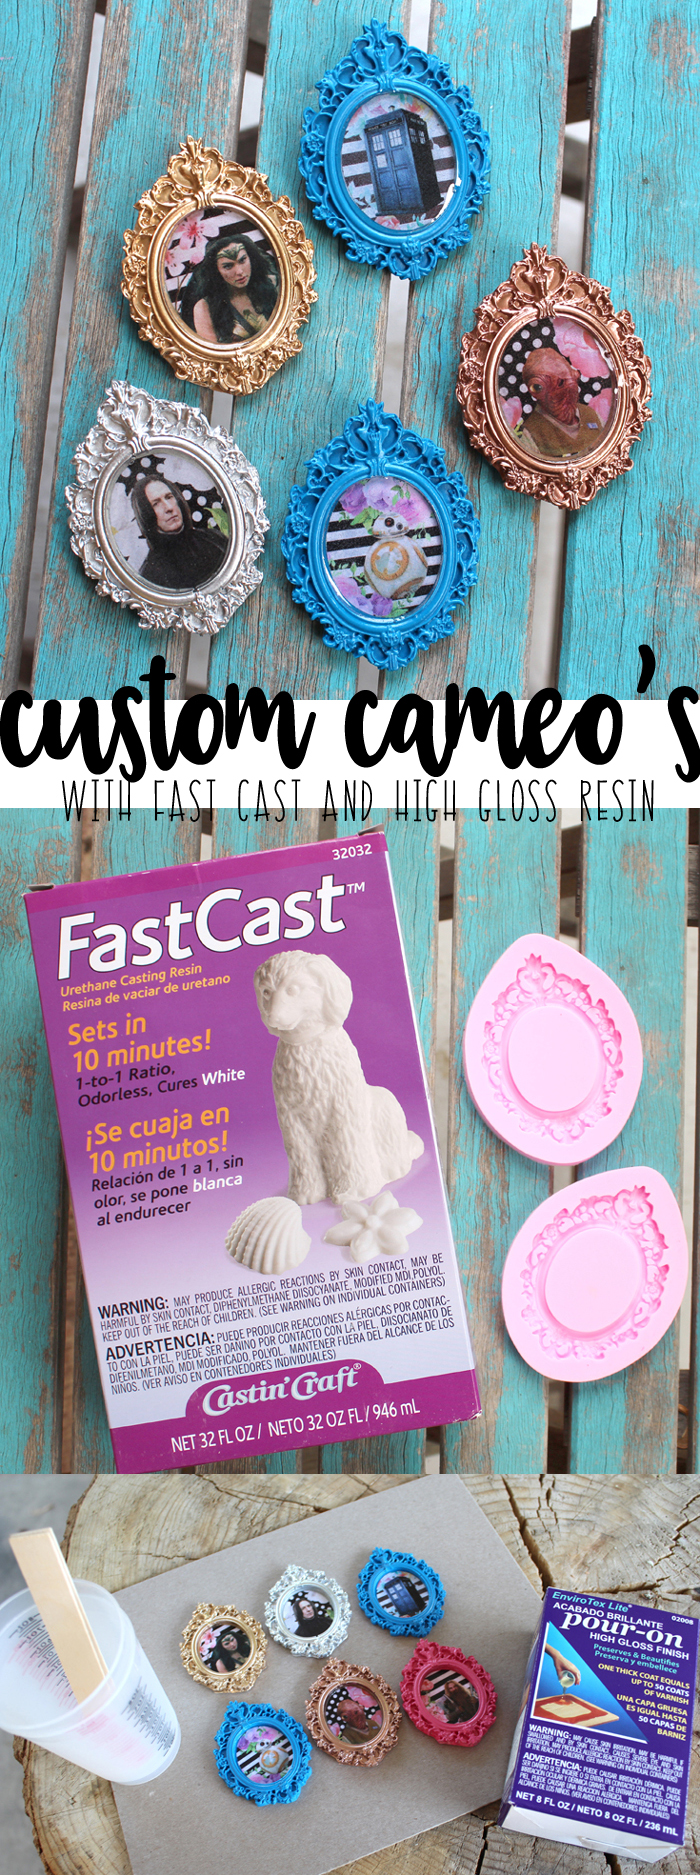
- Fast Cast
- Silicone frame mold
- Printed images
- Mod Podge/Paintbrush
- EnviroTex Lite High Gloss
- Pin Backs
- E6000
- Opaque Pigments
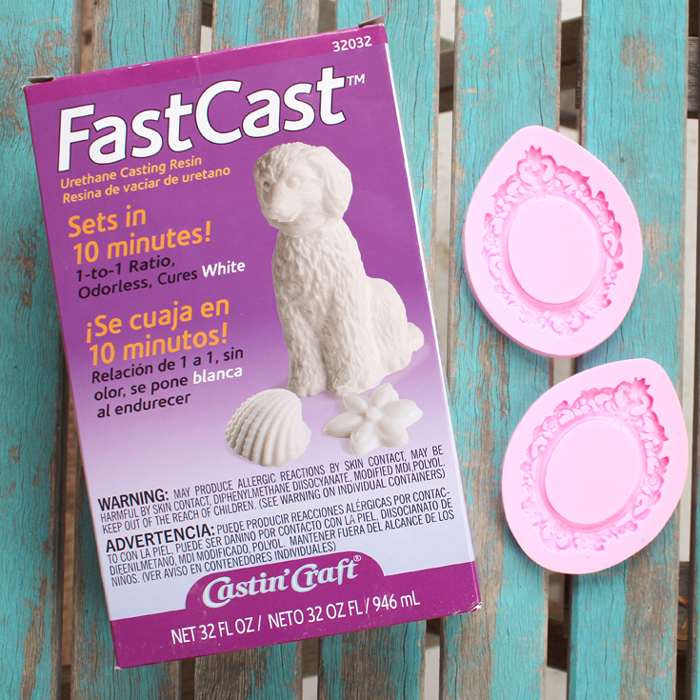
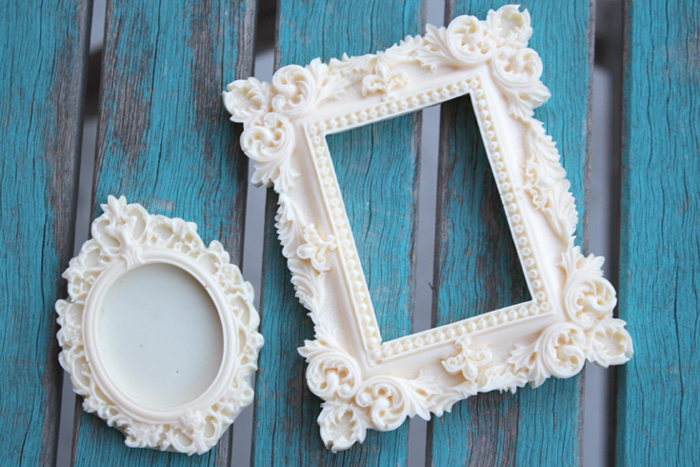
First of all, start with the Fast Cast. Fast Cast is amazing. It sets up in 10 minutes, making this a craft you can crank out quickly. Read the instructions for the Fast Cast. Follow the directions and pour the Fast Cast in the silicone cameo mold. Pour carefully and fill the back with a thin layer of fast cast completely, then let it set.
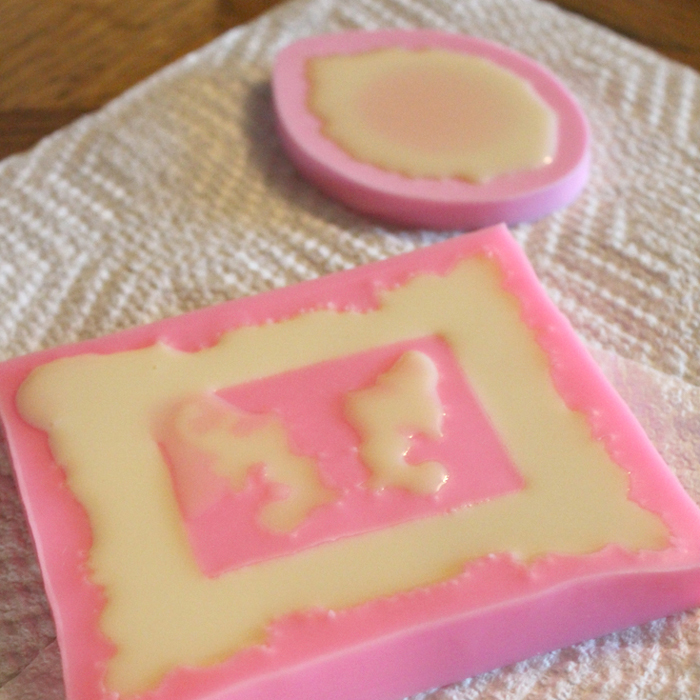
Then pull the frame out of the mold. With the solid back it is ready to turn into a cameo pin! Frame molds are so much fun to use with Fast Cast.
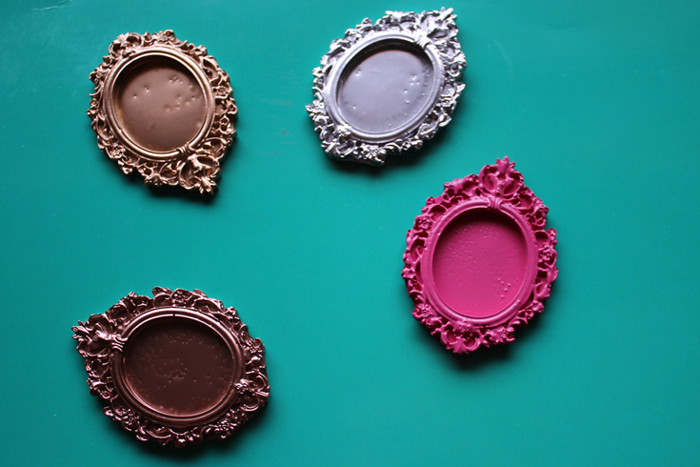
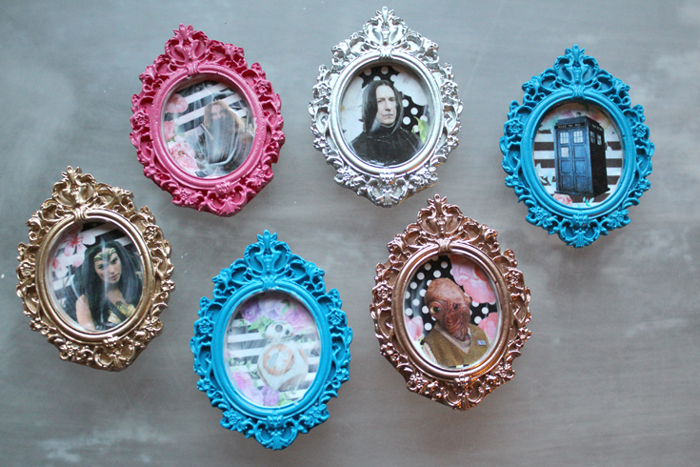
The Fast Cast dries white and can be sanded and painted. Sand any edges that didn’t set just perfectly or were overfilled. Next, use spray paint to paint these frames different colors. Silver, copper, gold and pink. Or add some opaque pigments directly in the fast cast like I did for the blue cameo.
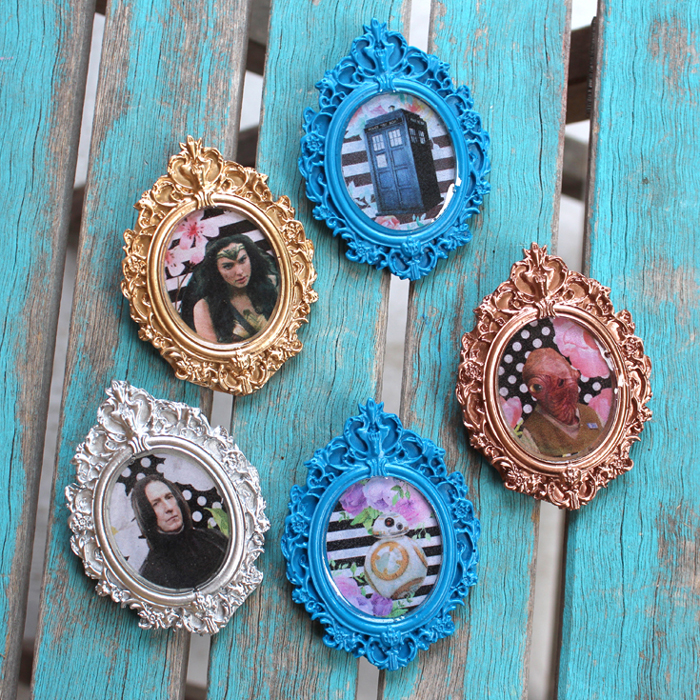
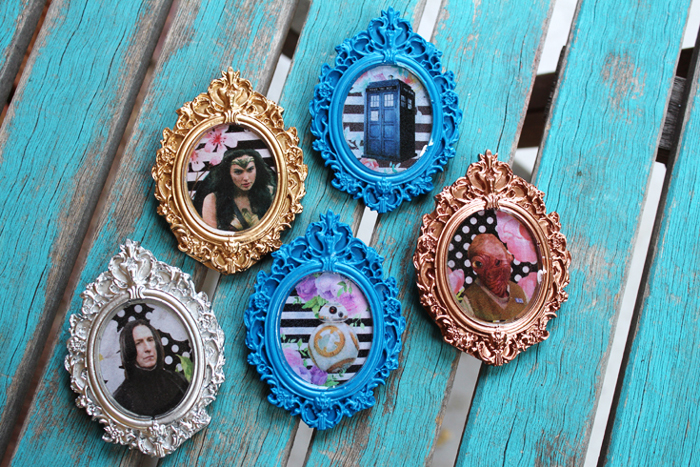
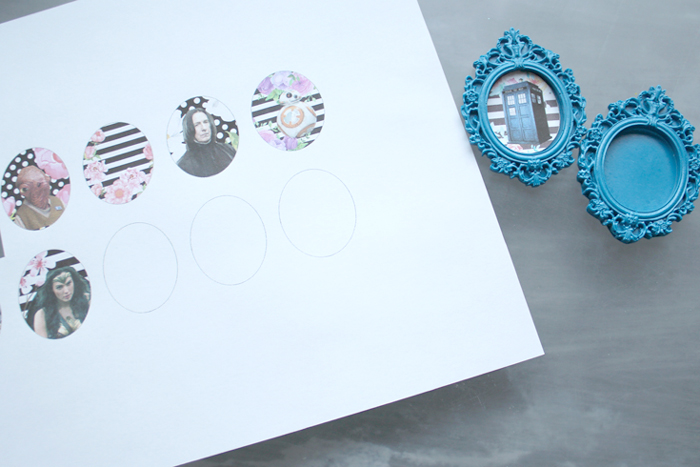
Next, the fun customization part. I love sci-fi and fantasy geekery, so I made a fun combination of black and white florals and favorite icons. I scanned the cameo, traced the center circle and made the image match. Print them and cut them out. Other options would be using scrapbooking paper, stickers or even photographs of the people you love!
Paint the inside of the frame with Mod Podge. Then place the paper inside the cameo and paint the top with Mod Podge.
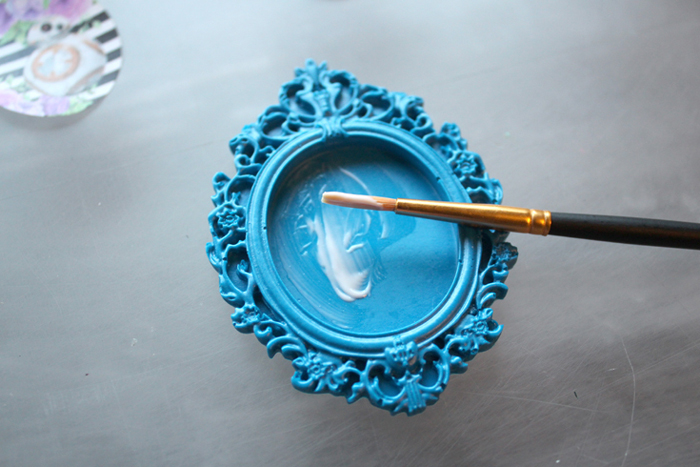
Let them dry completely.
Finally, it’s time for the EnviroTex Lite.
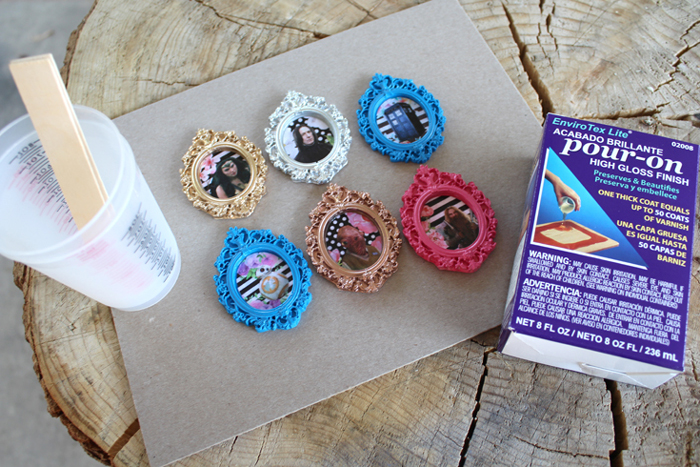
Begin by reading through all the instructions. Next follow the directions for mixing the high gloss. Even if you use resin frequently, it is always a good practice to read the instructions each time you work with it.
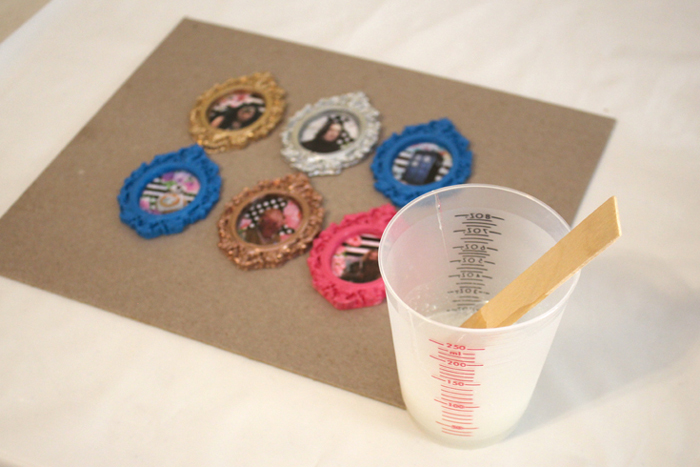
Then pour carefully into the center reservoir. The high gloss is full of bubbles from the vigorous stirring. Be careful not to overfill, I messed up my hot pink Gimli cameo because of that.
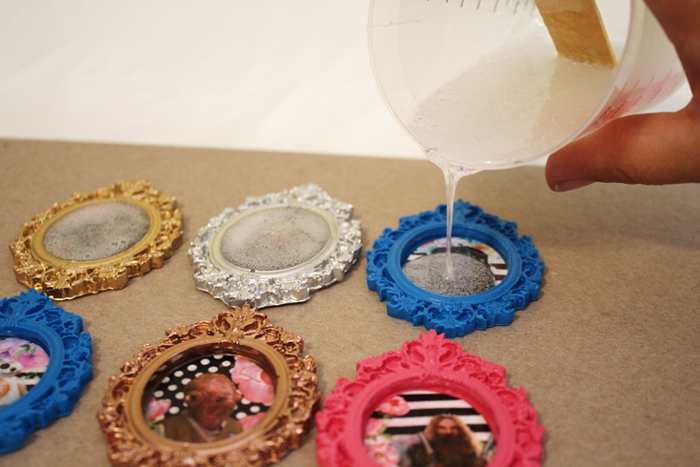
Let them set for about 10 minutes, then use a mini torch or a heat gun to pop the bubbles. Then let them set completely overnight.
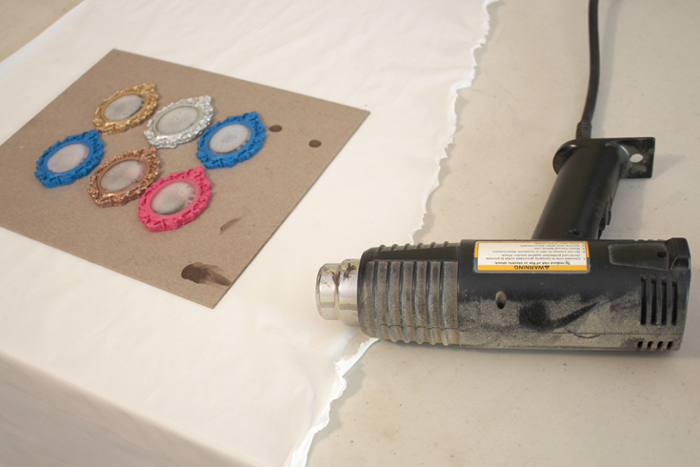
After they set, use the E6000 to adhere pin backs on the backside of the cameo.
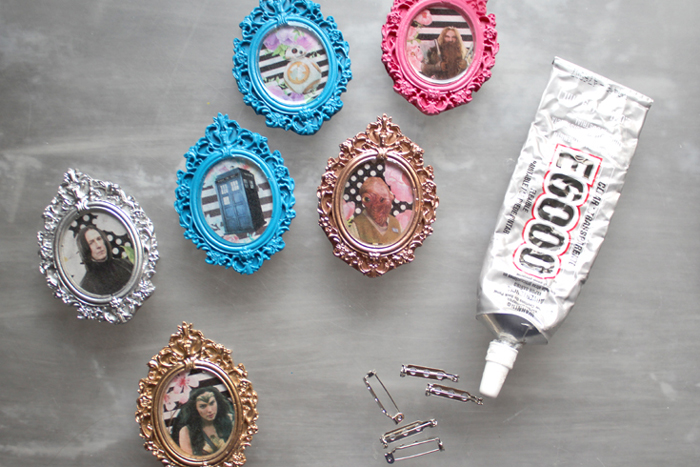
Let the E6000 dry completely…at least 4 hours.

Now these custom cameo pins are ready to wear or give as a gift! They are so much fun and make a great wearable conversation piece. Great for flair on a bag or jacket…or even on a fancy blazer!
SaveSave
Natalie Shaw is a Craft/DIY blogger at Doodlecraftblog.com. She loves sci-fi, fantasy and video game geekery and that comes out in many of her projects. She posts budget conscious DIY’s, crafts, jewelry, kid friendly projects, upcycled treasures and other fun on her blog 5 days a week.


These are just great Natalie! So many possible uses for them.
Where do we find the mold?
So cool! Where can we find those molds?