 I found this little wooden picture frame at the store on clearance and knew that with some ETI products I could make this frame beautiful! Here’s how I made this resin coated picture frame and how you can too:
DIY Resin Coated Picture Frame
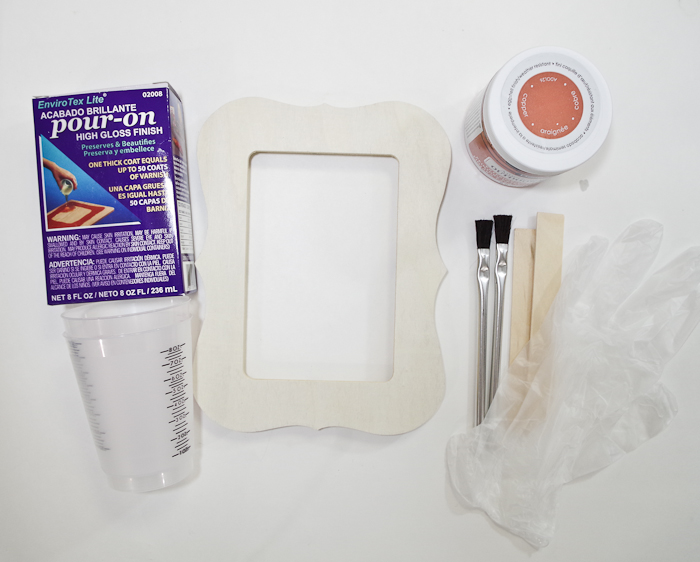
SUPPLIES I USED:
- Envirotex Lite
- Wooden frame
- Paint
- Paint brushes
- Vinyl gloves and eye protection for safety
- Measured mixing cups
- Stir sticks
- Cardboard box
- Wood scraps
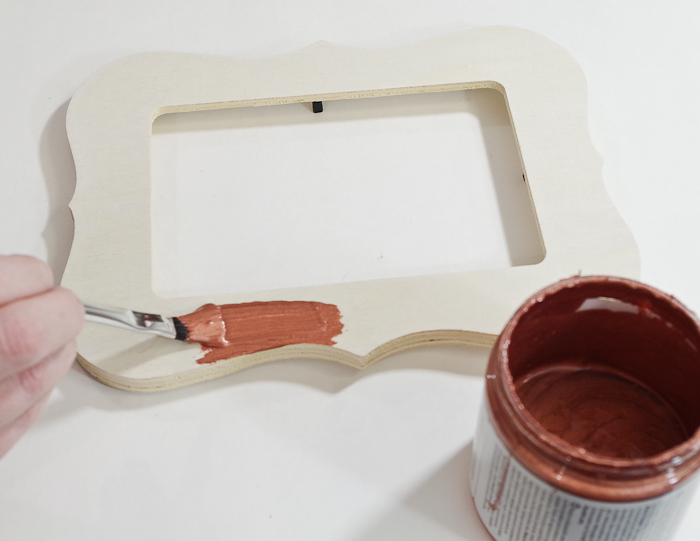
Paint Frame:
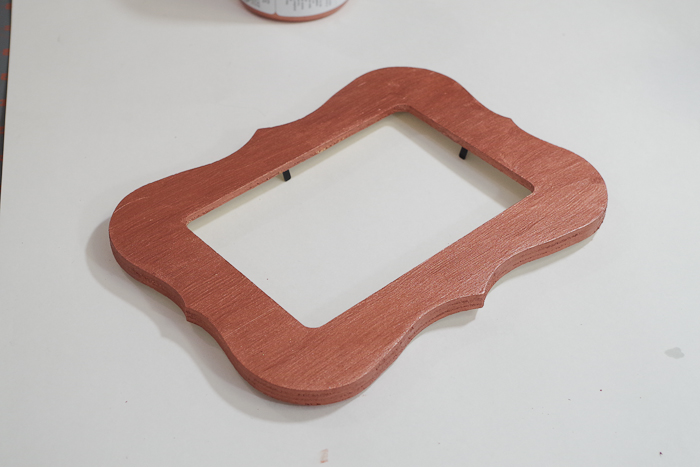
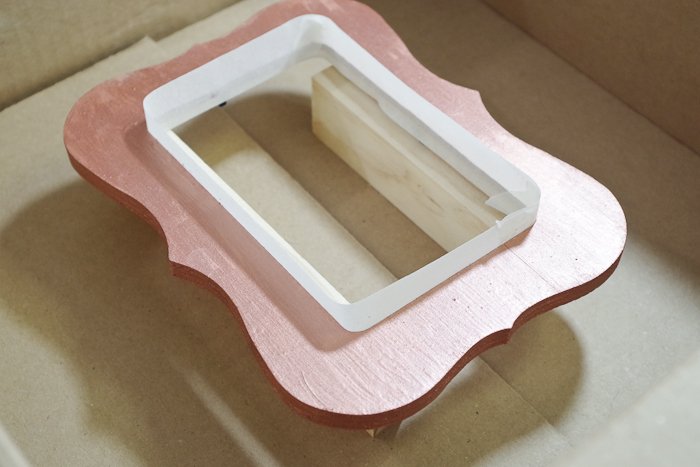
The first step is to paint the frame. Choose any color you want or find a metallic copper like I did. I just love copper lately. Let the frame dry completely before moving on to the resin.
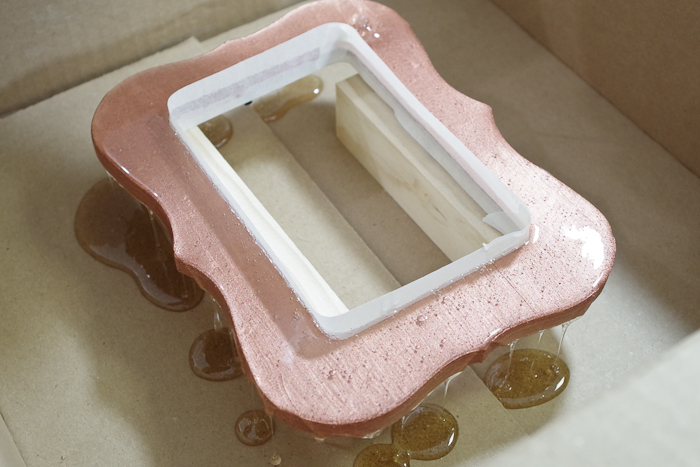
Put the frame inside a cardboard box and propped up some wood scraps to elevate it. You can see the black prongs that hold the picture inside the frame… I used those to lift the frame off of the wood scraps. This is important because if anything solid is touching the underside of the frame then the resin may adhere them together. These prongs worked perfectly and though they did stick a little in the excess resin, they came apart easily.
You can see I also used masking tape around the inner edge of the frame. This was to ensure the resin leaked only to the outside of the frame. It worked pretty well, though I did have one or two spots where the resin leaked through. No big deal!
Mixing Envirotex Lite:
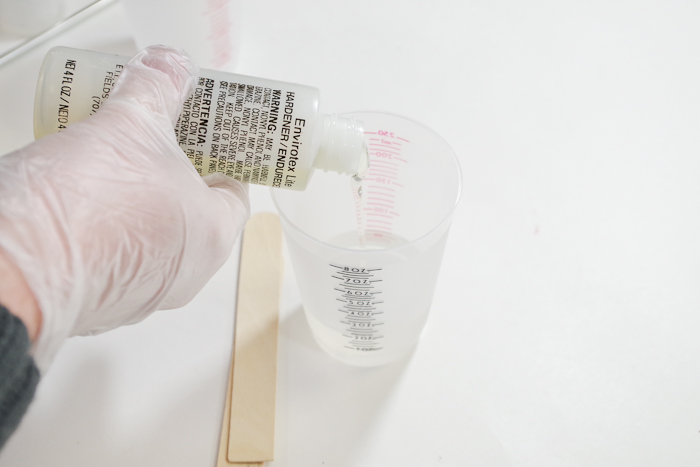
Make sure you have all the supplies you need for this step at hand. The Envirotex Lite, the mixing cups, stir sticks and a butane torch if you are using one. Put on your gloves and eye protection!
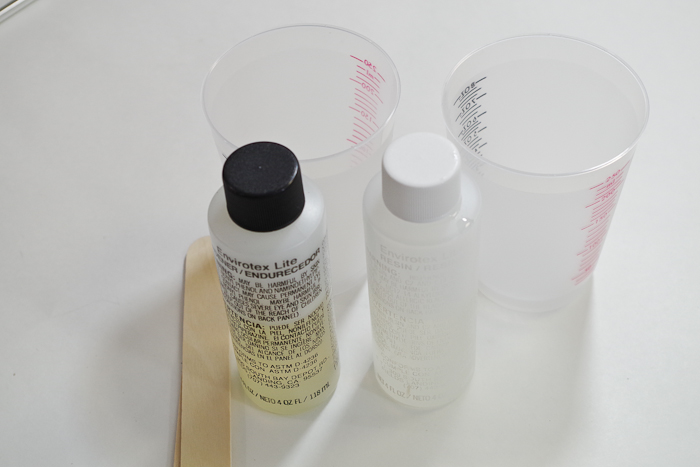
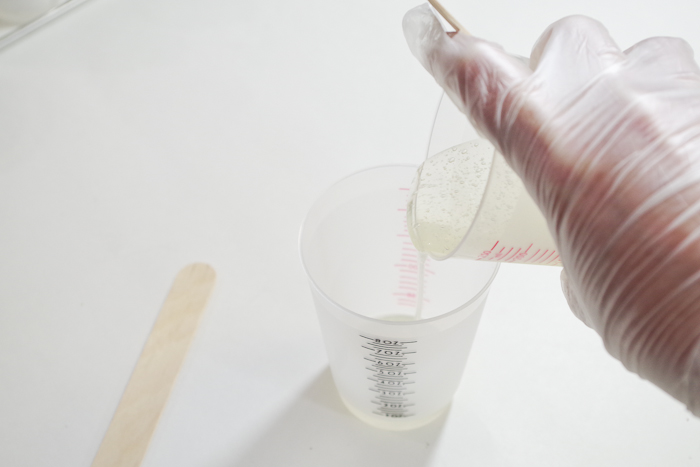
Pour Part A into a cup. I measured 2 oz. for my frame.

Next, pour an EQUAL amount of part B, so again I used 2oz. Making 4 oz. total.
Stir the two parts together thoroughly until the resin is clear, not cloudy.
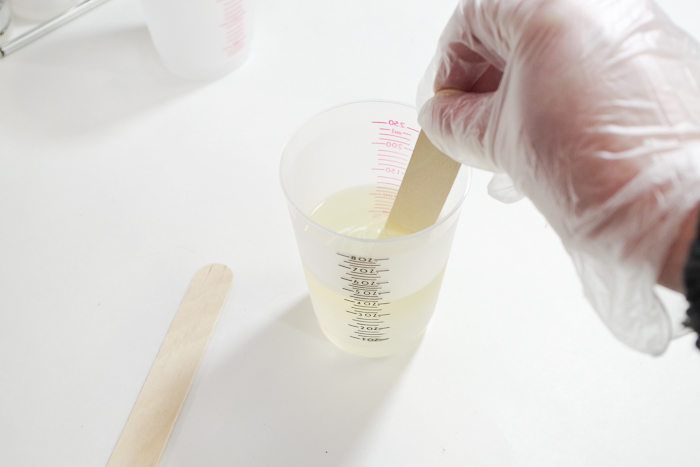
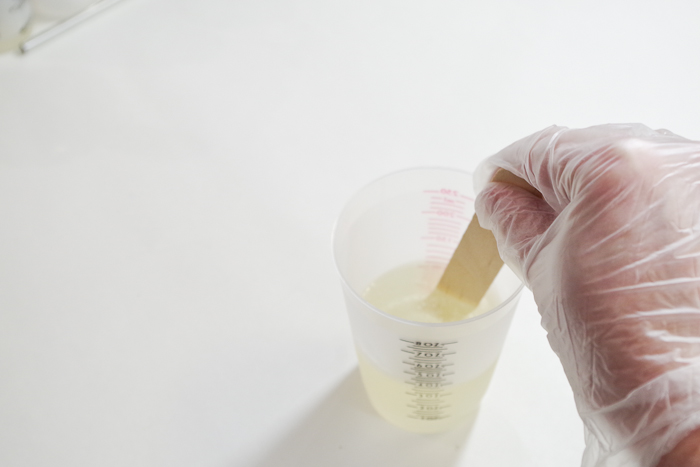
Use the two-cup method; pour all of the resin into a second clean cup and use another clean stir stick to mix it thoroughly again.
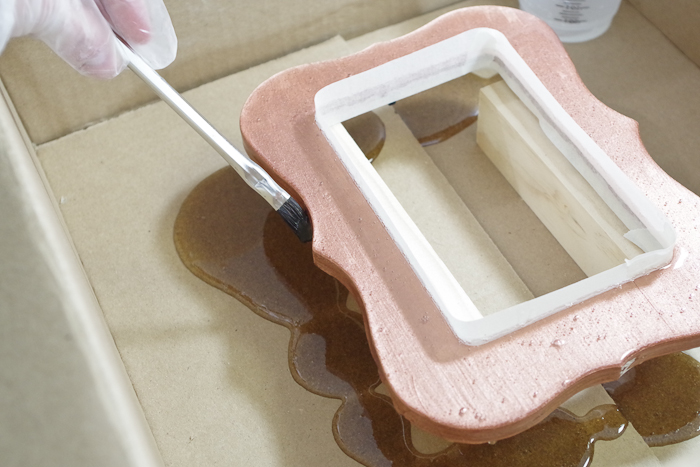
Pouring the resin:
Slowly pour the resin onto the frame. There will be drips! And those drips spread… that is why I instructed you to put it inside a cardboard box. Be sure that your box is fully sealed on the bottom with tape because the resin can leak through if there is a slit on the bottom.
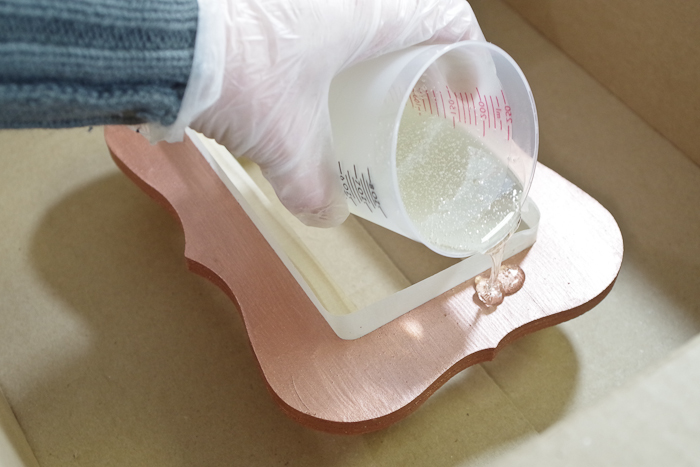
Keep pouring until the entire thing is covered.
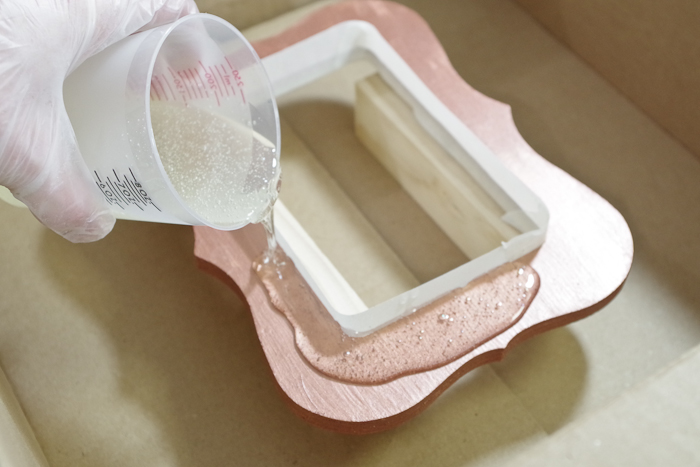
Once the frame is covered in resin, use a brush and make sure all of the edges are coated as well. You can get extra resin from the excess that dripped off.
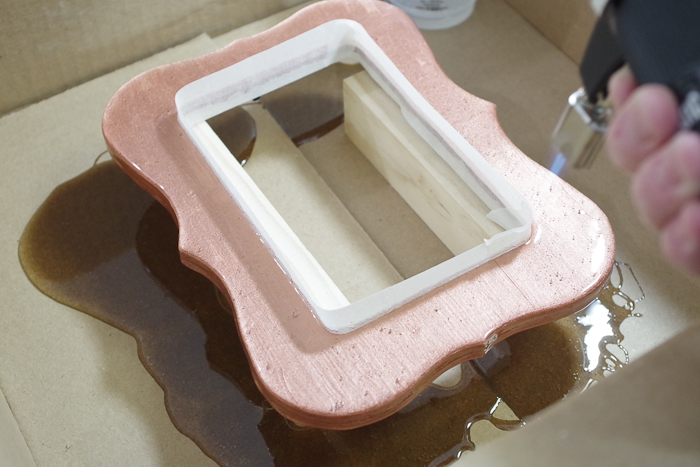
Let the resin settle for 10 or 15 minutes, then use your butane torch to pop any bubbles that have risen to the surface. If you don’t have a torch, simply exhale over the piece and watch those bubbles pop!
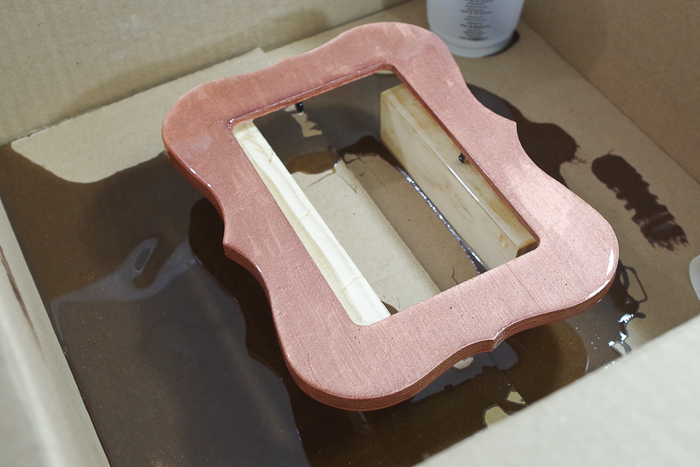
Alright, the pour is finished. Let the resin cure for at least 24 hours. Be sure to cover your piece so dust or debris doesn’t fall into the resin.
Finished!
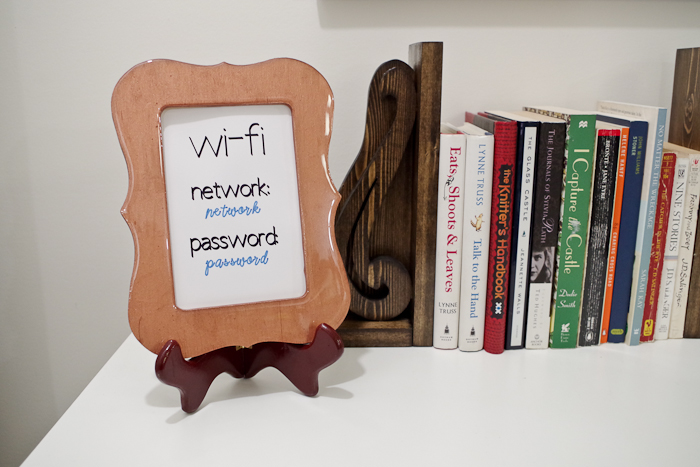
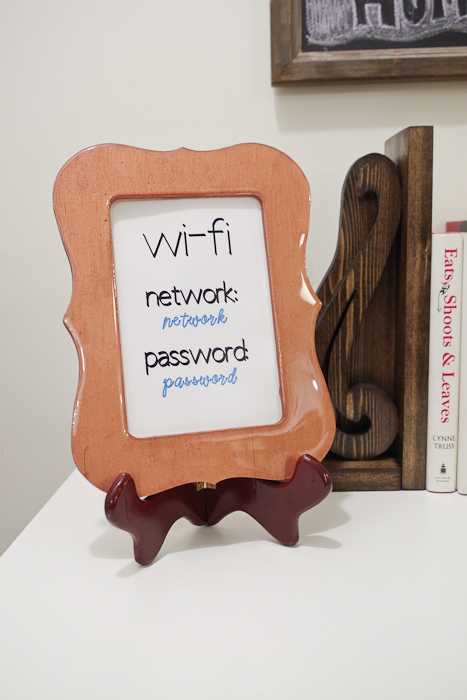
And there you have it! A beautiful, shiny, copper picture frame. I’ve seen some Wi-Fi signs around lately so guests/kids can know your wifi password without having to ask, so I made a mock one for the photos but a real one for my home. 😉
I hope you like this project. If you do, please PIN this image and SHARE via social media. Thank you so much! Let me know what you think or if you have any questions in the comments below!
–Sheri
Sheri is a Maker and DIY blogger at Hazel + Gold Designs. She is usually in the middle of multiple projects at once and finds great satisfaction and joy in creating something new. She is constantly learning new skills, putting them to the test, and sharing her experience and knowledge with others. Her favorite hobbies are crafting, painting, crocheting and basic woodworking. Her goal is to inspire others to step out of their comfort zone, learn a new skill and have the confidence to make their life a little more beautiful!


Leave a Reply