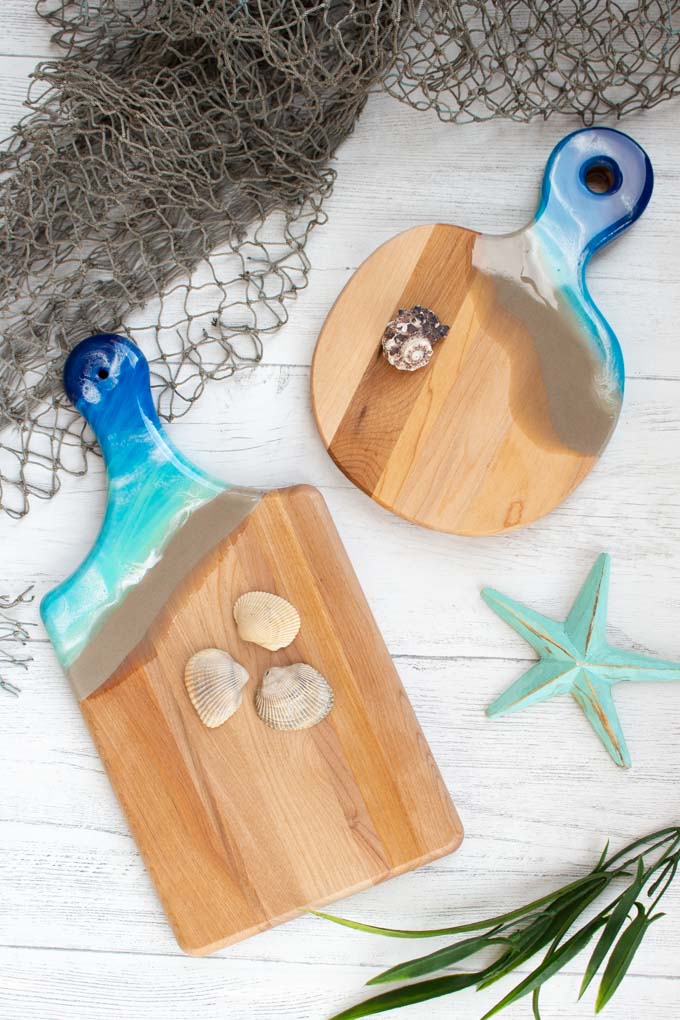
Bring some beachy vibes into your kitchen with these DIY coastal-inspired wooden cutting boards with resin.
I’ve been eagerly wanting to create a project that combines resin with natural elements. So when I purchased these wooden cutting boards for my coastal cottage kitchen remodel, I was instantly inspired to add a little something special to them. Simply painting the surface of the cutting board with beachy hues wouldn’t give the same effect as adding a layer of high gloss resin. The resin not only resembles water for this coastal-inspired cutting board, it protects the paint and adds a level of interest with some smooth texture.
Hi friends! Sonja here from Sustain My Craft Habit where we love, love, love to incorporate the beach in many of our DIY projects and home decor. Is there such a thing as too much coastal-inspired decor? Why would anyone not want to be reminded of cool crashing waves and relaxing beaches? This DIY beach-inspired poured resin wall art idea is right up our alley as well as these DIY vacation photo coasters with resin that combines function with fun.
By adding the detail only to the one side of the cutting board, allows the board to still function in the kitchen. Although the cutting board will also serve as a piece of art against your kitchen’s backsplash. Seeing how great they turned out, we think they’d make a thoughtful gift giving idea. Consider making one as a gift to the next wedding, bridal shower or even birthday party you attend.
Materials Needed:
- Envirotex Lite Pour-On
- Wooden cutting boards
- Painter’s tape
- Utility knife
- Acrylic paints
- Paint brush
- Castin’ Craft Opaque Pigment in White
- Alcohol and dropper
- Small and large mixing cups, wooden stir sticks, small kitchen torch, hair dryer or heat gun
- Disposable work surface, disposable brush, gloves
Instructions for Making Coastal-Inspired Cutting Boards with Resin:
Preparing the Cutting Boards
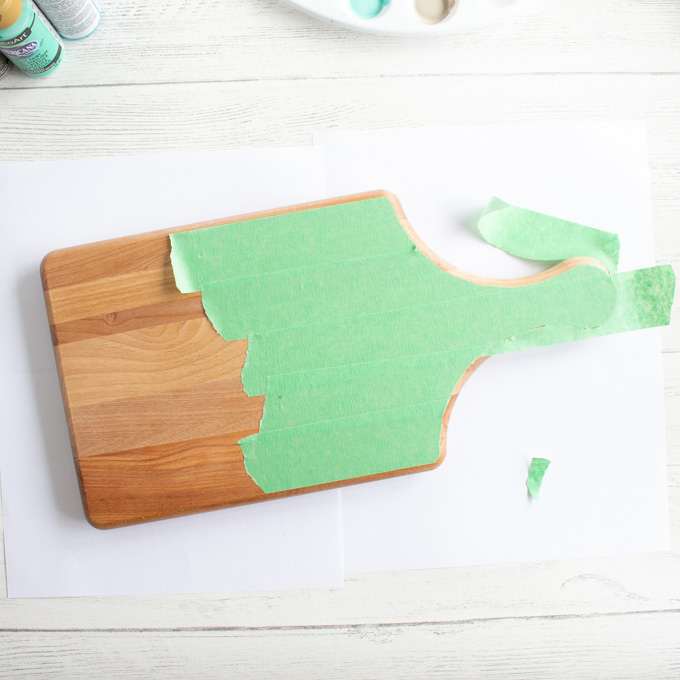
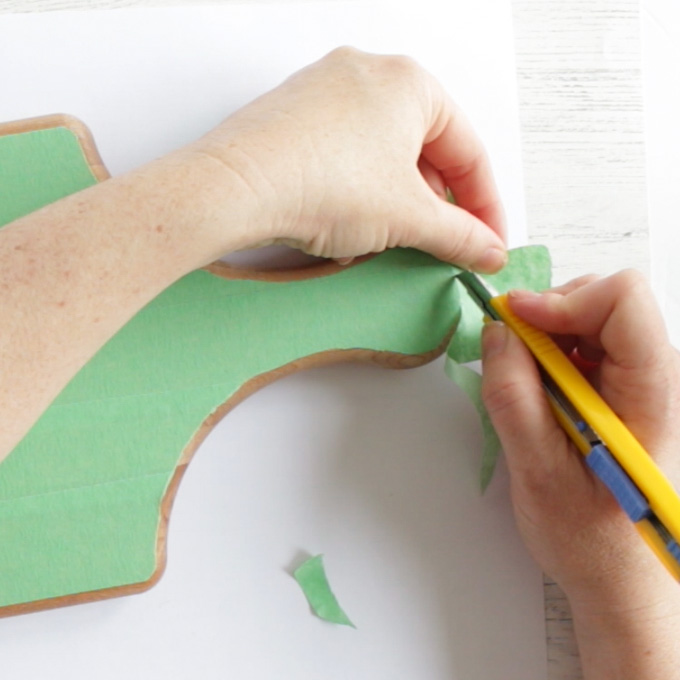
Apply strips of painter’s tape to the back side of the cutting board directly behind the area you will be painting and resin pouring. This will prevent resin from dripping over the edge and on to the usable portion of the cutting board. With a utility knife, carefully cut the painter’s tape evenly around the edge of the cutting board leaving a nice smooth edge.
Painting the Coastal Scene
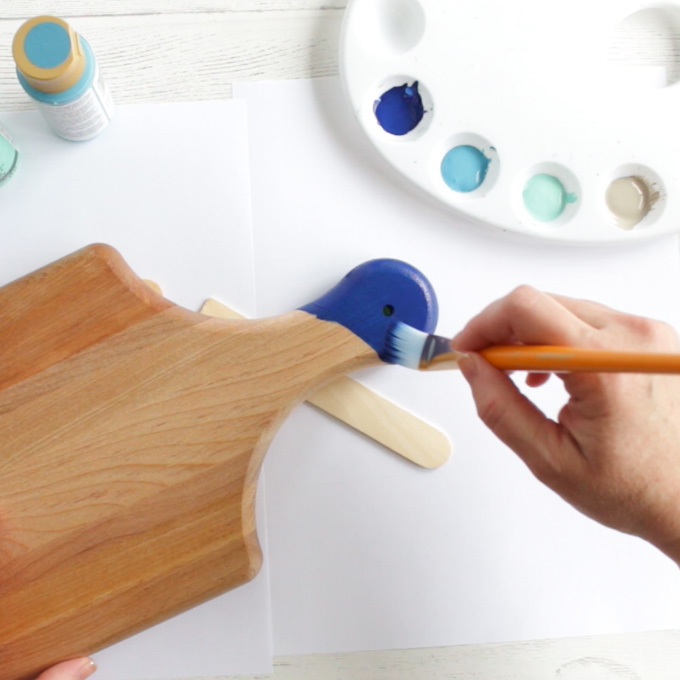
Prop the cutting board slightly off of the surface of the table (we simply wedged a stir stick underneath to raise it slightly).
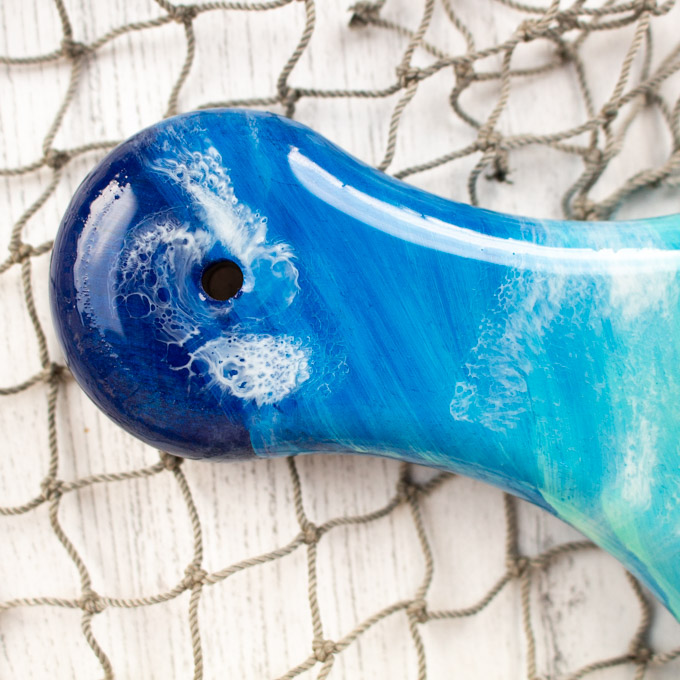
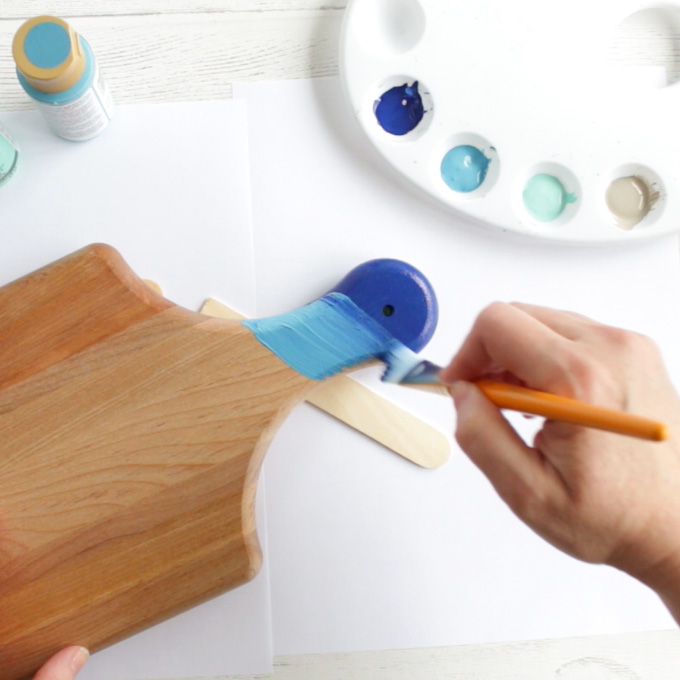
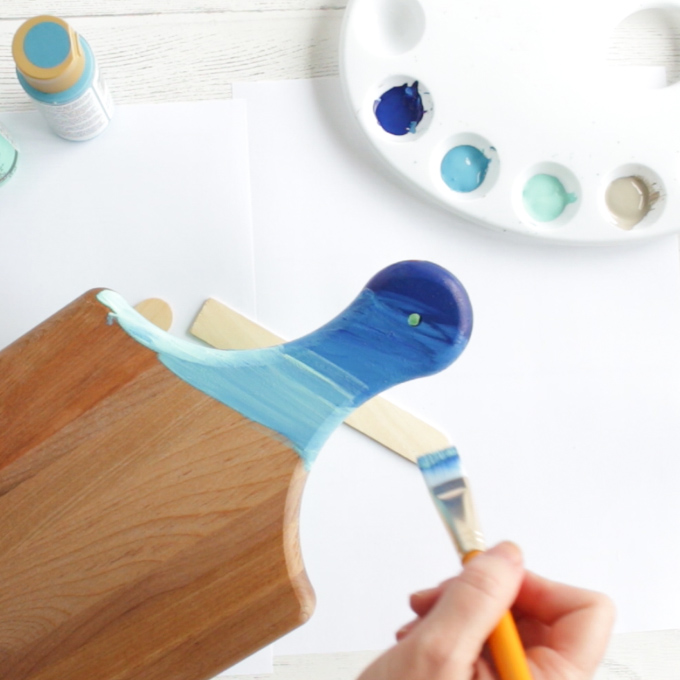
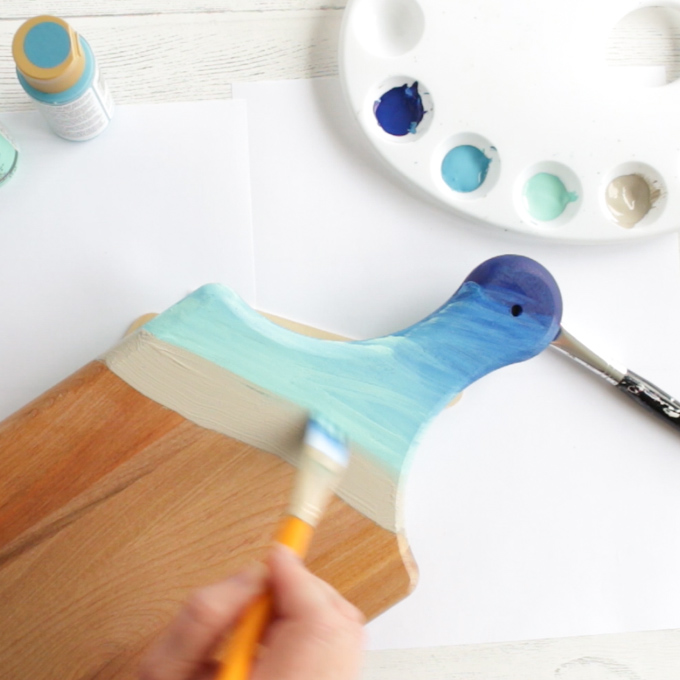
Using a combination of acrylic paint colors, brush on the paint in diagonal stripes working quickly. It’s important to do this before the paint dries so that each color blends together with the next. First, brush on the deep blue color on the cutting board handle. Next, apply the ocean blue paint color in a diagonal direction as shown. And follow that layer with the bahama blue paint color. Lastly, brush on a diagonal stripe with the desert sand color. Leave the cutting board to dry before moving on to the next step.
Pouring the Resin “Sand”
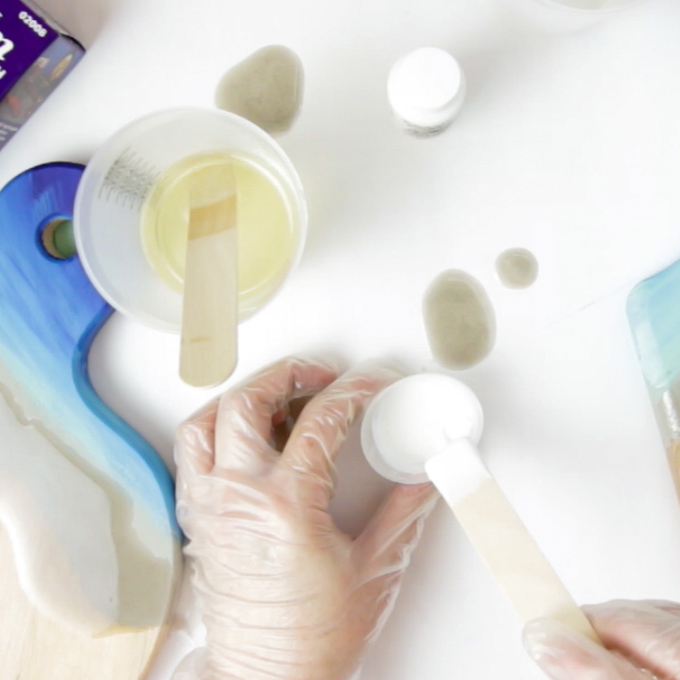
Mix equal parts of resin and hardener in a clean measuring cup. I used about 8 oz in total for this project.
Stir for 2 minutes then transfer into a second clean measuring cup. Stir with a clean stir stick for another minute.
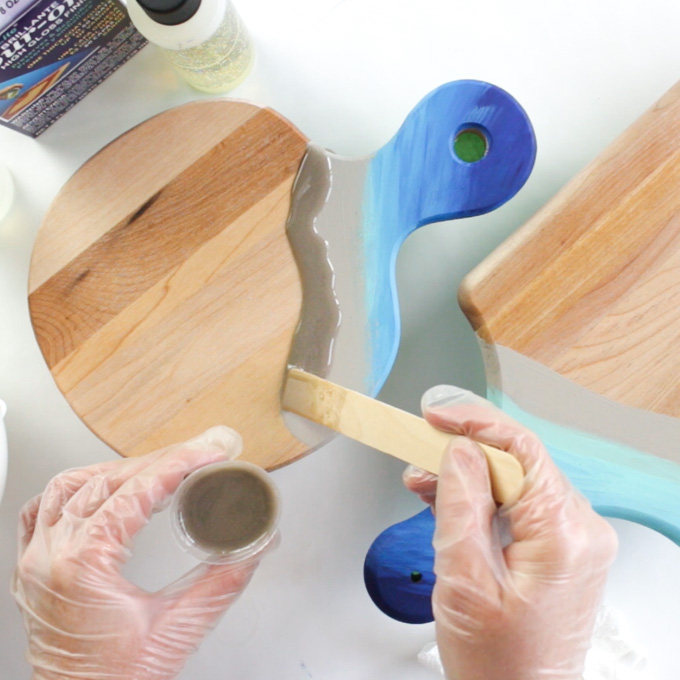
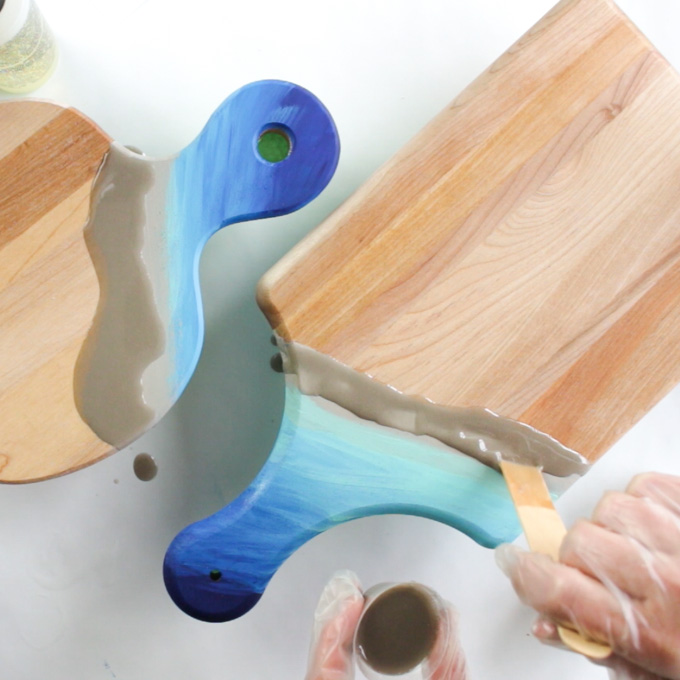
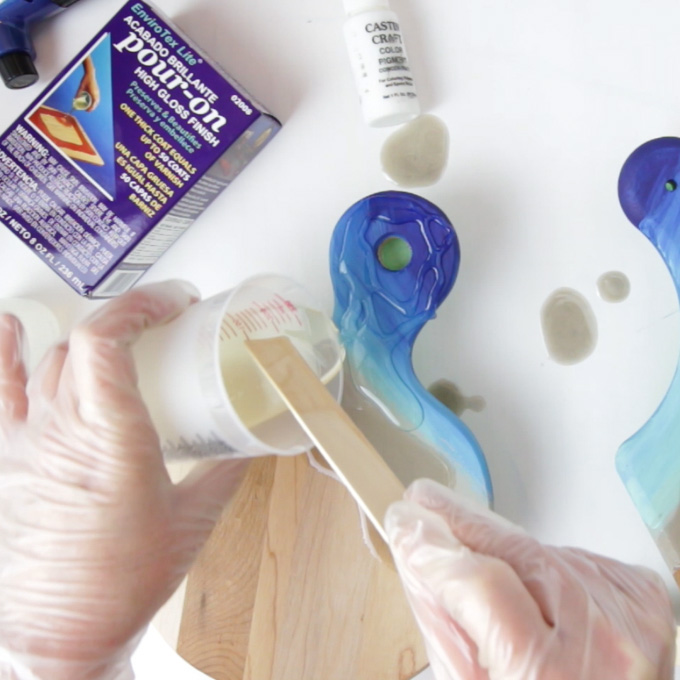
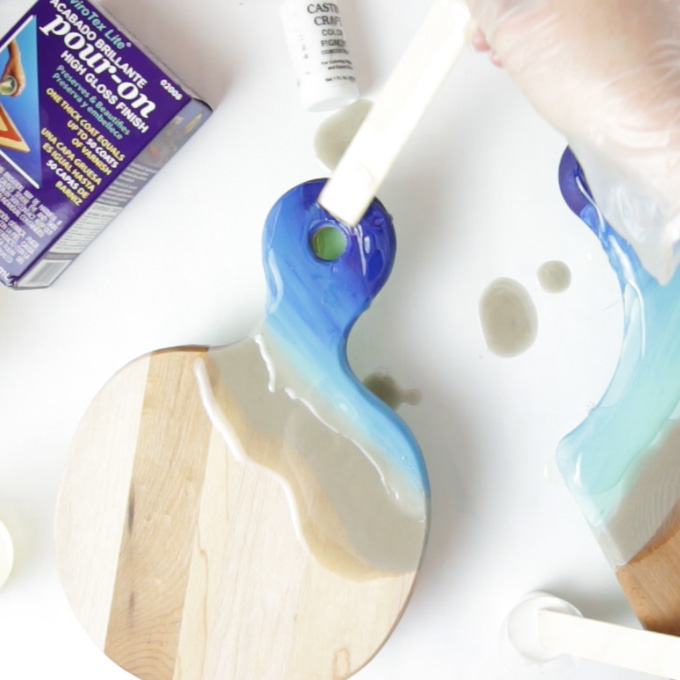
Pour about 1 oz of the mixed resin into a smaller measuring cup. Add a few drops of the sand paint color to the resin and stir together. Using the end of a wide mixing stick pour the mixture along 1/2 to 3/4 of the width of the sand painted cutting board.
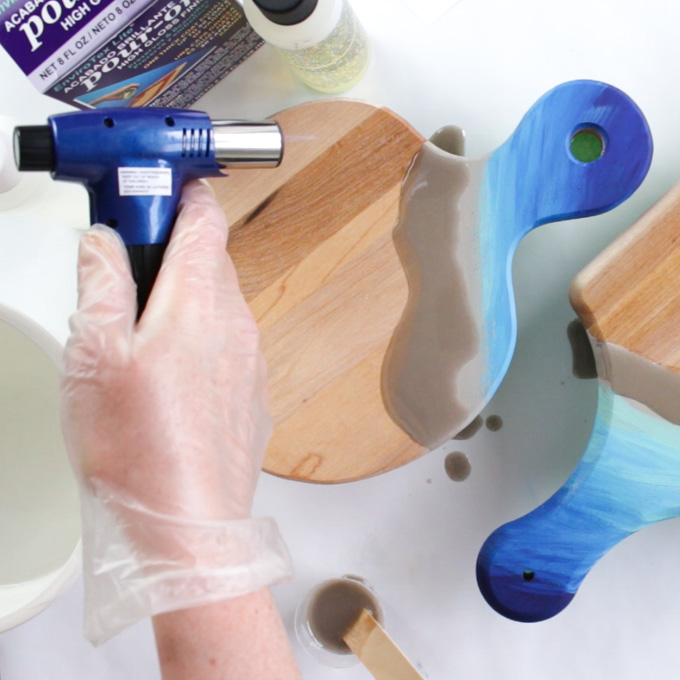
After 10-15 minutes blow off any air bubbles rising to the surface of the resin using a small kitchen torch or hair dryer. Repeat as necessary over the next 1-2 hours. Aim the direction of the torch or dryer towards the cutting board handle.
Pouring the Clear Resin “Water”
Pour about 1 oz of the mixed resin into another smaller measuring cup and put it aside for use after this step (see pouring the resin “crashing waves” below).
Pouring the Resin “Crashing Waves”
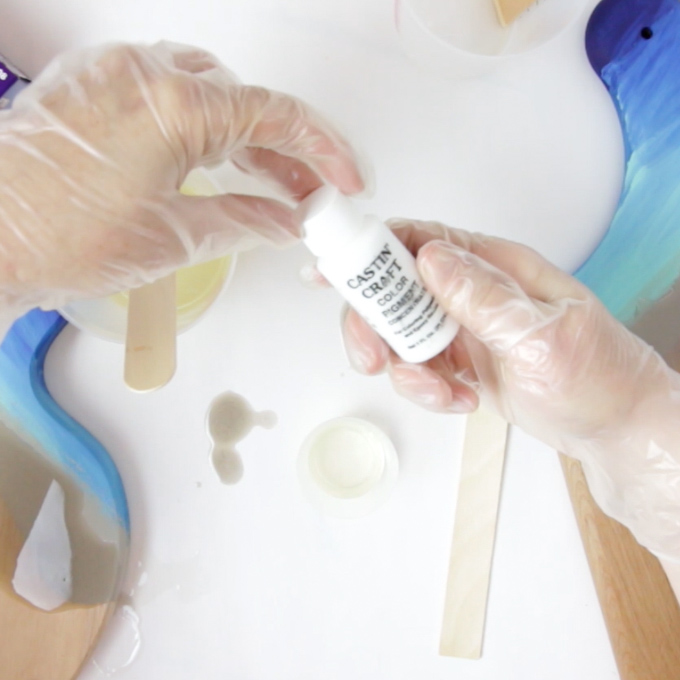
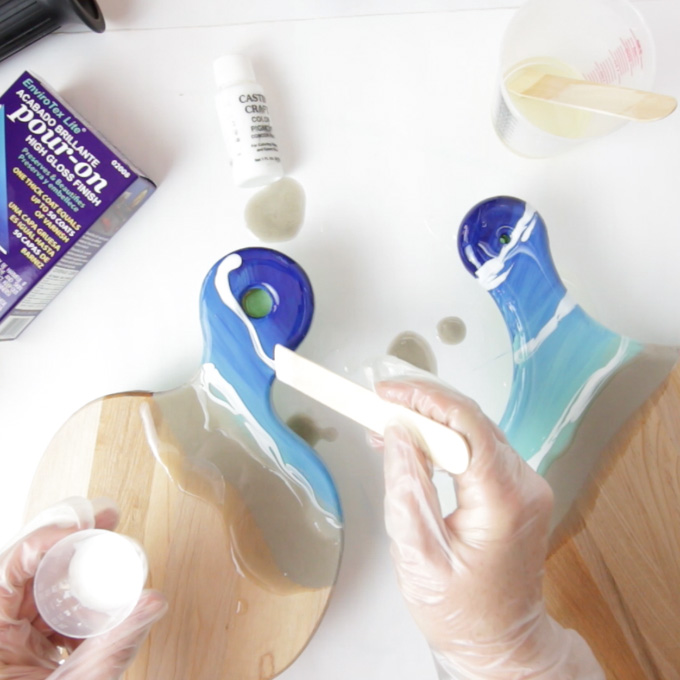
With the smaller cup of the prepared resin, add a few drops of the opaque white color pigment to the resin and stir together. With the end of the stir stick, apply the white resin mixture in uneven diagonal stripes over the cutting board where the colors transition.
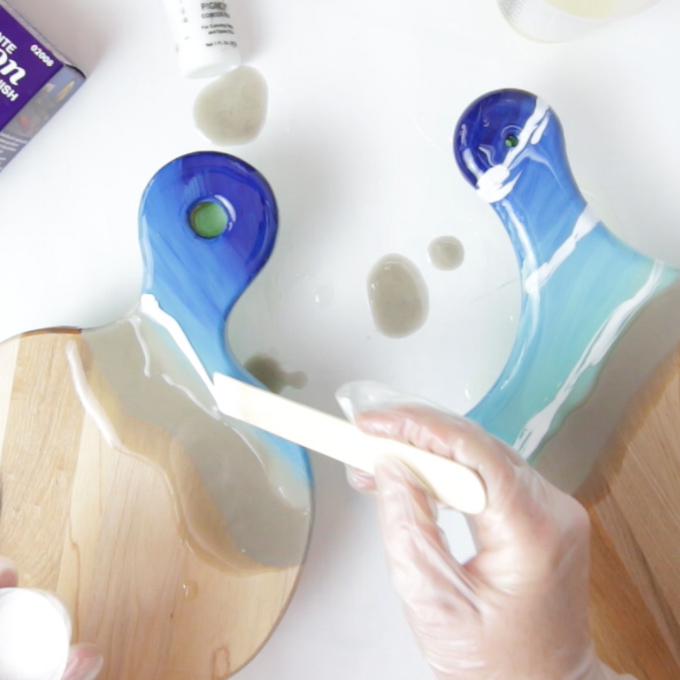
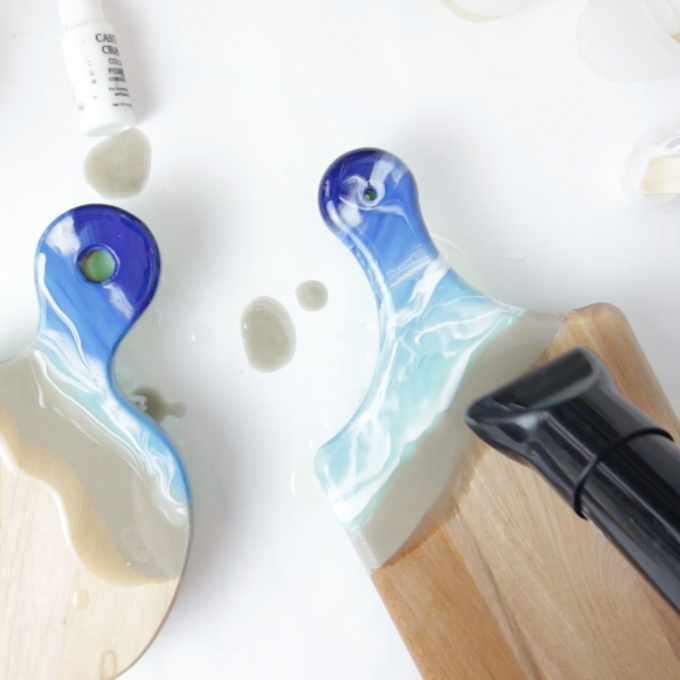
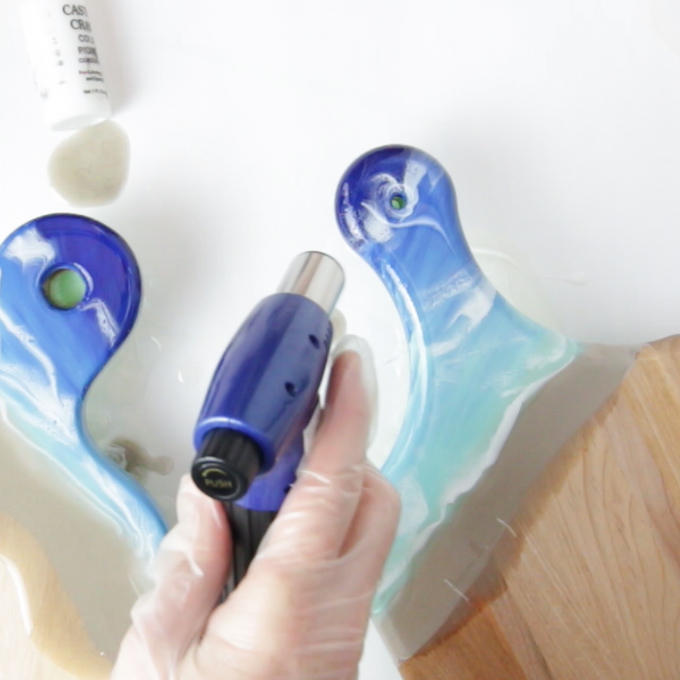
Immediately after pouring the white resin mixture, use the hair dryer or kitchen torch to blow the resin causing the white “crashing waves” to disperse and blend. The heat and blowing air will create a pretty realistic wave-like effect. As mentioned before, ensure the direction of the torch or dryer is facing towards the cutting board handle.
After 10-15 minutes blow off any air bubbles rising to the surface of the resin using a small torch or hair dryer. Repeat as necessary over the next 1-2 hours.
Place the cutting boards on a level surface and cover to keep dust from settling in. Leave to cure overnight (24 hours for a soft cure, 72 hours for full cure).
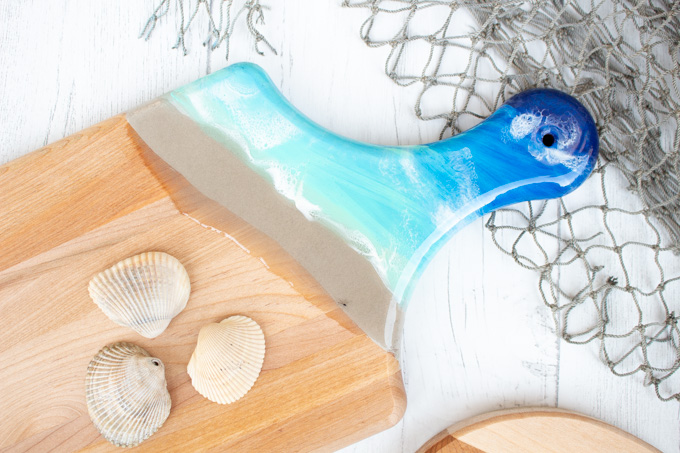
And there you have it, your wooden cutting boards are ready to go! Don’t they take you right back to the beach?

Jane and Sonja are sisters, moms and lifelong craft addicts both living near Toronto, Canada with their families. They share their love of creativity, nature and coastal DIY ideas on their blog Sustain My Craft Habit. They craft and decorate their homes using repurposed and upcycled items and materials found in nature.


I have found that tape often does not stick well to the backs of cutting/cheese boards. Scotch, Painters, etc. I’ve tried many different tapes with marginal stickiness success. Do you ever have this issue? Thank you.
Hi Patty.
You’re right! I also tried a few different tapes. This green painters tape worked OK, although I did have a little seepage at the top of one handle. When I applied the tape I made sure to really work it onto the wood by pressing down and scraping the edges with my nail. Next time I’ll try wiping the surface with a bit of alcohol before applying the tape to remove any grease. I also imagine that different types of wood might behave differently with the tape.
I wish I could have been more helpful! Do let us know if you find a better option.
Thank you,
Jane
Tyvek tape is the way to go! No leaks at all you can find it at Lowe’s 164 feet for 13$
Is there a step missing from the instructions? I can’t find the instructions for adding the “water” over the blue painted section. Does it come before or after the white resin step?
Wow great project you had there. Maybe I can try to make one on my own.
Thank you! Let us know if you have any questions.
Jane
You mention equal parts hardener and resin- what’s. The name of the hardener and where can I buy it?
Hi there! It’s called Envirotex Lite, our 2 part pou-on. You can find it on Amazon and most craft stores: https://www.amazon.com/Environmental-Technology-32-Ounce-Pour-Finish/dp/B000BZYYQ0/ref=sr_1_3?dchild=1&keywords=Environmental+Technology&qid=1611755600&sr=8-3
Hi I’m wondering if you can give me some advice please?
How can I make the resin stay on the edges of my boards? In you images the boards have reason perfect on the edges, however sometimes on my boards ir just qont stay and stick
Is there something I can do?
Many thanks
Hi Lisa!
Try sanding the edges for best adhesion and make sure the tray is elevated for the drips to fall.
I have experience with 2 part epoxy. I usually use it to cover jewelry box lids and wall art. I’m now working on a maple/walnut charcuterie board with an image of a wine glass and bottle in the center. I’ve routed the design to a depth of 1/8 inch. My plan is to tint the epoxy and pour it into the routed-out design and sand it level with the rest of the board.
Question # 1: Will the color bleed into the adjoining sanded but unfinished wood?
Question # 2: I usually use Minwax wipe on poly for my finishes; Since this is not a “cutting board” is it necessary to use a “food safe” finish or can I use the Minwax poly finish for the board
Hi George,
That sounds amazing! The color won’t bleed if poured only into the routed-out design. If there’s going to be food on it you would still want it to be food safe. You could always pour a flood coat of Envirotex Lite over the finished board to seal and it can come in contact with food.