Updated April 2026
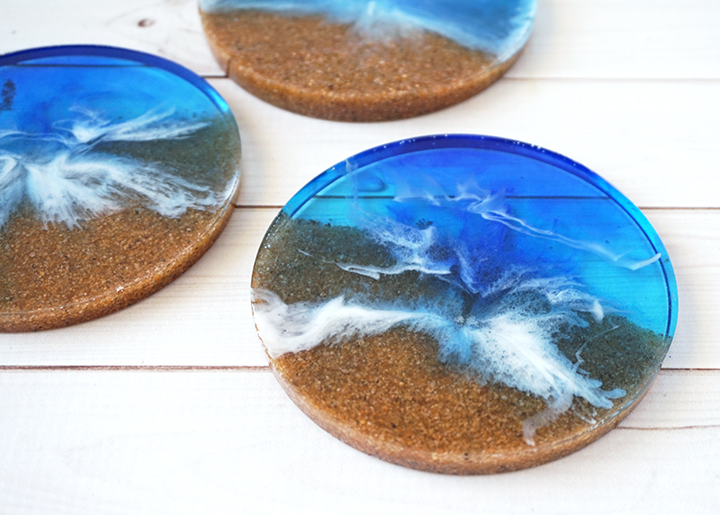
Bring a bit of the beach into your home with these DIY beach-inspired coasters made of resin and real sand!
Hey Resin Crafters! Lindsay from Artsy-Fartsy Mama here with a beach-inspired resin project. The beach is one of my favorite places to visit. I love the feel of the sand on my toes, the beautiful blue color of the ocean, and the calming sound of the waves. We recently took a trip to Turks and Caicos and brought home some sand that I decided to use to make coasters as a beautiful reminder of our trip!
Supplies you will need to make your own DIY Resin Beach Coasters:
- Amazing Clear Cast Epoxy
- Mixing Cups, Stir Sticks
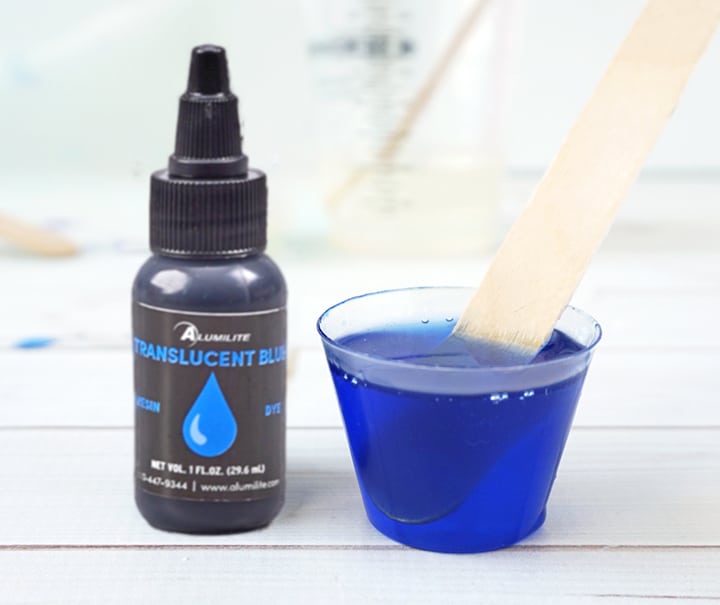
- Transparent Resin Dye – Blue, Green
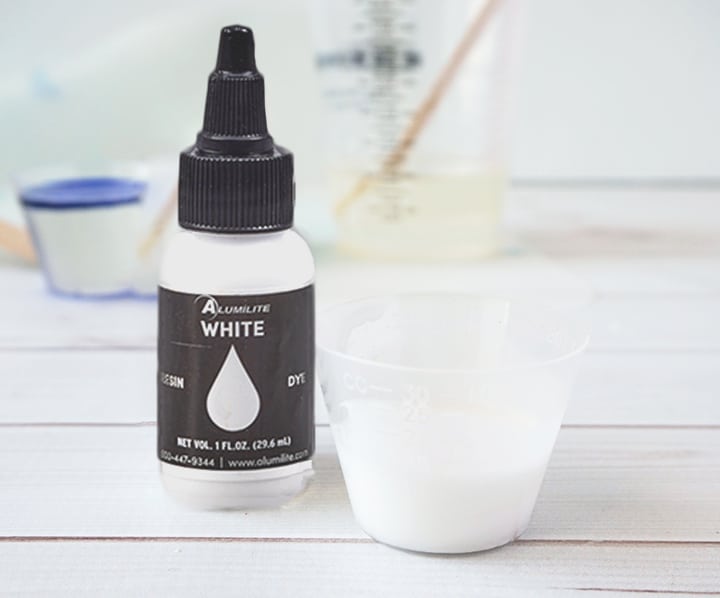
- Opaque Pigment – White
- Gloves
- Beach Sand
- 4″ Circle Coaster Mold
- Hair Dryer, Straw, or Heat Gun
Step 1:
To make one coaster, you will need about 3 oz of epoxy. Wear gloves to protect your hands, and pour equal amounts of resin and hardener into a mixing cup. Use a stirring stick and mix the resin well for 2 minutes. Pour the resin into a clean mixing cup and stir for another minute.
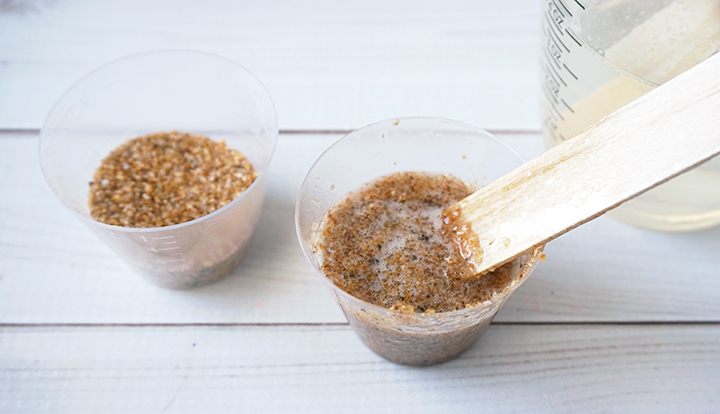
Step 2:
Add some sand to a small mixing cup. I used about 0.5 oz for one coaster. Add a little bit of resin to the sand and mix it well until all of the sand is coated. The consistency should be like a paste. If it’s too runny, add a little more sand. If it’s too thick, add a little more resin.
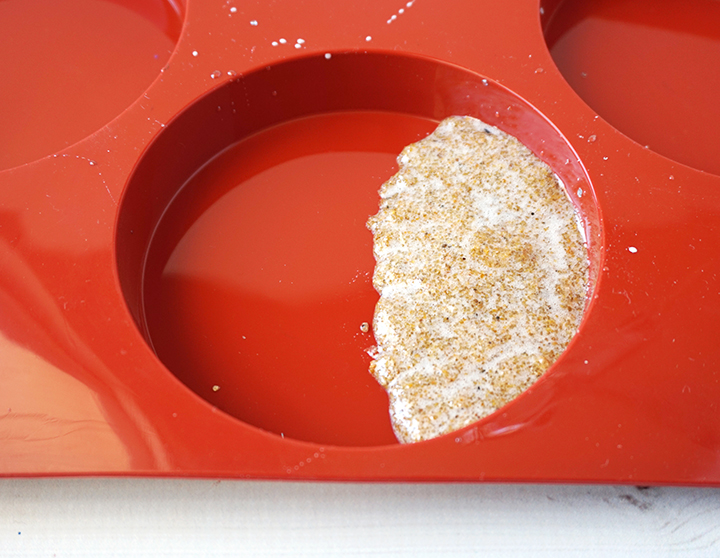
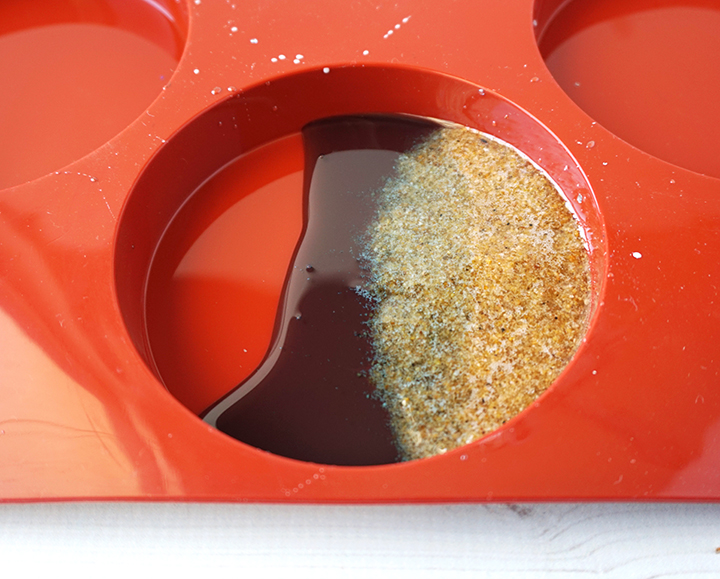
Step 3:
Pour the sandy resin into one third of the mold. It’s important that it has a paste consistency, otherwise it will spread and level itself throughout the mold. There will be a lot of bubbles that rise to the top, but we will take care of that later.
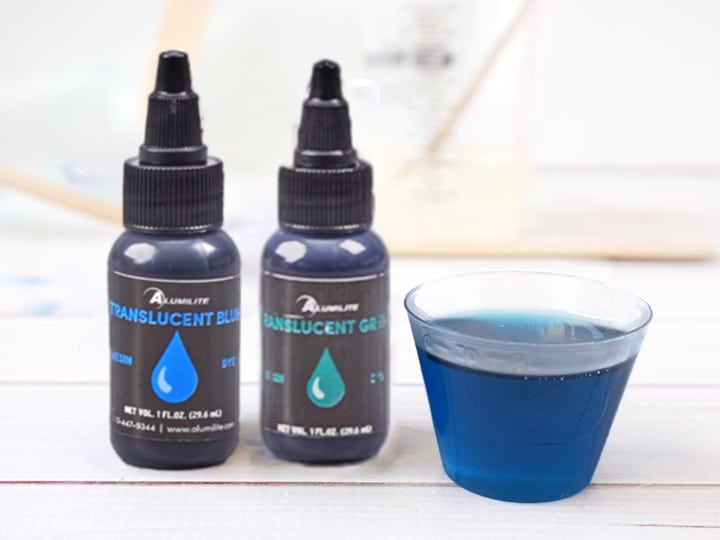
Step 4:
Pour about 1 oz of resin into a mixing cup. Add 3-4 drops of blue and 2 drops of green transparent resin dye into the resin to make a light, teal color. Use a clean stir stick and mix well.
Step 5:
Pour about 1 oz of resin into a mixing cup. Add 3-4 drops of blue transparent resin dye into the resin to make a deep blue color. Use a clean stir stick and mix well.
Step 6:
Pour some of the teal resin in the center of the mold and over about half of the sand resin. This will be the shallow end and shore of the ocean. Don’t worry about any bubbles that rise to the surface.
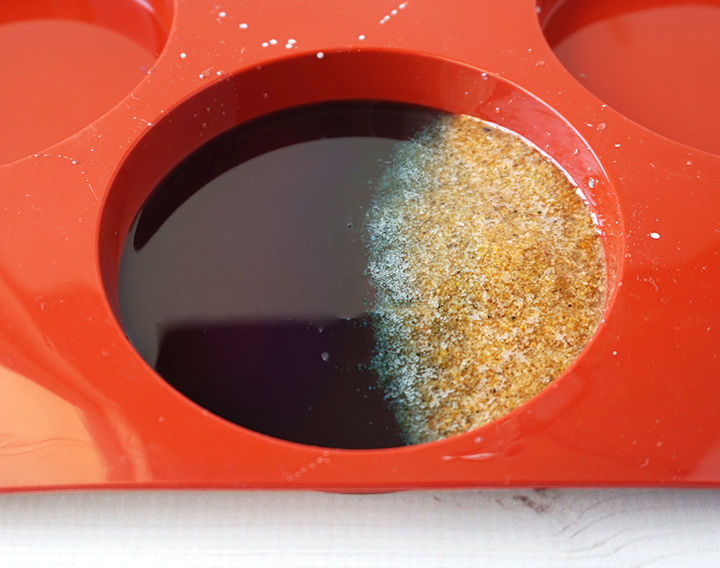
Step 7:
Pour some of the blue resin into the left third of the mold. This will be like the deeper part of the ocean.
Alternate pouring the teal and blue resins into the mold until both cups are empty. This will help the two colors blend better so you don’t have a harsh line of color in the mold.
Step 8:
Pour about another 0.5 oz of resin to another mixing cup. Add a small drop of white opaque pigment to the resin and mix well with a clean stir stick.
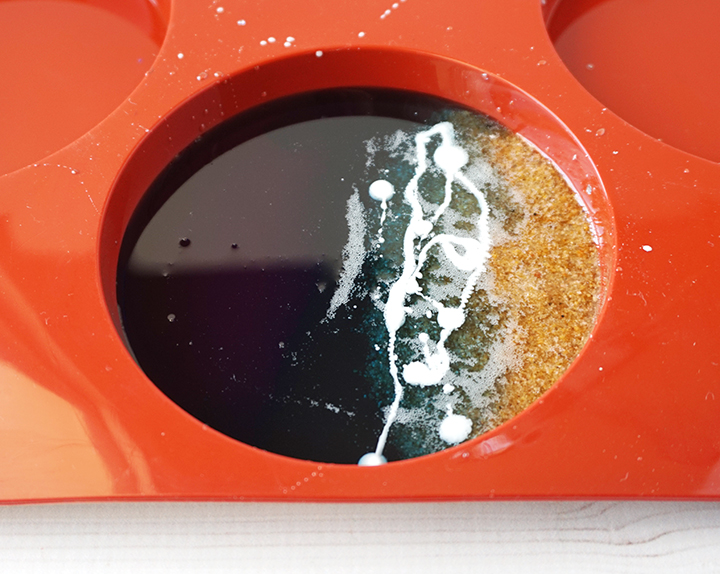
Step 9:
Carefully drizzle some of the white resin over the area where the teal resin is covering the sand. Try to make thin, vertical lines instead of drops and pools of resin.
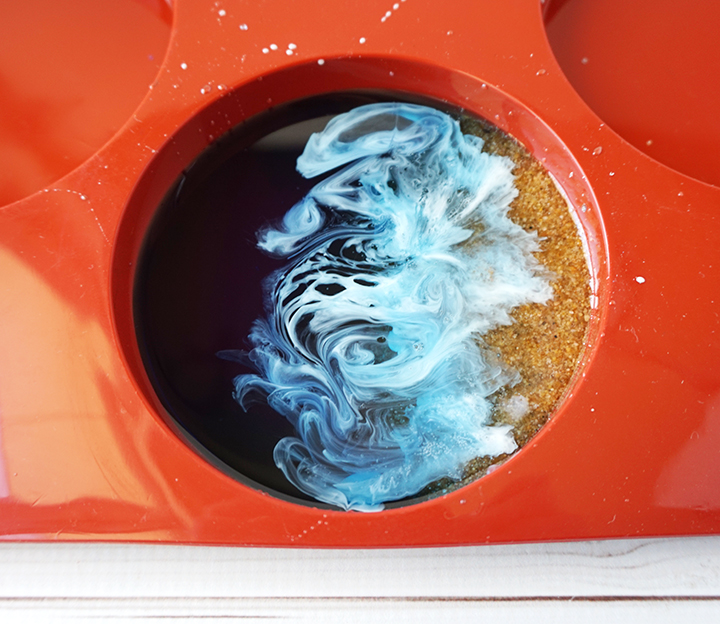
Step 10:
Now it’s time to turn those lines of white resin into sea foam! Use a straw, hair dryer or a heat gun on a low setting to blow the white resin in all directions. This will gently blend it in to the lighter teal resin and give the effect of sea foam. This step will also pop all of the surface bubbles in your resin! Be careful not to use too much heat and to work quickly for best results.
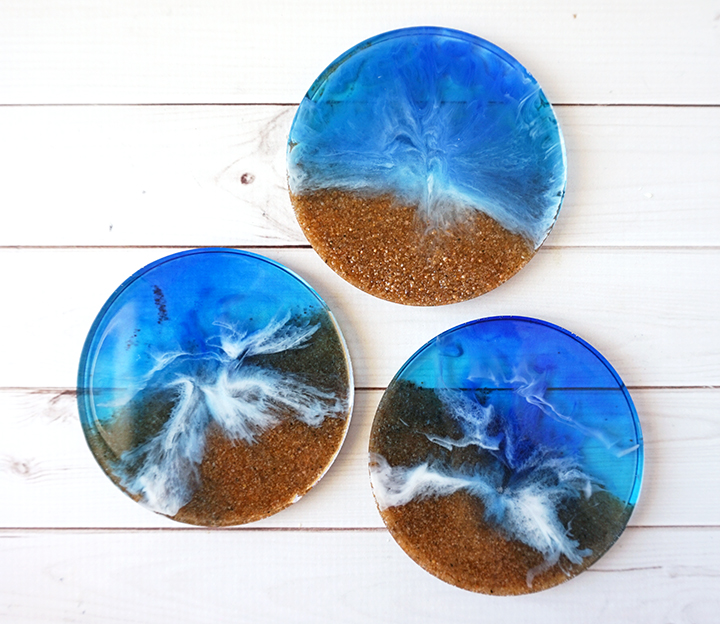
Let the coasters cure overnight in an undisturbed area. Carefully remove the coasters from the mold, and sand down any edges if necessary.
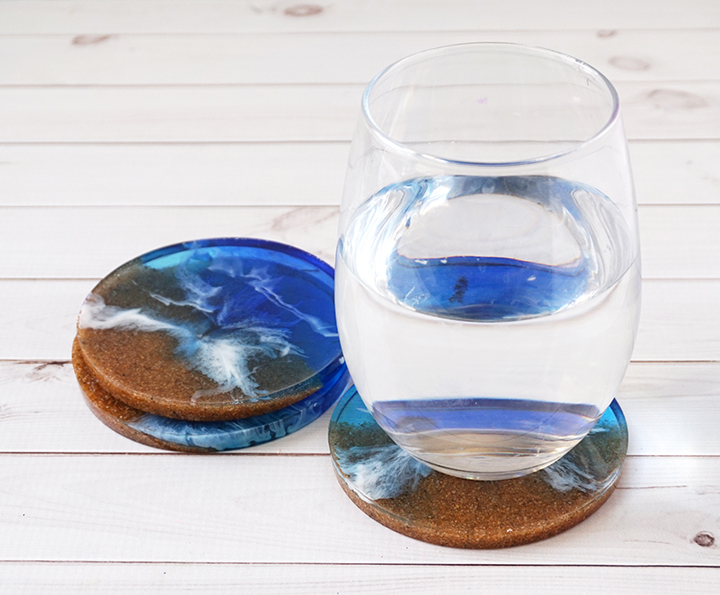
Just like the beach, no two coasters will be alike. Since these coasters are made of our sand souvenir, we are sure to keep our beach vacation memories alive while sipping on our favorite drinks! You can also get sand at the craft store and make gorgeous coasters as a gift, or to keep as a unique conversation piece on your coffee table at home.
Lindsay is a crafter, graphic designer, and glitter enthusiast from Utah. She’s passionate about homeschooling her creative daughter, traveling, and spending time in the craft room. Lindsay shares DIY project tutorials, printables, recipes, kids crafts, and more on her blog, ArtsyFartsyMama.com, where she inspires readers to live a creative life.


Where to find the dyes? Want local Hobby Lobby, Acmoore, Michaels…..
Yes, where do I find the dyes? Been looking all craft stores–no one carries them. Please advise!
Hi Christine, you can get them on Amazon if your local stores don’t carry them or use a little bit of acrylic craft paint.
Hi Lindsey. I have used alcohol ink, mica powder and also mixed in acrylic paint. When I pour the white over the blue, it melts into the blue and then the white hardly stands out. What do you recommend? Should I do a blue ocean layer, let it set and go back with white in a 2nd layer? Thank you!
Hi J! I would add a layer of white over the blue.
I found mine at Joann’s craft store
You can also find them on Ebay, Amazon, Hobby Lobby. I found them to be most affordable at Temu & Shein
Love these! What is the approximate thickness of the coasters? Also, do you have to add a layer of clear to make everything level for a glass/cup?
Hi Jess! The coasters are about 1/2″ thick, and you do not need to add any extra layers of resin. Everything levels out as it cures.
These are so great!! I love them! However, if a glass sweats does the coaster stick to the bottom of the glass? That is my only worry.
Hi Karen, no it doesn’t!
Hi can i use art resin instead?
Hi Julia, any kind of epoxy resin should work for this project.
Hi are these silicone molds you use for resin? Any other type of material that can be used for the molds?
I tried to make it, but it doesn’t seem to be easy. Are there any details to pay attention to?
Just make sure the sand and resin mixture is a paste consistency, and the best way to get the white “wave” look is by blowing air through a straw, a hair dryer (low setting), or a heat gun.
Hello! Thank you for your wonderful Blog! I am excited to work with resin for the first time. I wanted to ask if this step is really necessary (Use a stirring stick and mix the resin well for 2 minutes. Pour the resin into a clean mixing cup and stir for another minute.)
I am just trying to figure out how many cups I need to order and wanted to understand this part of the process better. Thank you very much!
Hi Christine! I definitely recommend this step. If the resin isn’t completely mixed together, your project will not cure properly.
Hi! These are so cool, I ordered all the supplies on your list and they have come in. Do you need to make these one coaster at a time?
I’m inexperienced with resin, and only have used it once before. It seems like it would make the most use of the supplies if I did it a few at a time, going step by step first in each mold. Do you recommend this?
Hi Rachael! I would recommend starting by making one coaster to get a feel for the process, and then making any adjustments or changing techniques as necessary when you make the rest of the set. Most importantly – have fun!!
Lindsey,
Where did you purchase the 4 inch molds you have in the illustration? I have been looking for 4 inch silicone molds.
Hi Cindy! I found the molds on Amazon.
Did you add white pigment color to the sand cup ? It looks like there is white between the grains of sand
Hi Jessie! No, I didn’t add any white pigment to the sand. Any white in the image is from bubbles rising to the top, or from the white resin mixture I added towards the end of the project.
Hi! So I tried to make 2 for the first time without the sand, I just used glitter. First they didn’t dry level,I guess my table isnt????♀️
Also I stirred them to mix the glitter in a swirl using a stick, and now there are stir marks in the bottom ????♀️ Unless the mold left the marks IDK.
I use the same mold you showed, and on one of them the mold peeled off and stuck to the resin ☹️
After sanding the edge don’t you have to coat them again? Won’t it leave a white area?
I really want this to work but so far I’m very discouraged.
Thanks for any tips. Shayne
Hi Shayne, So sorry you are having trouble! Not sure why your project isn’t level, I would check your workspace to make sure. For the stir marks, my best guess is that they came from the stick. Unfortunately, sometimes molds can stick to your resin projects. I definitely recommend using Mold Release/Conditioner as a release agent and to clean, condition and extend the life of your molds. After sanding a project, always add a thin coat of resin on top. For more tips and help with resin, I highly recommend joining the Resin Crafting with ETI Facebook Group!
Hi, I am having a tough time purchasing/finding the blue and green transparent dyes. Would transparent alcohol ink work for this project as a substitute?
Thanks!
Hi Olivia! I think alcohol ink would work great!
How many drops do you think?
I would think 1-2 should be fine.
Hi, I just tried this and I am getting a lot of bubbles and the white doesn’t really create a wave look. Any tips?
If using a lighter or heat gun doesn’t work, you could try misting a little bit of alcohol over the resin to help get rid of bubbles. To get the white to look like waves, you need to get it moving. Use a hair dryer (low heat) if necessary. Good luck!!
I bought Black Diamond pigment powders. Can I use them instead of the liquid? I want to do the beach coaster out of epoxy.
Hi Tina! I’ve never tried the beach coasters with powders, but think it should work great! Let us know how it goes!
These are gorgeous! My sister and I tried our first resin project with acrylic paints and resin. We did swirls but as they dried the paint moved to the middle and on the back side the paint didn’t swirl but stayed in the original pour circles. Do you have any thoughts on why this may have occurred?
I found the paints for the resin in Joann’s Craft store. You can go online and order it.
Hi
You say to sand down the edges, what can I put on to gloss the edges with once sanded?
Hi Kaz! After sanding resin, you can add a thin layer of resin over the top or spray it with some Envirotex Spray Sealer.
I have the worst time with resin not setting up. I did 4 coasters first times and two did and 2 didn’t. I just don’t understand. So I tried it again to fill in on top and wiht that said, I stirred a lot and then did it again. Still not setting up. I just don’t get it.
Hi Diane! I am so sorry you are having trouble with your resin. It can be frustrating when a project doesn’t turn out. I would refer to this FAQ to see if it will help with your issue.
how do you keep the coasters from sticking to the cups when being used???
Hi Kari! As long as you mean “sticking” from condensation and not uncured resin, it’s actually because the coasters aren’t porous so the water kind of acts like a suction cup. I just hold the coaster down with my other hand and lift the glass at an angle instead of straight up. Hopefully that helps answer your question!
Could I add small seashells or other ornaments to ‘sit on the beach’ and add more clear resin for a thicker coaster? Thanks for any suggestions!
Hi Vicki! That’s a great idea to add more shells and resin. It would definitely work and would look fantastic!
Lindsay,
Love your coaster idea. I’ve tried coasters in the past (not using resin), but the cup or glass I put on it kinda stuck to the coaster. Can this happen using resin also?
Hi Therese! This can happen with any coaster from the condensation on the cup creating a “vacuum” seal effect. However, if the resin on the coaster is sticky, the resin may not have been mixed correctly. To fix it, you will need to cover it with a sealant or a top coat.
Thank you for a great tutorial. I have a couple of questions. I tried making the coasters, but the white just settled to the bottom of the mold and I just couldn’t get it to create the waves I wanted. What am I doing wrong? Another question, did you bank the sand when you put it into the mold? The reason I ask is that when I carefully pour the teal resin, it still almost covers all the sand. How can I prevent that from happening? I’ve tried 4 coaster molds, though I must admit they are improving, I’m still not pleased with them.
Hi Therese! You may need to wait until the resin in the mold becomes gel-like in consistency before adding the white resin so that it doesn’t immediately sink down. I did bank the sand to one side (as seen in the post photos). If you can’t see the sand through the resin, it may be because you have added too much pigment. Hopefully these tips will help. Don’t give up!