I’m always looking for fun and creative new items to add in my girls’ birthday party loot bags. These pretty glittering resin cupcake charms make a great option that they’re sure to love!

DIY Resin Cupcake Charms
I have four kiddos between the ages of 4-12, all with their birthdays in the last few months of the year. I have to confess I get pretty burnt out planning birthday parties and putting together little loot bags ends up being a point of stress for me.
Why?
Well, I don’t want to send them home with junk that they won’t use or a bag full of candy. So the options become limited.

For this year, I’ve decided to stick with quality over quantity! Each girl will get a little resin cupcake charm to use as a pendant or as a zipper pull. Based on my girls’ reactions to the project, they’re sure to be a hit. I may add them into a bag alongside our easy painted rock bird magnets or personalized hand lettered key chains such as these. Or this DIY donut necklace and earrings would be adorable!
This is a multi-staged project with three separate resin pours. So to make things faster I’ll be picking up a few more of the cupcake molds to be able to do the project in one or two large batches.
Supplies Needed to Make Resin Cupcake Charms
- Cupcake silicone mold
- EasyCast Clear Casting Epoxy
- Glitter (silver, green or color of your choice)
- FastCast Urethane Casting Resin
- Measuring cups, wooden stir sticks, paper towels, gloves
- Pendant and/or keychain hardware
How to make Resin Cupcake Charms
Be sure to read all the instructions and work in a well ventilated area prior to using the EasyCast and FastCast resins.
The First Resin Pour
To prepare the resin for pouring, mix equal amounts of resin and hardener in a measuring cup. One and a half ounces of each should be sufficient for this project. Stir the two parts together for 2 minutes scraping the bottom and sides with the wooden stir stick.
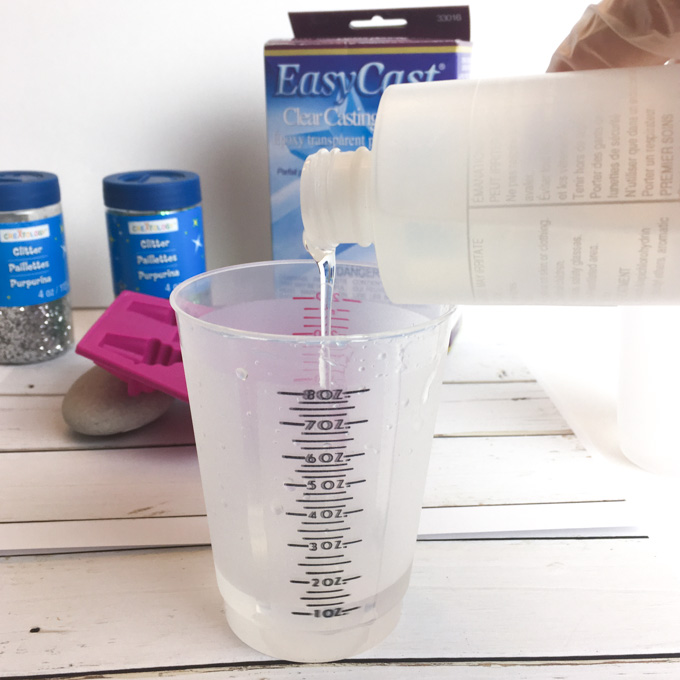
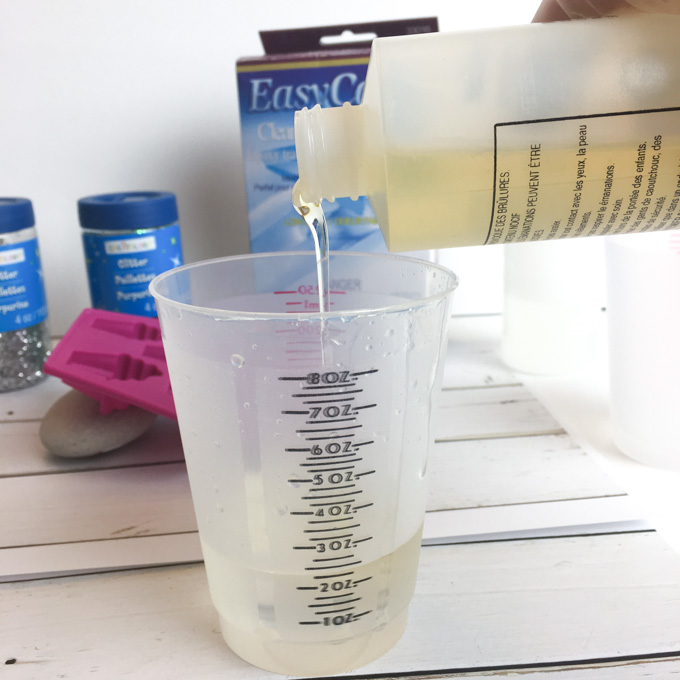
Pour the mixture into a second measuring cup and continue stirring for another minute. Your resin will then be ready to pour.

Prop your silicone cupcake mold up on one end (I just placed a stone under mine).

Carefully pour the mixed EasyCast resin into the bottom third of each cupcake well. Be careful not to overfill – you don’t want to cover the base of the cupcake.

Let the resin rest for about 15 minutes and then blow off any bubbles that rise to the surface.

Sprinkle a layer of glitter in the colours of your choice over the resin.

Cover and let cure overnight.
The Second Resin Pour
For the “cup” of the cupcake, I used FastCast casting resin. Alternatively, you could use another batch of EasyCast resin, tinted to a colour of your choice with resin pigments or acrylic craft paint. I preferred the FastCast for this step because it sets in less than 10 minutes, so I could move on to the third resin pour quite quickly.
Follow the instructions in the package to mix the FastCast resin. It’s a similar process to the EasyCast resin but with much shorter mixing times.
Turn the mold around and prop up the opposite end.

Work quickly and pour the mixed FastCast onto the bottom third of the cupcake mold. Don’t overfill as you don’t want to completely cover the glitter!

Within a couple of minutes the clear FastCast resin mixture will start to turn white. The resin will be fully cured within 10 minutes and ready to move on to the next step.
The Third Resin Pour
Finally, set the cupcake mold flat on your working surface. Mix one another small batch of the EasyCast resin and fill the cupcake molds. Blow off any air bubbles and let cure completely overnight.

Finishing the Resin Cupcake Charms
Once fully cured remove the cupcakes from the mold. They turned out so cute!
Drill a small hole on the top of each cupcake.

Add in a small eyelet screw and a 10 mm jump ring.

You can simply add the charm onto a necklace as these little besties chose to do.

Or, you can add a couple to a small chain and lobster clasp or key chain ring.

I’m so happy with how these turned out and will definitely be making more with different colours of glitter (rainbow would be perfect!). Do you have any loot bag gift ideas that tween girls would love?
Like it? Pin it for Later!

Jane and Sonja are sisters, moms and lifelong craft addicts both living near Toronto, Canada with their families. They share their love of creativity, nature and coastal DIY ideas on their blog Sustain My Craft Habit. They craft and decorate their homes using repurposed and upcycled items and materials found in nature.


I’m hoping you know where you purchased the cupcake silicone mold. I’ve seen numerous molds, but not this one. Thank you, they are just adorable!
Hi Cathey! Thank you for your kind words. I bought this one at Michael’s a few month ago. I believe they still have it. -Jane