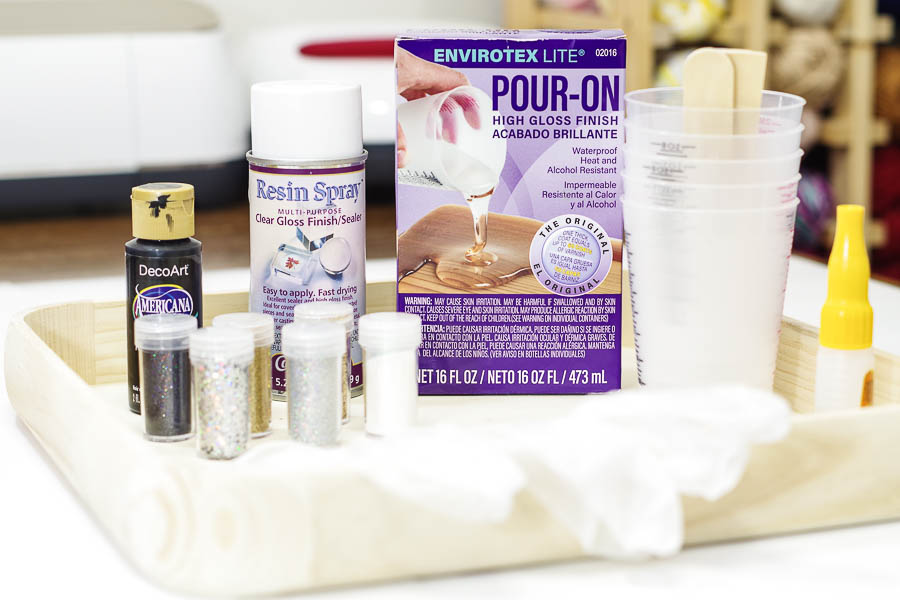
• About Us
  • FAQ
  • Contact Us
  • Shop Supplies
  • Email
  • Facebook
  • Instagram
  • Pinterest
  • Twitter
  • YouTube
  • Skip to primary navigation
  • Skip to main content
  • Skip to primary sidebar

Resin Crafts Blog

Resin crafting projects and tutorials

  • Home
  • Resin Projects
  • Molds
  • Project Type
    • Jewelry
    • Home Decor
    • Art
    • Gift Ideas
    • Crafts
  • Resin Tips

DIY Happy New Year Glitter Resin Tray

by Sheri Leave a Comment

Share
Pin222
Tweet
222Shares
Create this amazing, shiny and sparkling DIY Happy New Year Glitter Resin Tray and have a beautiful way to serve drinks during your party! via @resincraftsblog

Happy New Year Glitter Resin Tray- final photo close

SUPPLIES:

  • Wooden Tray (bought mine at the craft store)
  • Envirotex Lite High Gloss Finish
  • Castin’ Craft Resin Spray Finish
  • Black acrylic paint
  • Disposable Mixing Cups
  • Stir Sticks
  • Glitter
  • Vinyl Gloves
  • Super Glue
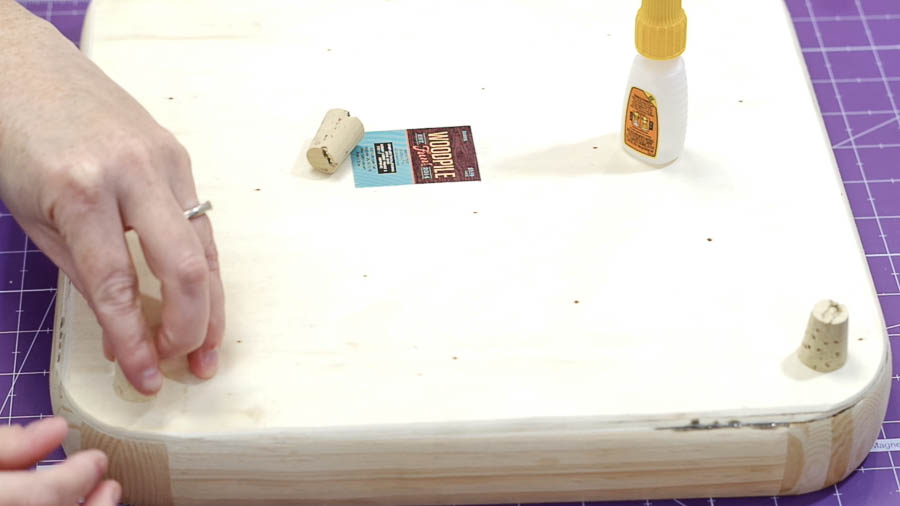
  • Small Corks for bottom of tray
  • Micro-Butane Torch
    Happy New Year Glitter Resin Tray- Supplies


TUTORIAL:

The first step to this project is to coat the wooden tray with Resin Spray. This will prevent the black resin from seeping into the wood. I sprayed three coats on the inside of my tray.Happy New Year Glitter Resin Tray- Spray entire wooden tray with three coats of resin spray

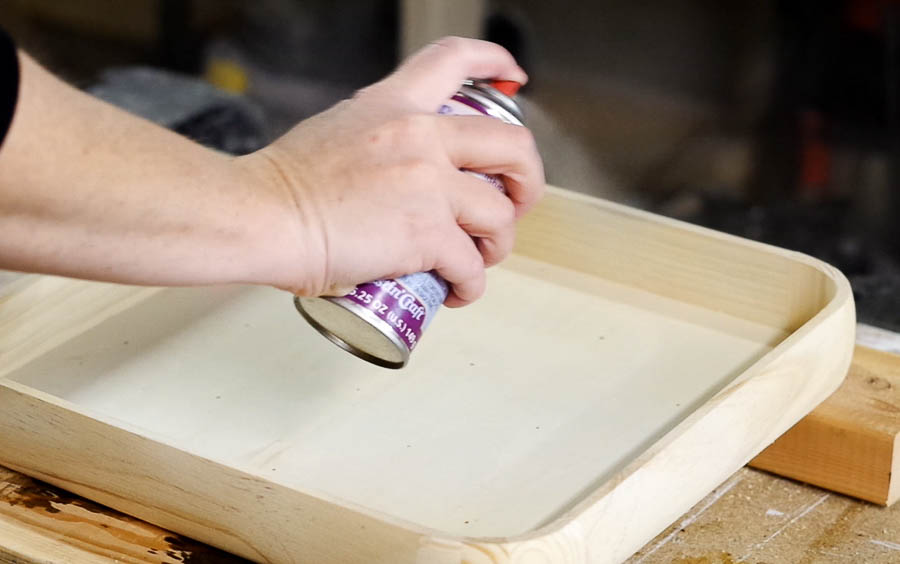
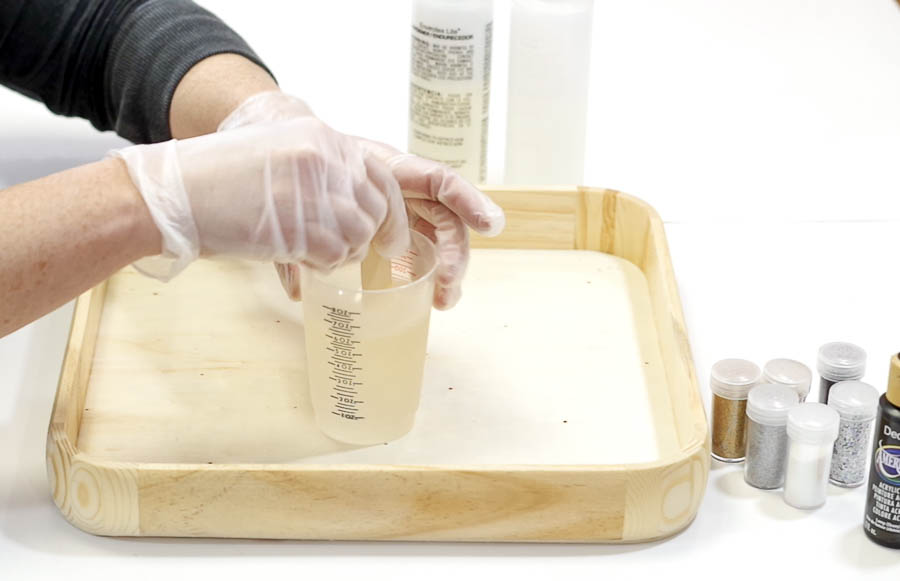
Next, mix Envirotex Lite. First, put on your vinyl gloves. Then add equal amounts of Part A and Part B to a large mixing cup (I used 3 oz. of each). Mix thoroughly.

Happy New Year Glitter Resin Tray- Mix equal amounts of Part A and B

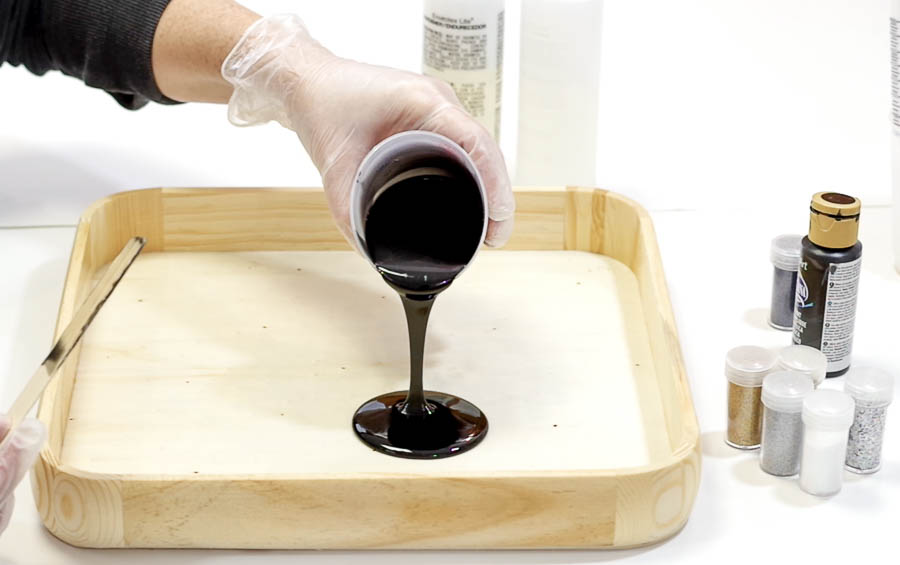
Pour the resin into a second cup and add a couple squirts of black paint. Mix thoroughly again.

Happy New Year Glitter Resin Tray- mix in black paint

Add glitter to your black resin. Begin pouring it into the center of the tray.

Happy New Year Glitter Resin Tray- being pouring black resin into center of tray


Tip the tray to spread the resin across the entire thing. Be sure not to tip it back as soon as it hits the edges. Happy New Year Glitter Resin Tray- tip tray to spread resin across entire tray

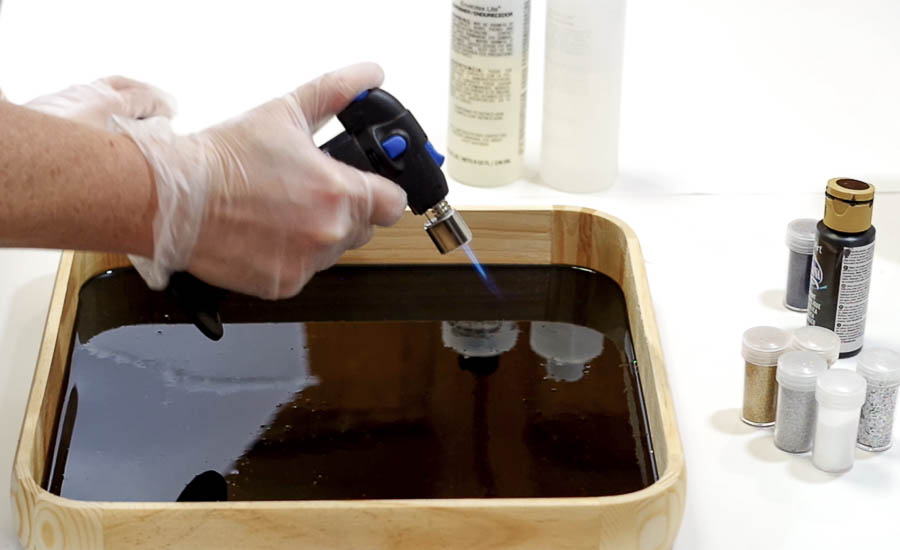
Be sure your tray is on a level surface. Use your micro-butane torch to pop all of the bubbles. Be sure not to scorch the resin.

Happy New Year Glitter Resin Tray- put on level surface, pop bubbles with micro butane torch

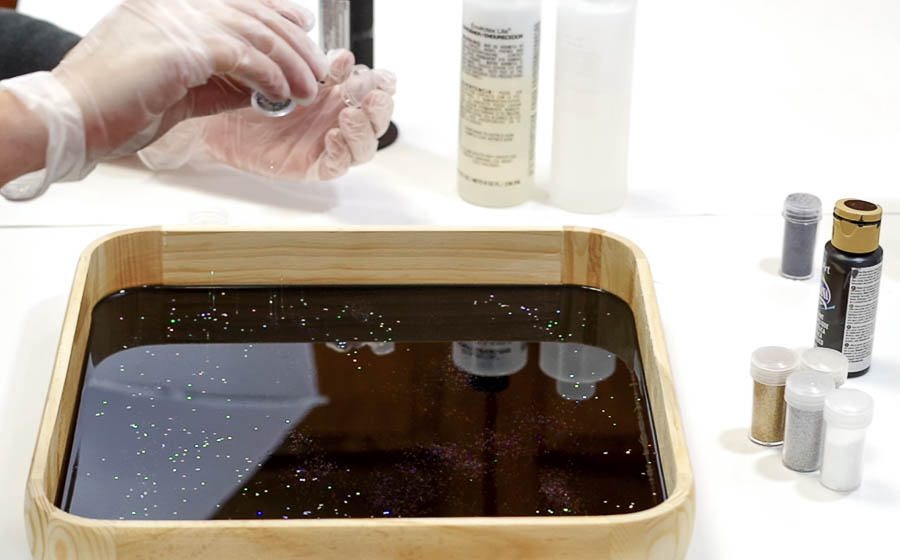
Sprinkle glitter wherever you want while the resin is still wet.

Happy New Year Glitter Resin Tray - sprinkle glitter where you want, let cure 24 hours

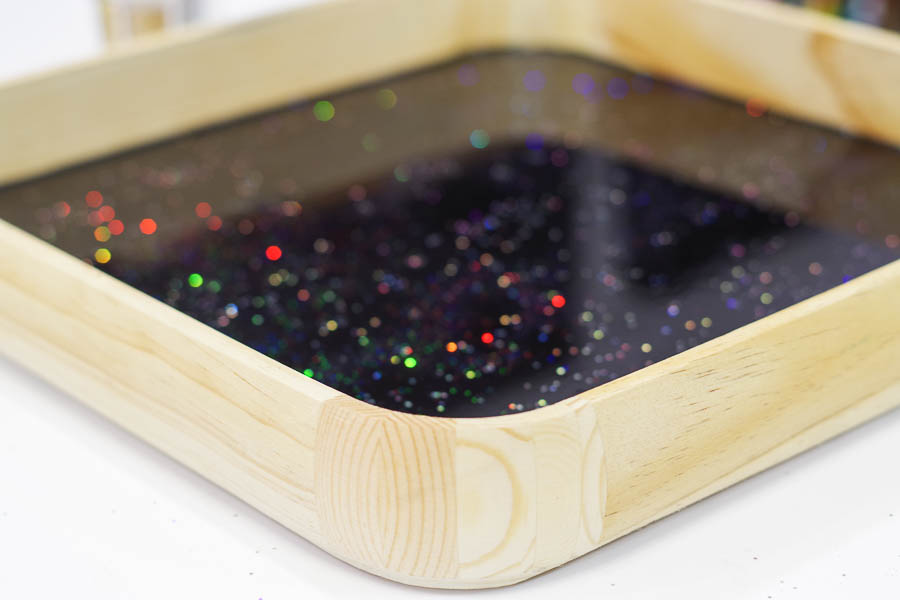
Let cure for 24 hours.

Happy New Year Glitter Resin Tray- let cure 24 hours

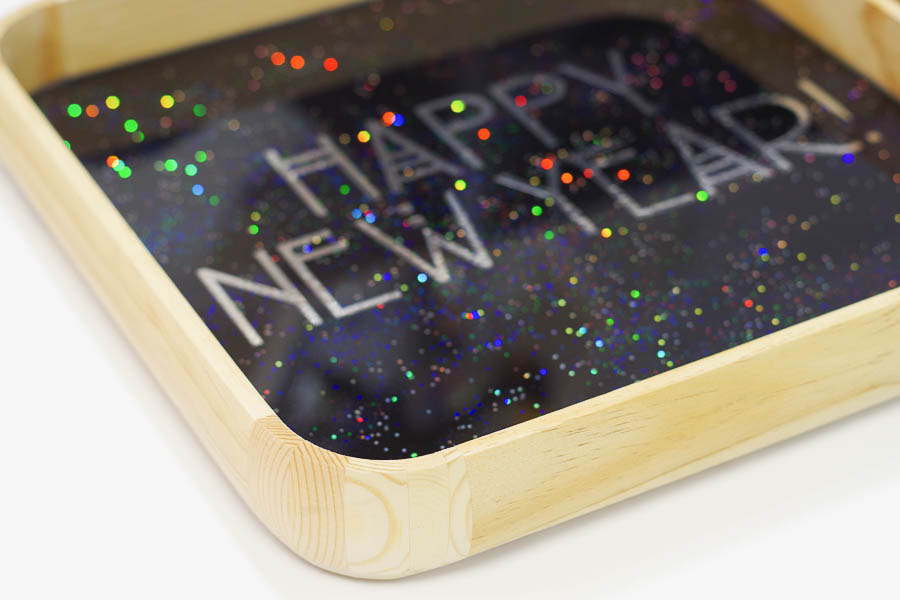
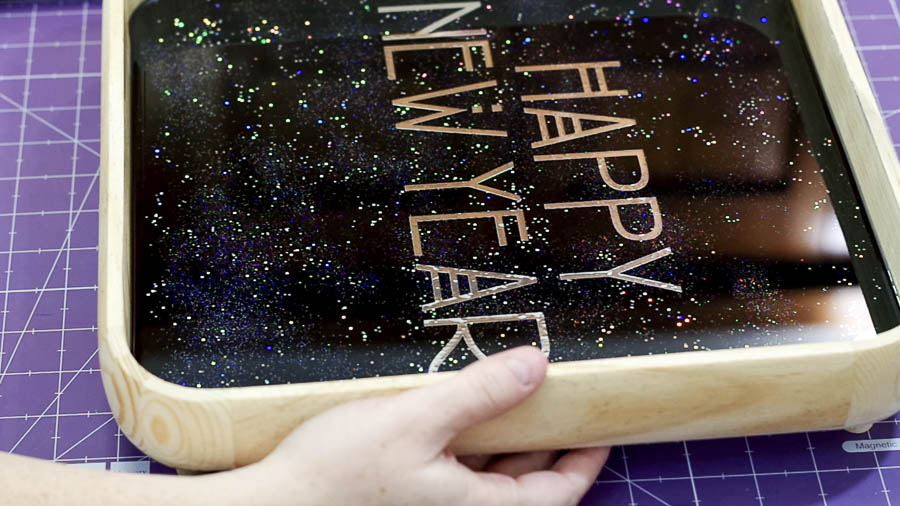
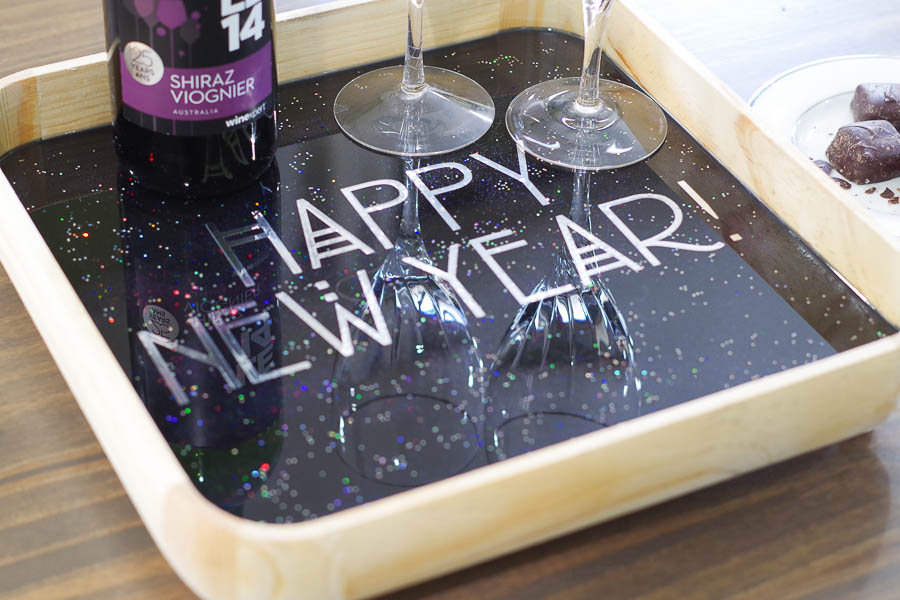
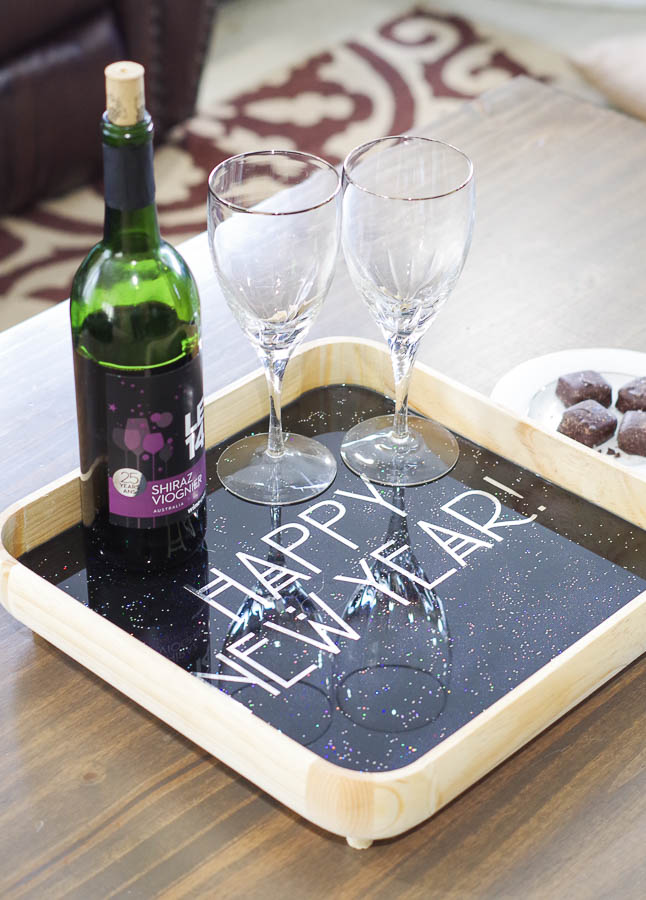
Add a sticker that says Happy New Year! (I made mine from adhesive foil vinyl with my vinyl cutting machine.)

Happy New Year Glitter Resin Tray- grab Happy New Year sticker and apply it Happy New Year Glitter Resin Tray- apply Happy New Year Sticker

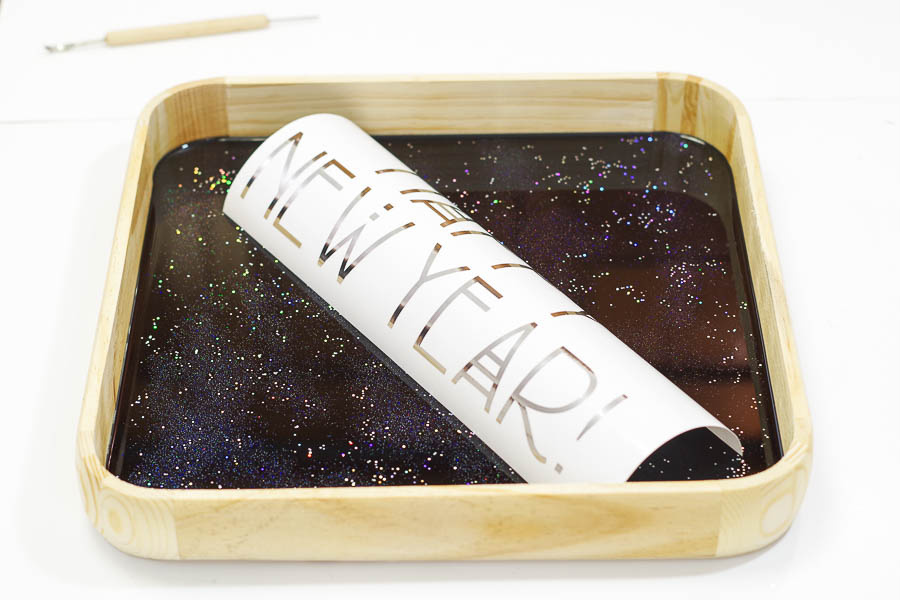
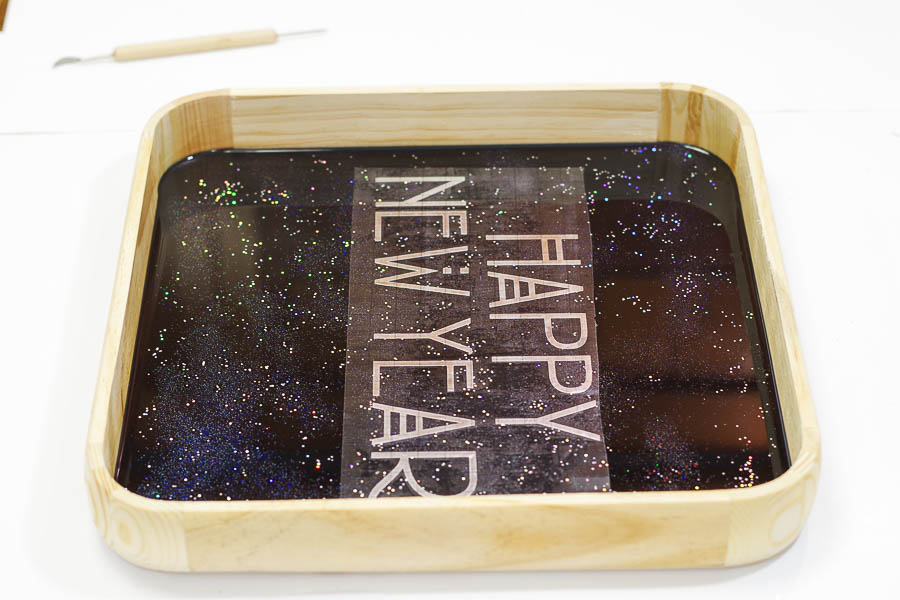
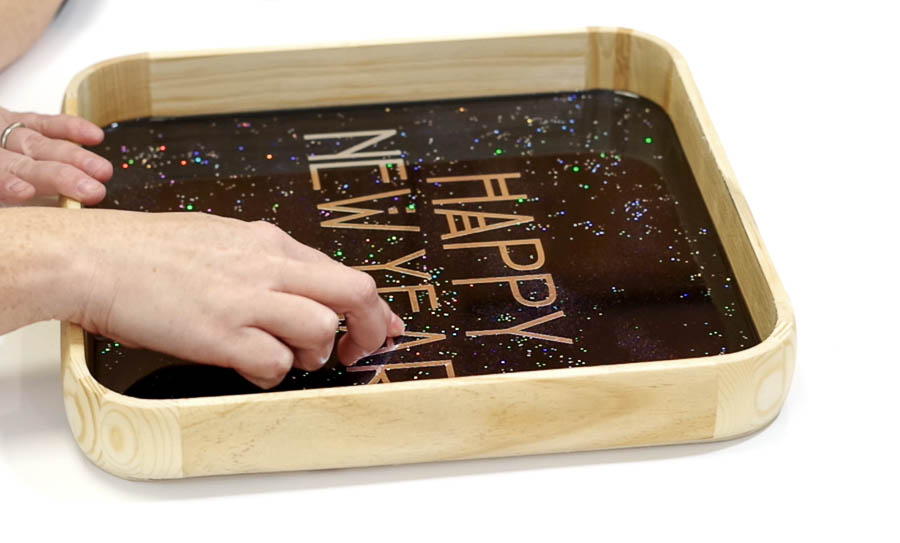
Press the letters down firmly.

Happy New Year Glitter Resin Tray- press letters down firmly

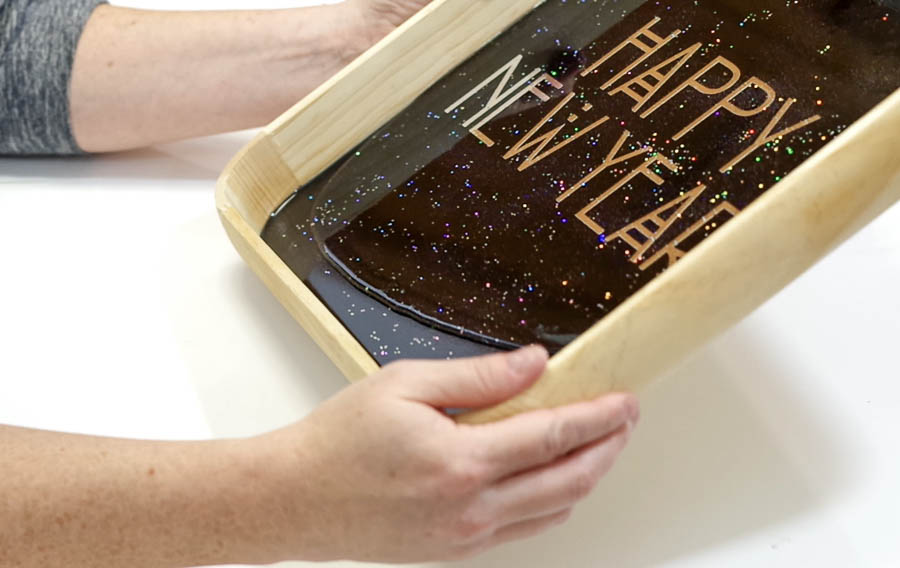
Mix another batch of resin, this time leaving it clear, and pour a final coat onto your tray.

Happy New Year Glitter Resin Tray- mix clear resin and pour onto tray

Tip to spread the resin across the entire surface.

Happy New Year Glitter Resin Tray- spread the clear resin

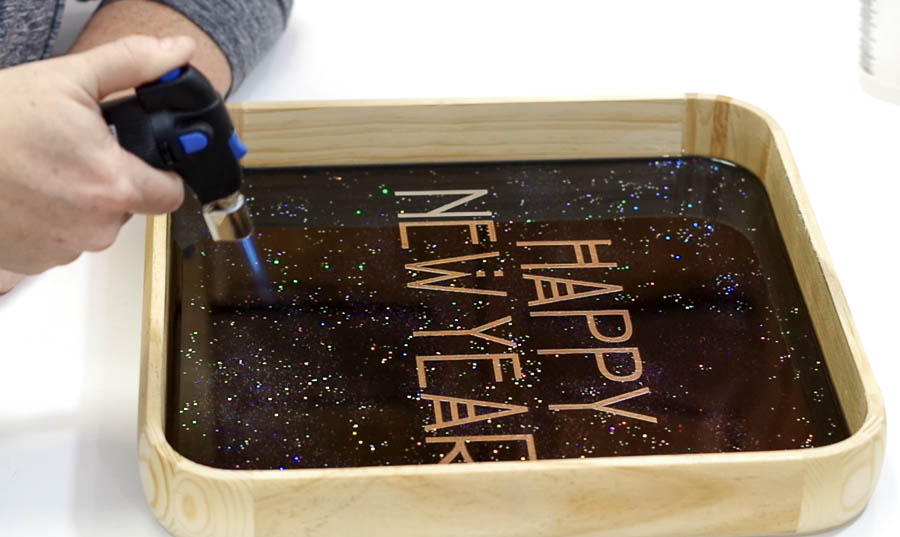
Use your micro butane torch again to pop all the bubbles.

Happy New Year Glitter Resin Tray- pop all bubbles

Let cure 24 hours.

Happy New Year Glitter Resin Tray- let cure 24 hours

Super glue small corks to the bottom of the tray to elevate it and leave space to slide your hands underneath, and also to prevent it from scratching any table surface.
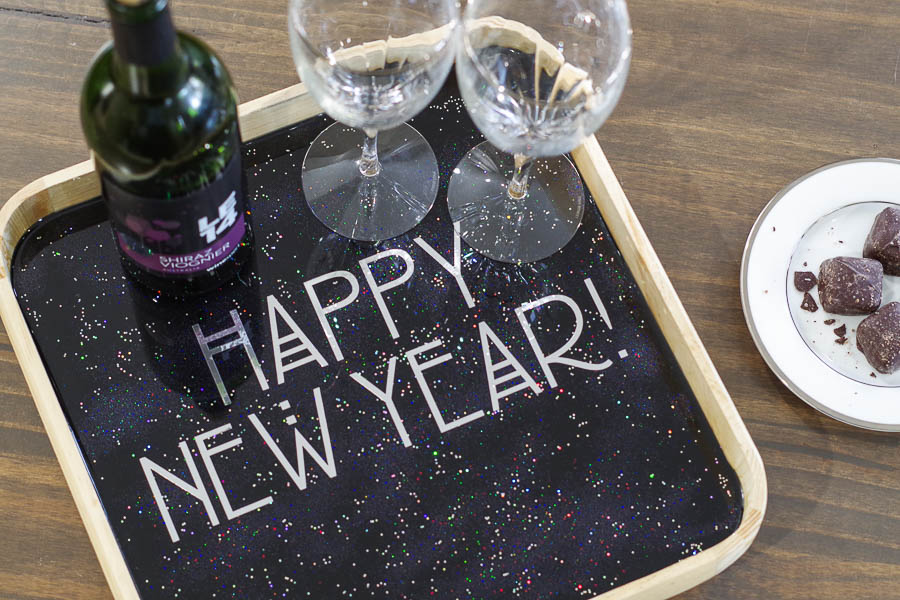
Happy New Year Glitter Resin Tray- super glue small corks to the bottom Happy New Year Glitter Resin Tray- room for hands underneath

Finished!

Now you have the perfect shiny and sparkly serving tray to use at your New Year celebration this year. I hope you have an amazing 2019!

Happy New Year Glitter Resin Tray- final photo above

Happy New Year Glitter Resin Tray- final photo close

Happy New Year Glitter Resin Tray- final photo vertical


Sheri
Sheri

Sheri is a Maker and DIY blogger at Hazel + Gold Designs. She is usually in the middle of multiple projects at once and finds great satisfaction and joy in creating something new. She is constantly learning new skills, putting them to the test, and sharing her experience and knowledge with others. Her favorite hobbies are crafting, painting, crocheting and basic woodworking. Her goal is to inspire others to step out of their comfort zone, learn a new skill and have the confidence to make their life a little more beautiful!

Share
Pin222
Tweet
222Shares

If you enjoyed this...

  • High-Gloss Charcoal Gray Bar Top Makeover with EnviroTex Lite
    High-Gloss Charcoal Gray Bar Top Makeover with EnviroTex…
  • Using an Oversized Wood Pool Ball to Make a Lucite Inspired Bookend
    Using an Oversized Wood Pool Ball to Make a Lucite Inspired…
  • DIY Glossy Photo Transfer Wood Slice
    DIY Glossy Photo Transfer Wood Slice

Filed Under: Home Decor, Project Type, Resin Projects

Previous Post: « Monogram Initial Resin Pendant Necklace DIY
Next Post: Resin Galaxy Constellation Clock DIY »

Reader Interactions

Leave a Reply Cancel reply

Thank you so much for leaving a comment on Resin Crafts Blog! For technical questions you can email our customer service at: [email protected] or via telephone @ 1-800-368-9323.
Recipe Rating


This site uses Akismet to reduce spam. Learn how your comment data is processed.

Primary Sidebar

color creator evergreen ad
upstart evergreen ad

Pin With Us

Categories

Resin Crafts Blog is a participant in the Amazon Services LLC Associates Program. As an Amazon Associate we earn from qualifying purchases.

Copyright © 2023 Resin Crafts

We use cookies to ensure that we give you the best experience on our website. If you continue to use this site we will assume that you are happy with it.OkNo