Updated April 2026
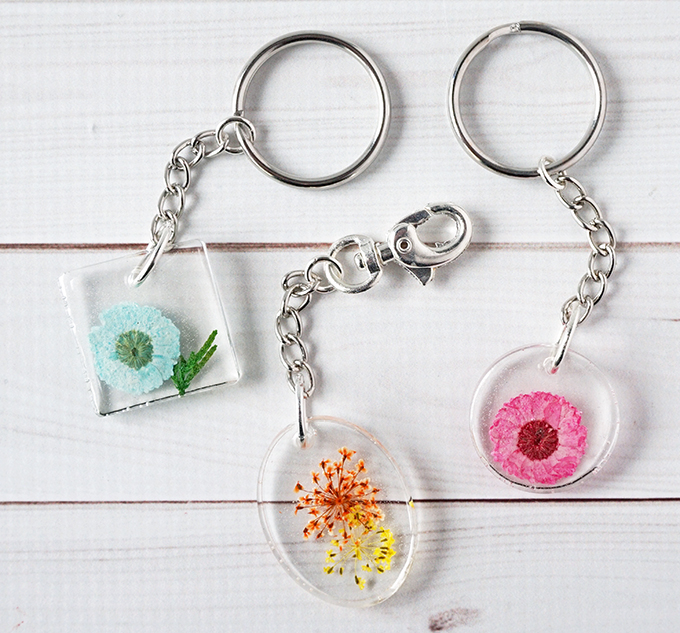
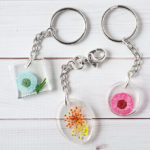
Carry a bit of springtime wherever you go with DIY Resin Flower Keychains!
Hi Resin Crafters, it’s Lindsay from Artsy-Fartsy Mama, sharing another fun resin craft! One of my favorite things about springtime is seeing all of the flowers start to bloom, making the world so much more colorful after a drab winter. Unfortunately flowers don’t live forever, but you can preserve their beauty in resin with these cute DIY keychains!
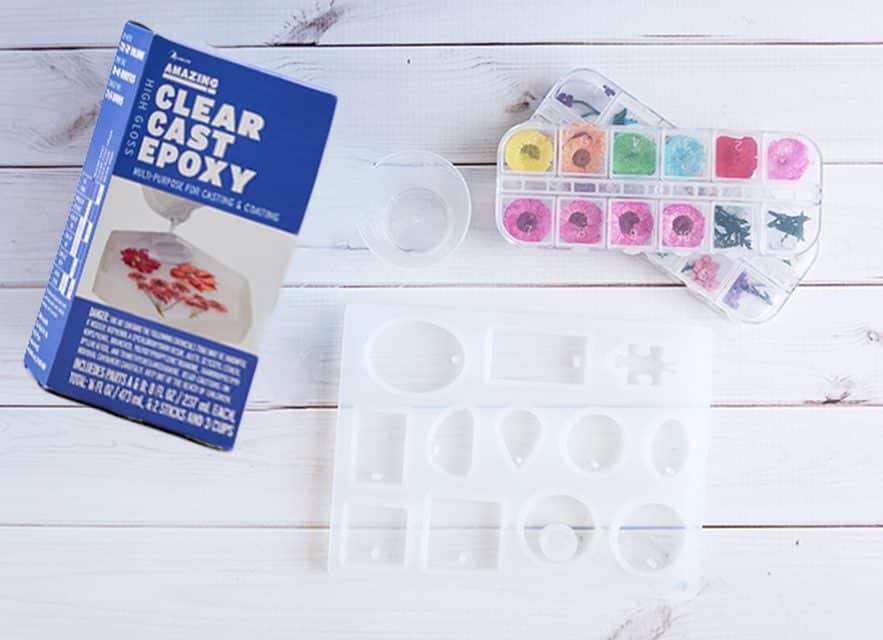
Supplies Needed:
- Amazing Clear Cast Epoxy
- Mold Release and Conditioner
- Resin Spray Sealer
- Measuring Cups and Stirring Sticks
- Disposable Gloves
- Jewelry Mold
- Small Flowers, pressed and dried (can do it yourself or find them online)
- Jump Rings
- Jewelry Chain
- Jewelry Pliers
- Key Rings
How to Make Dried Flower DIY Resin Keychains
Prep Your Dried Flowers and Molds:
To keep your flowers looking bright and beautiful, spray them Resin Spray Sealer and let it dry completely. It will seal the flower’s surface and colors, and also makes the flower sturdy enough to handle while you add it to the resin.
Spray your molds with with Mold Release and Conditioner according to package directions. Set it aside to dry. This step is important so that the resin releases from your mold later. It’s also a great way to clean, condition, and extend the life of your molds.
Step 1: Read the directions well, then prepare the Amazing Clear Cast Epoxy. Work in a well ventilated area and wear disposable gloves. You only need a little bit of resin to start with, so pour in equal parts (1/4 oz of each) of resin and hardener to the mixing cup.
Mix the resin together well for two minutes with a stir stick, making sure to scrape the bottom and the sides of your mixing/measuring cup. Pour the epoxy resin into a second clean mixing cup, and stir for another minute with a clean stir stick.
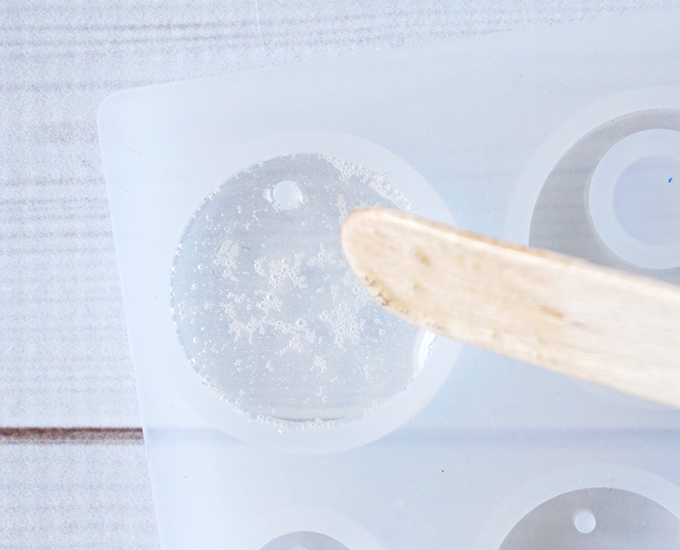
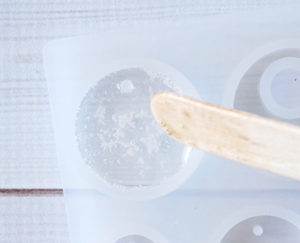
Step 2: Use the stir stick to add some resin to the mold. You only want to fill it up about 1/4 – 1/2 of the way. Use a straw or a lighter to remove any air bubbles.
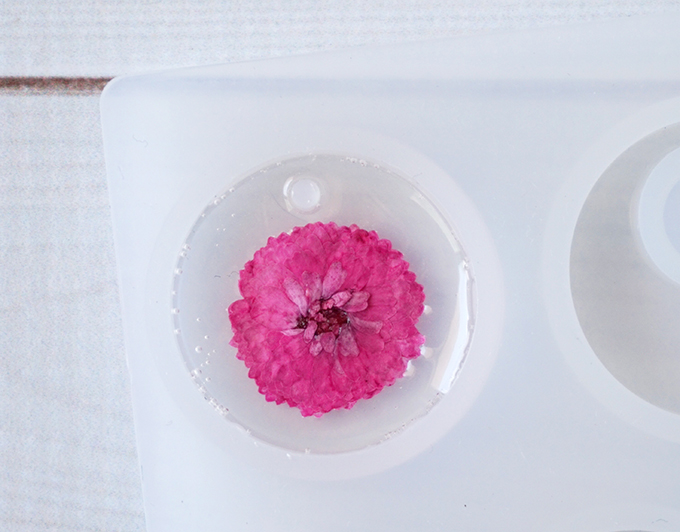
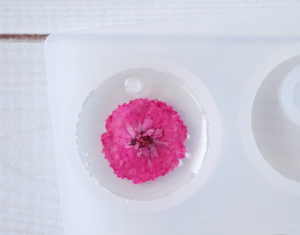
Step 3: Let the resin sit for 10-20 minutes so that it starts to turn into a gel consistency. This way, the flower won’t sink down to the bottom of the mold. Carefully place the flower face-down into the resin and press it down a little bit.
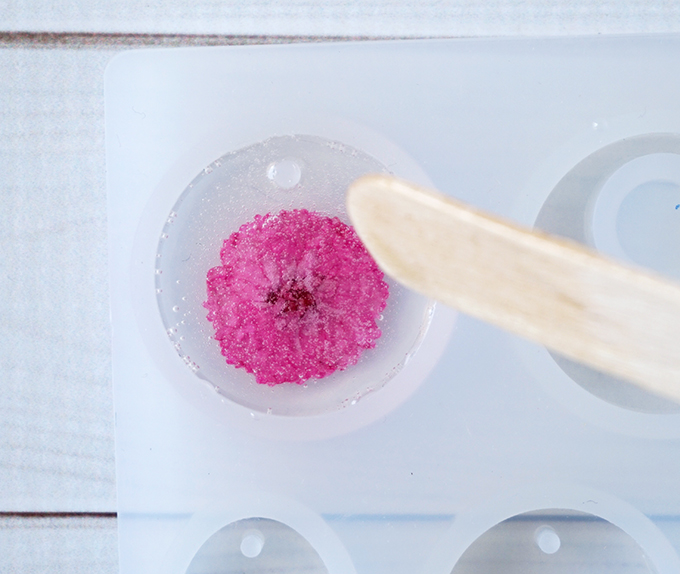
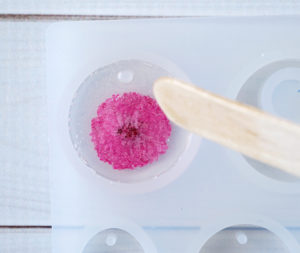
Step 4: Mix up another 1/2 oz of resin and use the stir stick to fill the molds the rest of the way. Pop any bubbles that come to the surface. Place the mold on a level surface to cure for at least 24 hours.
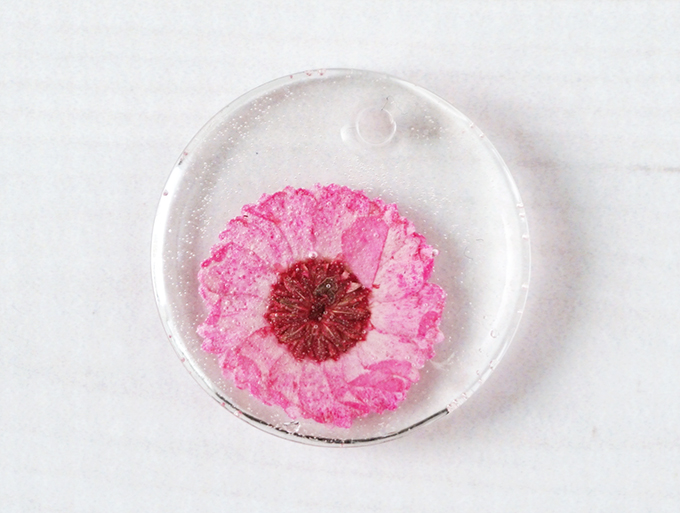
Step 5: When the resin is no longer tacky, it will be ready to pop out of the mold. Use a fine grit sandpaper to fix any uneven edges. If your mold doesn’t have a hole like mine does, no problem! You can add a hole to the pendant using a drill and small drill bit. Just make sure the hole is large enough to fit a jump ring through.
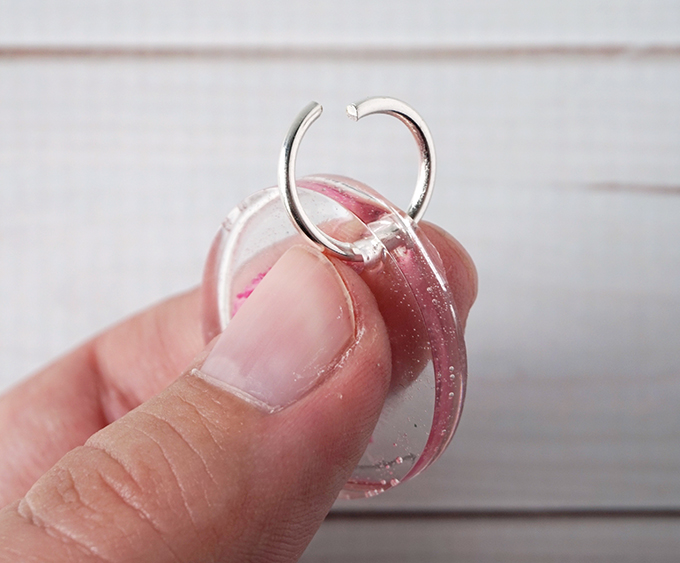
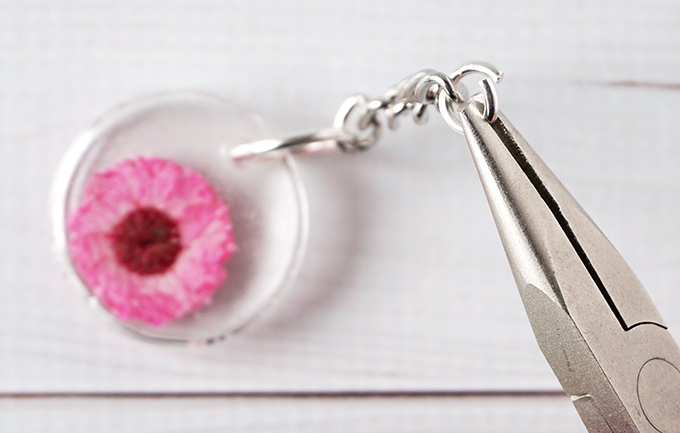
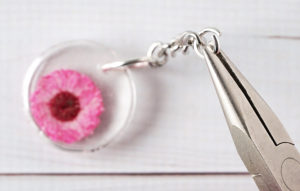
Step 6: Use jewelry pliers to open a jump ring and hook it through the hole in the pendant.
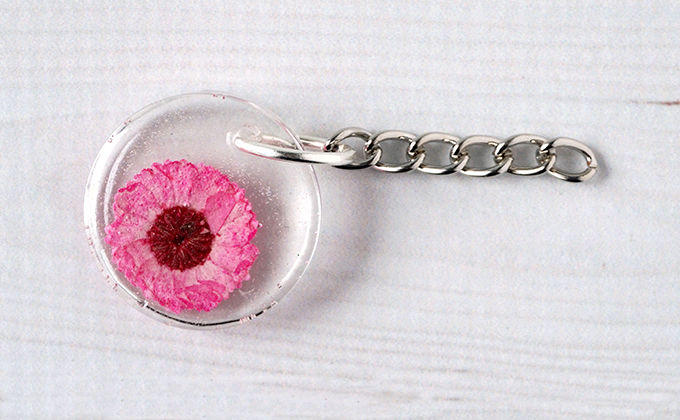
Step 7: Cut a small length of jewelry chain, and loop the jump ring through the end of the chain. Use the jewelry pliers to close the jump ring.
Step 8: Open another jump ring with the jewelry pliers and hook it to the other end of the chain. Hold it open with the pliers while you do the next step.
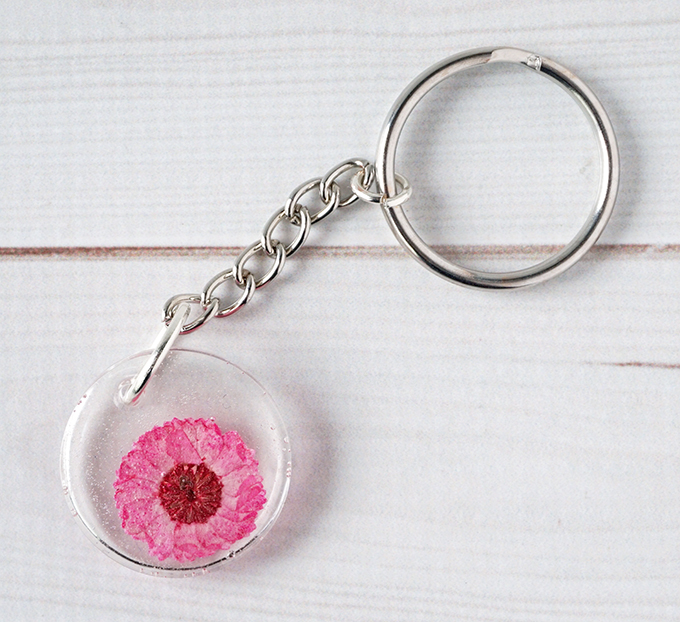
Step 9: Hook the key ring onto the jump ring, then close the jump ring with the pliers. Now you have a beautiful keychain!
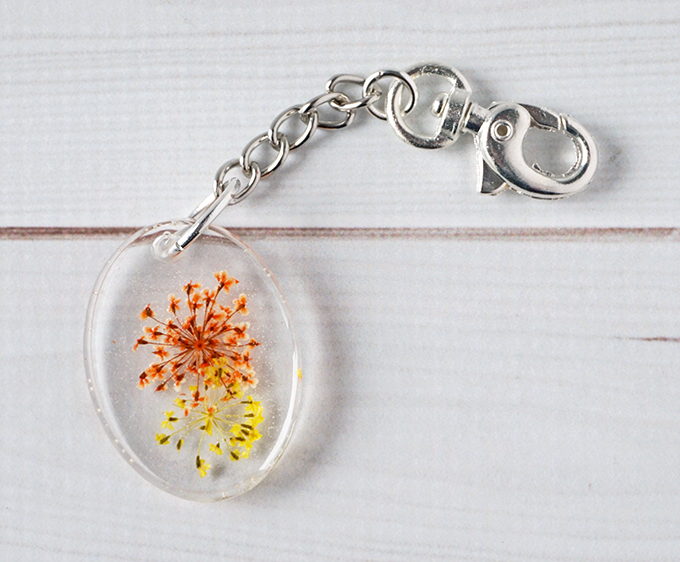
If you don’t like traditional key rings, you could attach a key ring clasp instead. I love these kind of key rings – they are easy to attach to hooks on your purse to keep your keys from getting lost inside!
You can attach these DIY Resin Flower Keychains to keys, zippers, or turn them into a one-of-a-kind necklace! I love that there are so many fun variations you can create using different flowers and mold shapes. These custom keychains are easy enough that you can make them for your own collection, or they would make great gifts to share with your family and friends!
DIY Pressed Flower Resin Keychains
Materials
- Amazing Clear Cast Epoxy
- Mold Release and Conditioner
- Resin Spray Sealer
- Measuring Cups and Stirring Sticks
- Disposable Gloves
- Jewelry Mold
- Small Flowers pressed and dried (can do it yourself or find them online)
- Jump Rings
- Jewelry Chain
- Jewelry Pliers
- Key Rings
Instructions
Prep Your Dried Flowers and Molds:
- Spray dried flowers with Resin Spray and Sealer. Spray molds with with Mold Release and Conditioner according to package directions. Set it aside to dry.
- Pour and measure Amazing Clear Cast Epoxy. Work in a well ventilated area and wear disposable gloves. You only need a little bit to start with, so pour in equal parts (1/4 oz of each) of resin and hardener to the mixing cup.
- Stir the resin together well for two minutes with a stir stick, making sure to scrape the bottom and the sides of your mixing/measuring cup. Pour the resin into a second clean mixing cup, and stir for another minute with a clean stir stick.
- Use the stir stick to add some resin to the mold. You only want to fill it up about 1/4 – 1/2 of the way. Use a straw or a lighter to remove any air bubbles.
- Let the resin sit for 10-20 minutes so that it starts to turn into a gel consistency. This way, the flower won’t sink down to the bottom of the mold. Carefully place the flower face-down into the resin and press it down a little bit.
- Mix up another 1/2 oz of resin and use the stir stick to fill the molds the rest of the way. Pop any bubbles that come to the surface. Place the mold on a level surface to cure for at least 24 hours.
- When the resin is no longer tacky, it will be ready to pop out of the mold. Use a fine grit sandpaper to fix any uneven edges. If your mold doesn’t have a hole like mine does, no problem! You can add a hole to the pendant using a drill and small drill bit. Just make sure the hole is large enough to fit a jump ring through.
- Use jewelry pliers to open a jump ring and hook it through the hole in the pendant.

- Cut a small length of jewelry chain, and loop the jump ring through the end of the chain. Use the jewelry pliers to close the jump ring.
- Open another jump ring with the jewelry pliers and hook it to the other end of the chain. Hold it open with the pliers while you do the next step.
- Hook the key ring onto the jump ring, then close the jump ring with the pliers. Now you have a beautiful keychain!
Lindsay is a crafter, graphic designer, and glitter enthusiast from Utah. She’s passionate about homeschooling her creative daughter, traveling, and spending time in the craft room. Lindsay shares DIY project tutorials, printables, recipes, kids crafts, and more on her blog, ArtsyFartsyMama.com, where she inspires readers to live a creative life.


Very beautiful key chains! I just recently got into resin crafting and I am hooked! I have been doing more of the cubes and pyramids, but I’m about to try doing the key chains. I know, I should have gone small before large…lol. I have so many ideas that I want to try.
Is it good enough to sell??
I don’t see why not.
Hi! Do you think paper would get ruined in the resin? Would you be able to read what’s on it, do you think?
Thank you so much!
Hi Kelli! Yes, you can definitely use paper in your resin projects. Just be sure to seal it well with a spray sealant, laminate it, or even seal it using clear packaging tape!
Hello This project sounds amazing! But where would you find the clear stuff? And what else could you put inside other then paper anf flowers? Thank you!
Hi Nataly! The clear stuff is resin, and you can find it here in our store: https://eti-usa.com/. Besides flowers and paper, you could put practically anything inside! Glitter, colorants (mica powders, alcohol ink, etc), stones or crystals, or even a bug! I’d recommend taking a look through the site to get some creative inspiration for projects.
Beautiful! What size jump rings are you using for this type of keyring?
I think the ones I used are 5-7mm.