
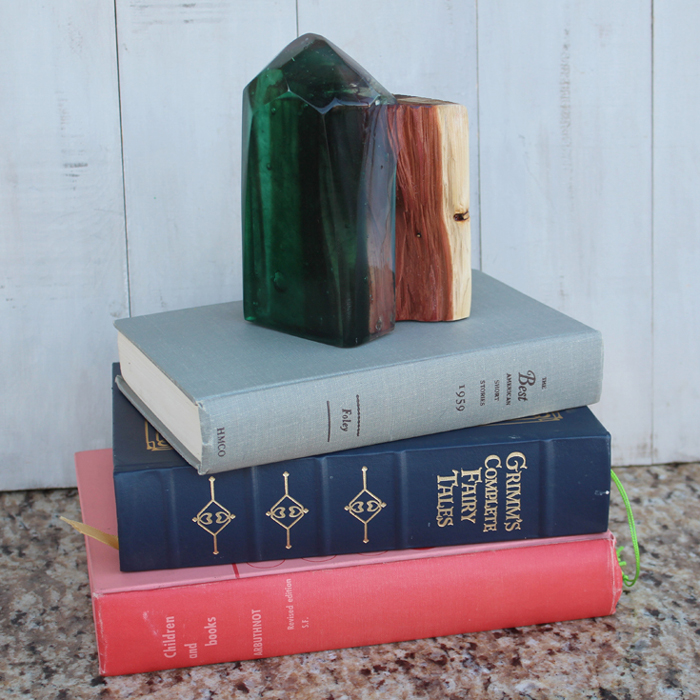
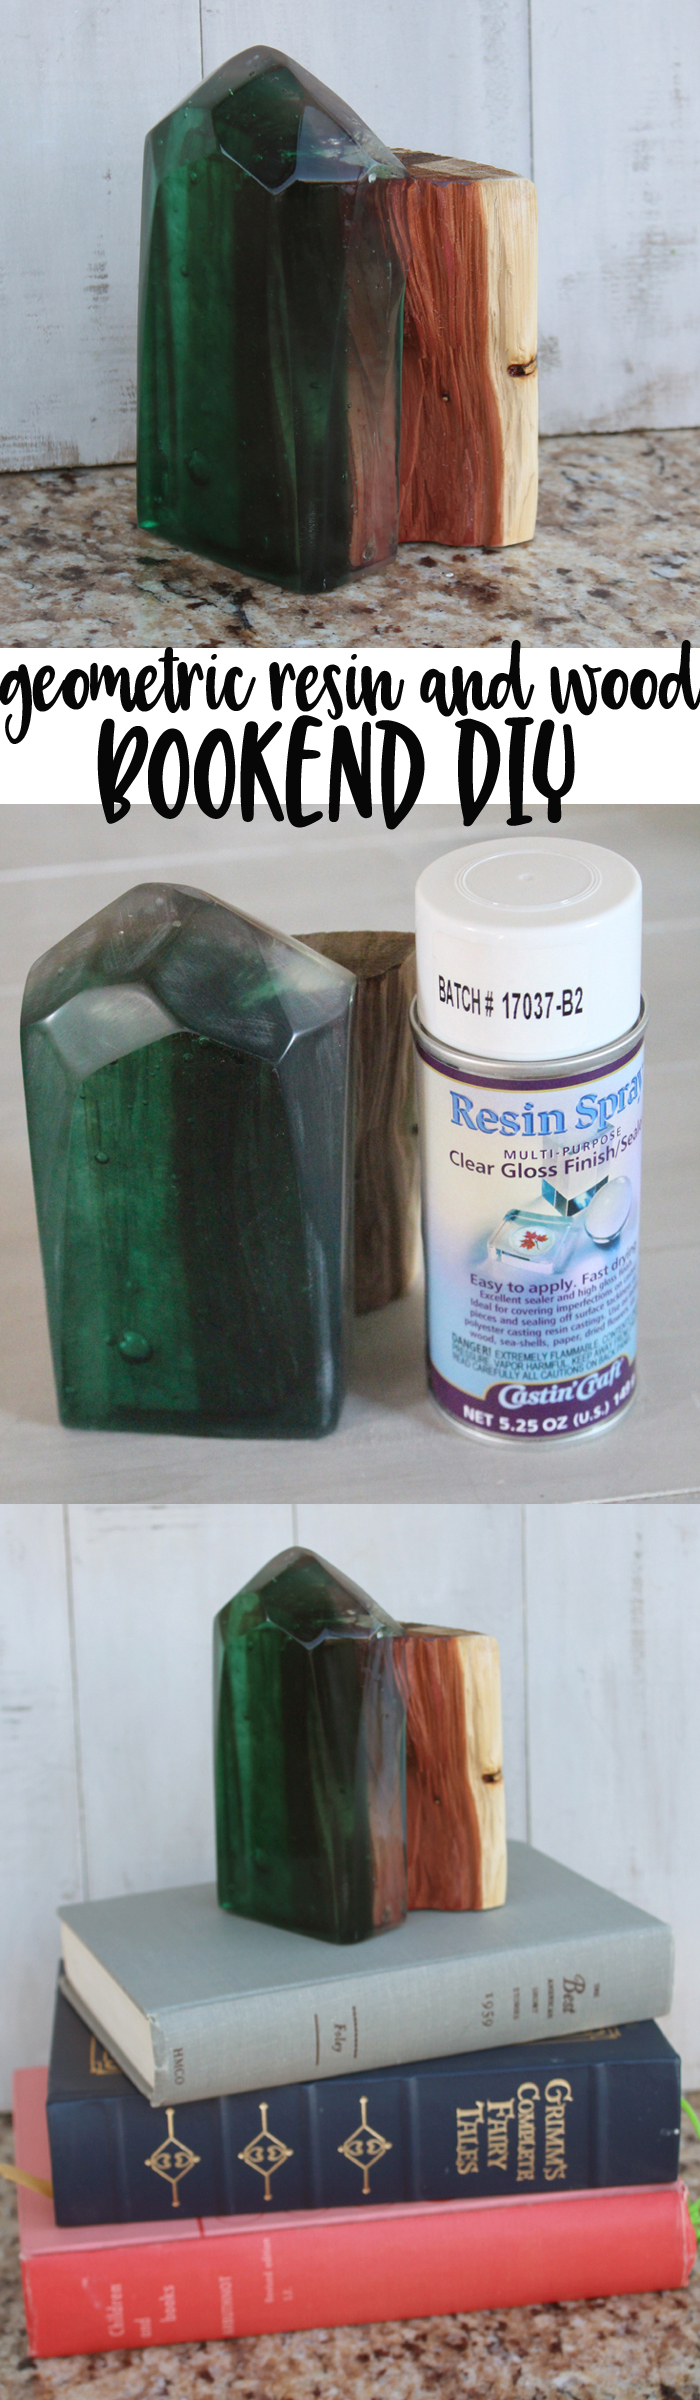
Geometric Crystal Resin Wood Bookend DIY
Combining multiple elements is especially perfect for home decor. This DIY goes one step further with making it a functional bookend as well. This piece is made with resin and is sanded to have a fun geometric shape. Make two for the perfect pair of bookends.

Then again, stack it on top of a pile of books for the perfect stunning home decor piece.
Supplies needed:
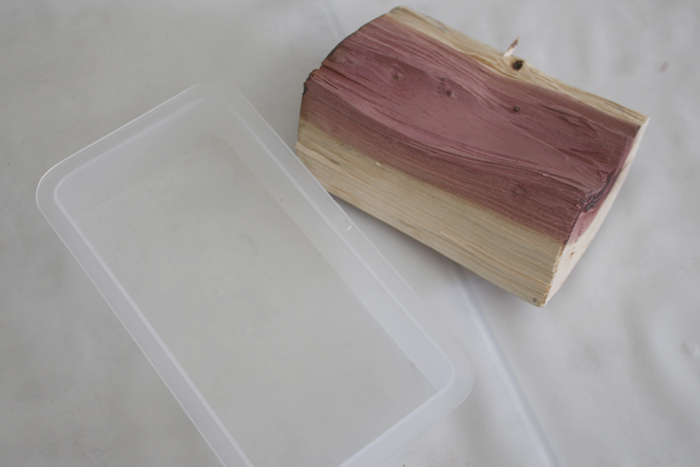
Cedar (or other natural wood) Chunk
Belt Sander
Sand Paper (grits 120 stepping up to 3000)
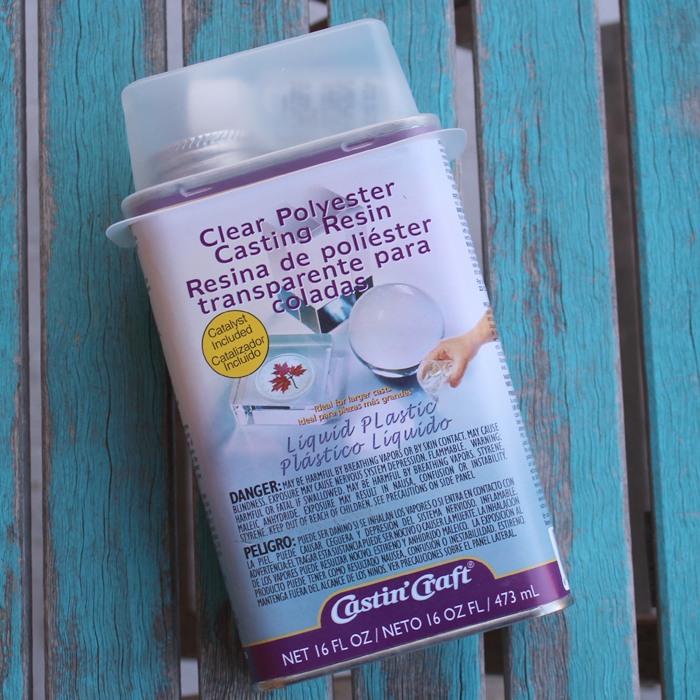
Castin’ Craft Resin Spray Finish
Disposable Gloves
Mixing cups and Stirring sticks
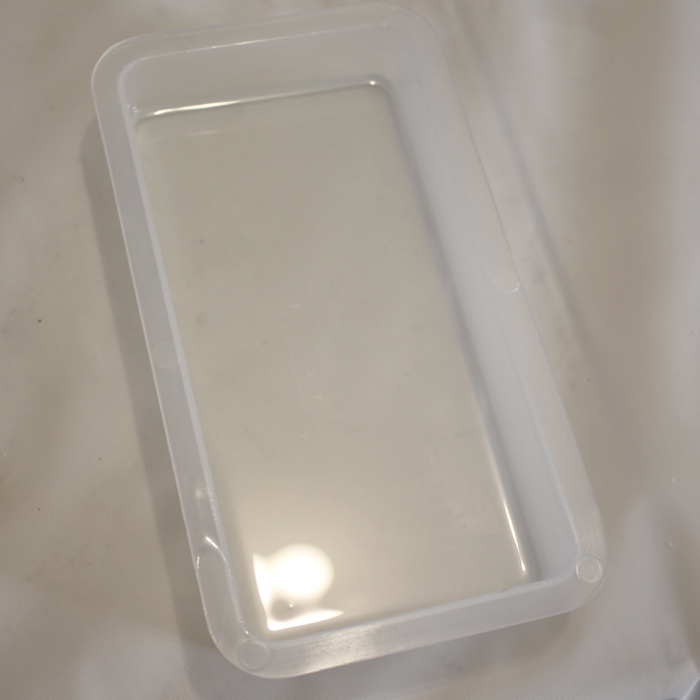
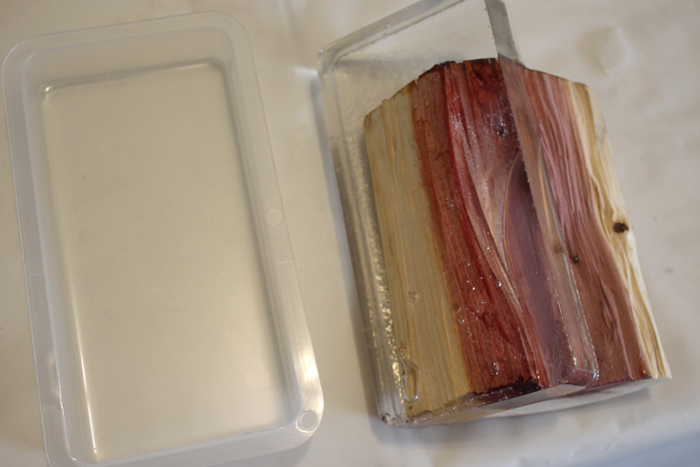
Work on a covered surface in a well ventilated area. Get all your supplies ready before starting. Find a piece of wood that fits inside the mold.
Start by spraying the mold release and conditioner spray in the rectangle mold. Then read the directions for the resin completely and mix up a few ounces of resin. Keep it clear and pour it in the mold. Let the resin set about 20 minutes until it is starting to gel. Then set the wood right in the resin. It should be firm enough to hold the wood in place.
Let the resin cure completely and pop it out of the mold. Notice some bubbles and even some holes. No worries.
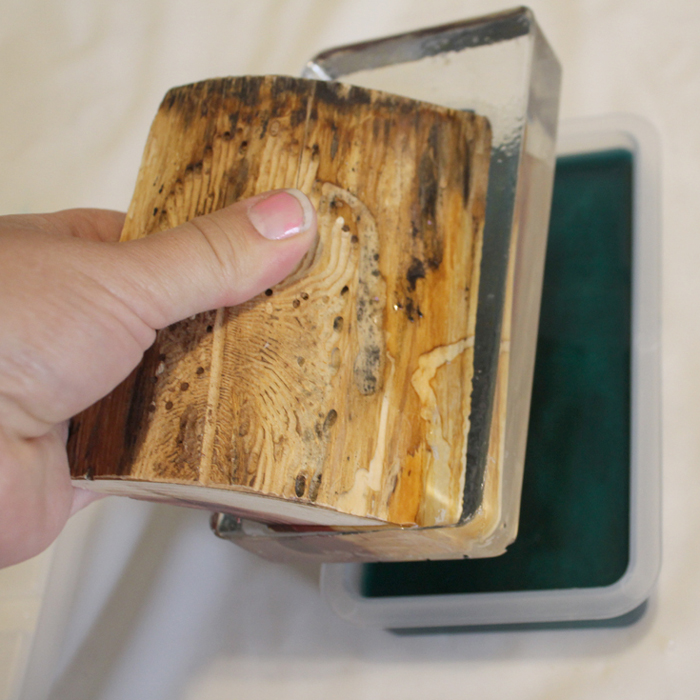
Next mix up the same amount of resin as earlier, stirring for the proper amount of time, etc. Then drop a couple drops of green translucent dye and mix it in. Spray the mold with release and conditioner spray and then pour the green resin right in the mold. Let it set for 20-30 minutes until it gels.

Then place the clear resin and wood piece right on top of the gelled green resin. Let it cure overnight.
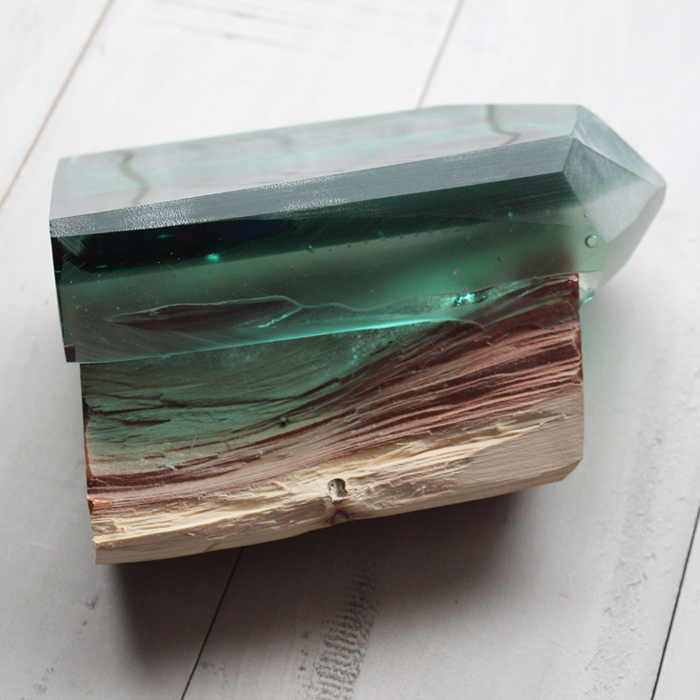
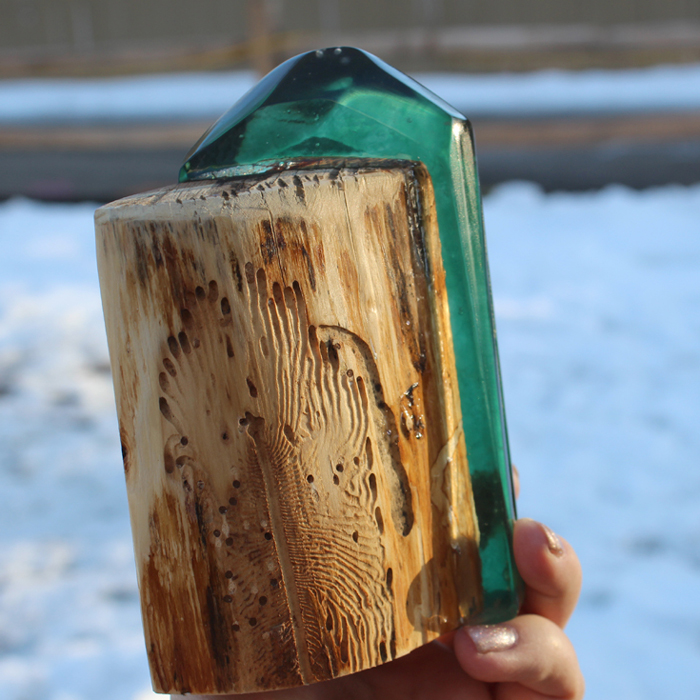
Oops, missed taking a picture after popping out of the mold. I took my resin straight into the garage and started sanding down edges on the belt grinder. This is a very rough grind to form some fun geometric shapes and angles. Sand the base of the bookend completely even, level and smooth enough to stand on it’s own. There is only a subtle color difference between the clear resin and the green dyed resin.
Next is the labor intensive part. Start by sanding all the edges with varied grits of sand paper. I started with 150 and gave each edge a thorough sanding. Leave the flat front surface natural resin.
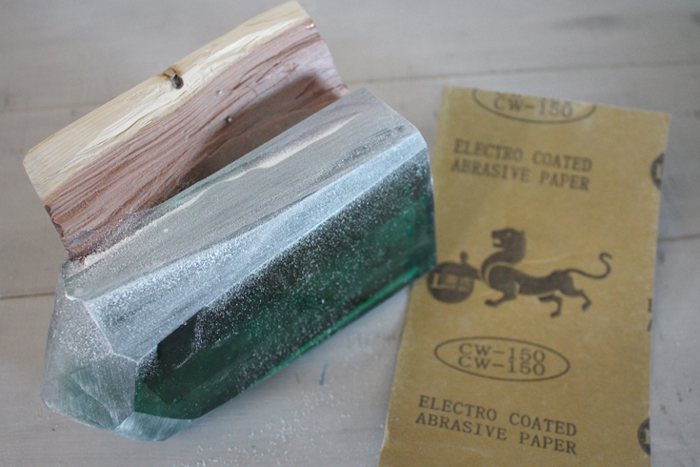
Then move on to the next sand paper grit, I stepped it up to 240. Sand thoroughly again.

Dust it off with a soft cloth as you go. Next use the 320 grit and sand the edges.
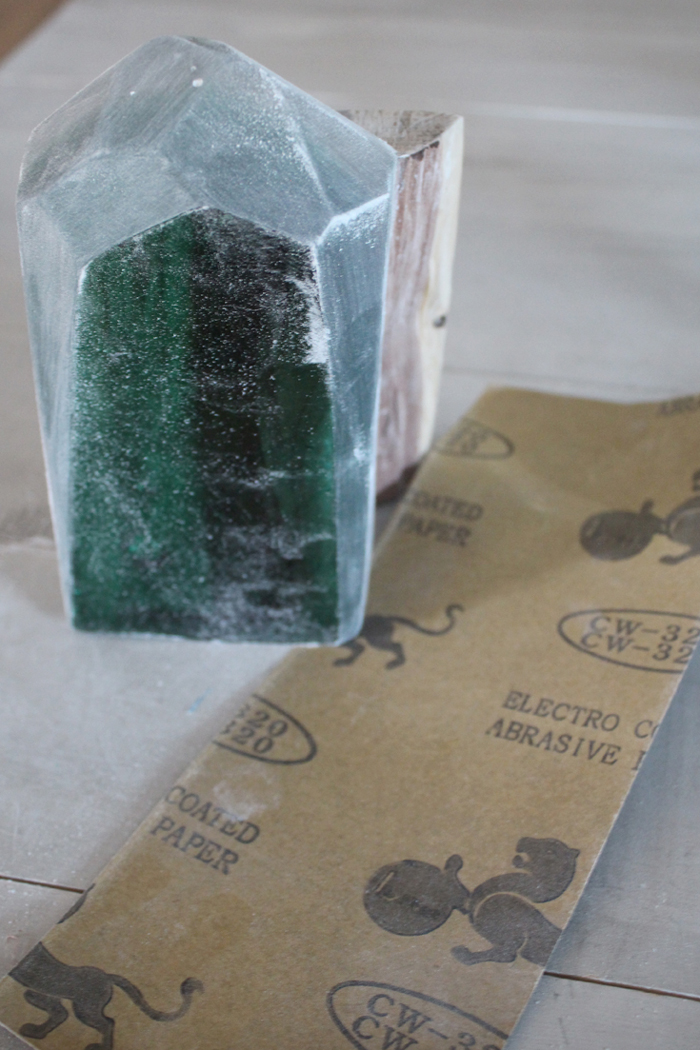
Now, gradually step it up to 400, 600, 800, 1000, 1200, 1500, 1800, 2000 and finally 3000. This process was a bit labor intensive and took a good hour.
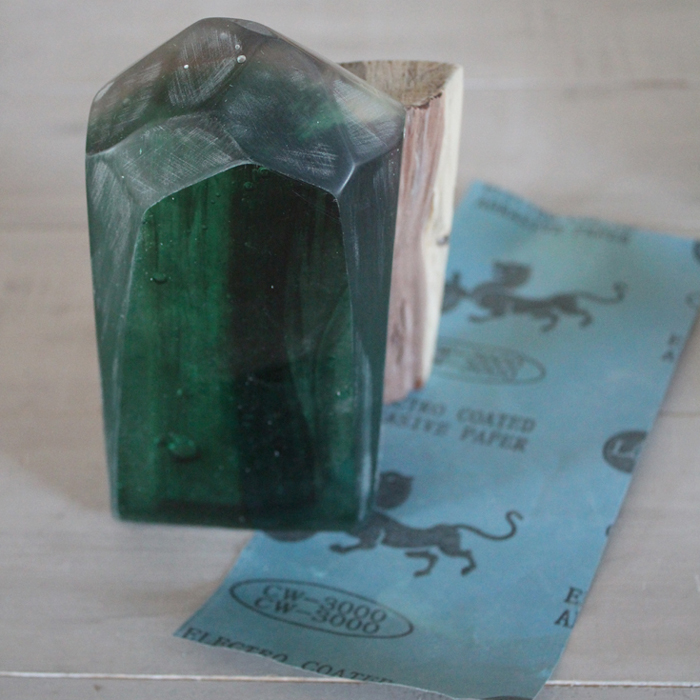
There are still visible sanding lines, but it feels really smooth….but I have a special trick up my sleeve.
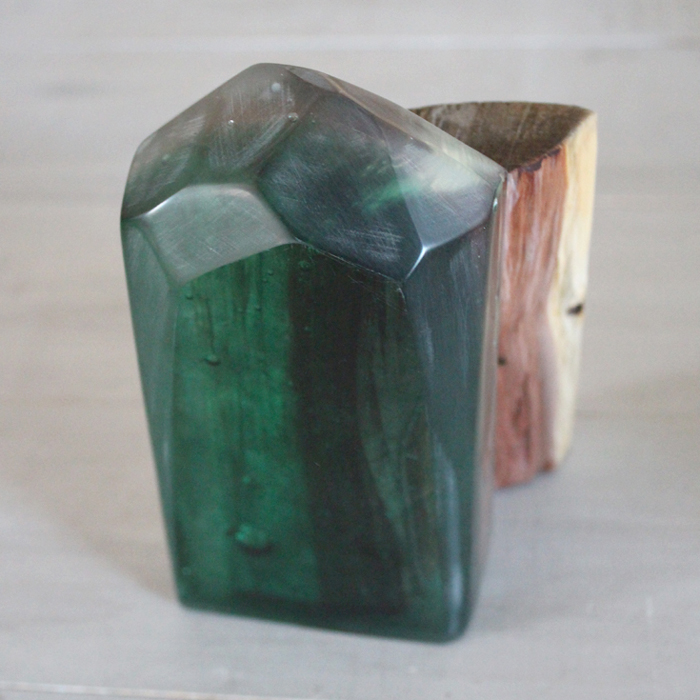
The real magic is this Multi purpose Clear Gloss Finish Resin Spray. It is a thick glossy spray to fill all the sanding lines with shiny resin gloss. Spray the wood and the resin with a thin layer of gloss, repeat after 10 minutes and then let it dry completely.
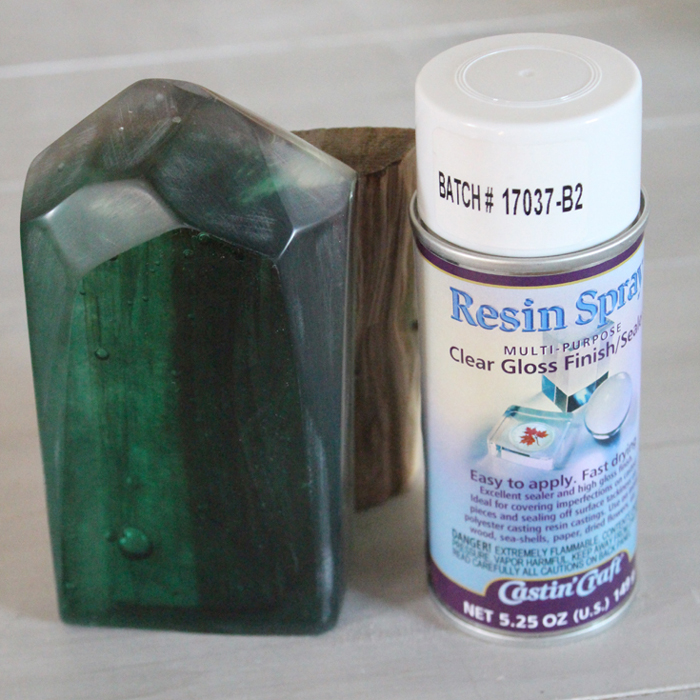
After the bookend dries, it’s time to admire. Check out that fabulous shine–no sanding marks are visible!
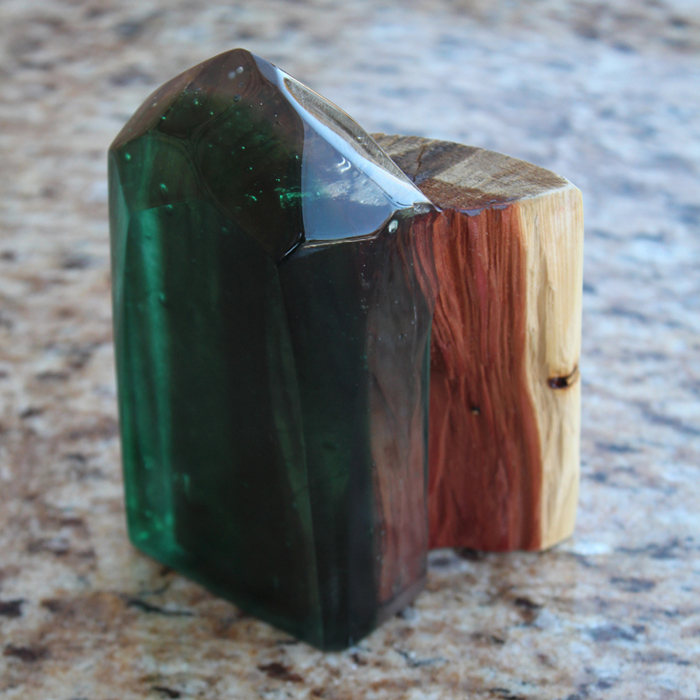
The sunlight catches in the resin and looks uniquely amazing. I love my choice of worm eaten wood too…so perfect, it was just in our wood pile–score!
Finally this awesome resin bookend is ready to display and hold up stacks of books. It would make a unique gift for someone too!
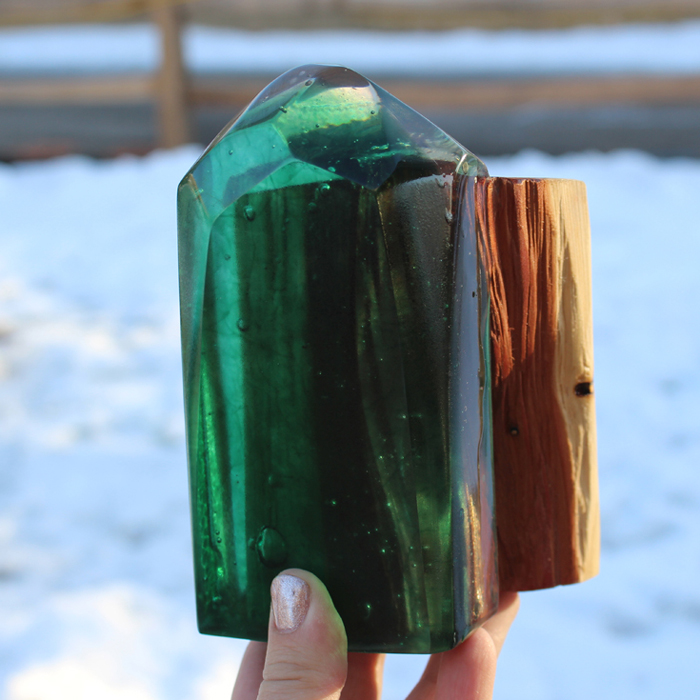
Make one or two and enjoy the juxtaposition of the translucent resin and worm eaten wood.
Natalie Shaw is a Craft/DIY blogger at Doodlecraftblog.com. She loves sci-fi, fantasy and video game geekery and that comes out in many of her projects. She posts budget conscious DIY’s, crafts, jewelry, kid friendly projects, upcycled treasures and other fun on her blog 5 days a week.


Wow! What a great project – lots of work but such a unique piece. I love your clever two step approach to create an even deeper pour.
So beautiful! Love how this piece turned out.