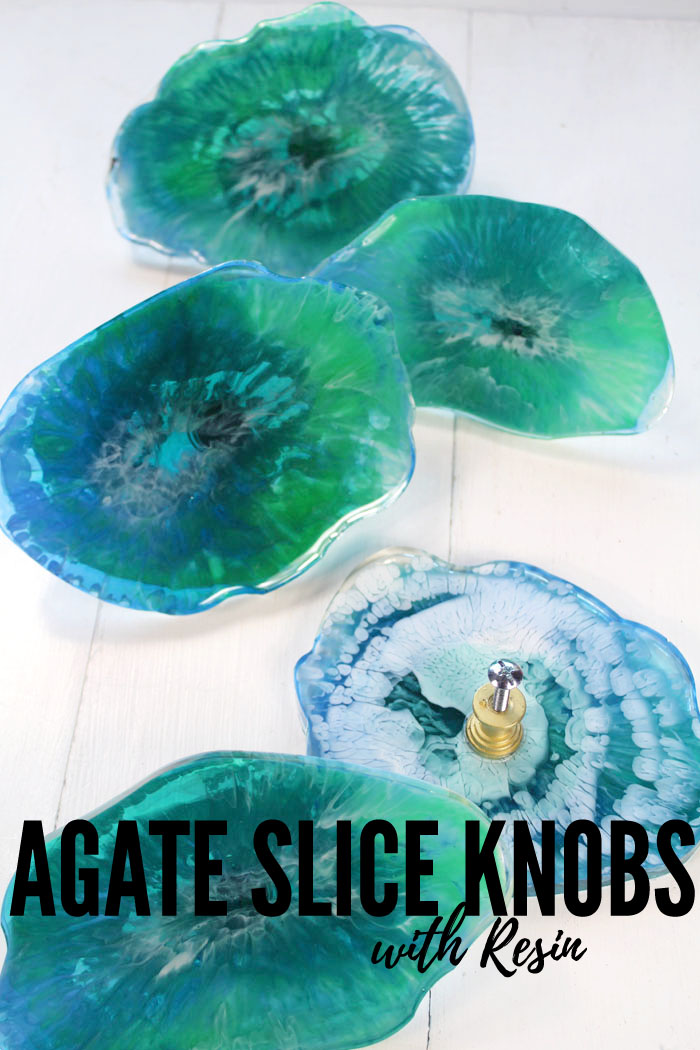
How to Make Resin Agate Slice Knobs
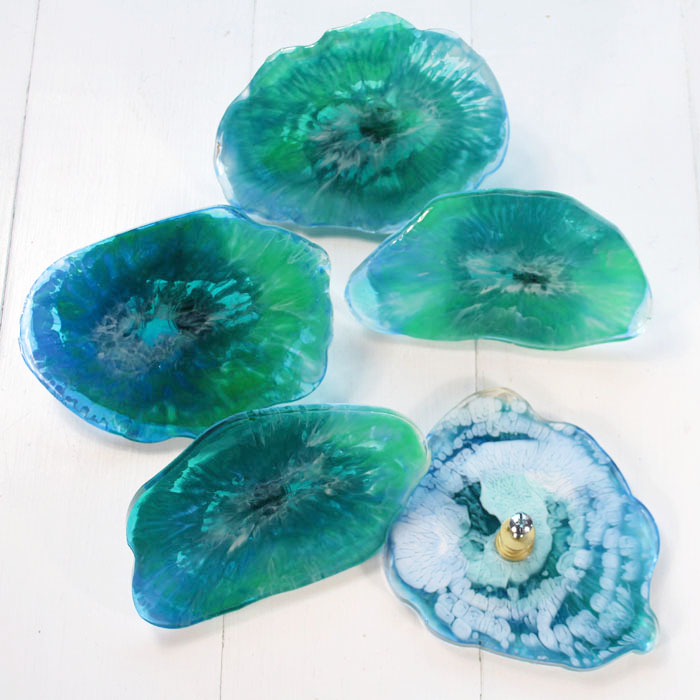
Hi Resin Crafters, it’s Natalie from Doodlecraft with a fun resin craft. Make gorgeous faux agate slice knobs using EasyCast Resin and add them to furniture, dressers, cabinets and cupboards for the perfect finishing touch. These faux agate slices have the look of natural crystalized stone with the ease of a DIY project.
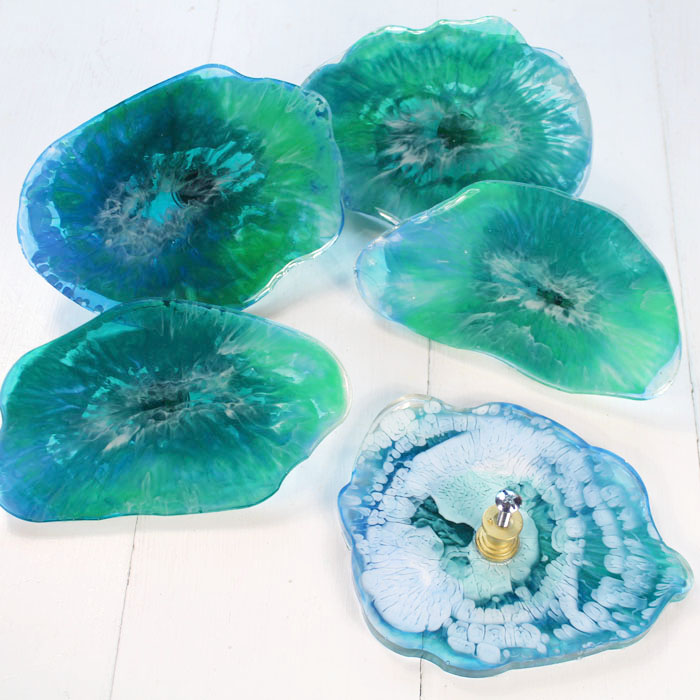
I always pick teals and aqua for my projects, but you can pick your favorite colors for your agate slices. Let’s get started!
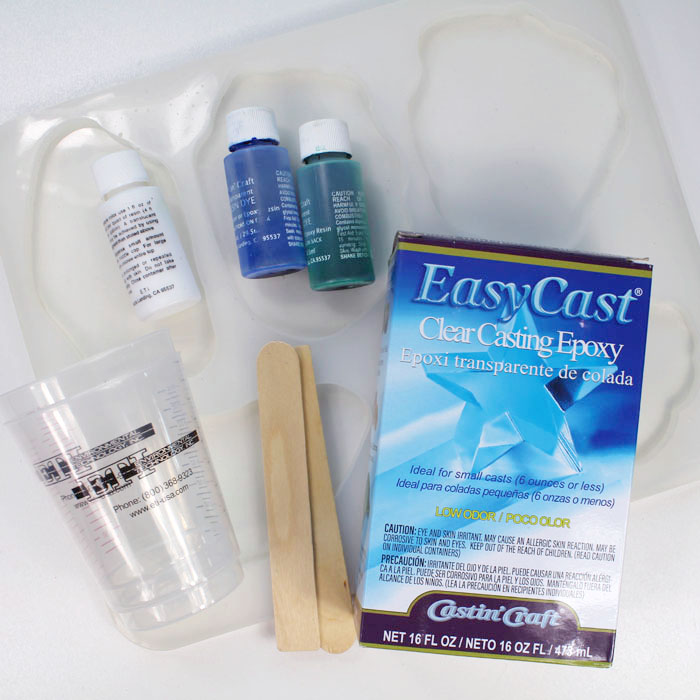
Supplies Needed for Agate Slice Knobs:
- EasyCast Resin
- Castin’ Craft Translucent Dye in Blue and Green
- Castin’ Craft Opaque Pigment in White
- Knob Hardware
- E6000 Glue
- Embossing Heat Gun
- Agate Slice Resin Mold (affiliate link)
- Small Paper Cups
- Mixing Cups, Stirring Sticks, Disposable Gloves, Disposable Work Surface
Step 1: Mix Resin
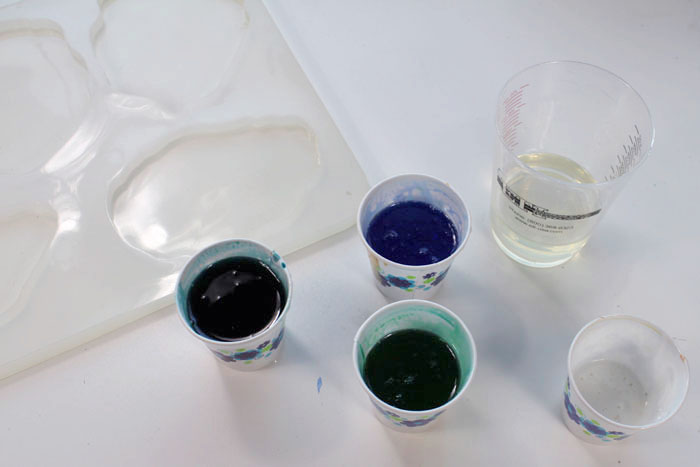
Begin by mixing resin according to the package directions in the 2-phase process. Then pour some resin in each of the small paper cups. I used 4 small cups. Leave some resin in the original mixing cup too.
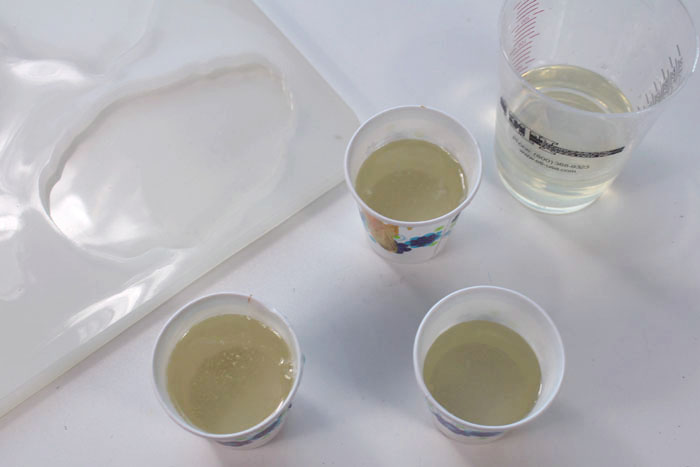
Step 2: Mix Agate Slice Color
Then add about 4 drops of blue dye in one cup. Next, 4 drops of green dye in another cup. Then mix 2 drops of blue and 2 drops of green in the third cup. Add some white pigment in the last small cup and leave the mixing cup with clear resin.
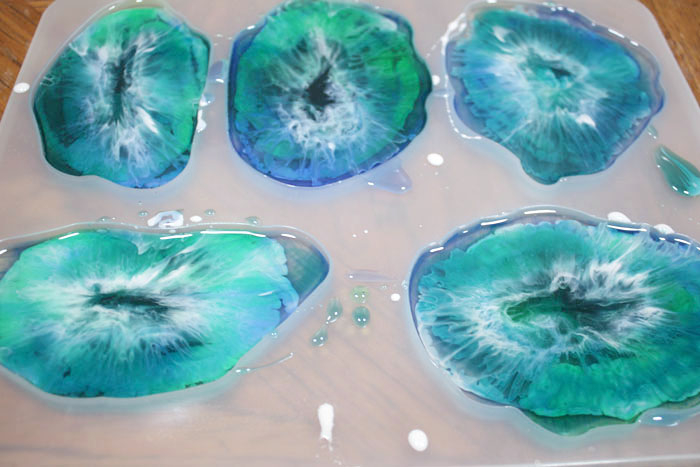
Step 3: Pouring Resin
Now pour one of the colors in the center of the each cavity in the mold. Followed by adding a circle of resin with another color around it.
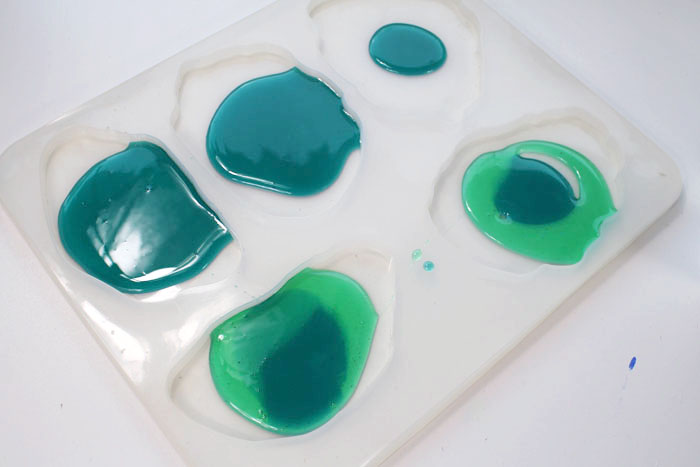
Repeat with the other colors of mixed resin.

Add the clear resin in to fill the cavities and fill in the gaps around the colors.
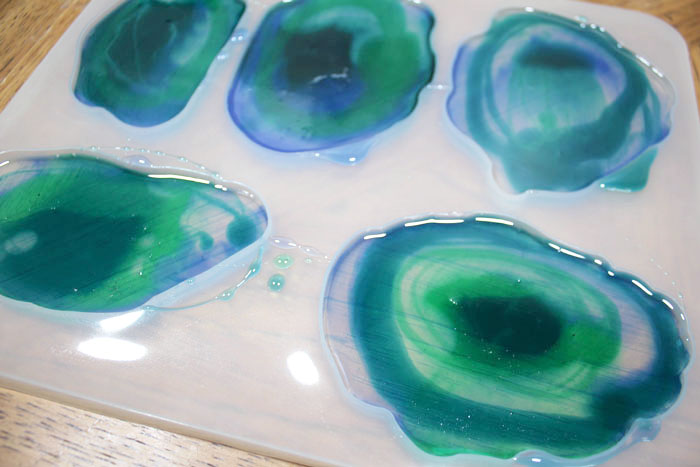
Finally, use a stirring stick to swirl the white resin around in a circular pattern.
Step 4: Heat
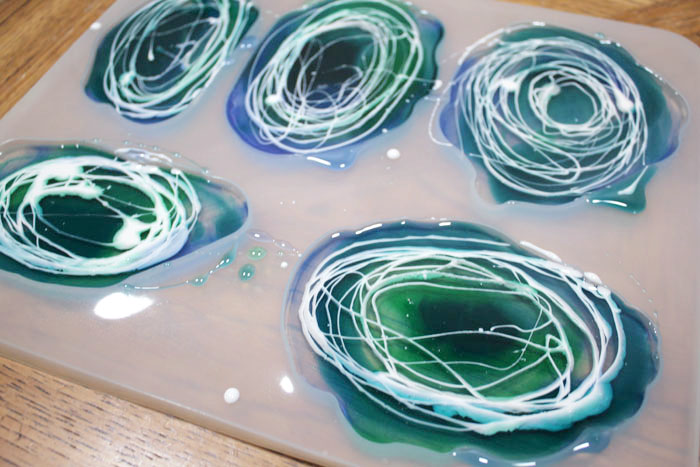
Now use an embossing heat gun to warm up and spread the resin around. Blow gently around in a circle. This will spread the white resin and create cells, veins and other interesting shapes in the resin.
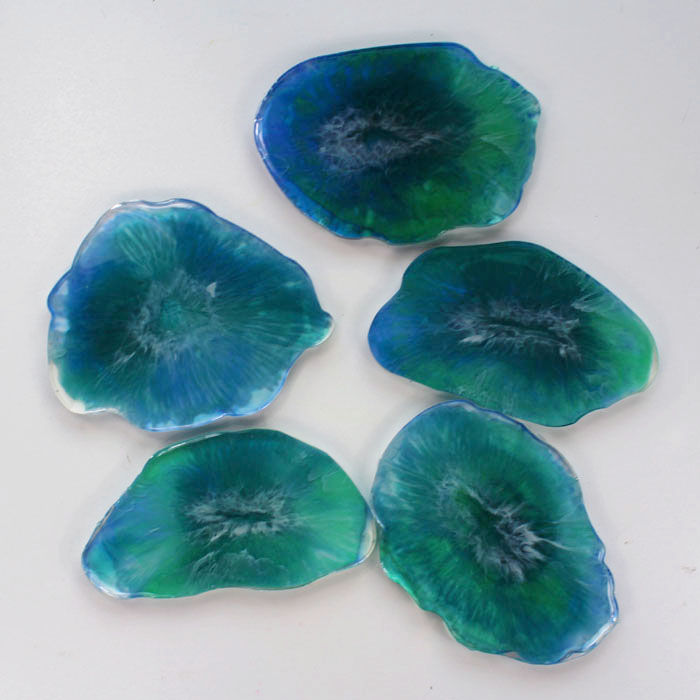
Step 5: Cure
Let the resin sit and cure for 24-48 hours. Set on a level surface and cover if possible to prevent dust and particles from landing on it.
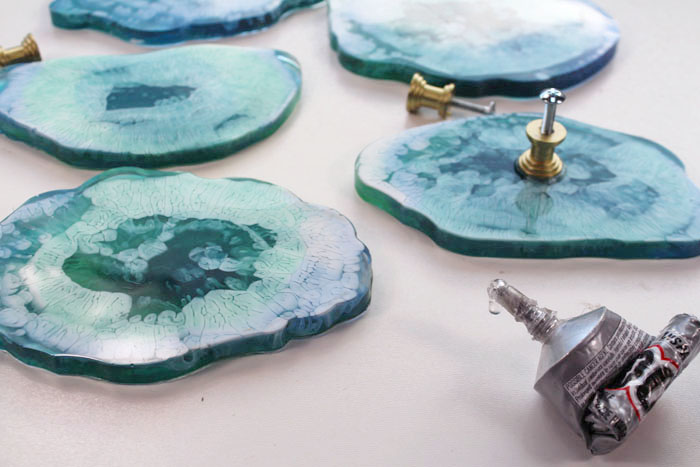
Step 6: Attaching Hardware to Agate Slice
Find some DIY Knob Pulls for the back of the resin slices.

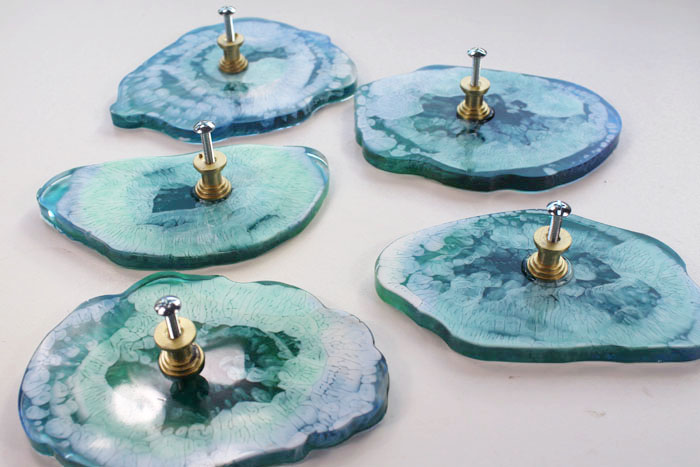
Put a glob of E6000 glue on the top of the hardware and press it down on the backside of the resin slices.
Then let the glue dry for at least 4 hours. All that is needed now is attaching them to furniture with a machine screw (typically included with the knob hardware).
Pick your favorite colors for your agate slices, make them match your room or furniture.
Enjoy!
Make resin knobs and share on social media! Tag @resincraftsblog and @doodlecraft so we can cheer you on!
Natalie Shaw is a Craft/DIY blogger at Doodlecraftblog.com. She loves sci-fi, fantasy and video game geekery and that comes out in many of her projects. She posts budget conscious DIY’s, crafts, jewelry, kid friendly projects, upcycled treasures and other fun on her blog 5 days a week.


Those are so neat. I am anxious to try doing them tomorrow. I also love the colors you used. Those are my favorite colors plus cobalt blue. Thanks for sharing your ideas.
Merry Christmas.