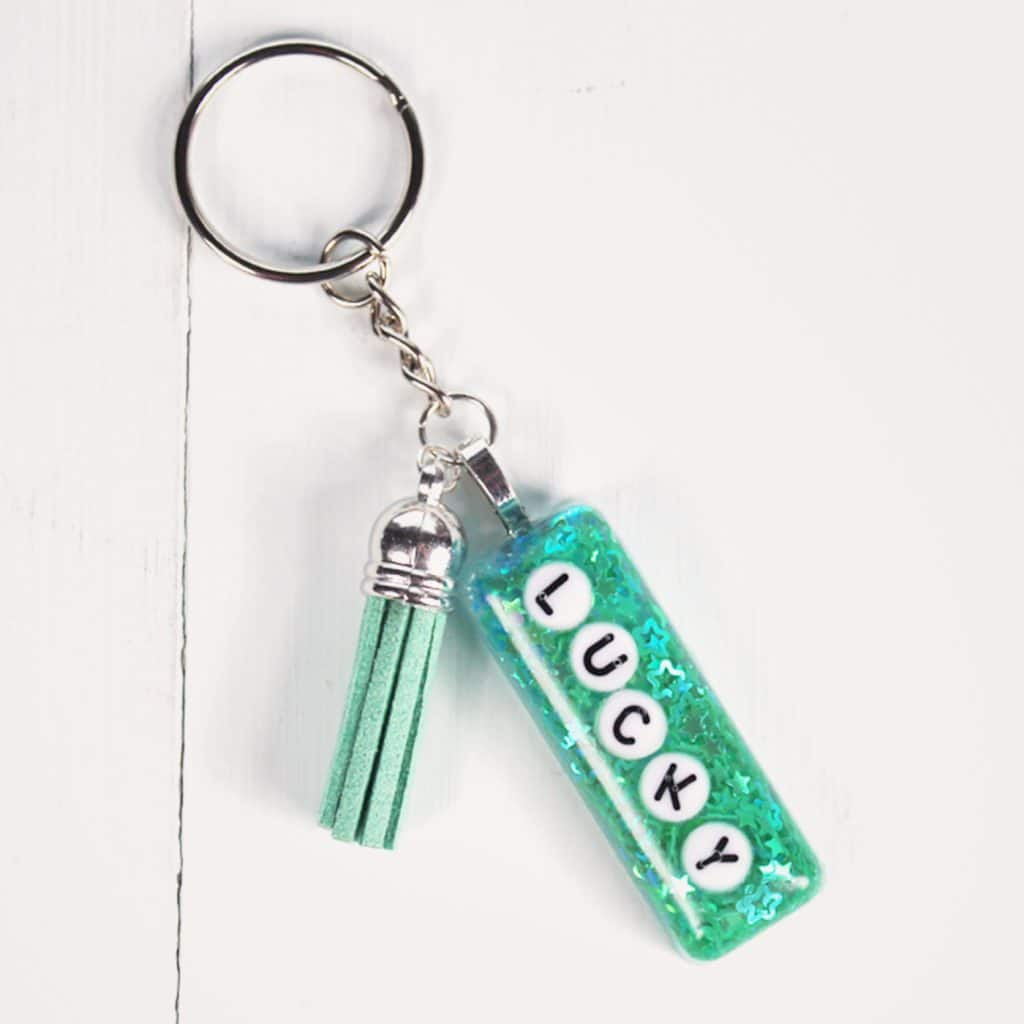
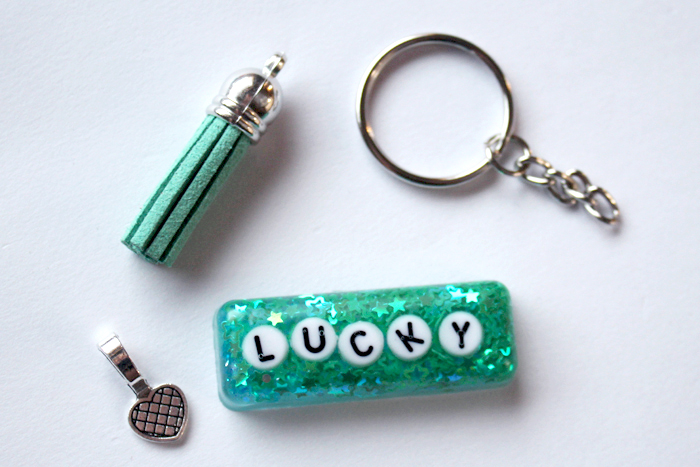
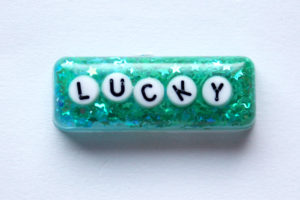
This cute and glittery DIY “Lucky” resin keychain is the perfect pinch-proof accessory for St. Patricks day!
DIY Lucky Glitter Resin Keychain with EasyCast Resin
Hi Resin Crafters, it’s Natalie from Doodlecraft sharing a lucky keychain DIY. This cute and glittery resin keychain is the perfect pinch-proof accessory for St. Patricks day, or year round to make those keys unique. Make a lucky glitter resin keychain quickly using Amazing Clear Cast Epoxy.
Do you do anything fun for St. Patrick’s day? Sometimes I make green food for my kids…and we wear green, but I don’t usually do a lot. I love this cute lucky keychain and it can be used year round, not just for the holiday.
Supplies Needed for Lucky Resin Keychain
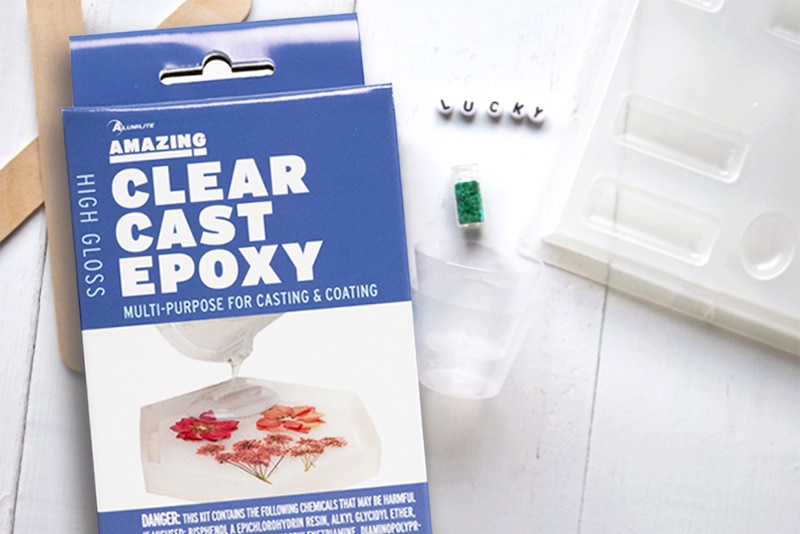
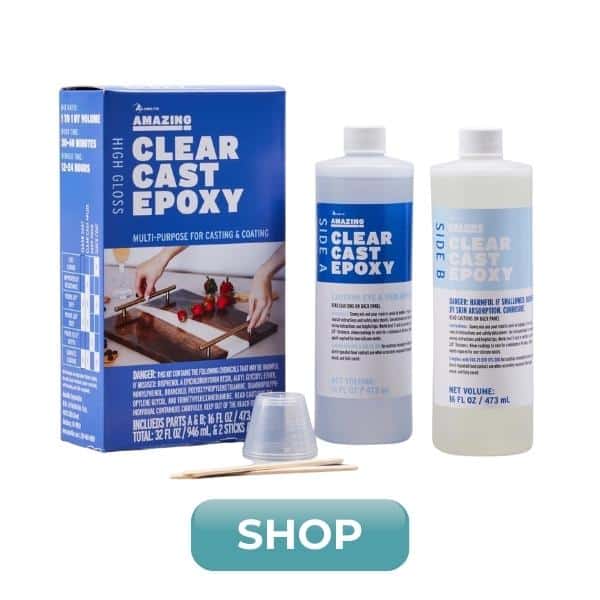
- Alumilite Amazing Clear Cast Epoxy
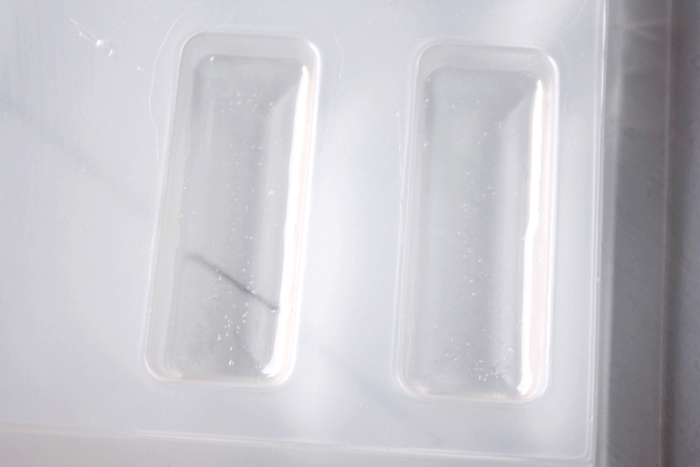
- Resin Mold
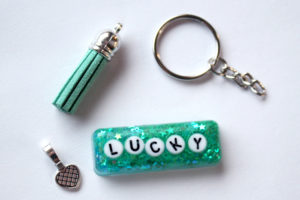
- Green Glitter
- LUCKY Alphabet Beads
- Tassel
- Keychain Hardware
- E6000 Glue
- Pendant Bail
- Jump Ring
- Jewelry Pliers
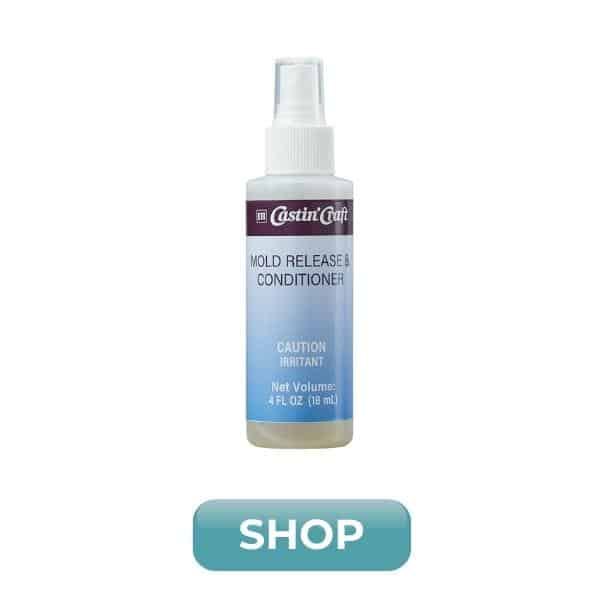
- Mold release
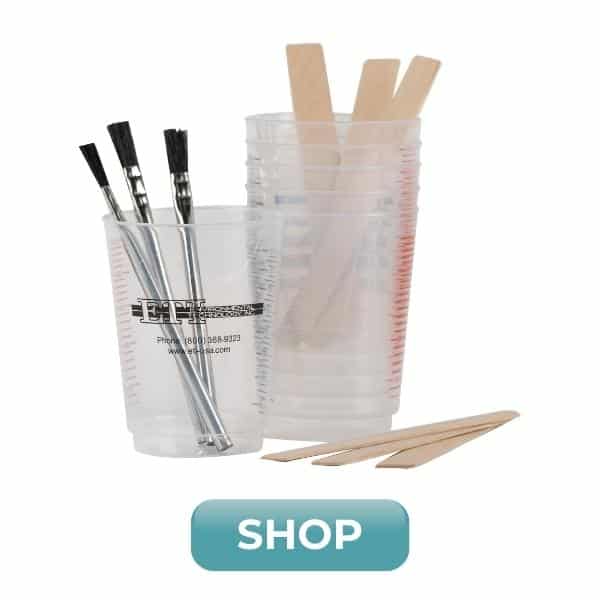
- Stirring Sticks, Mixing Cups, Disposable Gloves
Step 1: Mixing the epoxy
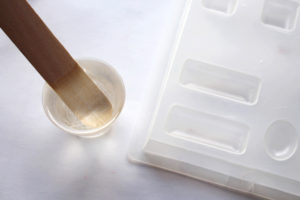
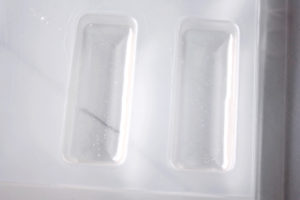
Before mixing, spray your mold with Mold Release spray. Read the Amazing Clear Cast directions to be sure mixing is done properly. Pour one part resin and one part hardener in the mixing cup and stir for 2 full minutes. Then pour into a second cup and use a second stick and stir again for 1 full minute or until there are no visible swirls.

Pour the mixed resin into the mold, but only to fill up half of the mold.
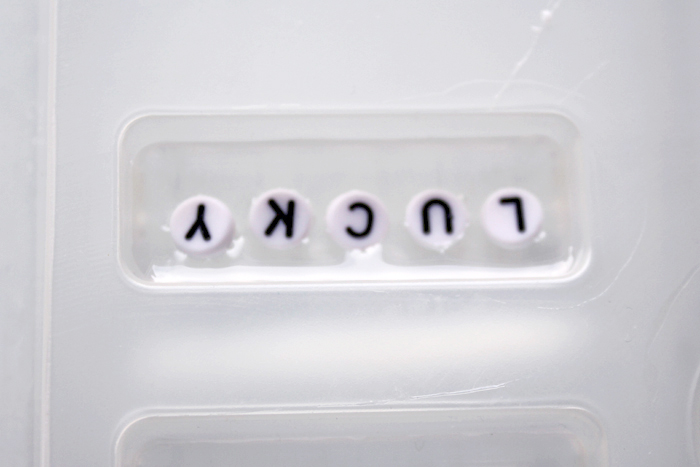
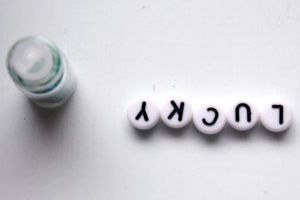
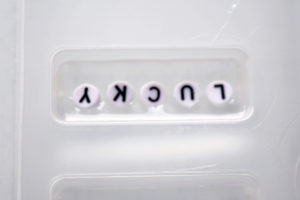
Let the resin gel for about one hour. Arrange the beads in the order they need to go into the resin…in this case, backwards and upside down.

Then place them in the gelled resin. Carefully lift up the mold and check the beads from the other side to make sure they read LUCKY in the correct way.
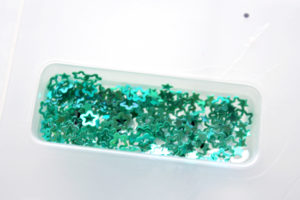
Then fill the top of the resin with sparkly green glitter. Now mix up a little more resin and fill the mold with clear resin. Then set it aside and let it dry and cure overnight.

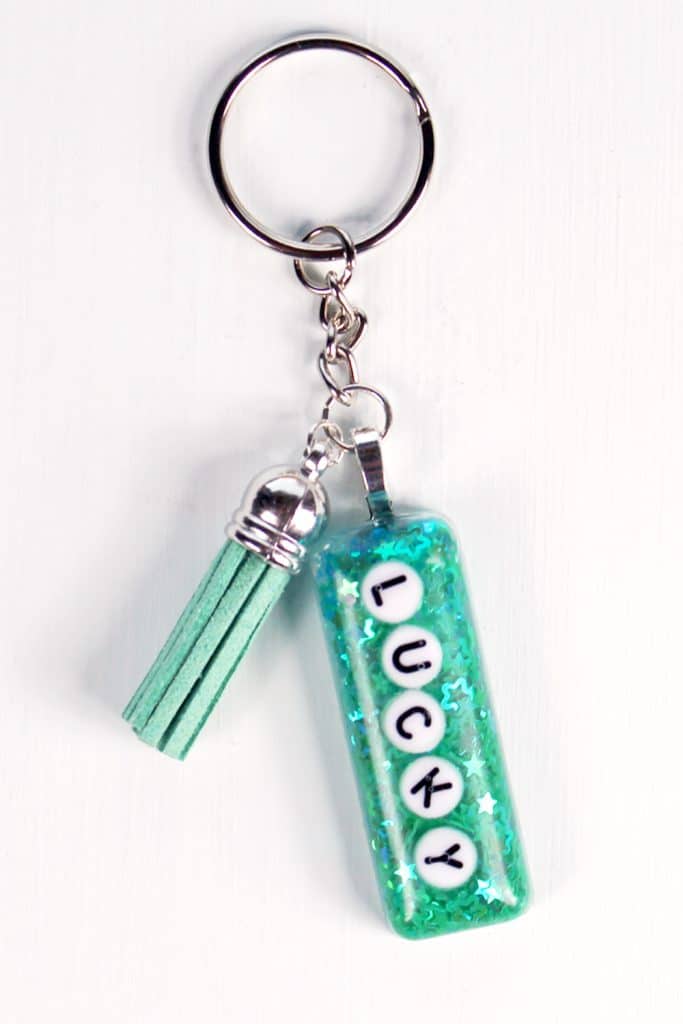
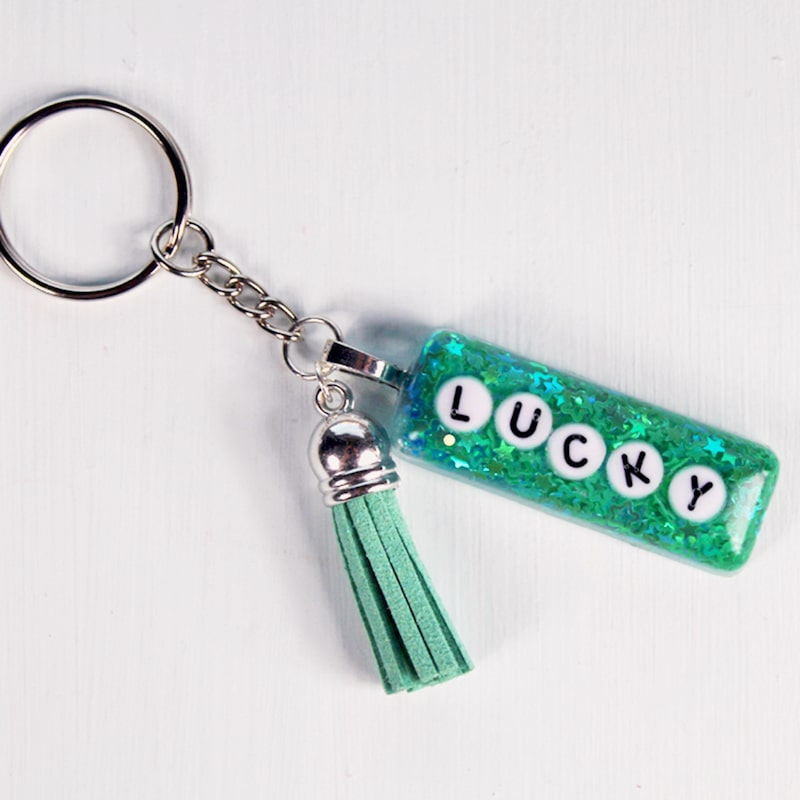
The next day, pop the resin out of the mold. It looks sparkly and lucky!

Step 2: Keychain Assembly
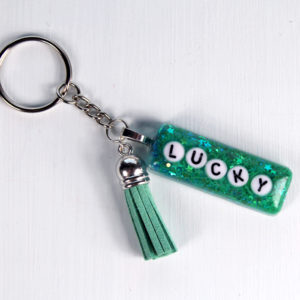
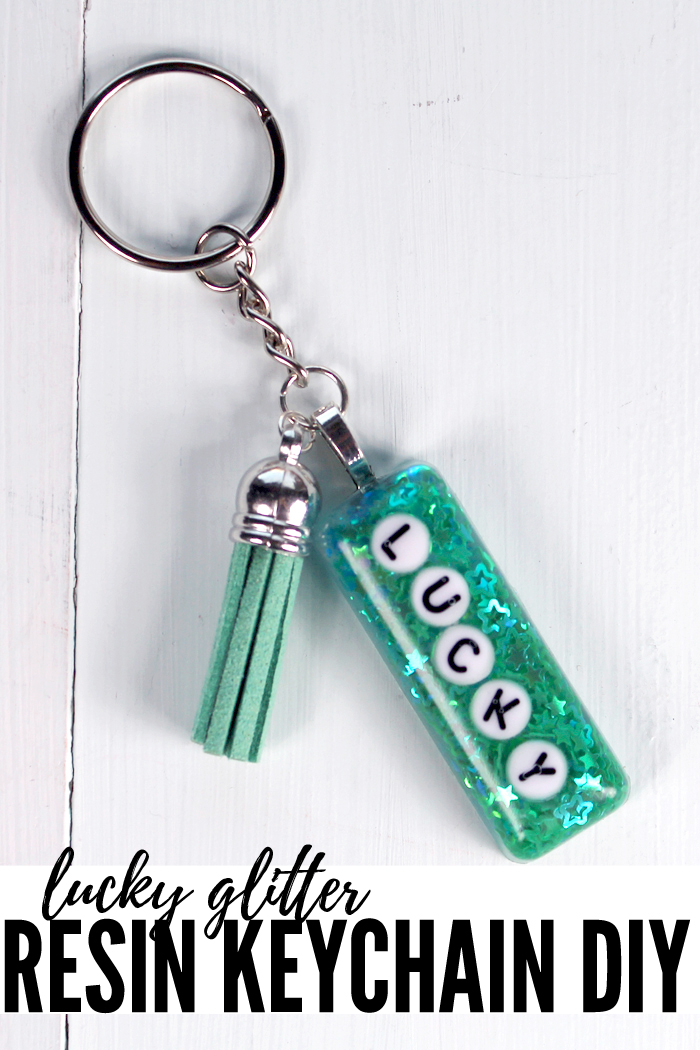
Now it’s time to assemble the lucky epoxy keychain. Use the E6000 or industrial adhesive to adhere the pendant bail on the backside of the resin and let it dry.
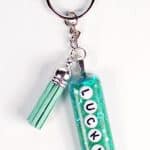
Then use jewelry pliers to open the jump ring and slide the tassel, resin and keychain hardware on, then close the jump ring.
That’s it! Now you have a LUCKY glitter resin keychain to keep you free of pinches on St. Paddy’s day…or hook on a bag as a zipper pull.
DIY Lucky Glitter Resin Keychain
Materials
- Alumilite Amazing Clear Cast Epoxy
- Resin mold
- Green glitter
- LUCKY alphabet beads
- Tassel
- Keychain hardware
- E6000 glue
- Pendant bail
- Jump ring
- Jewelry pliers
- Mold release
- Stirring sticks
- Mixing cups
- Nitrile gloves
- Safety glasses
Instructions
- Safety first! Before you start working with epoxy resin, make sure that you’re wearing safety glasses and nitrile gloves, cover your workspace or use a silicone mat in case of spills, and be sure to work in a well-ventilated area.
- Before mixing, spray your mold with Mold Release spray. Read the Amazing Clear Cast directions to be sure mixing is done properly.
- Pour one part resin and one part hardener in the mixing cup and stir for 2 full minutes. Then pour into a second cup and use a second stick and stir again for 1 full minute or until there are no visible swirls.
- Pour the mixed resin into the mold, but only to fill up half of the mold. Let the resin gel for about one hour.
- Arrange the beads in the order they need to go into the resin…in this case, backwards and upside down.
- Then place them in the gelled resin. Carefully lift up the mold and check the beads from the other side to make sure they read LUCKY in the correct way.
- Then fill the top of the resin with sparkly green glitter. Now mix up a little more resin and fill the mold with clear resin. Then set it aside and let it dry and cure overnight.
- The next day, pop the resin out of the mold. It looks sparkly and lucky!
- Now it's time to assemble the lucky epoxy keychain. Use the E6000 or industrial adhesive to adhere the pendant bail on the backside of the resin and let it dry.
- Then use jewelry pliers to open the jump ring and slide the tassel, resin and keychain hardware on, then close the jump ring.
- That's it! Now you have a LUCKY glitter resin keychain to keep you free of pinches on St. Paddy's day…or hook on a bag as a zipper pull.
Natalie Shaw is a Craft/DIY blogger at Doodlecraftblog.com. She loves sci-fi, fantasy and video game geekery and that comes out in many of her projects. She posts budget conscious DIY’s, crafts, jewelry, kid friendly projects, upcycled treasures and other fun on her blog 5 days a week.


So do you sell these Lucky keychains? Just checking . . .I love this, but no way would I have time to make it. It’s very cute!
She doesn’t, but it doesn’t take long to make! 🙂