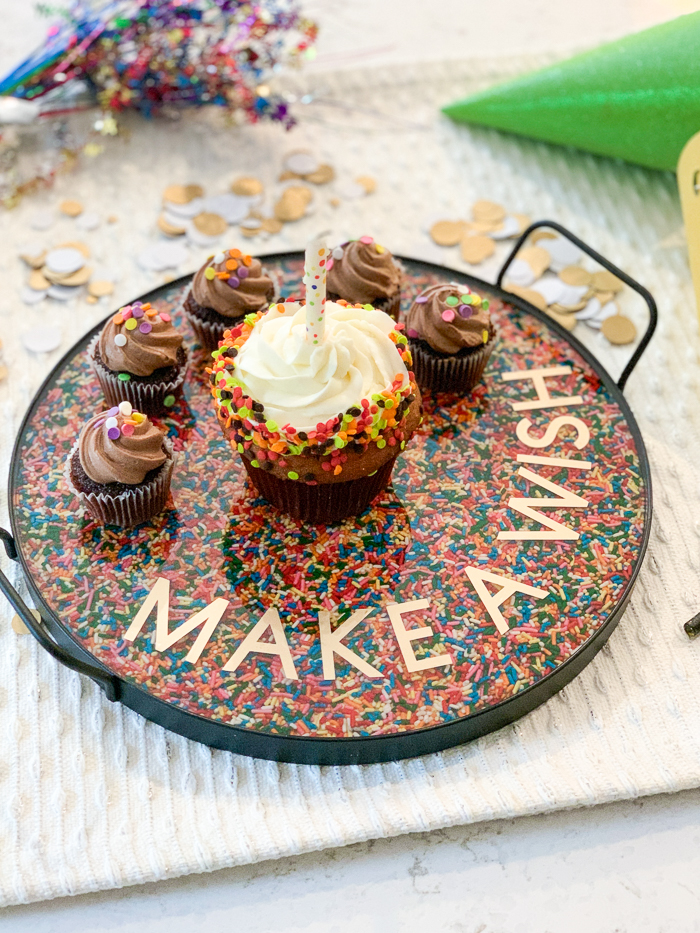
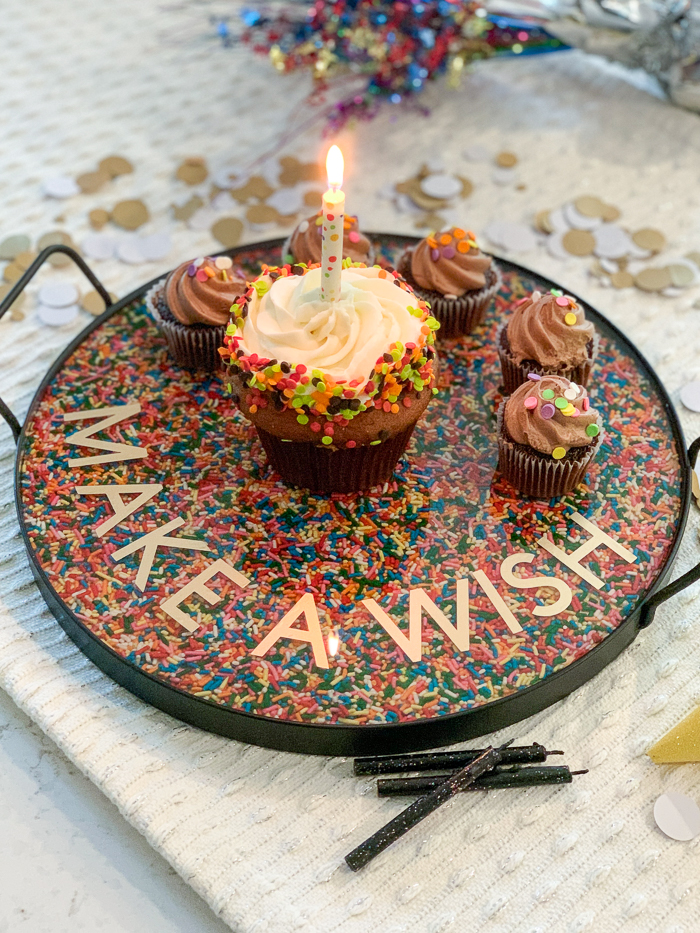
If you’re looking for a way to take your birthday celebrations to the next level, you will love this project! Learn how to make this DIY rainbow sprinkles resin tray, and serve those cakes and cupcakes in style.
Hi, Resin Crafters, it’s Bre from Average But Inspired, and I’m absolutely thrilled to share this colorful and festive resin tray project with you. It is guaranteed to become a family favorite and a cherished part of your birthday traditions. Something about seeing those sprinkles encased in the ultra-glossy resin is just magical!
Plus, the ETI products used to make it – EnviroTex Lite and Castin’Craft Resin Spray Finish – are simple enough for beginners to use. Because of that, this candy sprinkle tray is a great project for all resin crafter skill levels.
Supplies Needed to Make a DIY Rainbow Sprinkles Resin Tray
To make the project as shown in this tutorial, you’ll need the following supplies:
- ETI EnviroTex Lite pour-on high gloss resin
- ETI Castin’Craft Resin Spray Finish
- Mixing cups and stir sticks
- Rainbow sprinkles
- Tray (tip: select a tray that is one solid piece)
- Electronic cutting machine
- Permanent vinyl
- Protective gloves, protective eyewear, and table covering
How to Make a Rainbow Sprinkles Resin Tray
Pick the right tray for resin
Start by selecting a tray that will hold the sprinkles and the resin. I learned the hard way that a solid, one-piece tray works best for this.
The tray I chose was a piece of wood fastened to metal handles, and I realized that the EnviroTex Lite would likely run through the gaps between the wood and metal. To prevent this, I ran a line of hot glue through the gaps in an attempt to close them. This worked (for the most part), but a one-piece tray would have been better.
Seal the tray and rainbow sprinkles
If the tray you’re using is wood, make sure to seal it first. I used three light coats of ETI Castin’Craft Resin Spray Finish to seal the wood portion of the tray. Sealing the wood before adding resin ensures that no tannin bleed through from the wood will occur.

While I had the Castin’Craft Resin Spray Finish out, I also sealed the rainbow sprinkles. I spread out the sprinkles in a disposable aluminum pan and topcoated them with several light coats of Castin’Craft.
Sealing the sprinkles before topcoating with resin is important – if you don’t do this, their colors will likely bleed and ruin the look of the tray you’re working hard to create! (Check out my video on Castin’Craft Resin Spray and it’s awesome uses to learn more about this great product!)
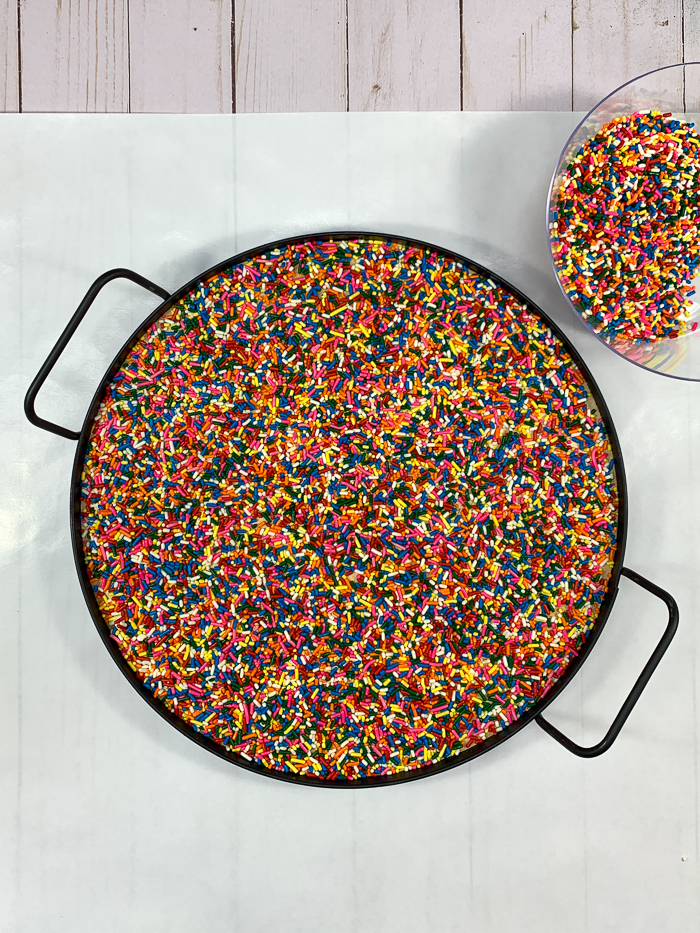
Spread the sprinkles in the tray
Once the sprinkles dried, the fun began. I spread a layer of sprinkles over the entire bottom of the tray, making sure to break apart any clumps that had formed and to get the sprinkles as level as possible.
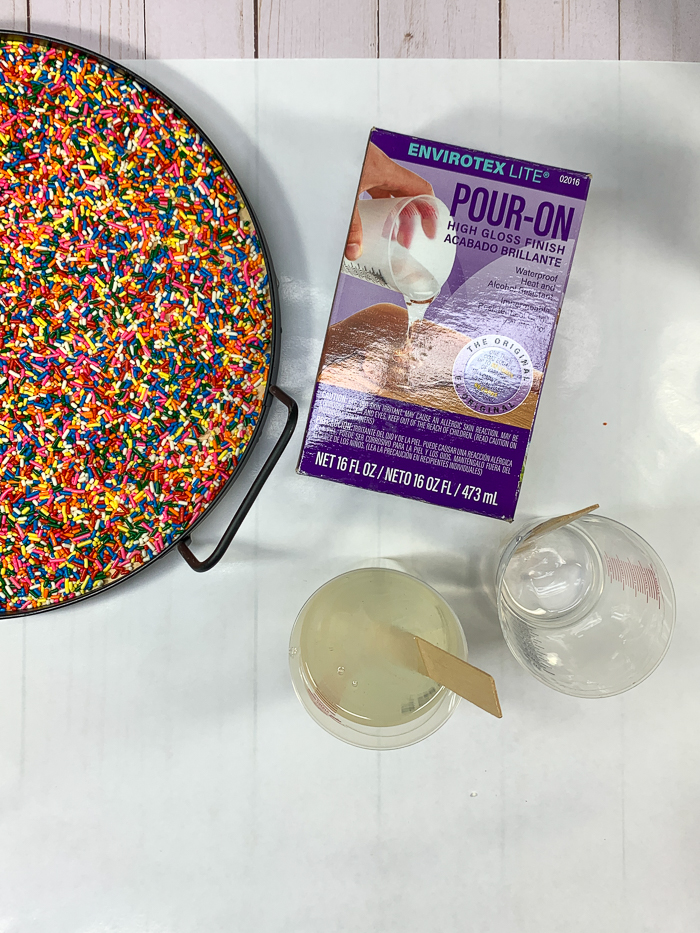
Mix and apply the first coat of EnviroTex Lite resin
Next, I mixed the first layer of EnviroTex Lite resin by combining 4 ounces of hardener to 4 ounces of resin (8 ounces total), and mixing for two minutes. I immediately poured that resin into a new cup, and stirred for another minute with a fresh stirring stick. (Note: depending on the size of tray used, the amount of resin needed may be different for your project.)
I poured the mixed EnviroTex Lite over the sprinkles in the tray, and used a small piece of cardstock to spread the resin onto areas that it wasn’t going naturally.

I let it sit for several minutes and then went over the entire surface with a heat gun to pop bubbles that had risen. If you don’t have a heat gun, you can pop bubbles by gently blowing on them with a straw.

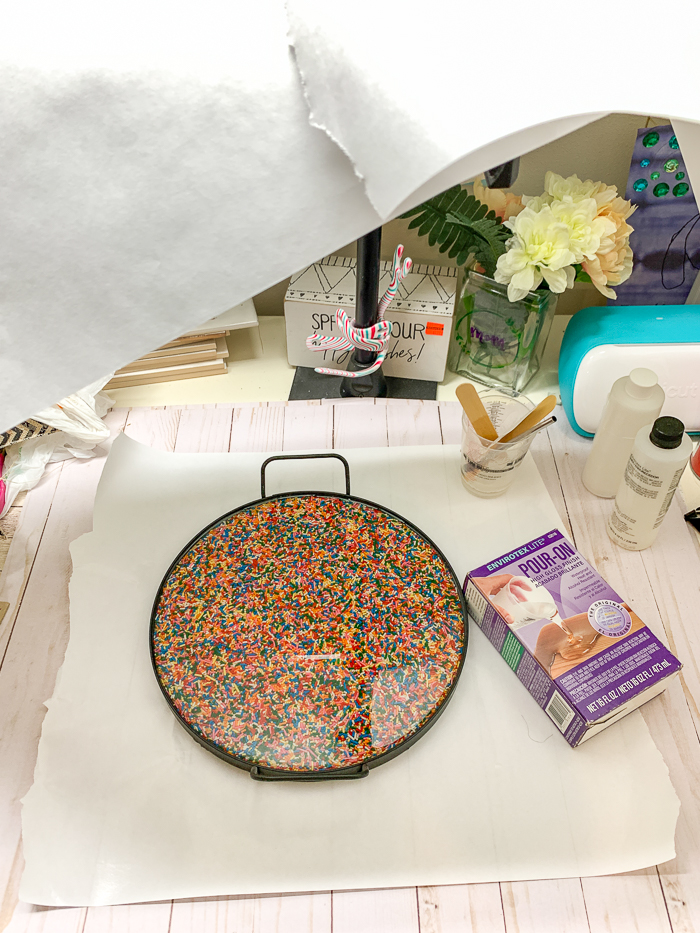
I then covered the tray to protect it from dust and debris, and I let it sit for 24 hours.
Mix and apply the second coat of EnviroTex Lite resin
The next day I noticed that some resin had seeped out of the bottom of the tray (where my hot glue reinforcements failed), and I was very glad that I’d protected the work surface below the tray. Luckily this didn’t cause much of an issue at all, but again, a one-piece tray would have been better here.
I mixed up another batch of EnviroTex Lite in the same manner as above, but this time only mixed seven ounces total.
I poured the resin over the tray, popped the bubbles, and let it sit covered again.
Add vinyl lettering to the tray
This time the resin coating over the sprinkles was totally smooth – no more bumps! So, two days later, I cut the words “MAKE A WISH” on permanent vinyl with my electronic cutting machine and added that right on top of the hardened resin.
If you don’t have a cutting machine, you can get the same look with letter stickers from a craft store!
Mix and apply the third and final coat of EnviroTex Lite resin
In order to protect the vinyl lettering and give a totally glossy and smooth look, I mixed a final batch of six ounces of EnviroTex Lite and poured that over the tray. Again, I spread it out with card stock, popped the bubbles with my heat gun, and set it aside to cure fully for three days.

After this time, the resin was totally cured and hard. This means it is food safe, as EnviroTex Lite is FDA complaint when accurately measured, thoroughly mixed, and fully cured. Yet another reason to love this product!
Can’t you imagine blowing out the candles with your cake sitting atop a bed of candy sprinkles? You’ll love making this rainbow sprinkle resin tray and using it for years to come!
Bre is a content creator at Average But Inspired. She strives to inspire creative action in others by providing written and video DIY and craft tutorials, furniture upcycle projects, and home decor ideas. She wants others to feel empowered to tackle DIY, regardless of skill level or experience. When she’s not making something, you can find her watching Bravo TV with her labradoodle, Jasper.


This is awesome. A project like this is waiting for me, but I am still scared to start.
Don’t be scared! You can totally do this. I’m relatively new to resin crafting, so if I can do it I know you can!
Hi Bre this looks fabulous! I’m wondering how long the sprinkles will last in the resin before breaking down? Or is there a way to coat the sprinkles? TIA
Hi, Kathy – thank you! So, these sprinkles should not ever break down! I did seal them with the Castin’ Craft Spray Sealer (linked in the supplies section). That really keeps the colors from running. But, the resin itself preserves those sprinkles and they will be good in there forever! Thank you so much for your question! Bre.