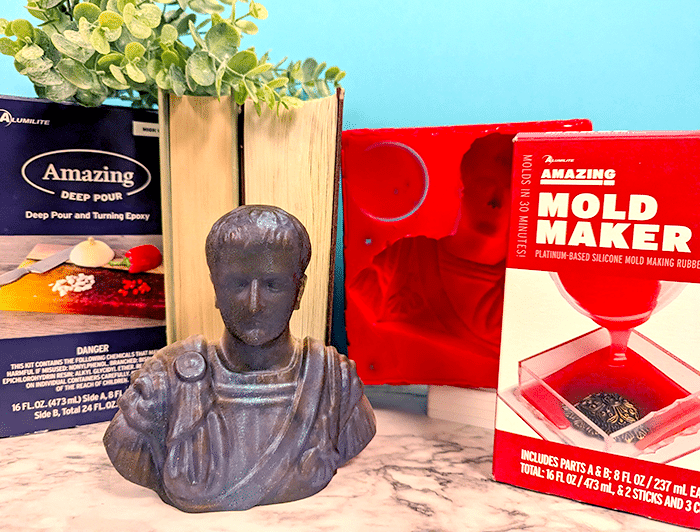
Combine resin and tech! I used Amazing Mold Maker with a 3D printed statue shape to make a really cool bookend.
This is such a fun project! Let’s start with the supplies, and then I’ll explain the process.
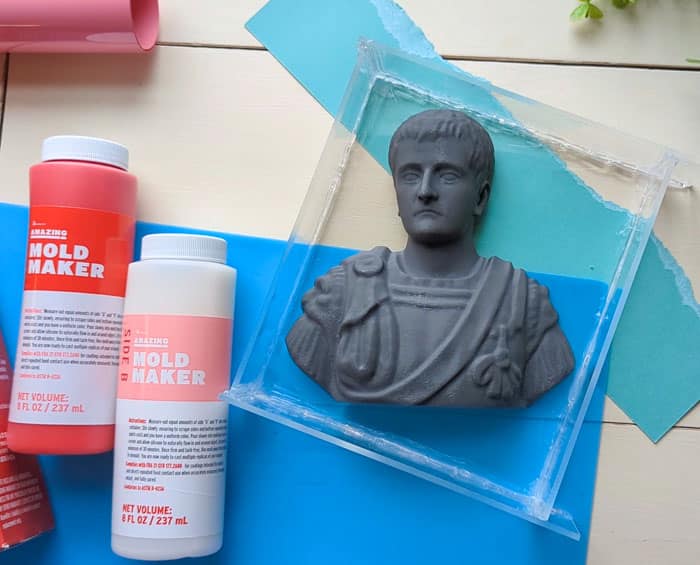
- Amazing Mold Maker
- Tray for making the mold (I hot glued some pieces of acrylic together to fit my piece, but you can use Alumilite Molding & Casting Trays for more shallow pieces to keep it super simple!)
- 3D printed statue, head, or other object
- Color Creator mica powder and Alcohol Ink
- Amazing Deep Pour Epoxy
- Mixing cups and stir sticks


Make a Mold with Silicone Amazing Mold Maker
If this your first time making your own silicone mold, I highly recommend molding something that has a flat back or bottom. It will be much easier to make your mold without bubbles, and use the mold later. You can read more about making your own molds here.
Use a mold tray or make your own mold box with acrylic and hot glue. Making a size just larger than your object will mean less silicone is wasted in making the mold. But you don’t want it to touch on the sides or you will create a hole in the mold.
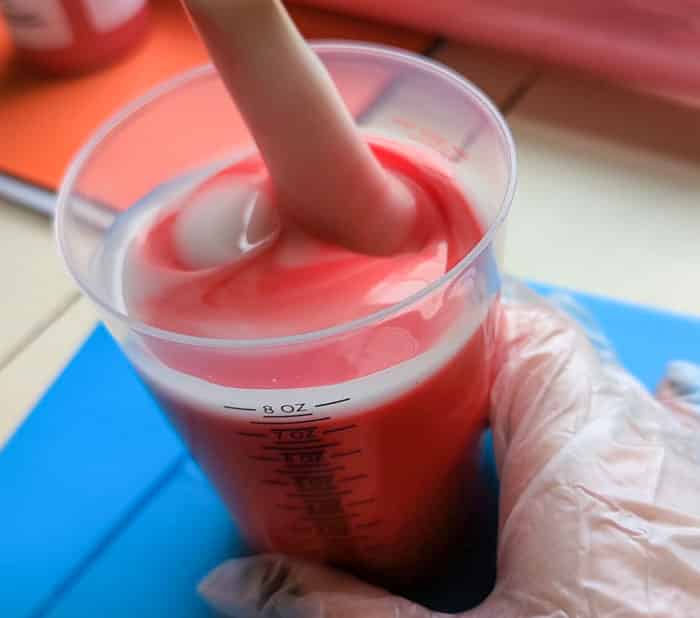
Mix equal parts A and B (they are red and white) in a mixing cup. Stir for 60 to 90 seconds, until the color is completely uniform and there are no more white streaks.
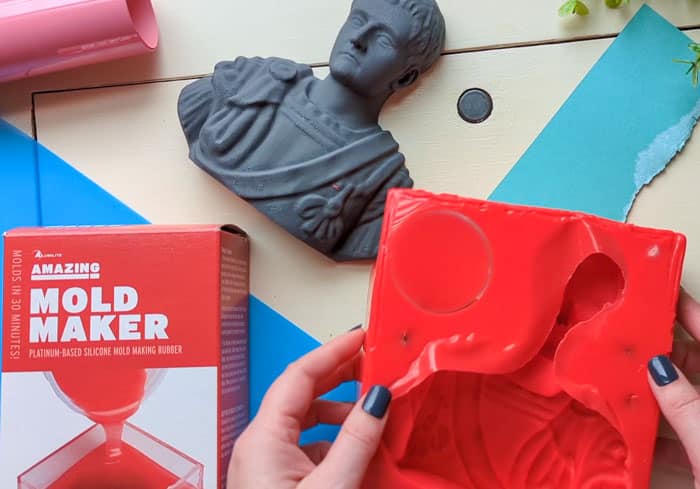
Place the object (my statue head) in the mold box and start pouring the silicone mixture around it. It’s pretty runny, so it has no problems getting in and around the small details.
After mixing, the silicone has a work time of about 6-8 minutes before it starts setting up. I had to do a bit of quick thinking when my box of silicone didn’t quite fill up my whole mold box I’d made. I pressed an empty mixing cup in one corner where there was some space, and that volume raised the surface to cover the statue. Phew!

The object can be removed in 30 minutes, and then the mold will continue to cure for the next 24 hours. I popped one side off of the acrylic box and wiggled the silicone out. I used scissors to carefully cut away all the super thin silicone that seeped under the statue.
Pro tip: If you do end up with any tiny holes, they can be patched using a small amount of mixed Amazing Mold Putty. I know from experience 🙂
After fully curing, I poured water into the mold and measured it so I would know how much resin to mix. A lint free cloth and hair dryer should be used to remove any and all moisture before adding resin.
Resin Statue Head with Deep Pour Epoxy
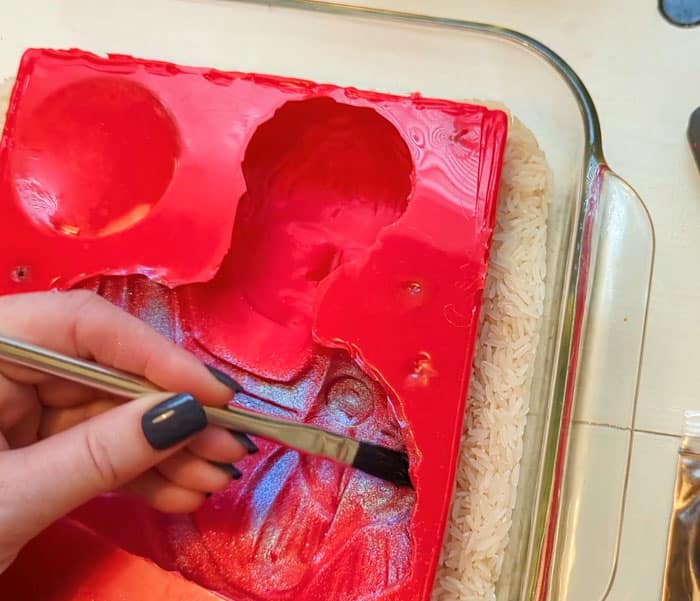
I used a brush to spread around some purple chameleon mica powder. Then I mixed up Alumilite Deep Pour. It is a 2:1 ratio of A:B so I used 7 ounces of A and 3.5 ounces of B.
I have the mold resting in a pan of rice so I could get it totally level.
Stir for 2-3 minutes until any cloudiness is gone. Then mix 2 more minutes.
At this point, add in any colorants. I used about 15 drops total of alcohol ink in Mahogany, and 1/2 teaspoon of copper mica powder.
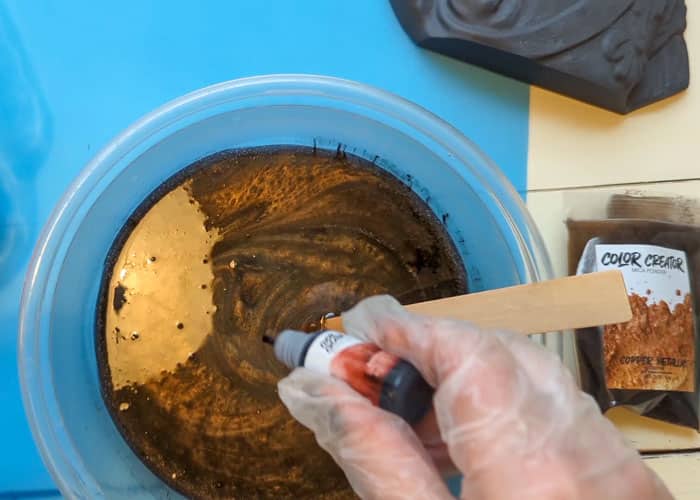
Stir until evenly mixed and then pour gently into the mold.
Wait at least 2 full days for this type of resin to cure and demold.
Look at that shimmer! I was really pleased with how well the silicone mold captured all of the tiny details of the 3D print.
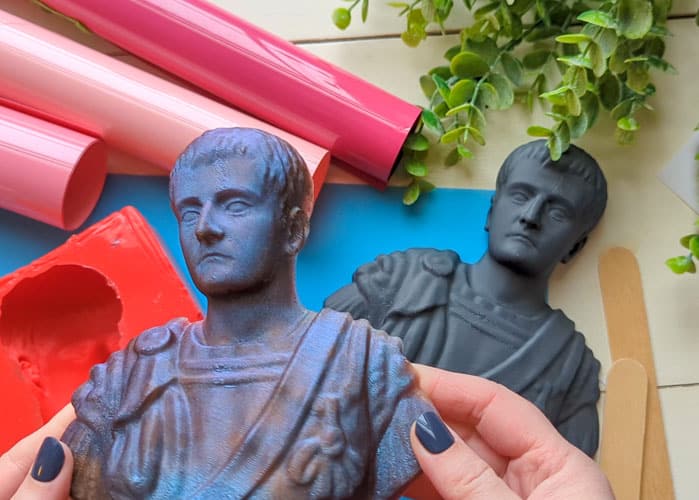
This resin statue has a couple of uses at this point. It is sturdy enough to act as a bookend for lightweight books. Or it can stand alone as decoration. It could also be super glued to a piece of wood to act as a more substantial book end.
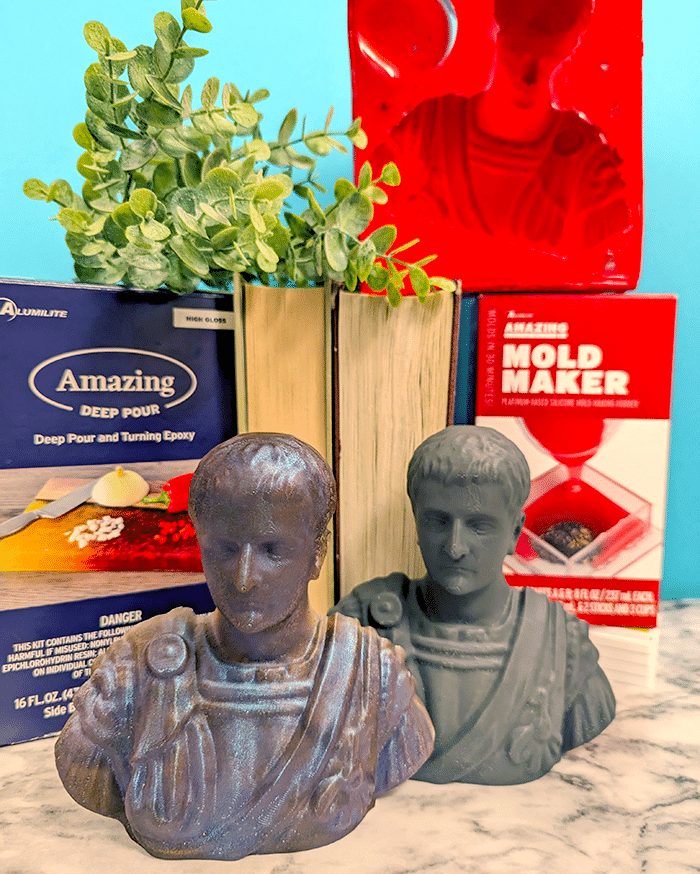
Is your mind turning with all kinds of molds you can make with Amazing Mold Maker now? Want to have something 3D printed but don’t have your own printer? Check around online for people selling prints, or see if you have a local maker space with a 3D printer.
I hope you learned something new – leave a comment if you have any questions about this resin statue made with a 3D print and Amazing Mold Maker.
Stephanie is a crafty wife and mom living in the Pacific Northwest. She shares her creative ideas -along with a bit of “making it up as she goes” – on her blog, Crafting in the Rain.


Leave a Reply