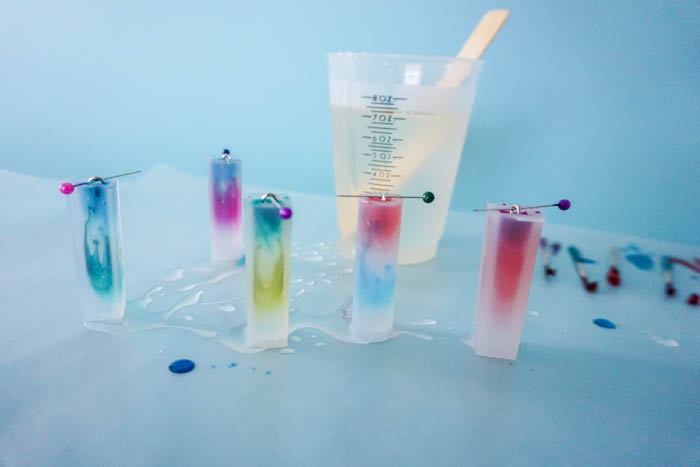
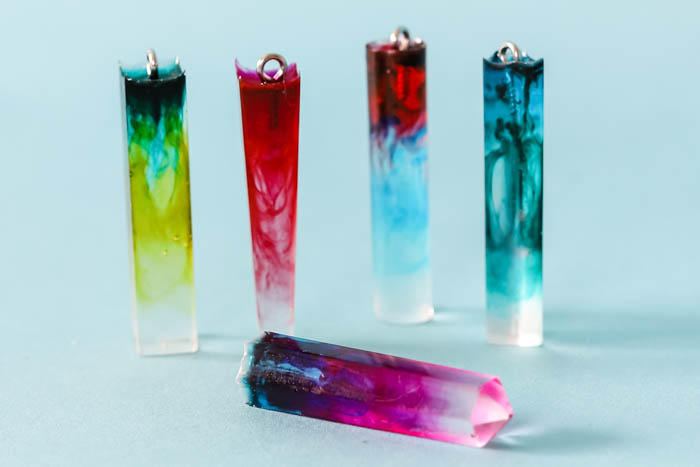
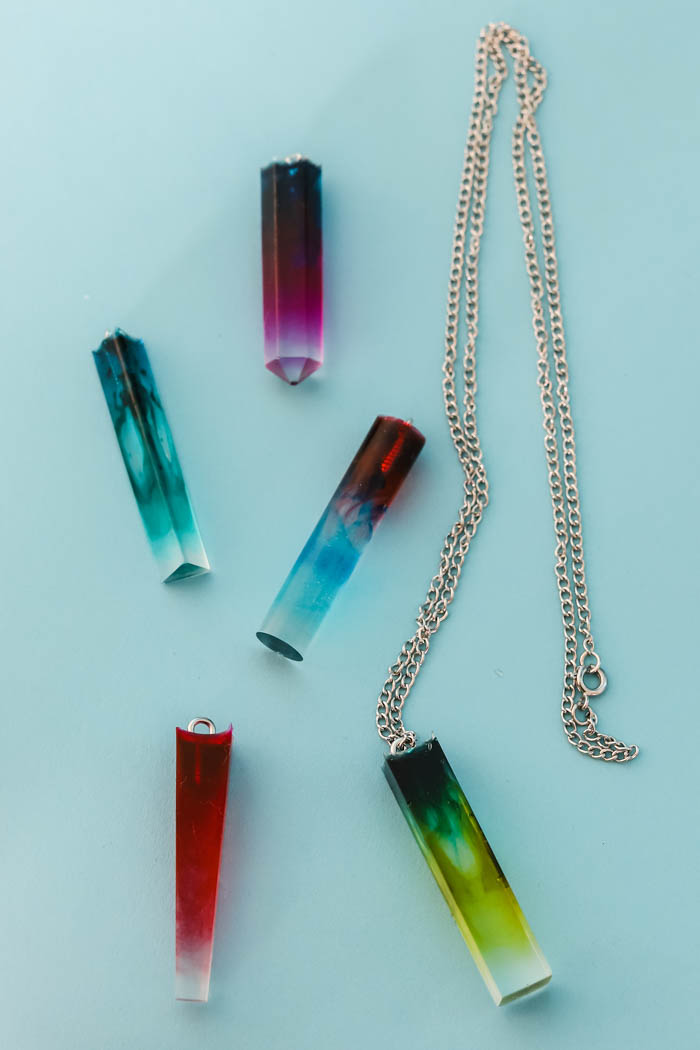
Hey Resin Crafters! Amber Oliver here with another great resin craft. Today I’m sharing another beautiful resin jewelry project! My very first resin craft was my resin dipped earrings, and I also created some pretty cool statement earrings out of resin! For this project, I started with EasyCast Clear Casting Epoxy and made some amazing designs using alcohol ink. Silicon tubes made for the perfect pendants and mixing the resin with alcohol ink was a lot of fun – it’s exciting to see how your designs turn out!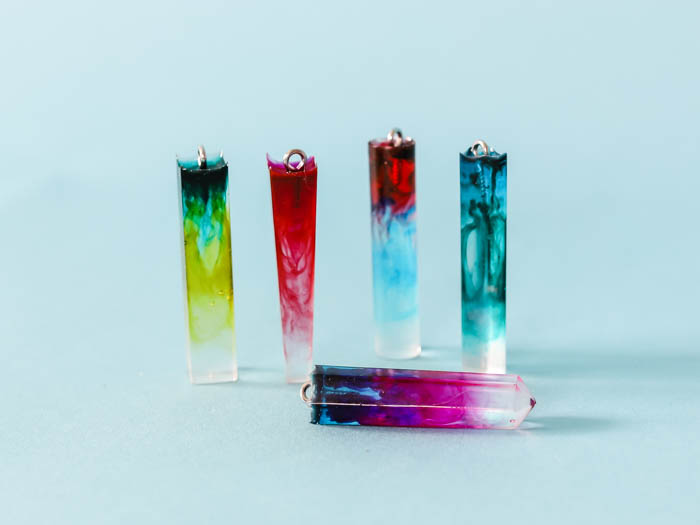
SUPPLIES NEEDED FOR RESIN NECKLACE PENDANTS:
- EasyCast Clear Casting Epoxy
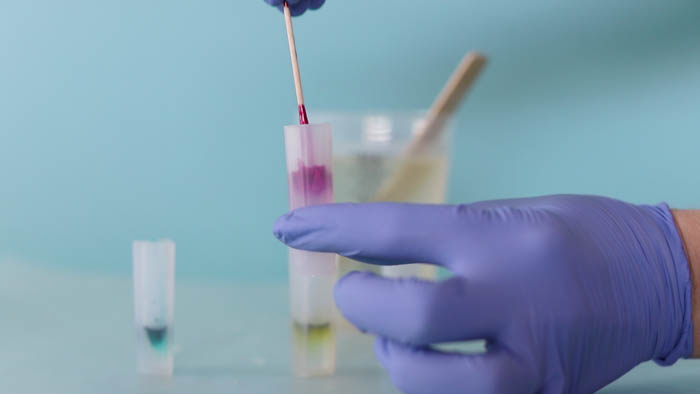
- Alcohol Inks in the colors of your choice
- Necklace Eye Hooks
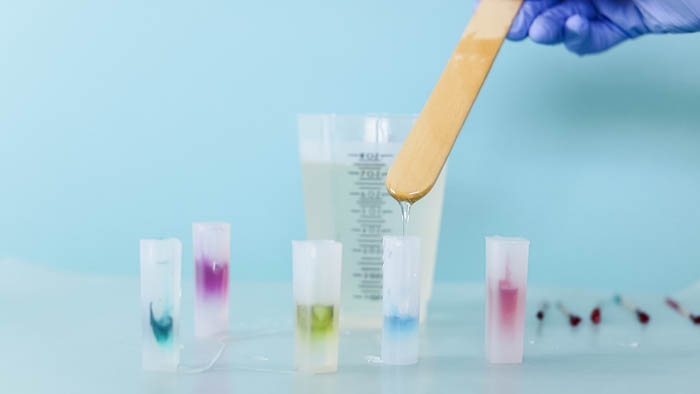
- Silicon Tube Molds
- Toothpicks
- Mixing Cups
- Stir Sticks
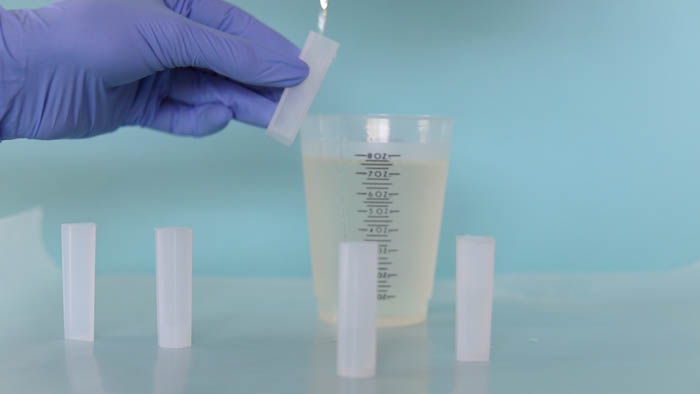
Step 1: First, prepare the EasyCast Clear Casting Epoxy. This is a multi-step process so don’t start mixing until you are ready to do the whole process from beginning to end!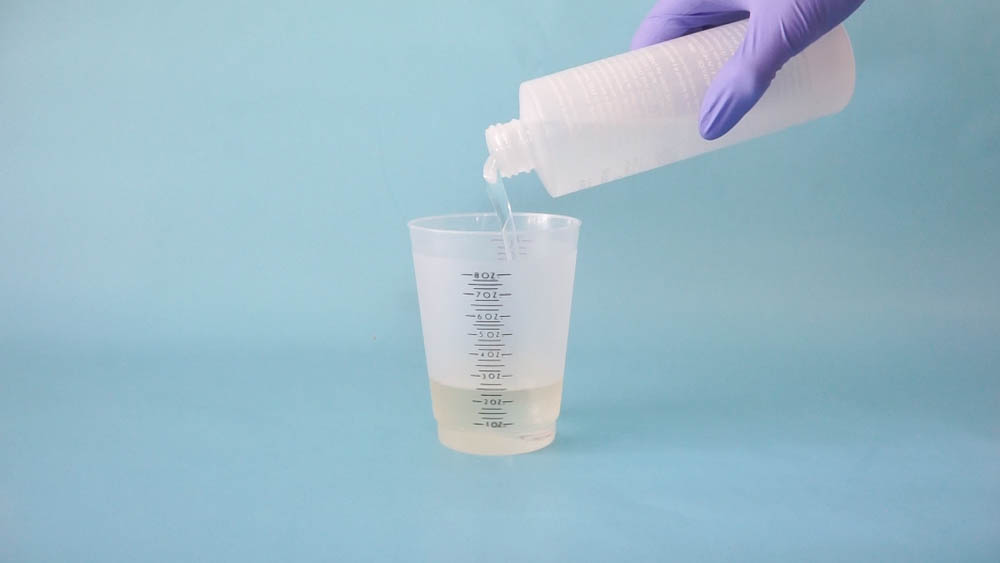 Start by mixing EQUAL parts of the Hardener and the Resin.
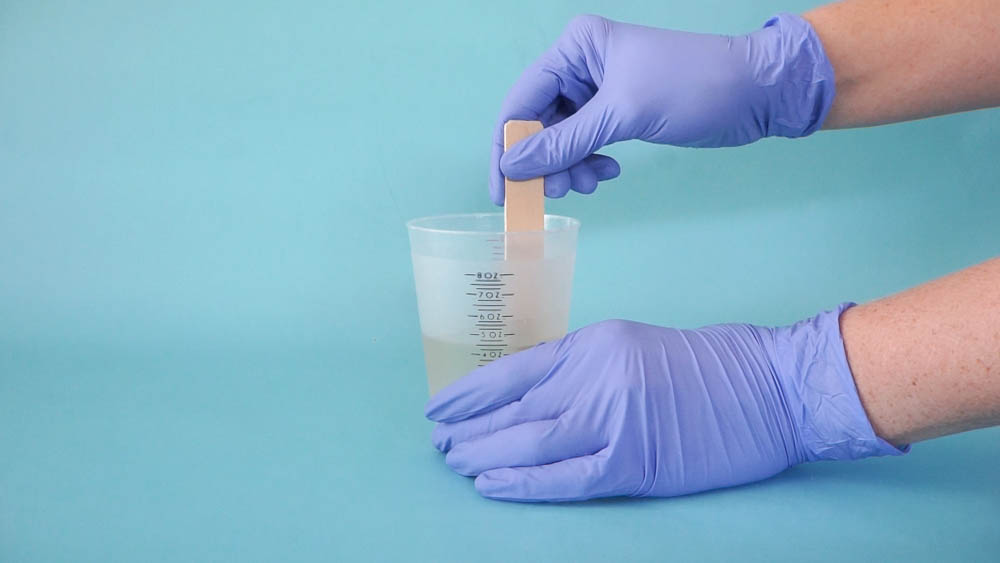
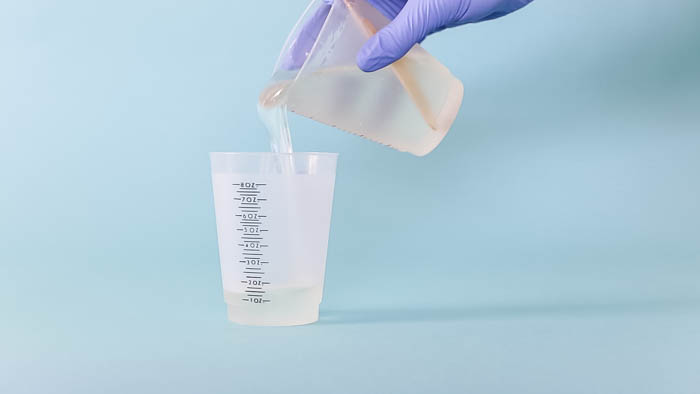
Stir for two minutes (be sure to scrape the bottoms and sides) then pour from the first cup into a second and mix with a new stir stick for another minute.
Amber Oliver is a DIY and lifestyle blogger who shares easy DIY tutorials, colorful crafts, and more on her blog, Amber Oliver. She’s a native Oklahoman living “in the loop” in Houston, TX with her husband and dog. She’s an avid reader, world traveler, loves Tex Mex food, and creating everything from woodworking projects to websites. She focuses on budget friendly projects for the home and empowering women to try new things.


These are so cool, Amber. I already have these molds. I may have to try these. TY for the clear step by step instructions.
You’re welcome! Thanks for reading 🙂 -Amber
I have trouble getting the resin out of the mold when it’s a long pendant. Any tricks? I was thinking of coconut oil ….. ????♀️
I soak them is soapy water first then take a Popsicle stick to gently push in at the sides . Works great for me.
Great tip!!