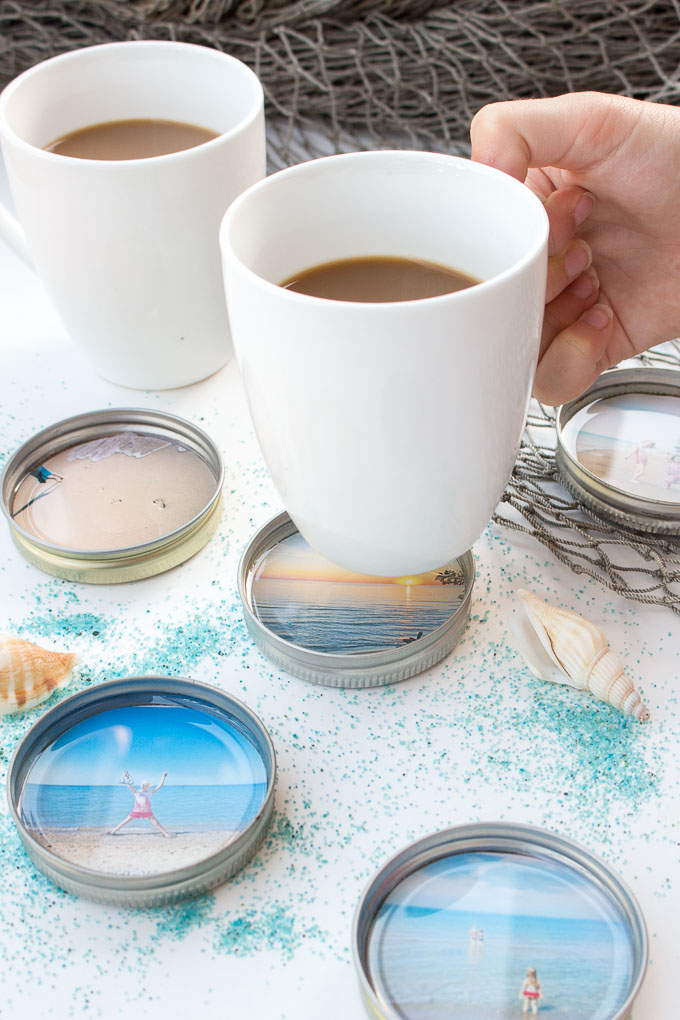
I’m sure I’m not the only one who rarely prints out photos anymore! I take a ton of them, especially on my phone, yet they rarely see the light of day. These simple photo coasters using Mason jar lids and EnviroTex Lite Pour-On are a great way to keep those summer vacation memories in mind, year-round.
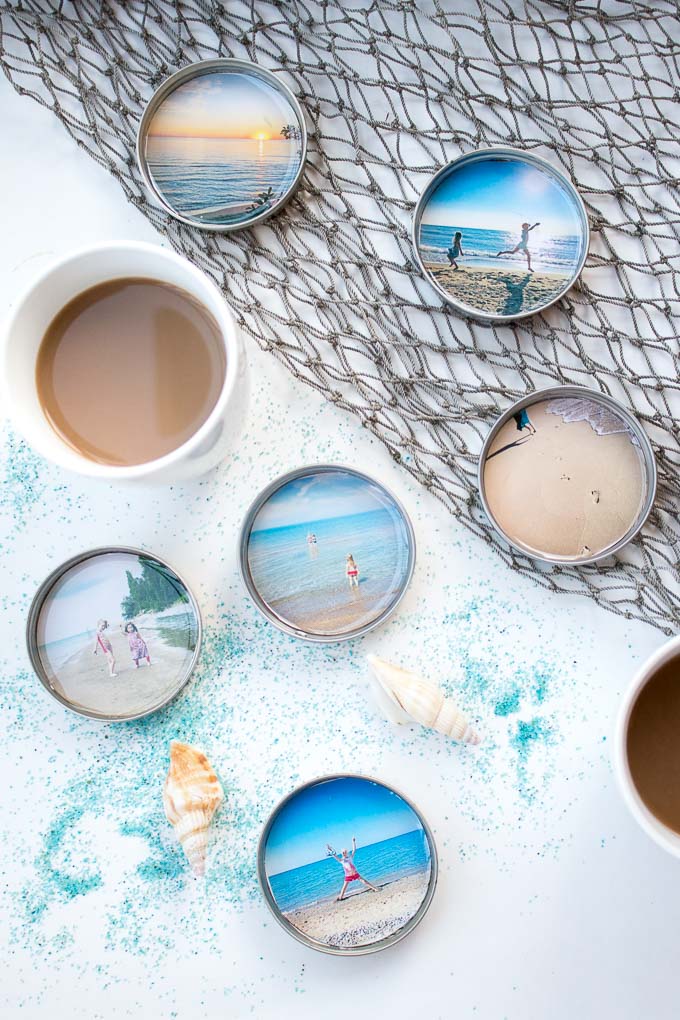
DIY Photo Coasters with Resin
Hi friends! This is Jane from Sustain My Craft Habit, a DIY, craft and home decor blog I write with my sister Sonja. We’re always on the search for creative ways to decorate our homes and resin makes it easy to make unique and inexpensive decor and gifts. For example, at Christmas time we made glittering photo ornaments with the kids’ school photos as gifts for their grandparents. And recently we created hand-lettered wood slice key chains with resin which made great end-of-year gifts for the kids’ teachers!
After spotting these wedding themed DIY photo mason jar coasters I was inspired to make my own set as a keepsake of our summer vacation at the beach. I’m fortunate to be able to spend much of our summers at our family cottage near the shores of Lake Huron, Ontario. Looking forward to those precious warm weeks on the lake is what helps us get through our long Canadian winters! And now we’ll have these drink coasters to keep the memories fresh.
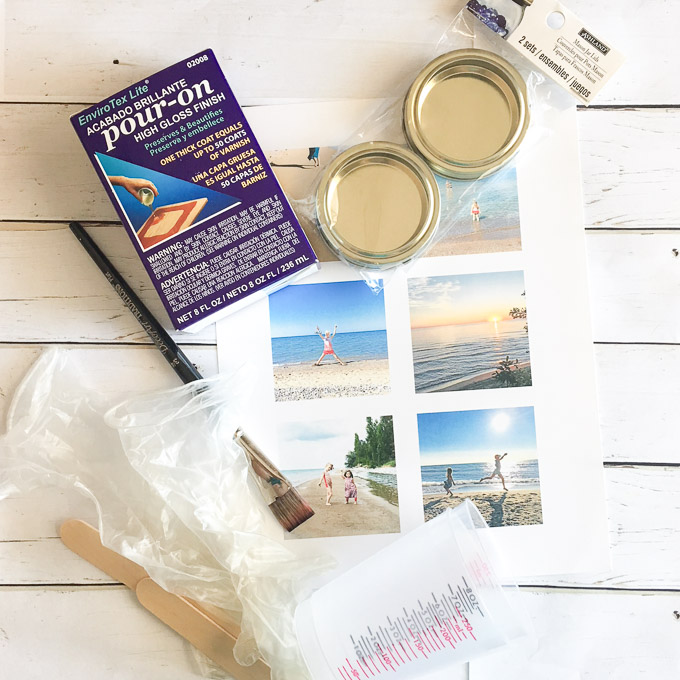
Materials Needed for these Photo Coasters with Resin
- Photos of your choice, printed to size on glossy photo paper
- Scissors
- 6 Gold Art Minds lids
- Ultra Seal Multi-Purpose Sealer / Glue (or any clear drying craft glue)
- Paintbrush
- Envirotex Lite Pour-On
- Mixing Cups
- Stirring Sticks
- Straw or kitchen torch, disposable work surface, gloves

How to Make Resin Coated Photo Coasters
Read all package instructions. Use gloves and work in a well-ventilated area on a surface protected with plastic or newspaper.
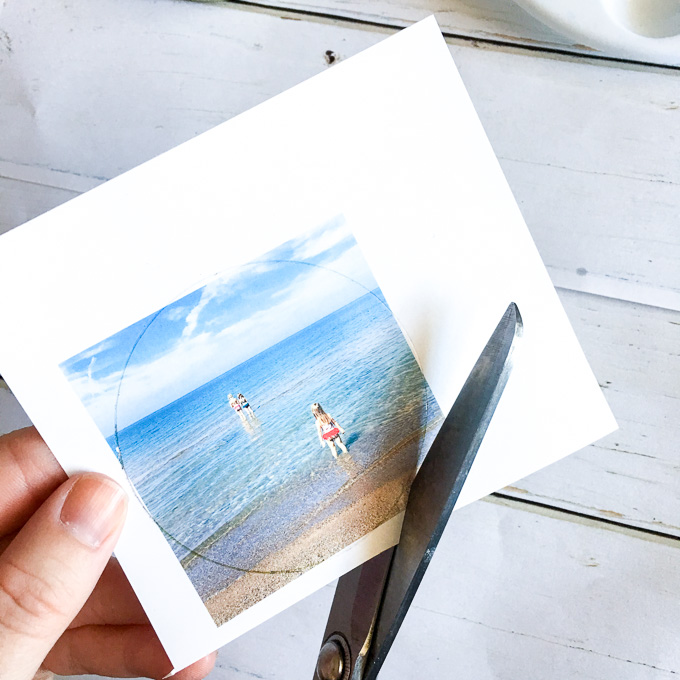
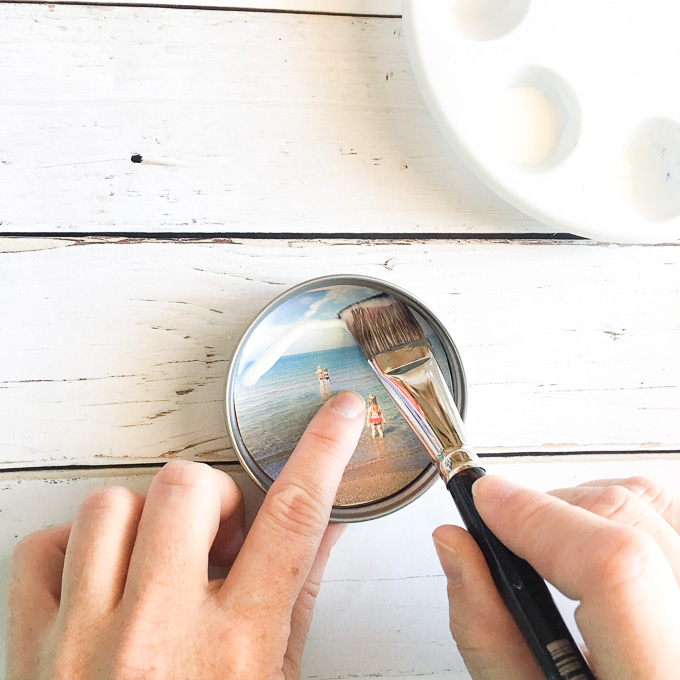
Preparing the Photos and Lids
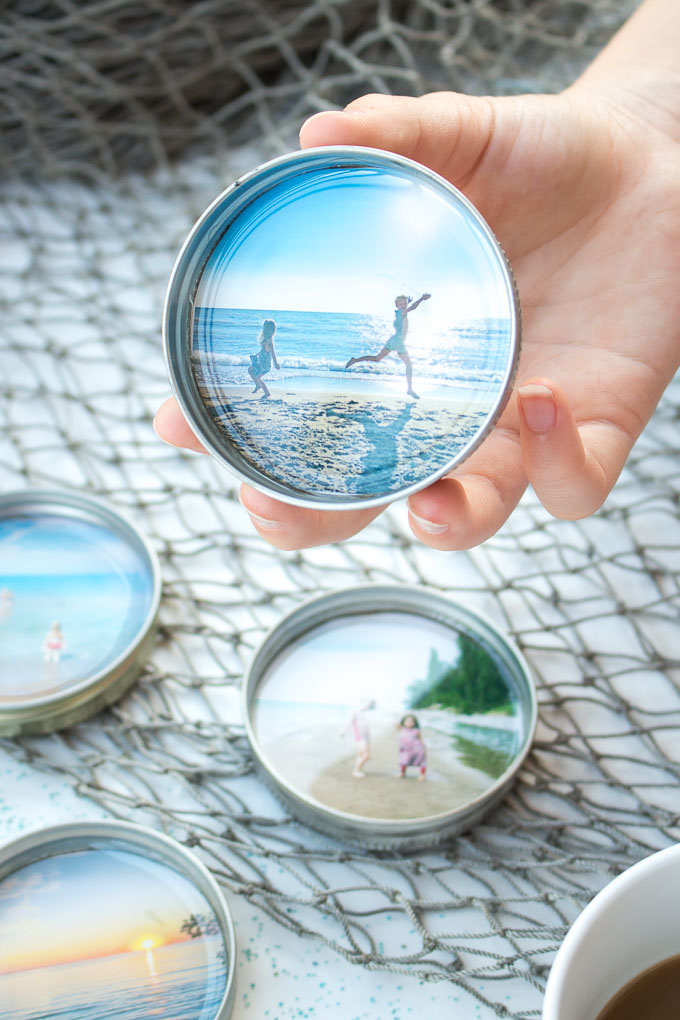
Print out your photos such that the shortest side is just larger than the lid insert. Use the lid insert to trace out the images.

Cut them out with sharp scissors.
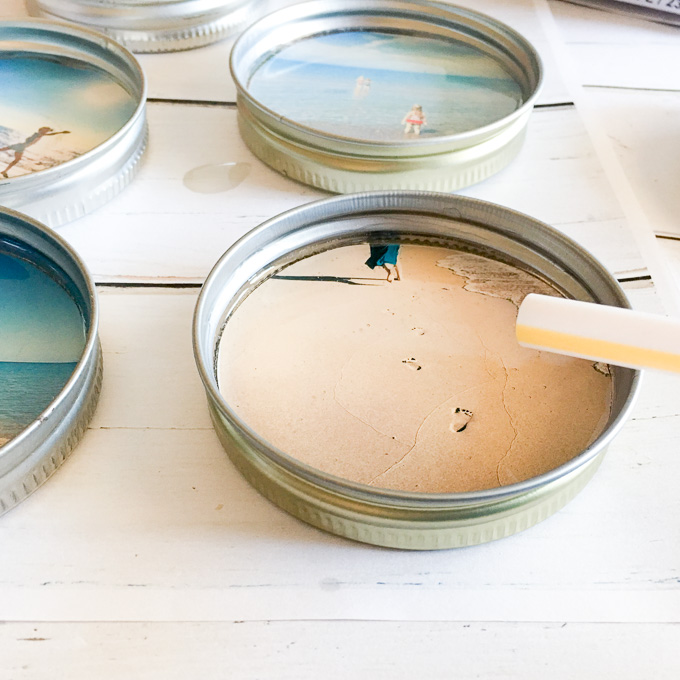
Glue the lid insert to the rim. This is important to prevent the resin from seeping out. This step isn’t necessary if you use a one piece lid.
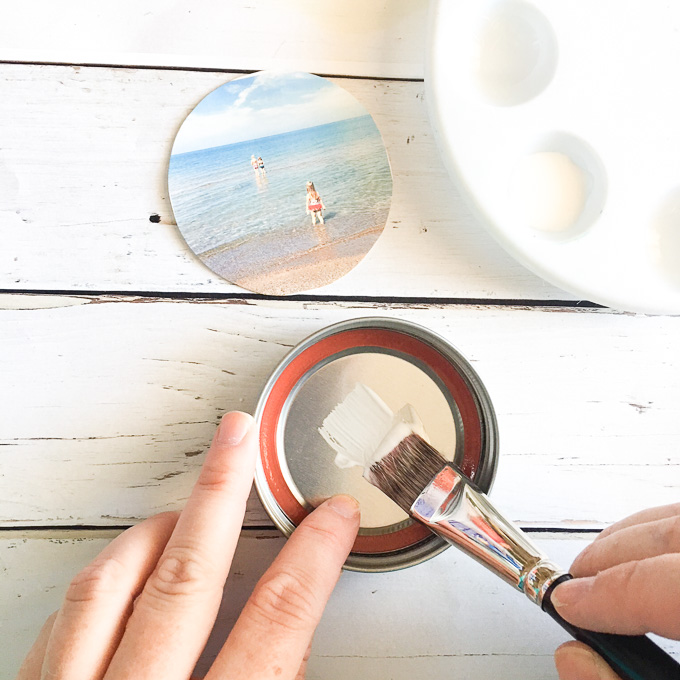
Glue the image into the lid.
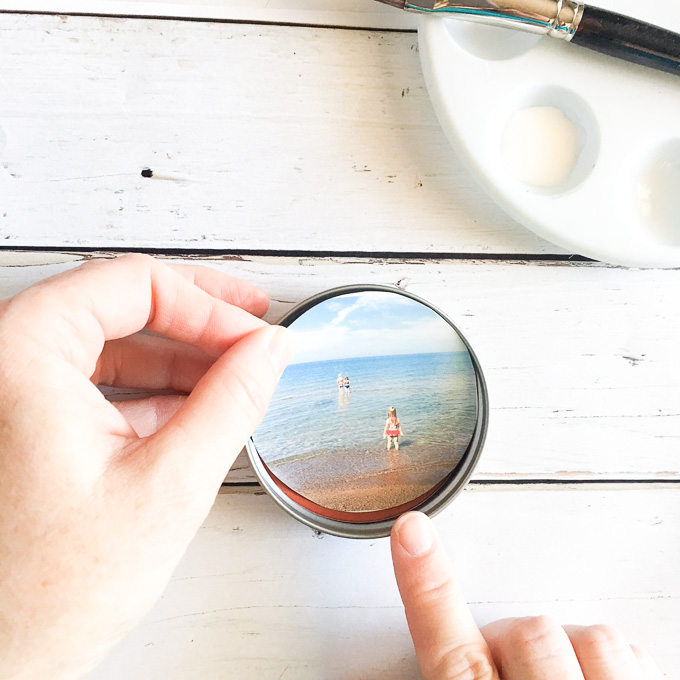
Paint a generous layer of glue along the edges and over the image to seal it all together. This make take several coats, especially in the edges. Let dry completely (I left mine overnight).
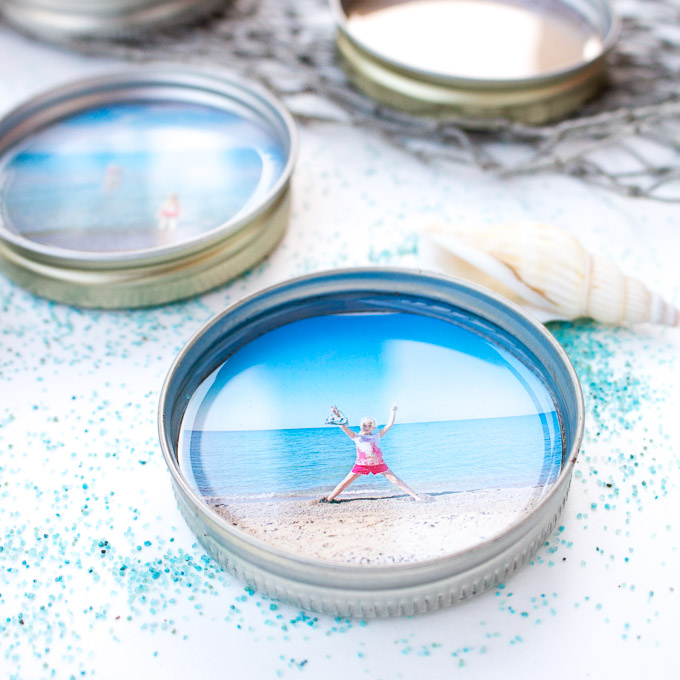
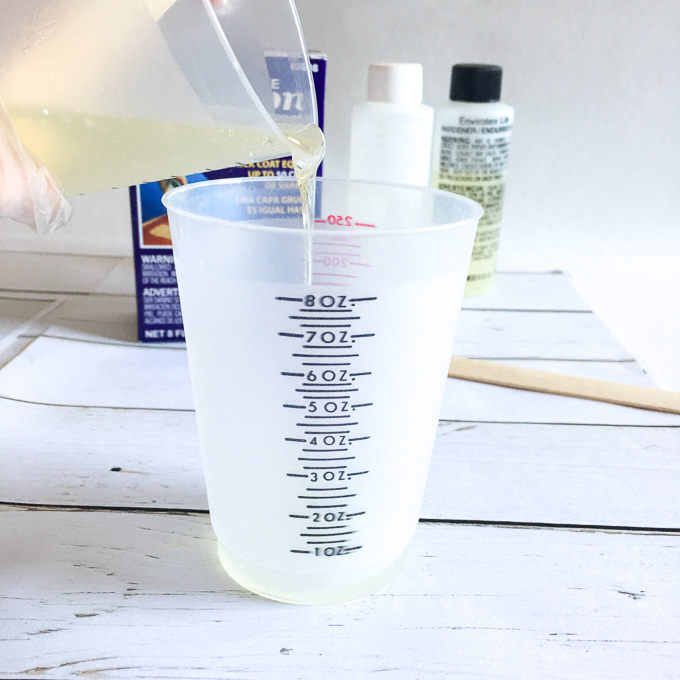
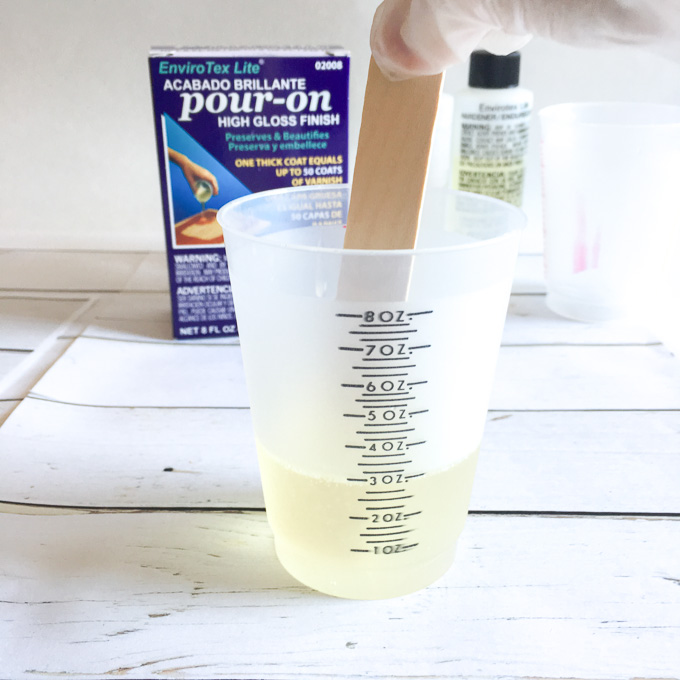
Pouring the EnviroTex Lite Resin
Mix equal parts of resin and hardener in a clean measuring cup. I used about ½ oz per coaster (3 oz total volume).
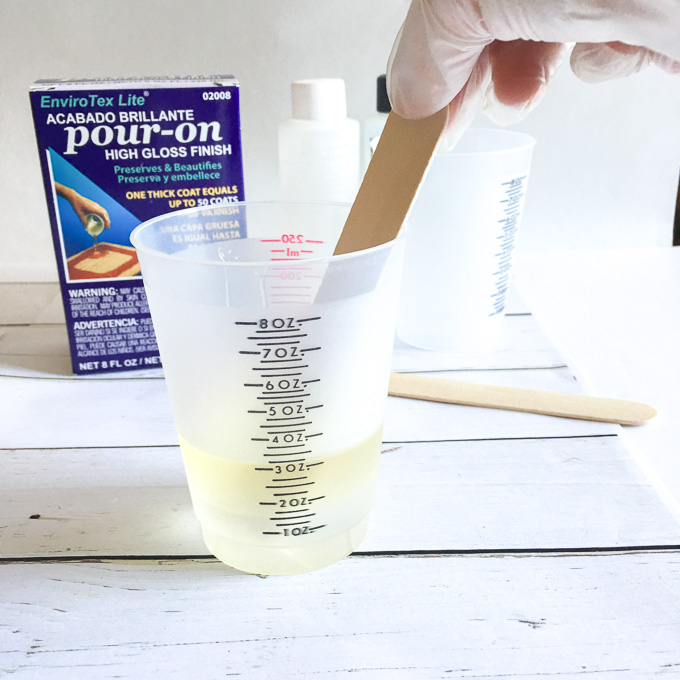
Stir for 2 minutes then transfer into a second clean measuring cup. Stir with a clean stir stick for another minute.
Distribute the mixed resin evenly across the six lids.
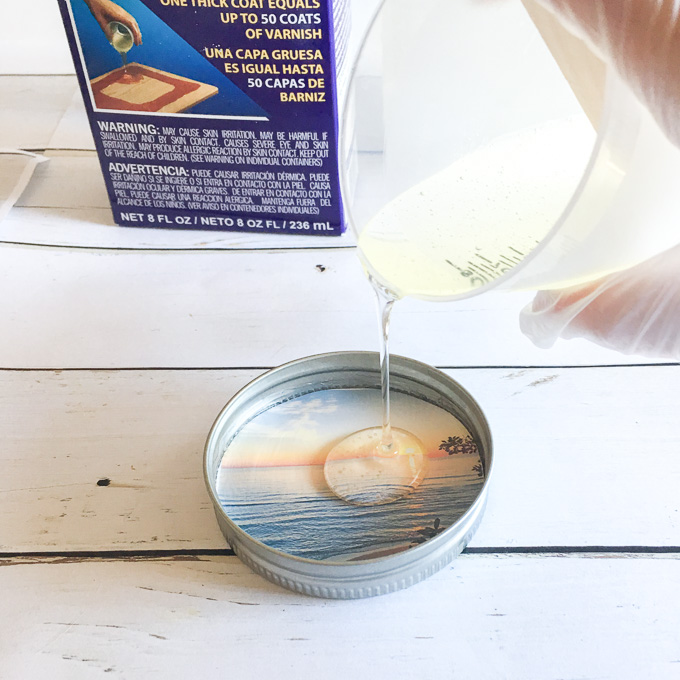
Tip the lids as needed to make sure it gets into the edges of the lids.
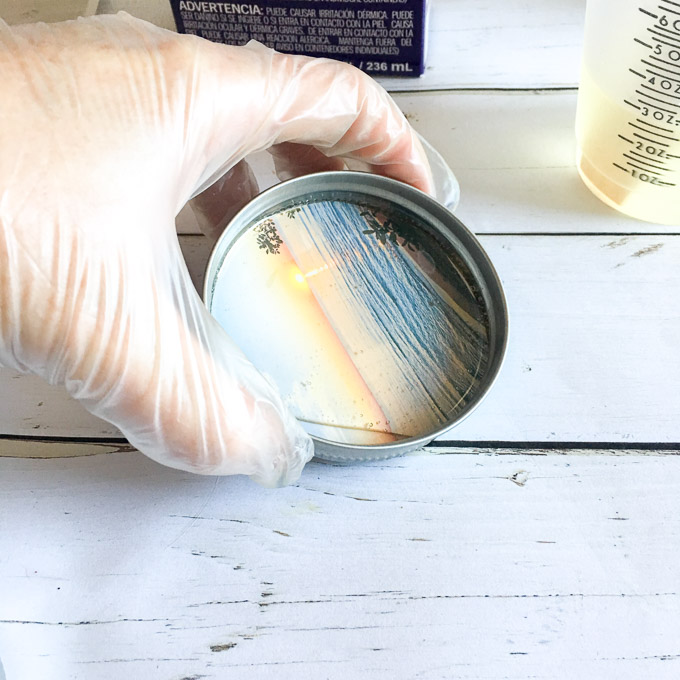
After 10-15 minutes blow off any air bubbles rising to the surface of the resin using a straw or small kitchen torch. Repeat as necessary over the next 1-2 hours.
Place the lids on a level surface and cover to keep dust from settling in. Leave to cure overnight (24 hours for a soft cure, 72 hours for full cure).
I love how these coasters turned out. I think they would also look adorable with a magnet attached to the back for the fridge. We make these monogram fridge magnets last year which we use to this day!
For another project using your photos you have to see Sheri’s DIY Glossy Photo Transfer Wood Slice project. It’s definitely on our to-try list!
Happy summer vacationing friends!
Jane and Sonja are sisters, moms and lifelong craft addicts both living near Toronto, Canada with their families. They share their love of creativity, nature and coastal DIY ideas on their blog Sustain My Craft Habit. They craft and decorate their homes using repurposed and upcycled items and materials found in nature.


I would like to make my coasters using playing cards as the theme. I have hexagon shape silicon coasters that allow the whole card to fit in to. What would be the best technique to use…place card on top and pour over or pour, cure, place card and pour to cover card?
Hi Micki.
That sounds so fun. I think the best approach would be to pour, cure, place the card and glue it down, then pour to cover the card. It’s actually quite similar to these ornaments we made with the kids’ school photos: https://resincraftsblog.com/resin-photo-christmas-ornaments/ . I hope that helps!
Jane
Can you make photo resin coasters in the silicone molds? Would it be the same process, would the photo be face down? Thank you.
Absolutely you can! And yes, that’s correct.
I’m thinking of using the tops off my soup or vegetable cans ( I use a side cut can opener) they have a lip. I would probably attach a magnet to the back though!
Can these be used outside?
Hi Nazolla. Yes, I don’t see why not. I would try and avoid leaving them out in the rain though – it’s likely that the meal rims would rust.
Happy crafting!
Jane
I have made coasters with envirotex and had trouble with warm tea cup sticking to the coasters if I pick it up straight. Anyone else had trouble? Any suggestions please?
Yes I often have that problem also. I’ve tried tile, wood and mason jar cover lids with resin and the cups and glasses often stick to the resin. I know I waited long enough for the resin to cure plus there were no soft spots in the resin so I know I mixed it completely. It’s probably just from the condensation, but it’s frustrating. Wish I could find a solution.
Hi Terri, yes that’s correct. The condensation is always a factor with coasters, epoxy or otherwise so it’s not that you’re doing anything wrong.
I would try a spray on acrylic/polycrylic clear coat. (maybe a couple coats). it wouldn’t hurt,especially for such a small surface.
GL