Make some Resin Dog Tags for your favorite furry friends!
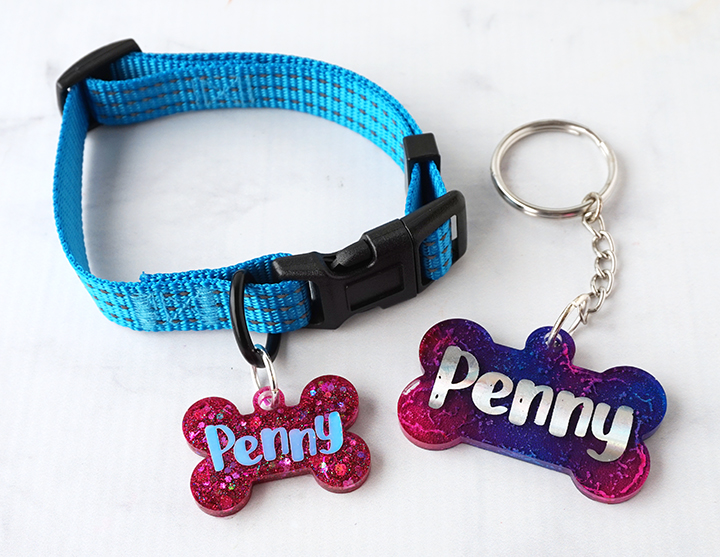
Hello, Resin Crafters! Lindsay from Artsy-Fartsy Mama here with a fun resin project to make for your favorite furry friends! Like a lot of people this year, a new little pooch joined our family this summer. Instead of the traditional metal tag, I decided to make her a custom dog tag using EasyCast resin. These DIY resin dog tags are easy to make, and have so many options for personalization. Not only do they make for a great name tag, but you could also use this project for a keychain or ornament to memorialize your pet.
SUPPLIES NEEDED FOR DIY RESIN DOG TAGS:
- Alumilite Amazing Clear Cast Epoxy
- Measuring Cups
- Stirring Sticks
- Disposable Gloves
- 3 cm/5 cm Bone-Shaped Silicone Tag Molds (smaller mold for little dogs, larger mold for big dogs)
- Mica powders
- Fine Glitter
- Alcohol Inks
- Transparency Sheet
- Markers, Vinyl, or Heat-Activated Foil

STEP 1:
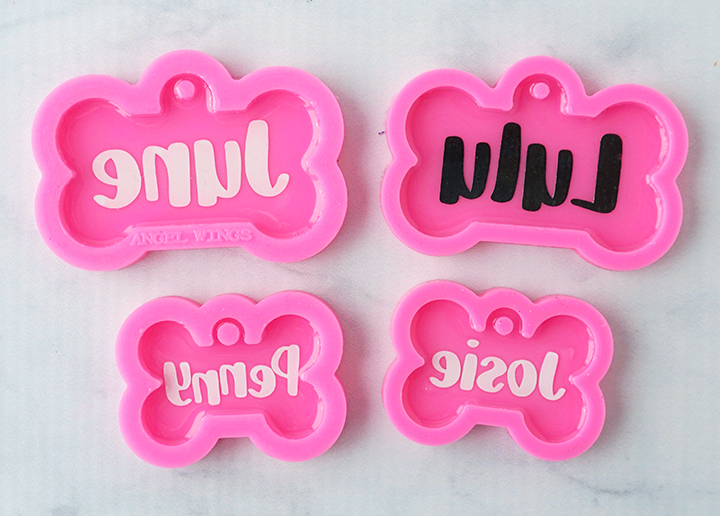
Decide how you want to add your pet’s name to the tag. There are quite a few options! I like using transparency sheets, because it’s virtually invisible once it’s placed in resin.
One option is to type up your pet’s name in a thick font and print the name out on transparency. I used a laser printer for mine, but make sure to check your transparency packaging for printing instructions. You can leave the name as-is, or add some extra flair by applying a heat-activated foil sheet (like Deco Foil) on top!
Another option is to cut the name out of vinyl, and then apply the vinyl to the transparency sheet. You can use all different colors and finishes of vinyl to get a different look. The last option is simple – just grab a permanent marker and write or draw the name yourself! Carefully cut around the name scissors.
STEP 2:
Prepare the Amazing Clear Cast according to package directions. Be sure to work in a well-ventilated area, wear disposable gloves, and protect your workspace. Add equal parts resin and hardener to the mixing cup. Each mold will need 5 ml of resin for this step. I made extra tags for my sister’s dogs, so I mixed up enough resin for four at a time. Stir the resin mixture together with a stir stick for two minutes, making sure to scrape the bottom and sides of the mixing cup. After 2 minutes, pour the resin into a clean mixing cup and stir the resin again for another minute or two with a clean stir stick.
To keep the bubbles down to a minimum, don’t stir too fast, and give the resin a minute or two to “rest” after mixing to let any bubbles rise to the top.
Pour a small layer of resin into the mold. Pop any bubbles that rise to the top with a heat gun or lighter. Place name (the piece of transparency film) face-down into the resin. Use your stir stick to press it down into the resin and try to remove any air bubbles caught underneath.
Pop any bubbles that rise to the top using a heat gun or by blowing through a straw. Leave the resin to cure in an undisturbed area for 24 hours. You will know that the resin is completely cured when it is no longer tacky. DO NOT REMOVE THE RESIN FROM THE MOLD.
STEP 3.1:
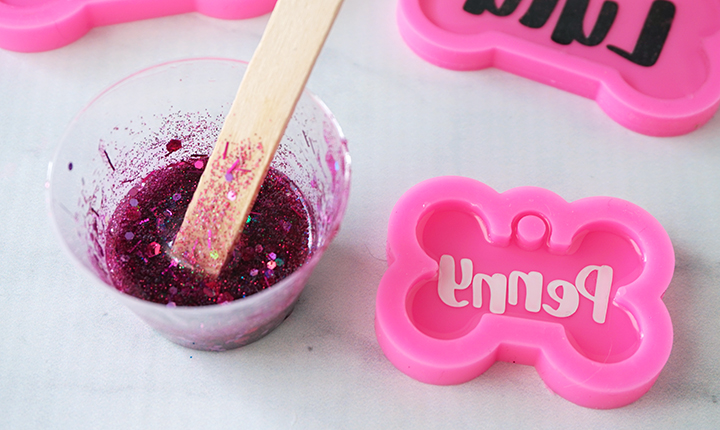
Now it’s time to get creative, and add some color to your dog tag! There are SO many ways to do this, but I am going to show you how I made tags using glitter and another using alcohol ink. Mix up about 10 ml of resin the same way you did for the first layer. Next, add in a generous amount of glitter and a small amount of mica powder. Stir until completely combined.
STEP 3.2:
For the alcohol ink technique, mix up about 10 ml of resin the same way you did for the first layer. Choose 1-2 colors of alcohol ink, and grab some white ink as well. If you are new to using alcohol inks, read through the instructions for these Alcohol Ink Keychains to understand how this process works.
STEP 4:
Fill the mold up with resin (either the glitter or the alcohol ink technique), and pop any bubbles that rise to the top using a heat gun or by blowing through a straw. Leave the resin to cure in an undisturbed area for 24 hours.
If you want to add contact information, add the info to a piece of transparency film and cut it out. Place it down face-up on the back of the tag and cover it with a small amount of resin (2.5-5 ml). Pop any bubbles and let the resin cure for 24 hours.
STEP 5:
Carefully remove the tags from the mold. If you over-poured any resin, you can trim the excess away using a craft knife. If the resin still feels a little flexible, it may just need more time to cure. Let it sit in a warm, flat area to cure for a few hours (or days).
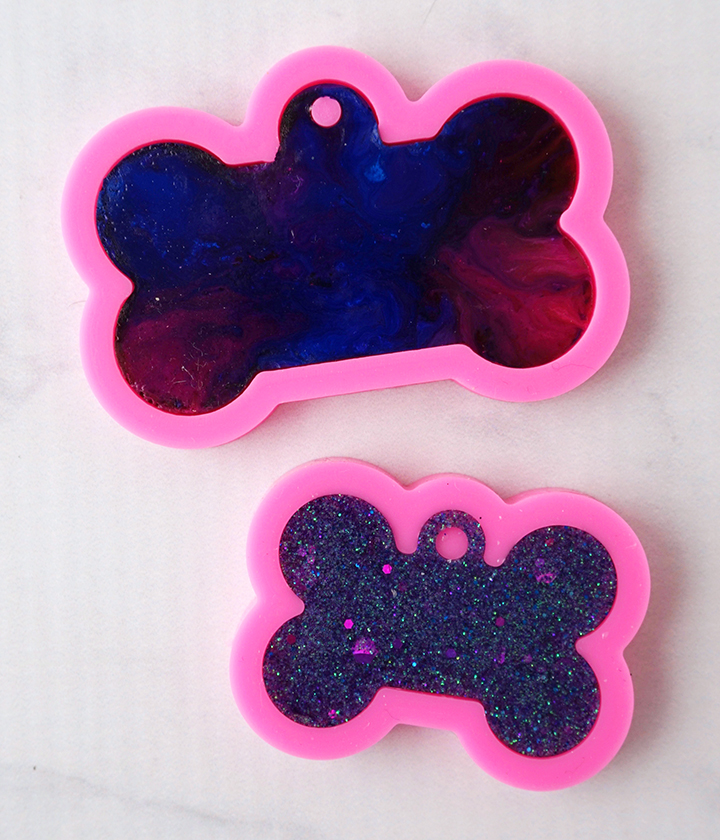
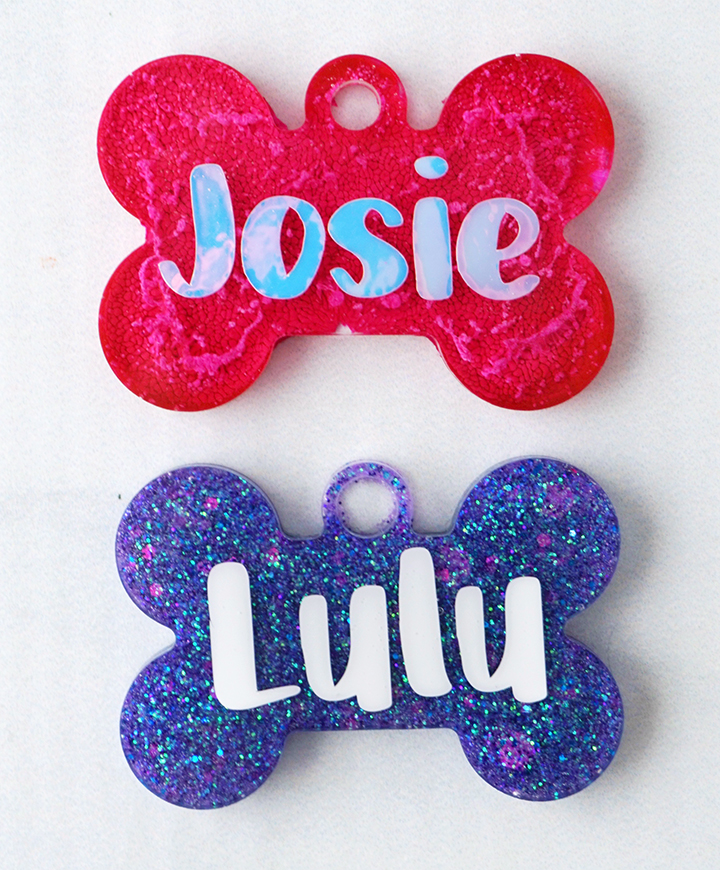
Which tag do you like better? I used pink alcohol ink only and holographic vinyl for Josie’s tag, and mixture of chunky and fine purple glitter with a little drop of purple pigment and white vinyl for Lulu’s dog tag. I am SO excited with how they turned out!
STEP 6:
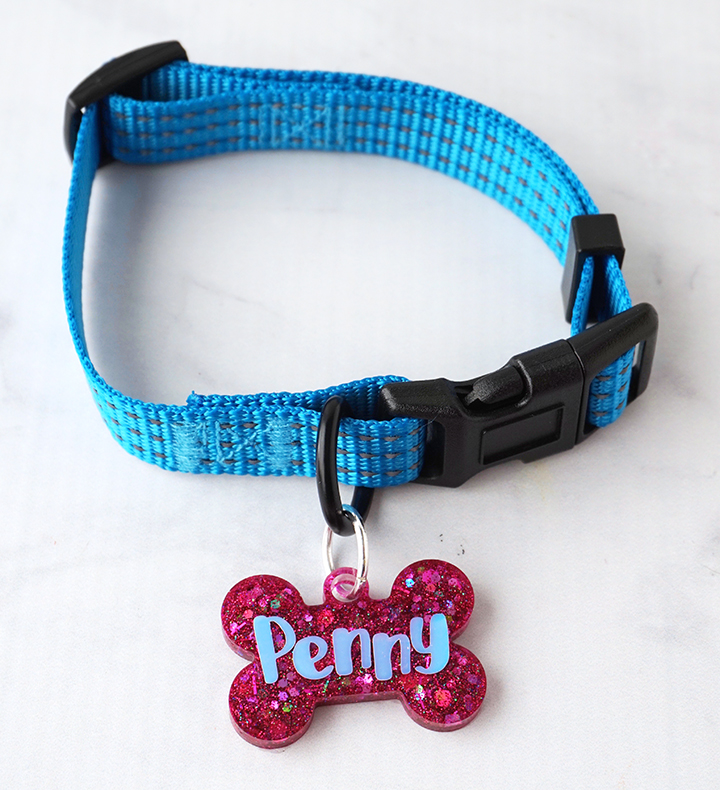
Hook a thick jump ring through the hole in the top of the tag. Use jewelry pliers to attach the ring to your dog collar. Now your dog can display their name proudly, and can be swiftly returned if they happen to make an escape.
Another great thing about this project is that if your pet unfortunately passes away, you can keep this tag with their name as a keepsake. Hook it on your keychain, make an ornament out of it, or even attach it to your own jewelry. If you decide to make your own Resin Dog Tags, please share your project with us in the Resin Crafting Facebook group!
Lindsay is a crafter, graphic designer, and glitter enthusiast from Utah. She’s passionate about homeschooling her creative daughter, traveling, and spending time in the craft room. Lindsay shares DIY project tutorials, printables, recipes, kids crafts, and more on her blog, ArtsyFartsyMama.com, where she inspires readers to live a creative life.


Hi there! This was an awesome tutorial, thank you! I did have a question, what transparency film did you use?
Hi Bianca! I personally use Samsill Transparency Film that I found on Amazon.
Hello there!
Thank you for sharing. What font sizes did you use for the names on the tags. Thanks.
When using the vinyl for the name, you keep the name on the transfer tape and place in the mold together?
Hi Katy, I applied the vinyl directly to the transparency film. Remove the transfer tape, and then place the film with the vinyl on it into the mold. Hope this helps!
Hi. Where can I print the label name? What do I need to buy for it?
Hi Esmeralda! Lindsay used a Cricut to cut the labels.
is it 5mL of resin and 5mL of hardener – so 10 mL in total for the first layer?
Hi Ashley! It’s 5mL total for the first layer: 2.5mL of resin and 2.5mL of hardener.
do you apply the vinyl with the transparency tape to hardened layer, not sure how you id this, can you explain a little more detailed for me?lol
Hi Catherine! Yes, I put the vinyl onto the transparency first. Then, I placed the transparency into the un-cured resin right after pouring it into the mold. Hope this helps!
Where can the small molds be ordered? Love this idea.
Hi CK! I found these molds on Amazon, but I have seen similar on Etsy.
What type of mask should you wear? I saw a post of a woman who made resin items and she never wore a wask or gloves and over time it burned her finger tips and around her lips.
Hi Kate! GREAT question! I personally use latex gloves and wear a P100 respirator mask. I know people have different preferences. I feel that as long as you are using something, it’s better than nothing!!
Question- I’ve tried this three times and always end up with a large sharp lip on the backside of the tag from the silicone mold. How do you avoid this? are you just doming afterwards? sanding?
Hello! You are right. To smooth out the backside of a project, you can sand the edges down or add a doming layer to make the edges even.