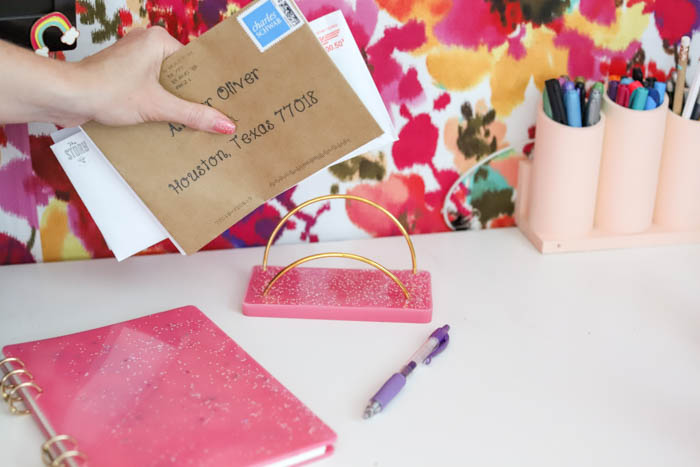
Create a beautiful resin mail holder using EasyCast Clear Casting Epoxy to help organize your mail.
Hey Resin Crafters! Amber Oliver here with another great resin project! Last month I shared with you a tutorial to create your own resin notebooks and this month I created a matching project – this adorable resin mail holder! I used acrylic paint and glitter to create a custom finish that I love, but you could easily customize to fit your style and office decor!
 SUPPLIES NEEDED FOR RESIN MAIL HOLDER:
- EasyCast Clear Casting Epoxy
- Acrylic Paint in the color of your choice
- Rectangle Mold
- Mixing Cups
- Stir Sticks
- Metal Ring (cut in two pieces!)
Step 1:
First, prepare the EasyCast Clear Casting Epoxy. This is a multi-step process so don’t start mixing until you are ready to do the whole process from beginning to end!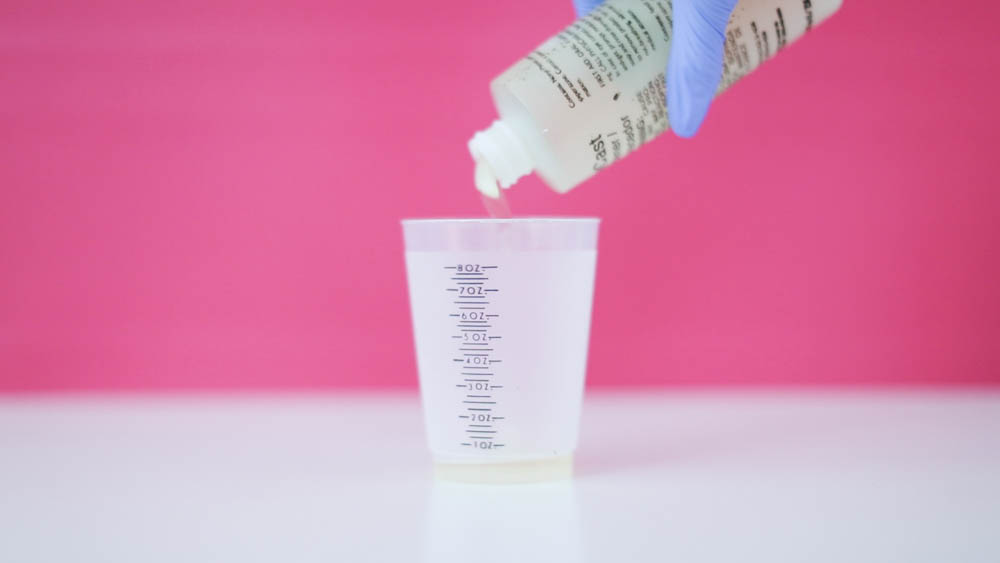
Start by mixing EQUAL parts of the Hardener and the Resin.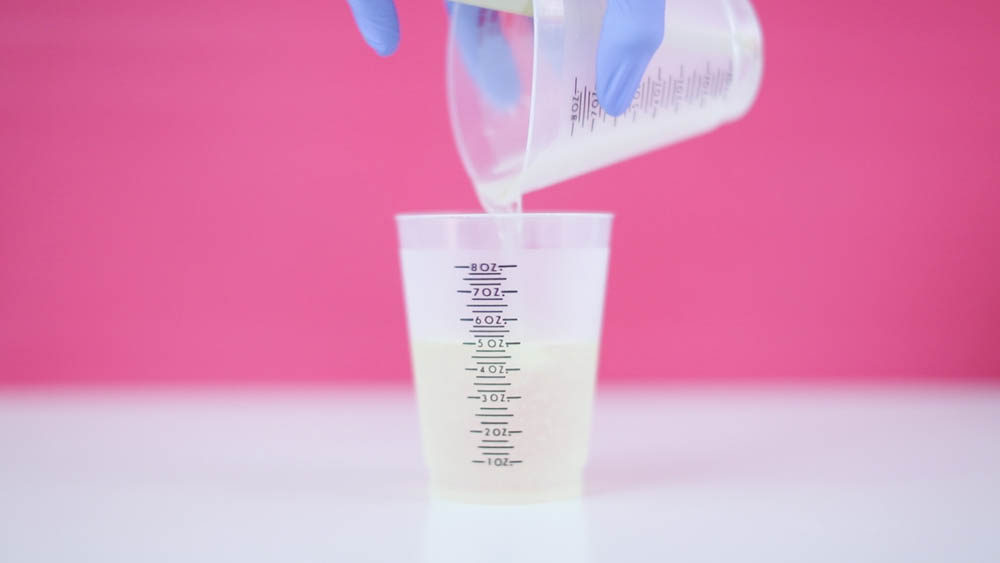
Stir for two minutes (be sure to scrape the bottoms and sides) then pour from the first cup into a second and mix with a new stir stick for another minute.
Step 2:
Once your mixture is ready, add in a few drops of acrylic paint then stir.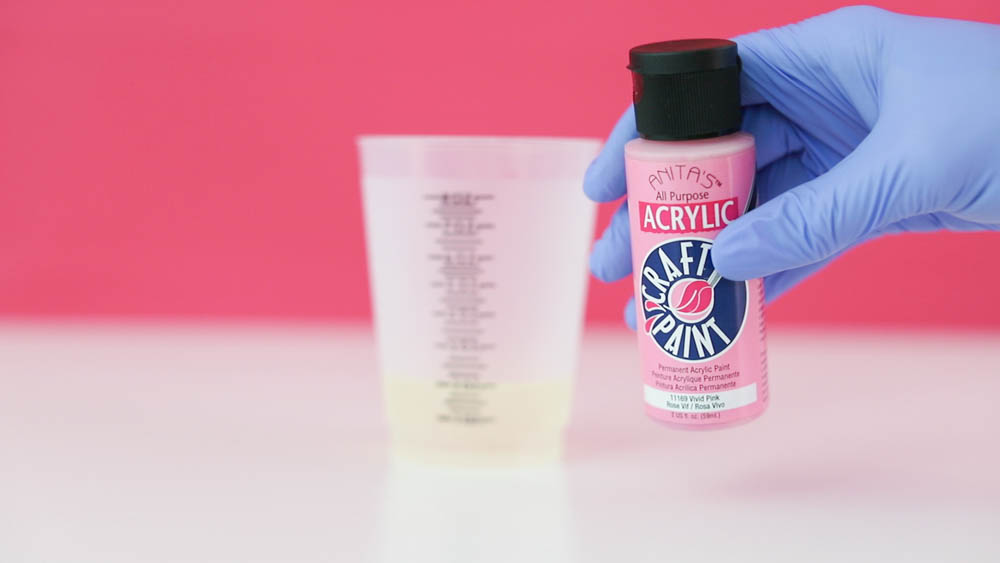
Step 3:
Pour slowly into your mold taking care to pour on a level surface.
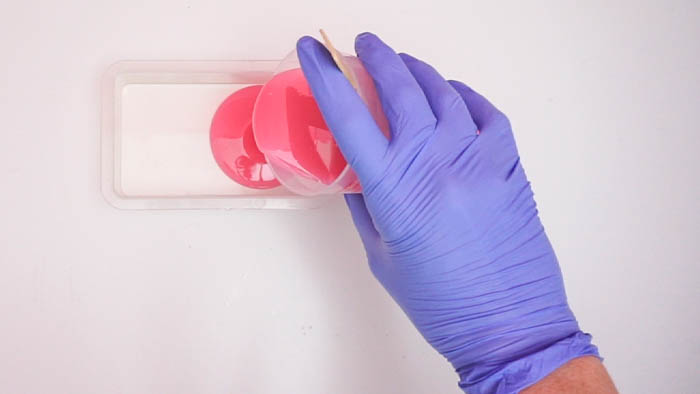
Step 3:
Insert the two pieces of your metal ring into the surface, spacing them evenly apart. You’ll need to use two items for the rings to lean on so they will stay upright while the resin cures.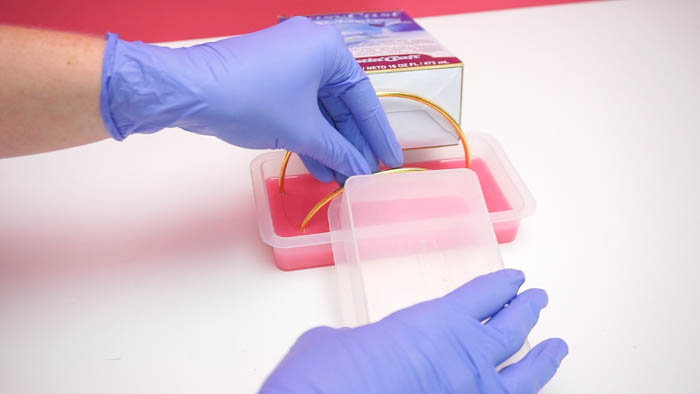
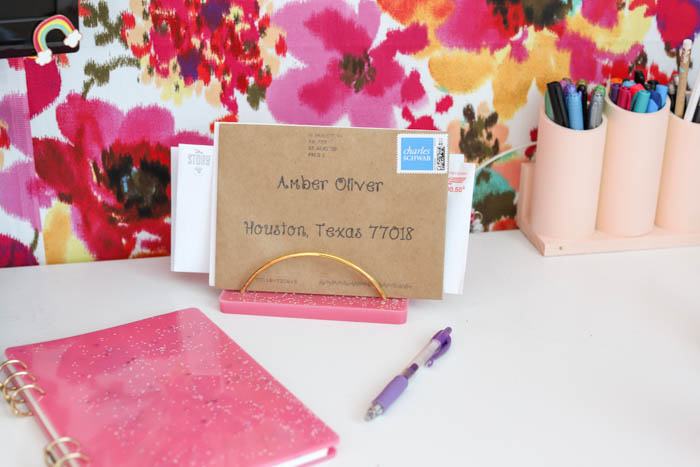

I love the added glitter in mine, and that it matches my resin notebook notebook. Now I need to brainstorm what other office items I can create to match! I hope this project inspires you to create your own resin mail holder!
Amber Oliver is a DIY and lifestyle blogger who shares easy DIY tutorials, colorful crafts, and more on her blog, Amber Oliver. She’s a native Oklahoman living “in the loop” in Houston, TX with her husband and dog. She’s an avid reader, world traveler, loves Tex Mex food, and creating everything from woodworking projects to websites. She focuses on budget friendly projects for the home and empowering women to try new things.


Hi. I would like to know what size is the rectangular mold. My email is kittyshore0814@msn.com. Thank you
Hi, the one I used is 3×5 inches