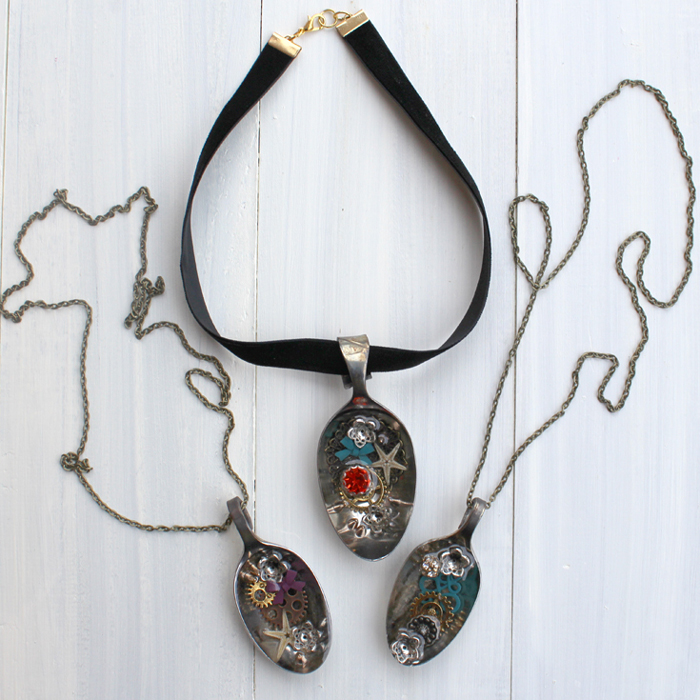
Trinket Spoon Jewelry Resin Necklace DIY
Hi friends, it’s Natalie from Doodlecraft, sharing another fun jewelry resin craft. When it comes to jewelry, I’m pretty minimal, but I absolutely love making it. These trinket filled spoons are so much fun. Even kids love them, they ask “how is that water holding everything in that spoon while you are wearing it?” Think of all the fun things you could embed in resin and wear proudly around your neck.
Supplies needed:
Spoons
Trinkets
E6000 Glue
Chain/Necklace findings
Mixing cups, sticks and disposable gloves
Torch/Hammer/Axe
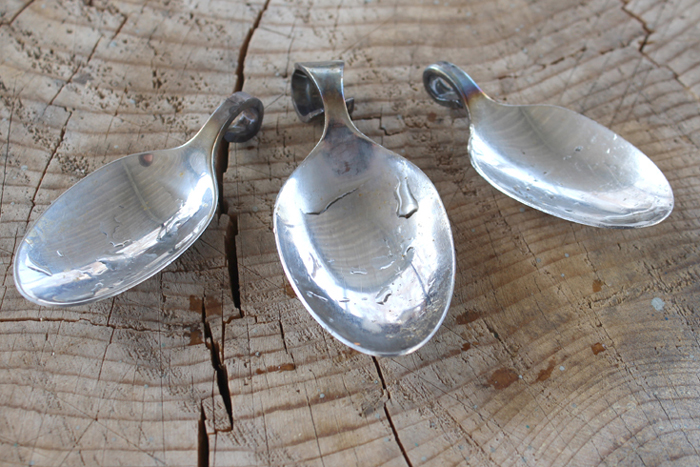
 I bought these spoons at the thrift store for 10 cents a piece…absolutely a steal, but I needed a way to bend them. My teenage son has a complete blacksmith forge in our workshop, but he tried to curl these so they used minimal supplies and set up. Use a torch and heat the handle of the spoon until red hot. Hold onto the spoon tightly with pliers.
 Immediately after removing from the heat, place the spoon on the edge of an axe and hammer down on it once to cut the metal in half.
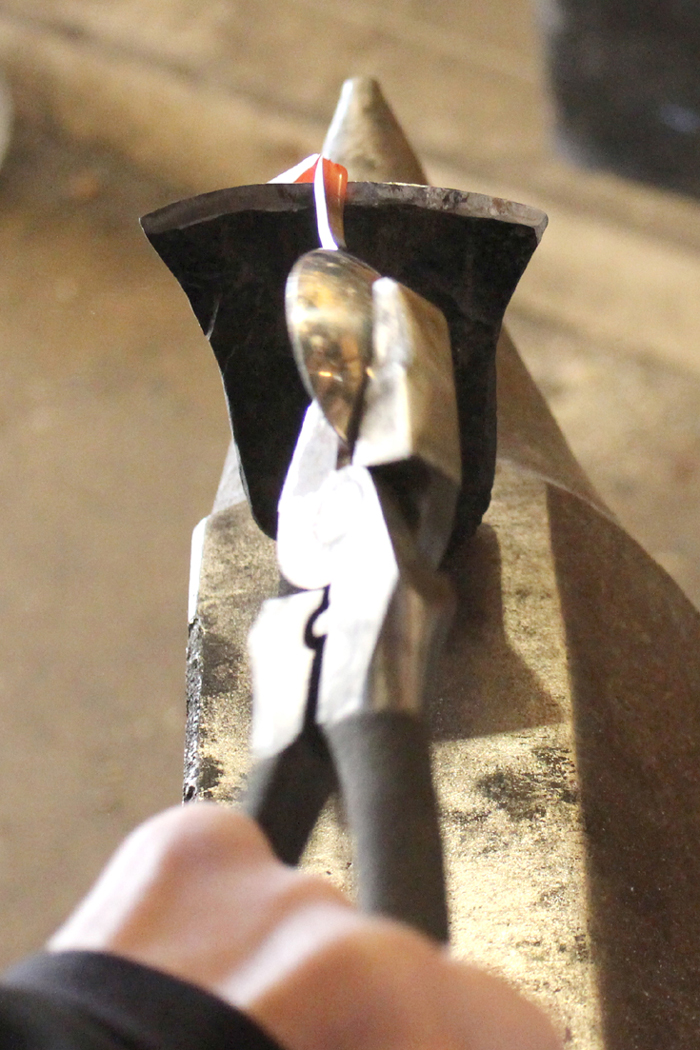 Heat the remaining handle up again in the torch until red hot. Then hammer the stem around a metal rod to make it round.
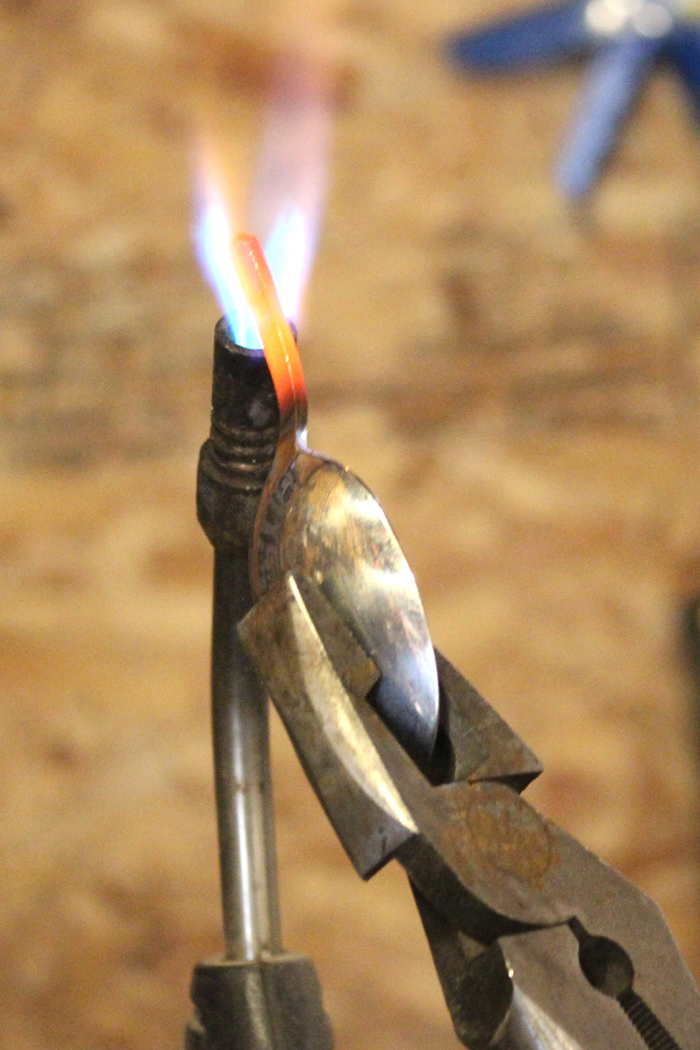
Ultimately, that is how we shaped our spoon pendants. There are other possible ways to do it, so don’t give up. Use a grinder to cut the handle shorter, and then hammer the end until round. OR, Grind the spoon handle off so it just has a 1/4 inch handle and drill a hole in it.
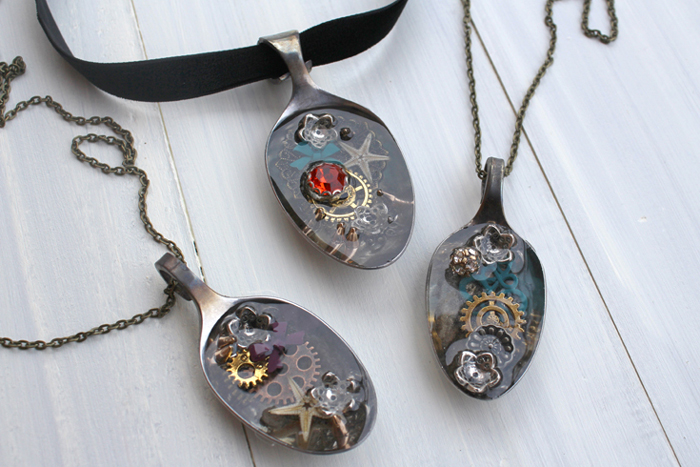
Next, gather all the trinkets to fill the spoons. For instance: sprockets, cogs, filigrees, jewelry pieces, sea shells, sea stars, baby teeth, studs, wasp nest paper…basically anything small enough will work.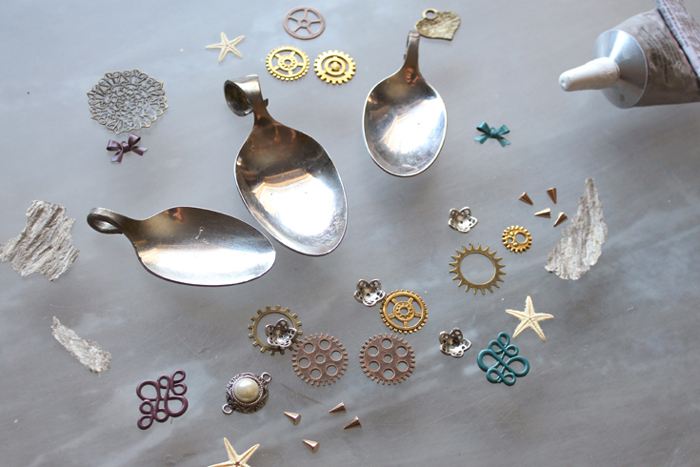 Now, use the E6000 Glue to glue the trinkets in place inside the spoons.
 Let everything dry once it’s been glued in place.
 Use some stirring sticks to prop the spoons up so they sit level on your work surface.
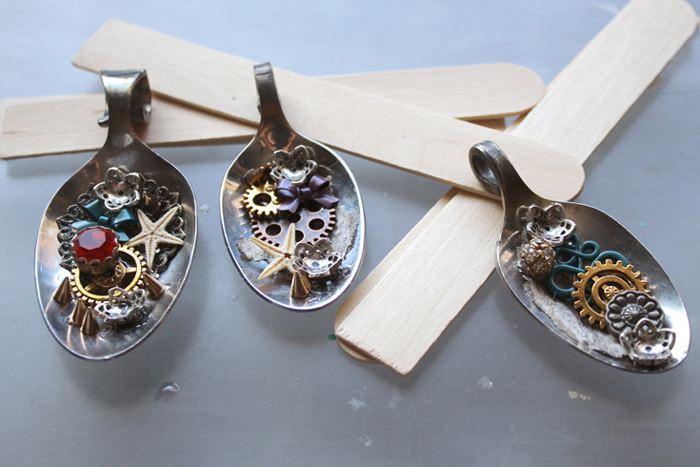
To begin the resin process, read the directions and prepare your workstation. Wear gloves and work in a well ventilated area. Mix the resin according to the package directions. I only needed 6 drams (not quite 1 ounce) of mixed resin for these 3 spoons.
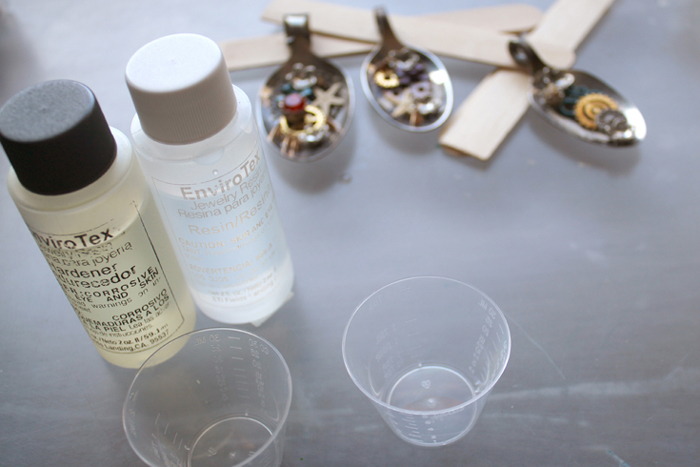 Use a stick to gently fill the spoon with resin. The resin should fill the spoon and count on surface tension for the best look.
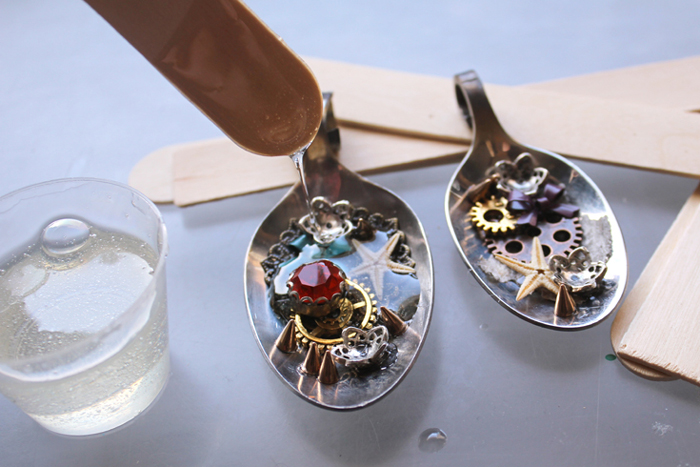 Then be patient and let the resin dry completely–overnight should do it.
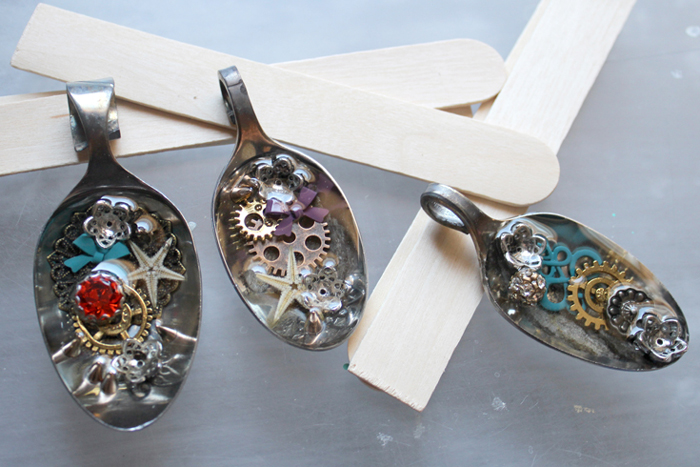 Finally, hook the spoons on necklace chains or a velvet choker.
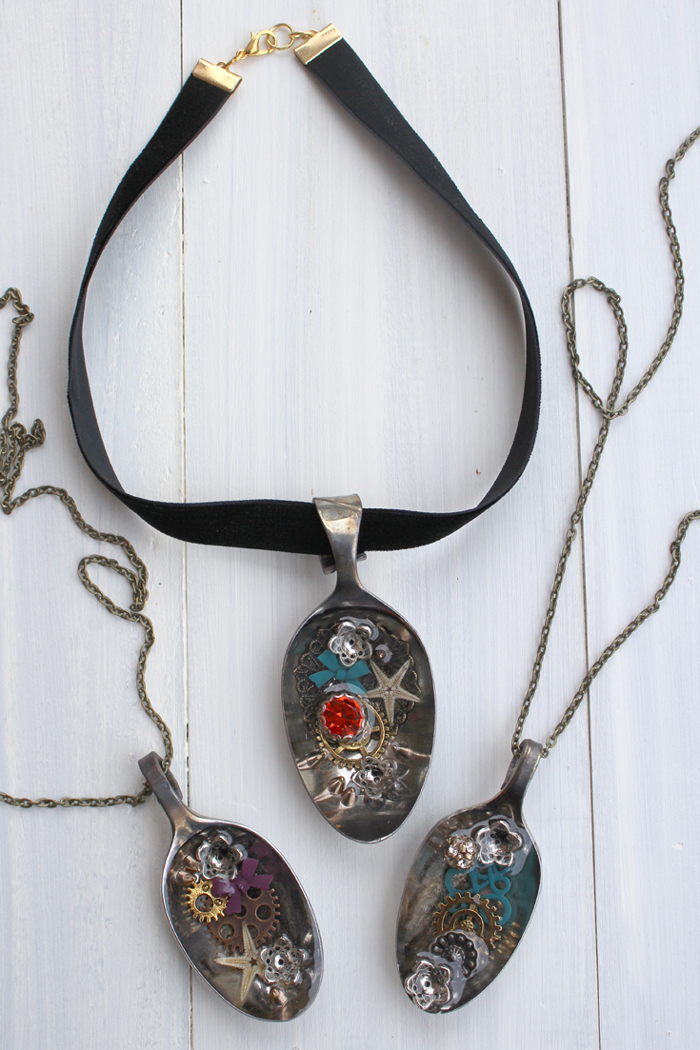 Totally unique jewelry that will have everyone commenting! It does looks like all these cute trinkets are just scooped up from a magical pool of water.
 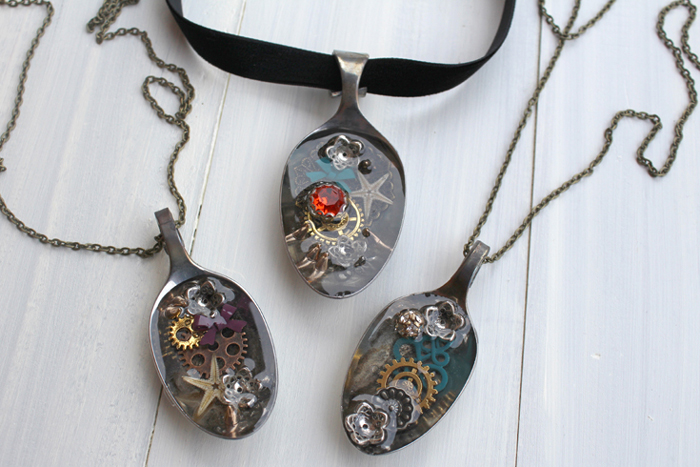 Save and Pin for Later!
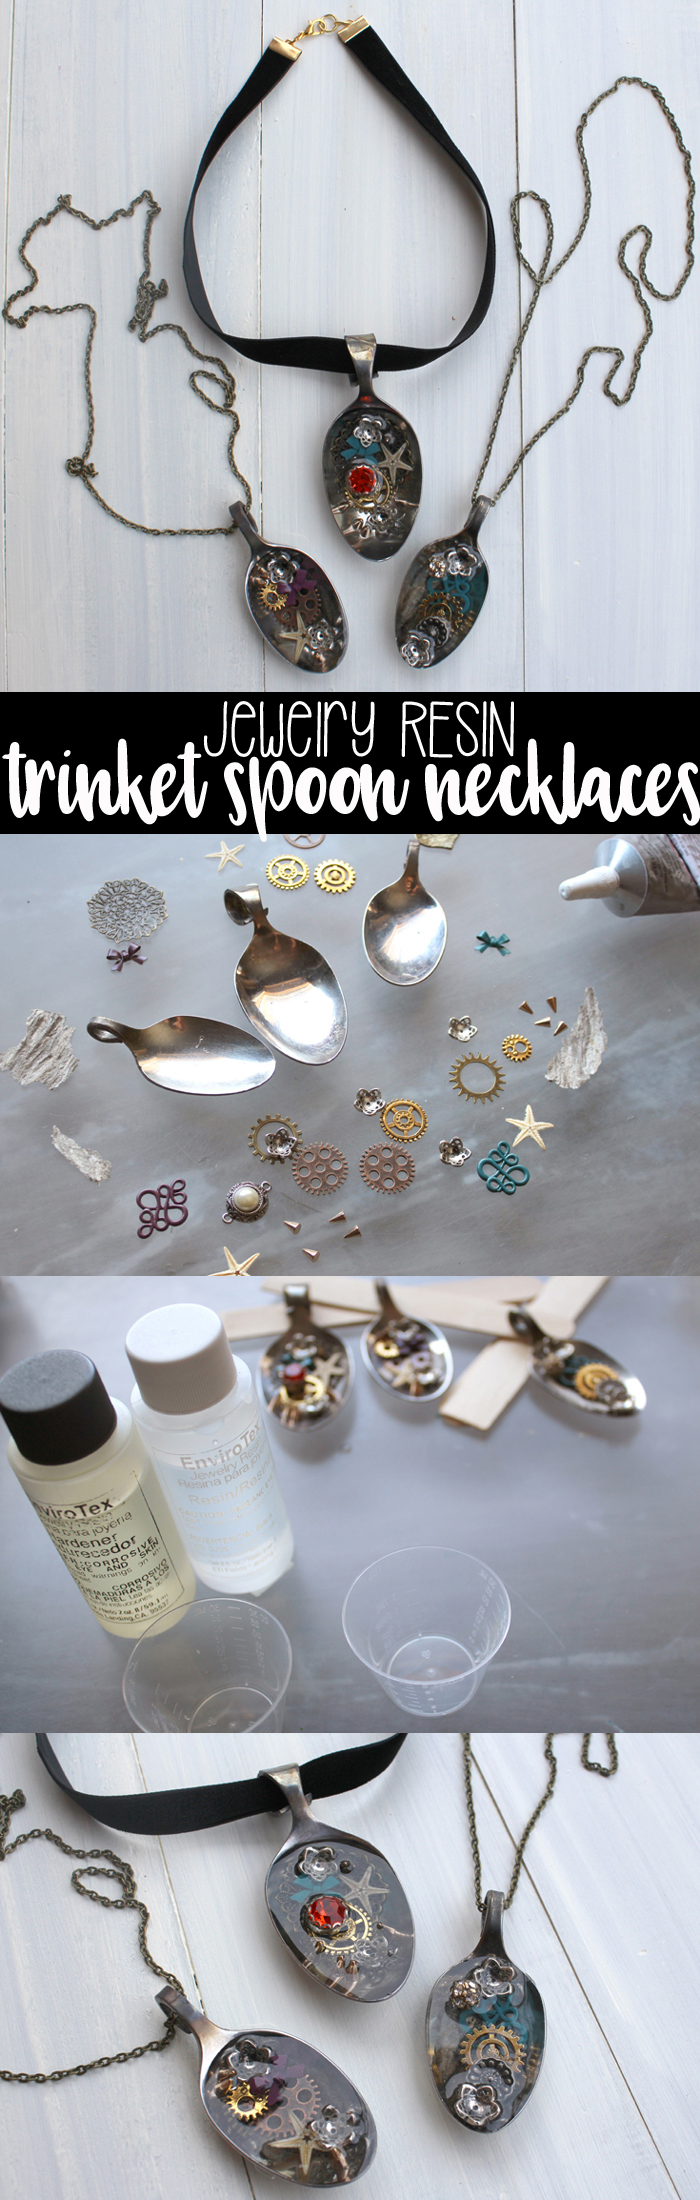
SaveSave
SaveSave
Natalie Shaw is a Craft/DIY blogger at Doodlecraftblog.com. She loves sci-fi, fantasy and video game geekery and that comes out in many of her projects. She posts budget conscious DIY’s, crafts, jewelry, kid friendly projects, upcycled treasures and other fun on her blog 5 days a week.


Didn’t you have a lot of resin left over? A teaspoon holds approx 5 mls and 6 ounces is 180 mls.
You are right, it was a typo! Thank you for catching it. It was 6 drams, so not even an ounce that I mixed up. No leftovers. Thanks again!