This elegant DIY resin serving tray is perfect for any occasion! With just a few supplies, you can create a beautiful tray that will add a touch of luxury to your table. Plus, the resin is easy to work with and makes for a fun crafting project. So gather your supplies and get ready to create your own DIY resin serving tray with gilded gold bamboo wood!
Hello, Resin Crafters! Michelle from Our Crafty Mom sharing an elegant DIY resin serving tray with bright and beautiful shades of blues, purples, and white.
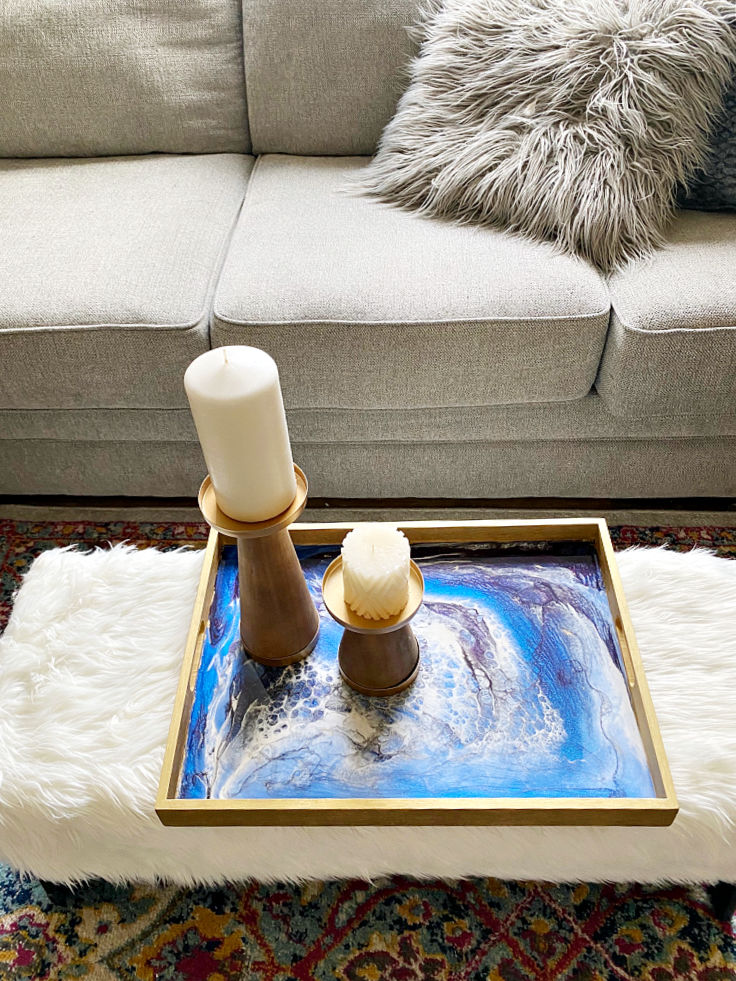
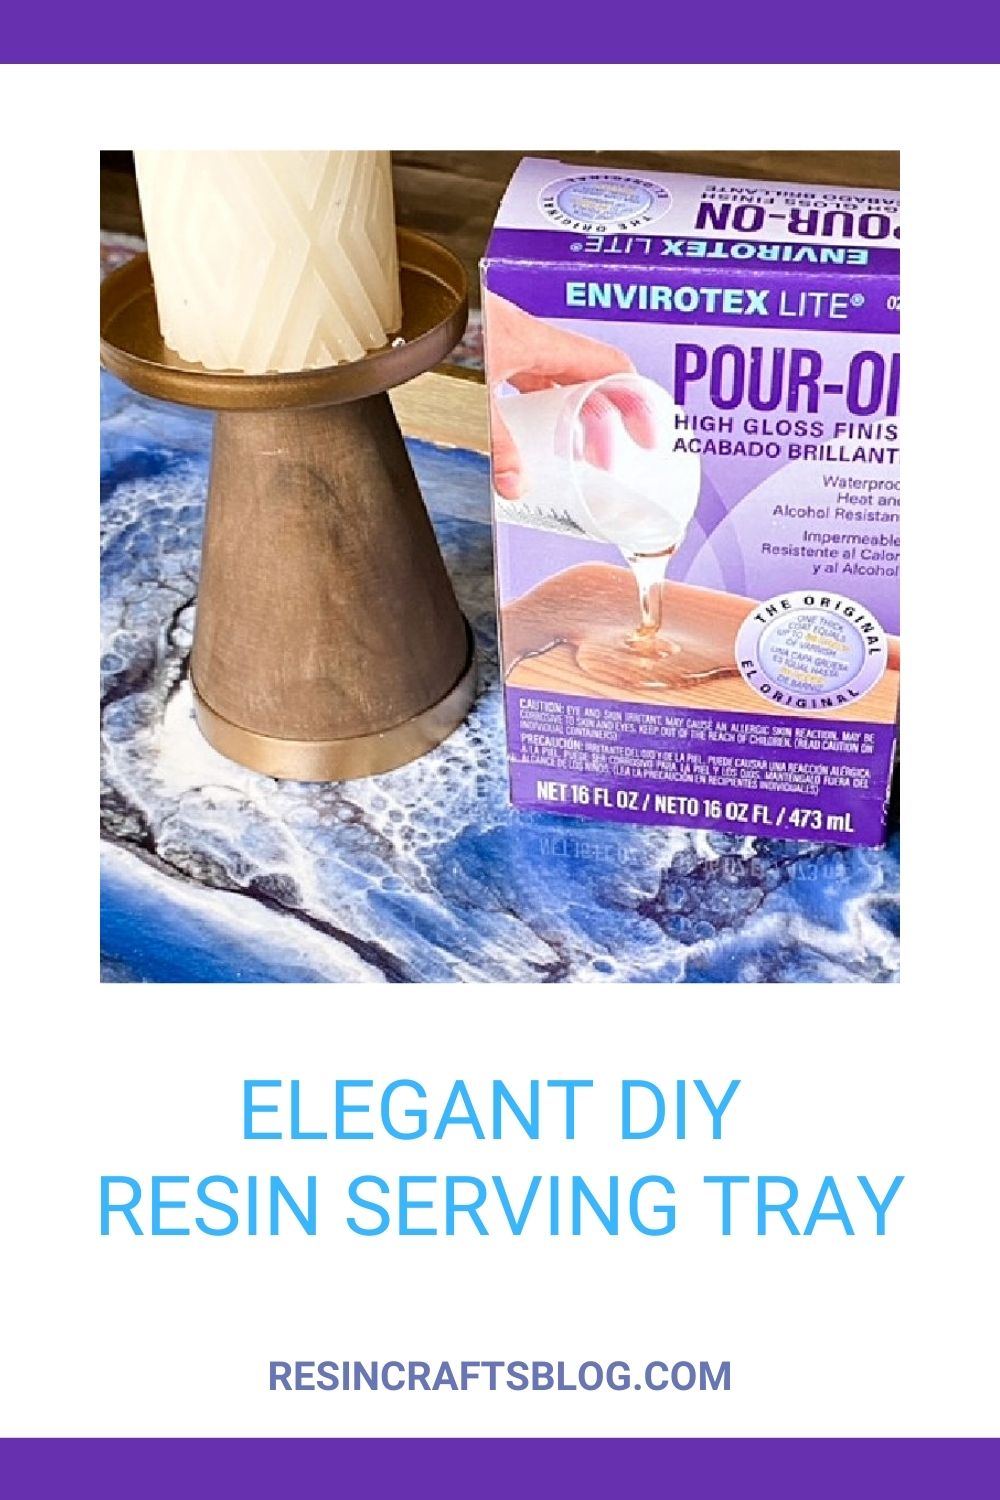
I made this wood and resin tray using EnviroTex Lite®Pour On. This tray makes a perfect serving tray for drinks or light snacks. But, it also looks lovely on a coffee table with candles or a simple vignette.
This is not something you want to cover up! I have a confession to make…this tray was supposed to be a gift for a friend, but my daughter and I loved it so much that we just couldn’t part with it. So, I have to make another one asap.
Do you love spending a weekend afternoon DIY-ing? Or are you more of a Pinterest enthusiast, looking for the next great project to try? Well, regardless of where you fall on the spectrum, we’ve got just the project for you: an elegant DIY resin serving tray with gilded gold bamboo wood.
This is definitely a showstopper project that will impress your guests! Not to mention, it’s pretty easy and beginner-friendly. Ready to get started? Keep reading for all the details.
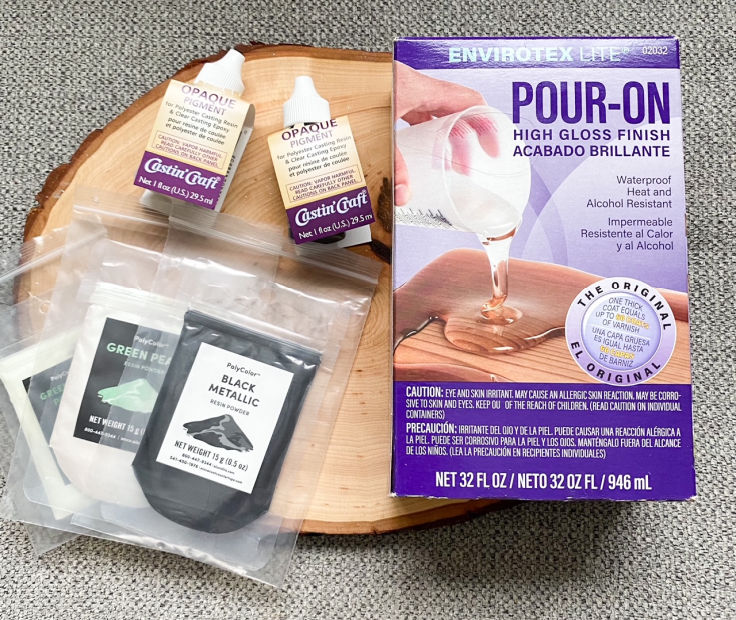
TO MAKE YOUR OWN DIY RESIN SERVING TRAY, YOU WILL NEED THESE SUPPLIES:
- EnviroTex Lite®Pour On
- Measuring Cups
- Stirring Sticks
- Disposable Gloves
- PolyColor Resin Powder – Ocean Blue Metallic, Violet Pearl Metallic, Pearl White and Diamond Dust Metallic
- Heat Gun
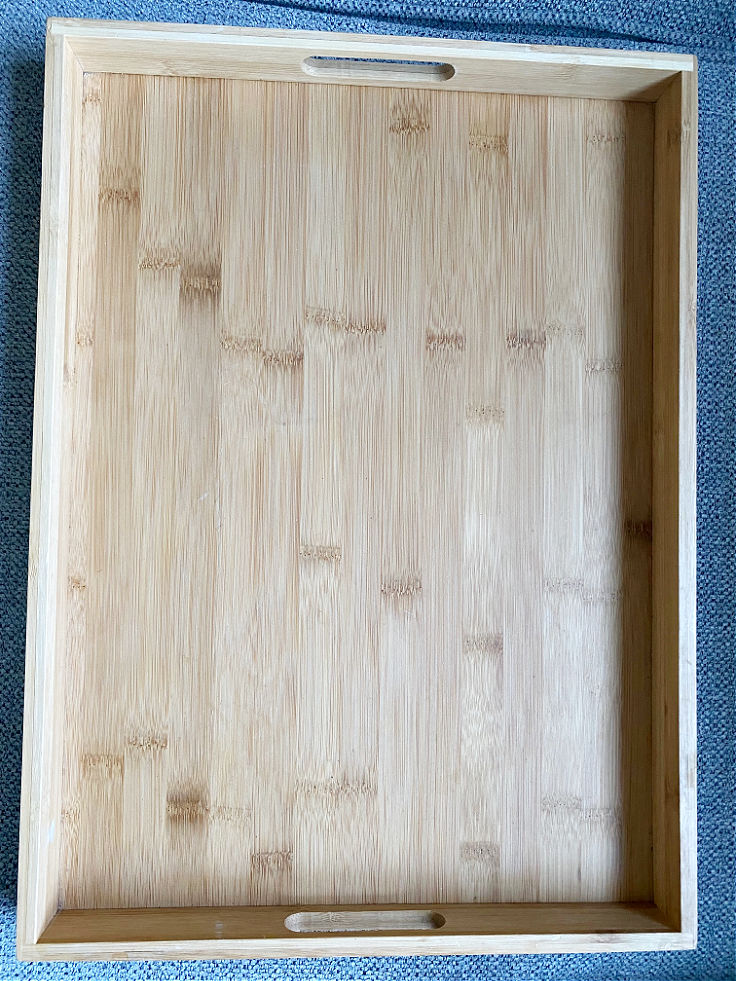
- Wood Tray – mine is bamboo
STEP 1:
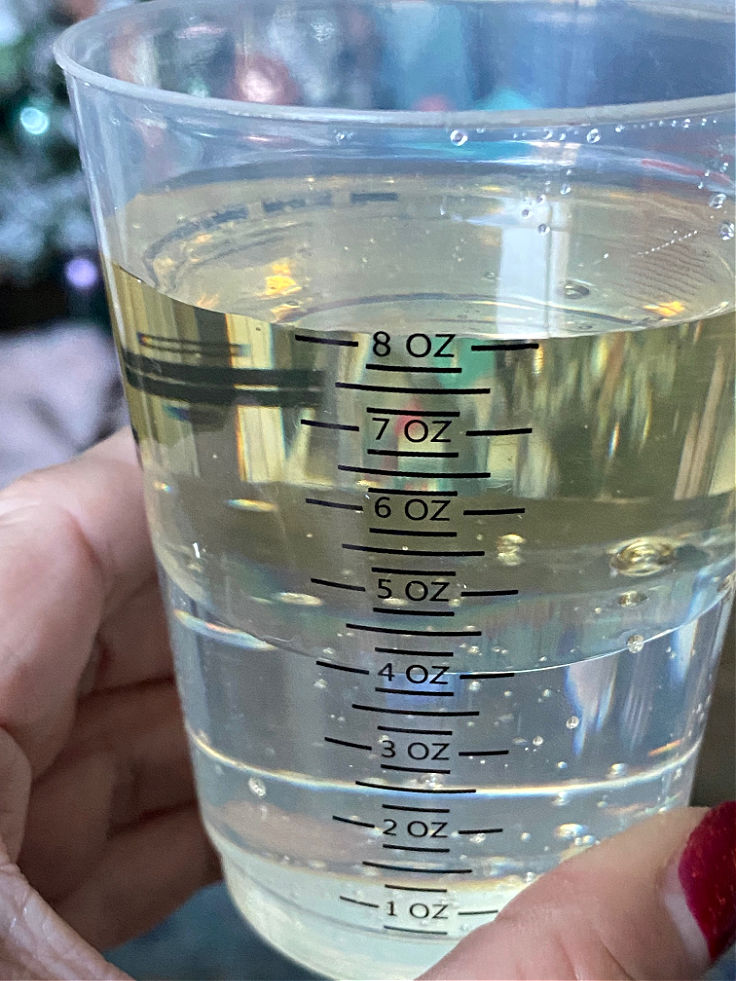
Mix 8 oz EnviroTex Lite®Pour On according to package directions. It’s important to work in a well-ventilated area and to wear disposable gloves. Use the mixing cups to pour in equal parts resin and hardener. For this tray I used 4 oz of resin and 4 oz of hardener.

You want to stir the resin mixture together slowly with a stir stick for two minutes. Mixing it slowly will help keep the number of bubbles down. Once you have mixed it for two minutes, pour the mixed resin into another CLEAN mixing cup.
This is an important step, so don’t skip this part. Stir the resin again for another minute with a CLEAN stir stick. The resin mixture should become clear. If it is streaky, it needs to be mixed a little bit longer.
STEP 2:
Since I was using 4 different colors of PolyColor Resin Powder, I split the resin into 4 cups with 2 ounces in each cup.
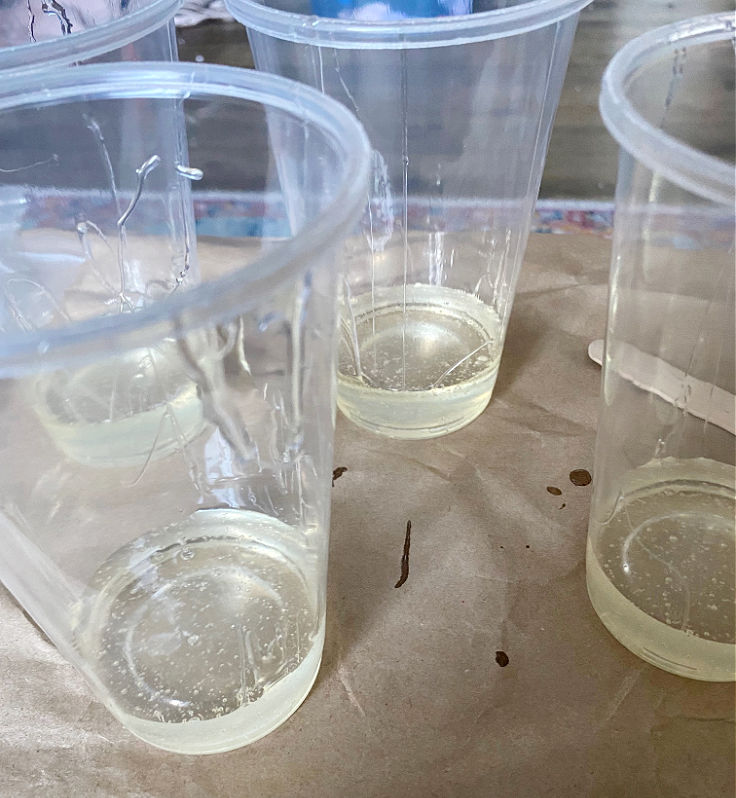
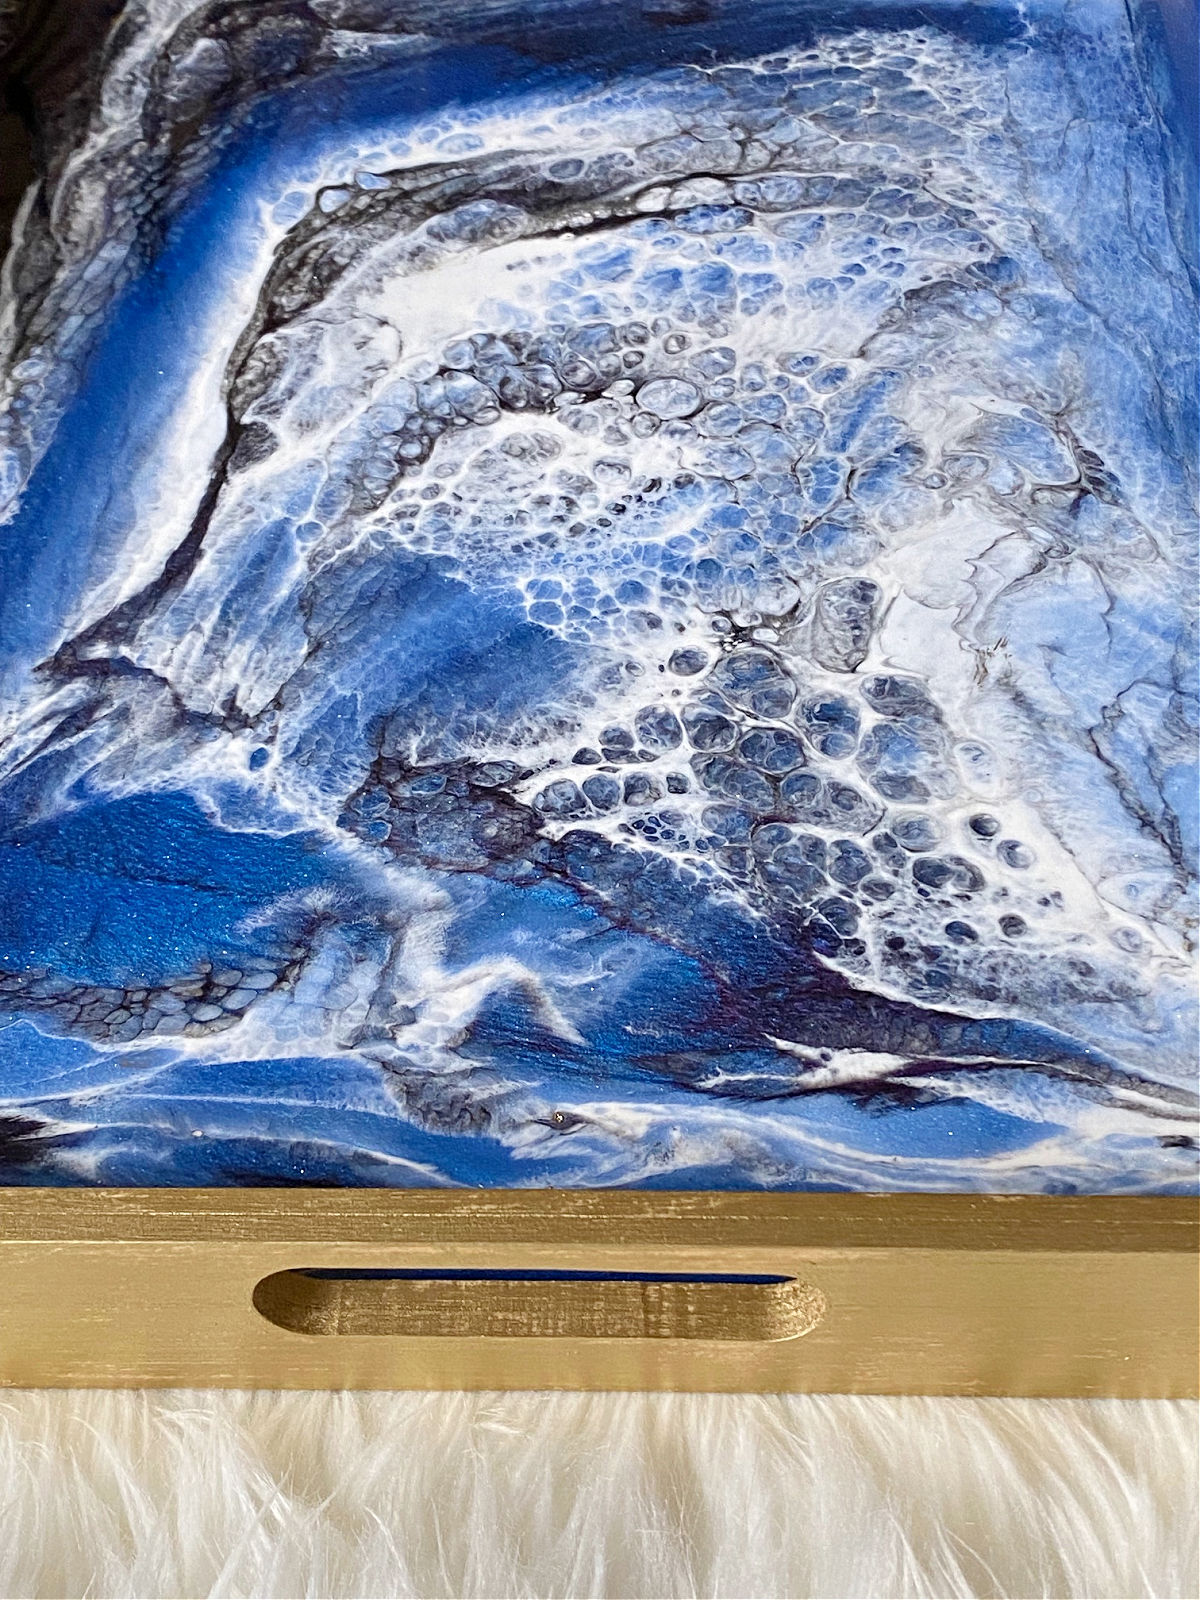
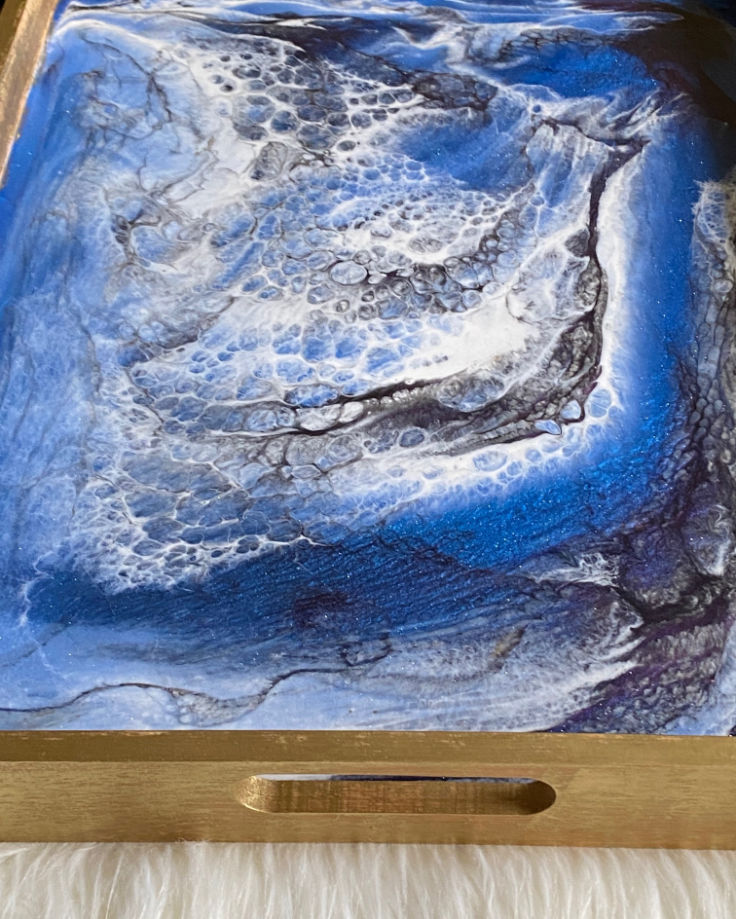
I wanted rich, deep colors with pops of white to really stand out so I went with Ocean Blue Metallic, Violet Pearl Metallic, Pearl White, and Diamond Dust Metallic for a bit of sparkle for the PolyColor Resin Powders.
Use whatever colors you like. It is amazing to see how different a resin wood tray will turn out depending on the colors used. Add powder into each cup and stir again until completely combined.
STEP 3:
Be sure that your tray is free of any dust or fingerprints. You don’t want anything to blemish your beautiful finish! This is the bamboo tray I used:
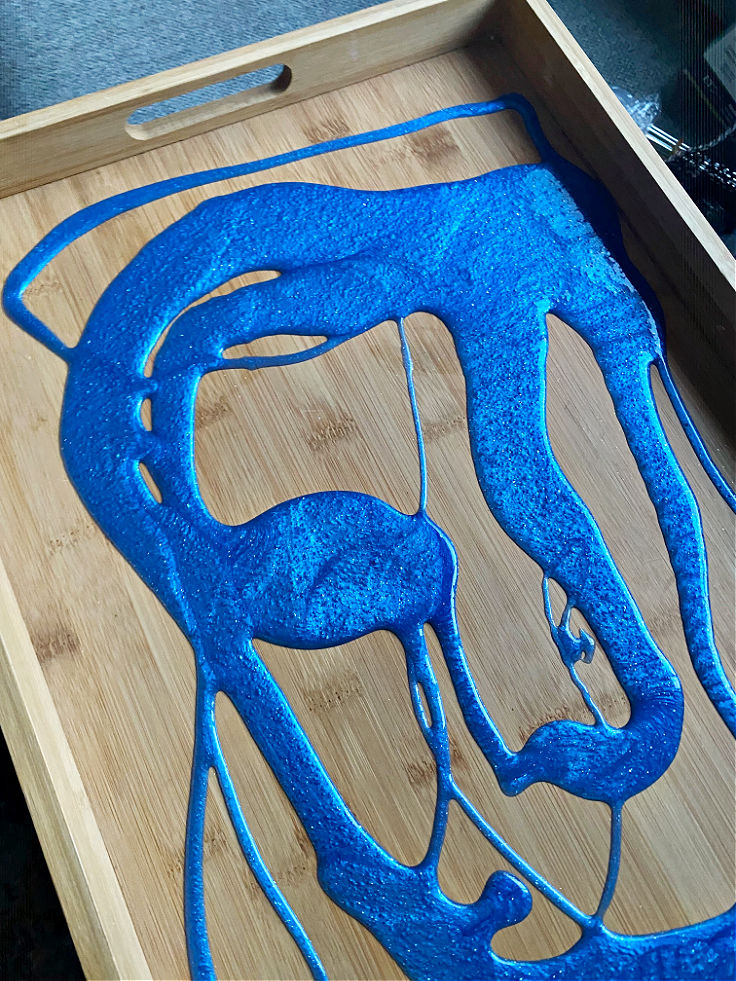
Slowly pour your first resin mixture color into the tray. The brilliant blue is breathtaking! Continue to pour the various colors into the tray and slowly tip the tray so the various colors start to blend and mix together. This is my favorite part!
STEP 4:
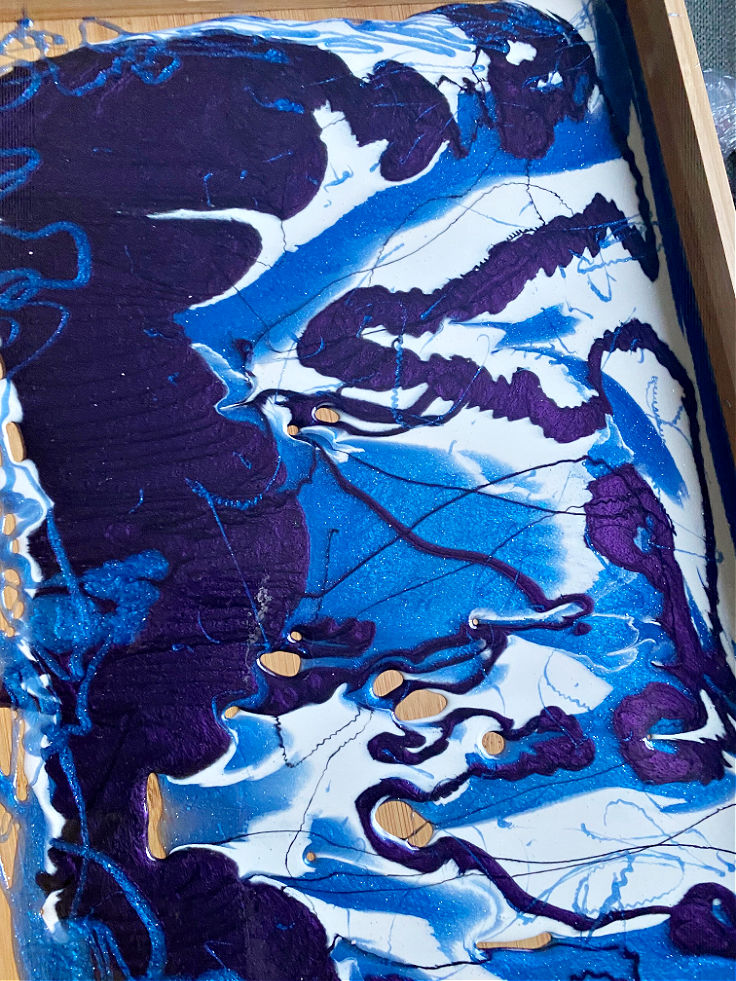
Once you have all the colors poured check to make sure the entire tray is covered with resin. The corners of this tray needed to be filled in a bit, so I used a heat gun to move the resin into all the corners. A heat gun is also a great way to create different designs and “cells” in the resin.
STEP 5:
Let the resin dry overnight in a safe space where no dust or anything will get on it. You can cover the top with wax paper if you’d like to protect it. Look at the gorgeous finish and all of the dimensions from the diamond dust glitter.
STEP 6:
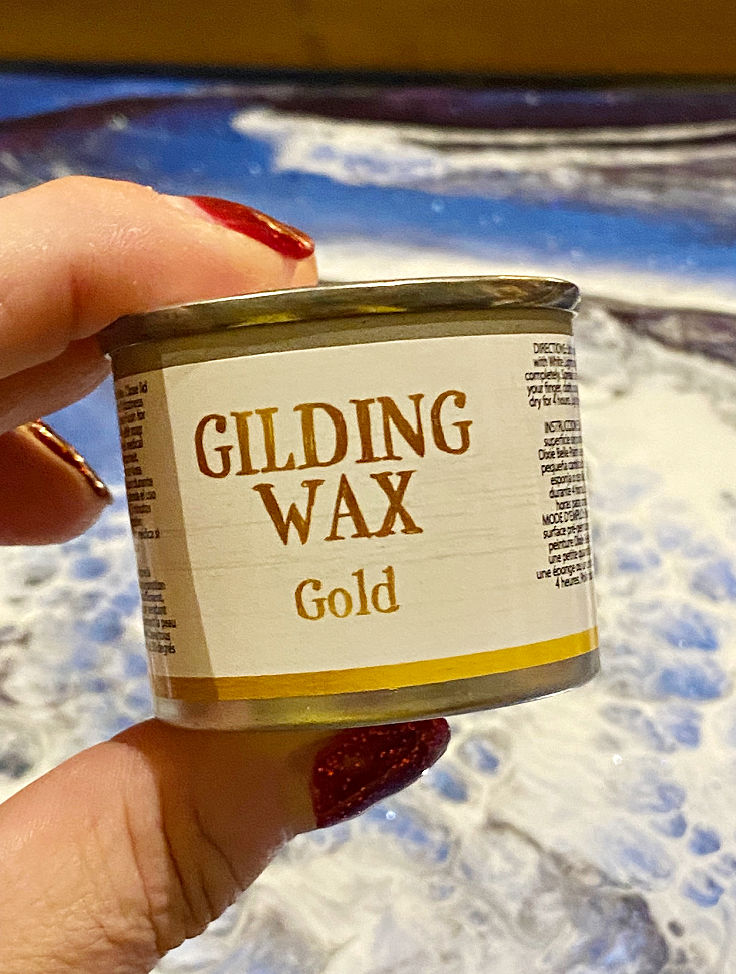
The last step to finishing this beauty is to add gold gilding wax to the wood. This is optional, but it adds to the elegance of the tray. A silver leaf would look stunning too.
That’s all there is to it! A gorgeous resin serving tray that is a one-of-a-kind piece. And, it’s surprisingly easy (and fun) to make.

Let me know what you think about this elegant DIY Resin Serving Tray made with EnviroTex Lite®Pour On.
Be sure to check out these other decorative resin trays for more inspiration, and share your own resin projects in the ETI Facebook Group!

Save this post by PINNING the below image:


Leave a Reply