• About Us
  • FAQ
  • Contact Us
  • Shop Supplies
  • Email
  • Facebook
  • Instagram
  • Pinterest
  • Twitter
  • YouTube
  • Skip to primary navigation
  • Skip to main content
  • Skip to primary sidebar

Resin Crafts Blog

Resin crafting projects and tutorials

  • Home
  • Resin Projects
  • Molds
  • Project Type
    • Jewelry
    • Home Decor
    • Art
    • Gift Ideas
    • Crafts
  • Resin Tips

Wood Framed Faux Stained Glass

by Sheri 1 Comment

Share
Pin281
Post
281Shares

Wood Framed Faux Stained Glass- finished artworkHello resin crafters! I am excited to share this Faux Stained Glass project with you! It’s a fun method to create some pretty art!
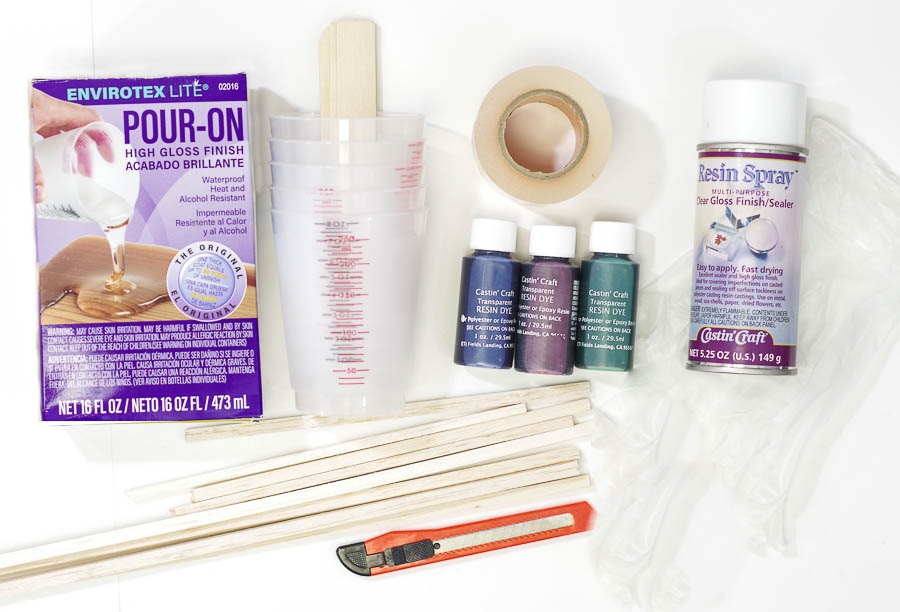
SUPPLIES:

  • Envirotex Lite
  • Castin’ Craft Resin Spray
  • Castin’ Craft Transparent Resin Dyes
  • Disposable Measuring Cups
  • Stir Sticks
  • Packing Tape
  • Thin Balsa Wood (found at craft stores)
  • Hobby knife
  • Vinyl Gloves
    Wood Framed Faux Stained Glass- supplies


Tutorial:

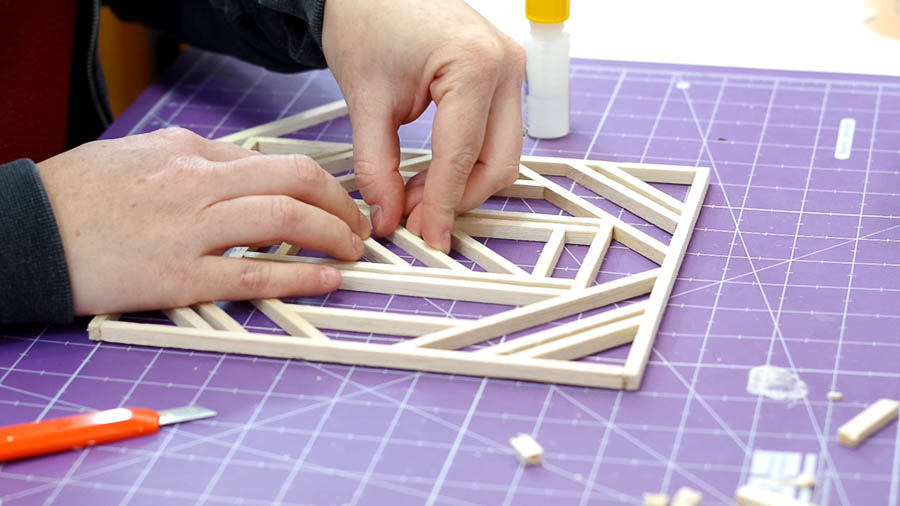
Begin by cutting the balsa wood pieces with your hobby knife and creating your design.Wood Framed Faux Stained Glass- begin cutting and assembling pieces into a design

Wood Framed Faux Stained Glass- begin cutting and assembling pieces into a design

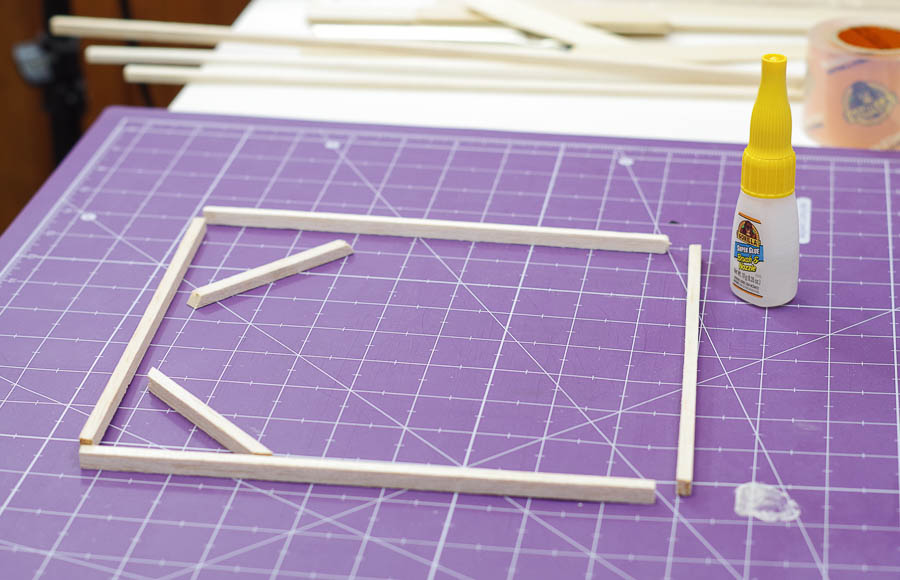
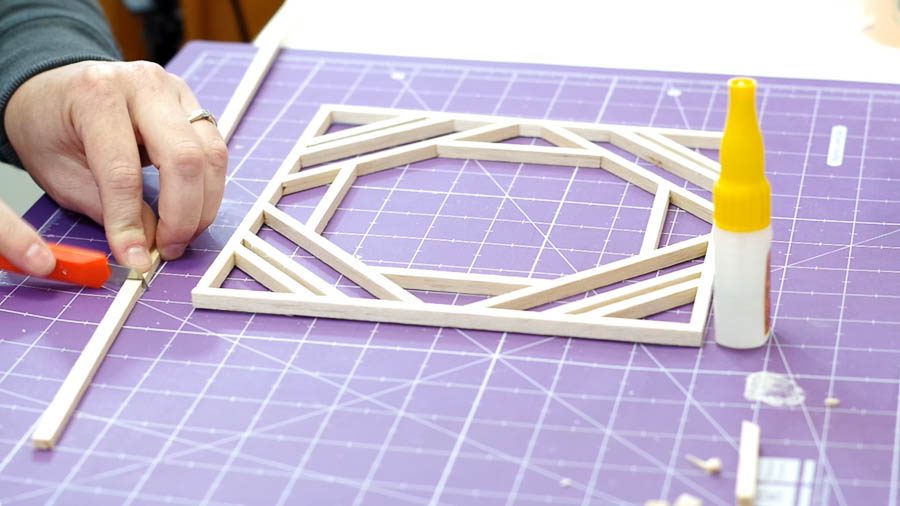
Use super glue to adhere the pieces together quickly.

Wood Framed Faux Stained Glass- use super clue to adhere pieces together quickly

Once you have your design completely assembled, spray it with a couple coats of Resin Spray to seal the wood.

Wood Framed Faux Stained Glass- apply packing tape to back of wooden frame, covering entire thing thoroughly


Wood Framed Faux Stained Glass- apply packing tape to back of wooden frame, covering entire thing thoroughly

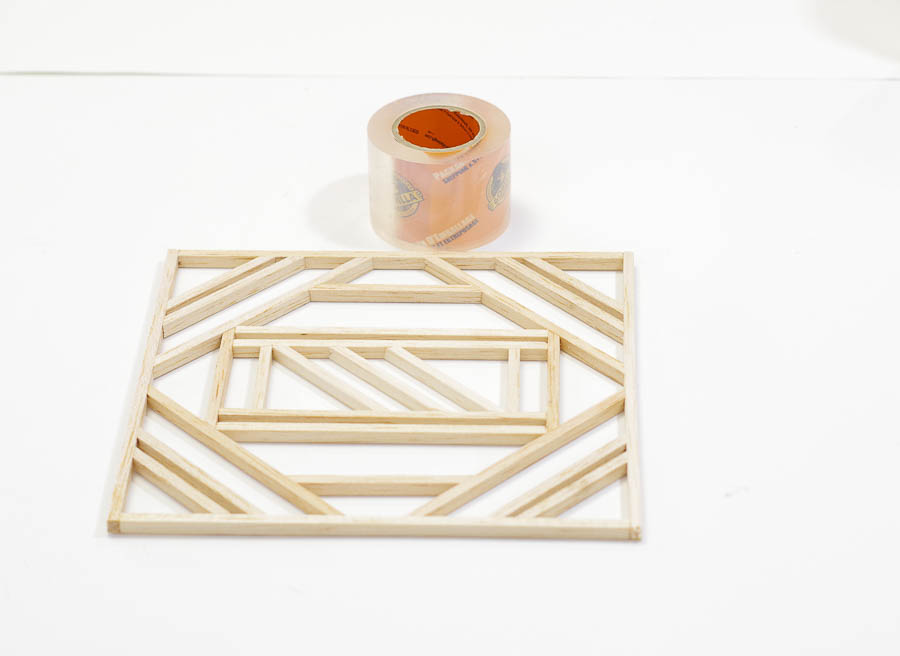
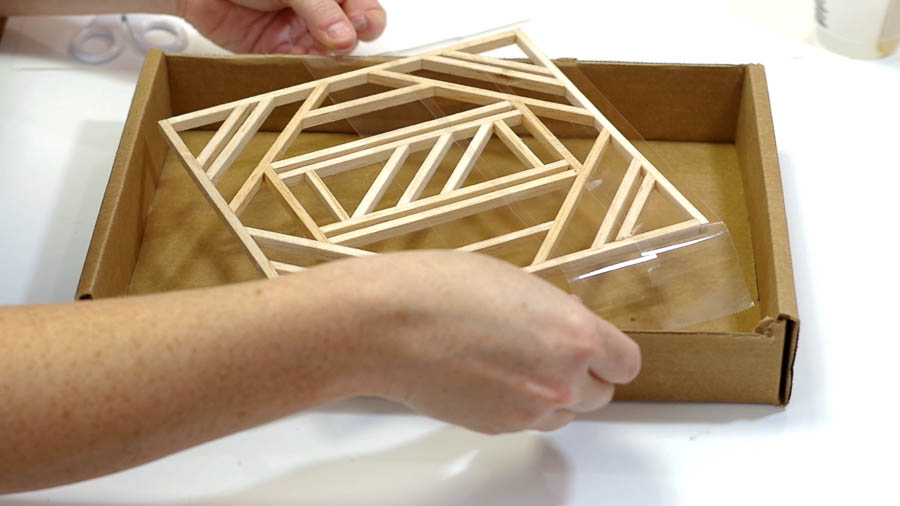
Flip it back over and place inside a box in case the resin leaks at all.

Next, mix your Envirotex Lite! Please put on your vinyl gloves first. As you can see I missed that in this step, but soon realized my mistake and put them on for the rest of the project. You don’t want this stuff on your hands!

Mix equal amounts of Part A and B in a large cup. Stir thoroughly then pour the resin into smaller cups for coloring.

Wood Framed Faux Stained Glass- Mix resin

Wood Framed Faux Stained Glass- color smaller cups of resin

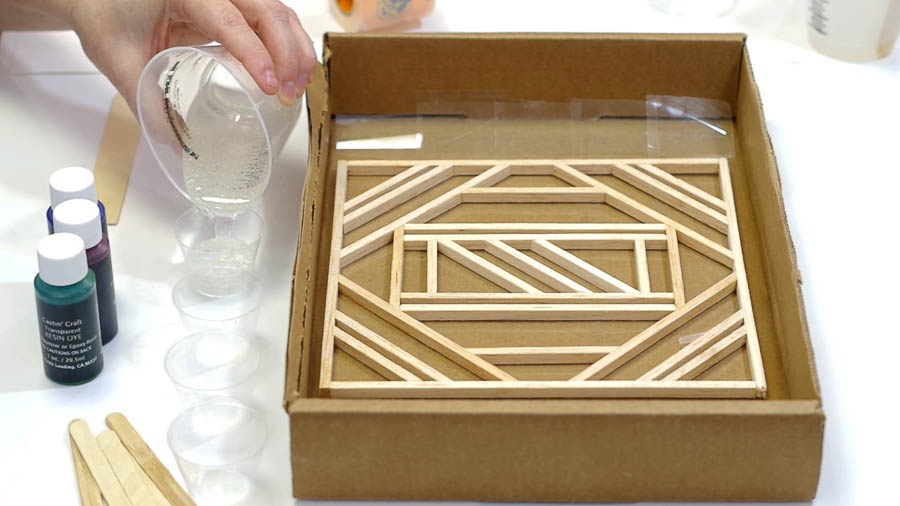
Pour the resin into each section as you like. As you can see mine leaked a little because I didn’t have the tape pressed on well enough. When I noticed this I put something heavy on the frame to hold it down better and it prevented more leaking. Just a tip.

Wood Framed Faux Stained Glass- pour colored resin into frame as you like

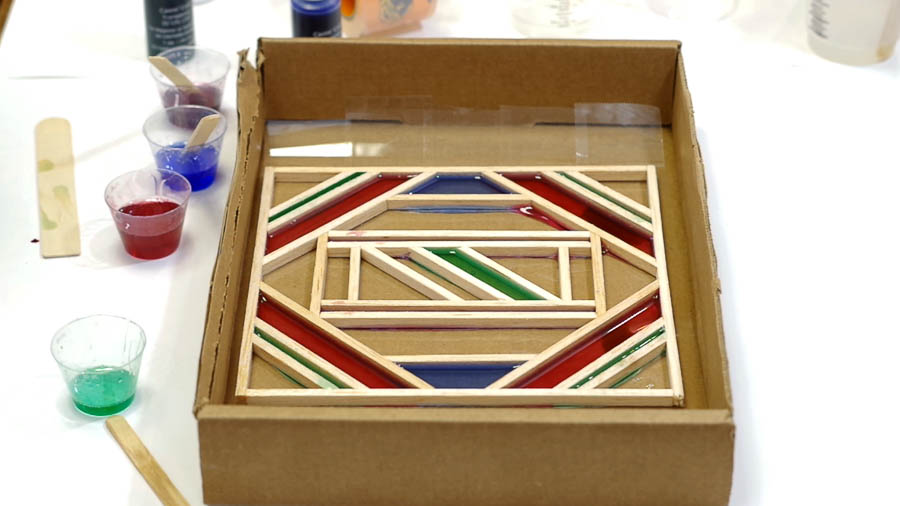
Once you have it all poured, let the entire thing cure for 24 hours.

Remove the tape from the back of the artwork.

Wood Framed Faux Stained Glass- remove tape from back of framed art

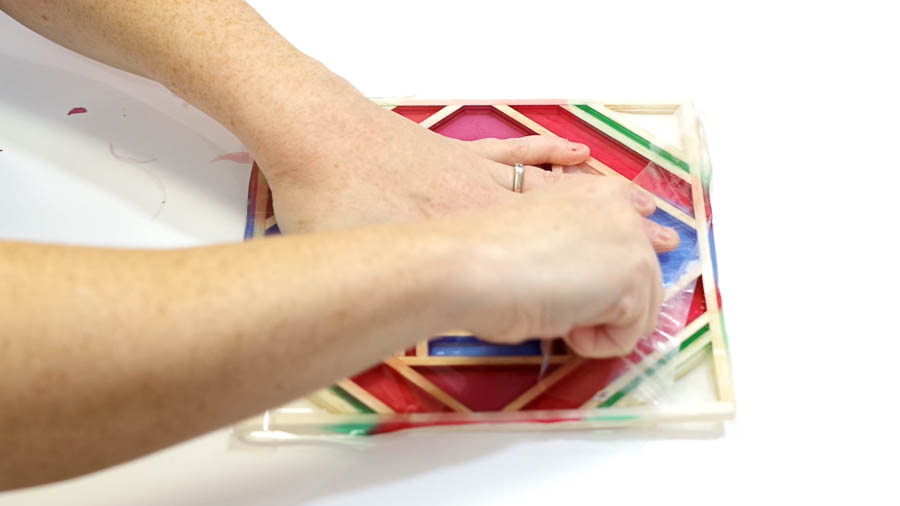
The back will have a matte finish because of the tape, so you may need to spray the back again with Resin Spray to finish it off and create a glossy finish again. Once that dries, you’re done!
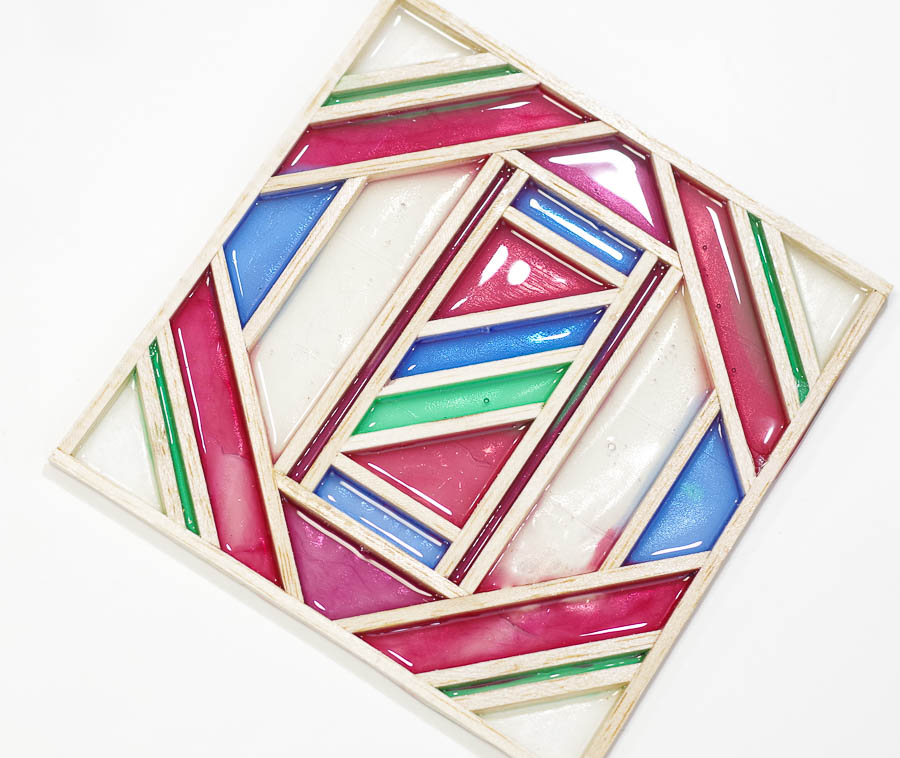
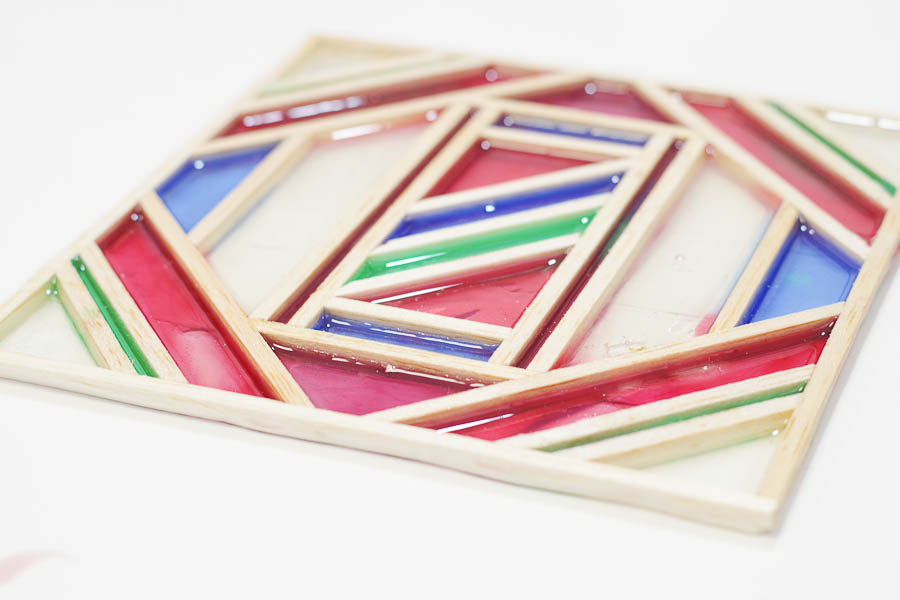
Finished!

I hope you like this Wood Framed Faux Stained Glass artwork. It was really fun to create and I can think of many designs I’d like to do.

Wood Framed Faux Stained Glass- finished artwork

Wood Framed Faux Stained Glass- finished artwork

Wood Framed Faux Stained Glass- finished artwork

Thank you for reading!


Sheri
Sheri

Sheri is a Maker and DIY blogger at Hazel + Gold Designs. She is usually in the middle of multiple projects at once and finds great satisfaction and joy in creating something new. She is constantly learning new skills, putting them to the test, and sharing her experience and knowledge with others. Her favorite hobbies are crafting, painting, crocheting and basic woodworking. Her goal is to inspire others to step out of their comfort zone, learn a new skill and have the confidence to make their life a little more beautiful!

Share
Pin281
Post
281Shares

If you enjoyed this...

  • high gloss bar top makeover | whitney j decor | interior design | decorating diy projects | charcoal gray bar | envirotex lite bar | bartop | bar makeover | home bar makeover | large bar | diy resin makeover | diy bar decor | diy resin decor
    High-Gloss Charcoal Gray Bar Top Makeover with…
  • Glossy Wood Slice Photo Transfer - completed
    DIY Glossy Photo Transfer Wood Slice
  • DIY coastal-inspired cutting boards with resin
    Coastal-Inspired Wooden Cutting Boards with Resin

Filed Under: Art, Home Decor, Project Type, Resin Projects

Previous Post: « DIY Pet Gifts
Next Post: Marbled Resin Round Serving Tray DIY »

Reader Interactions

Comments

  1. Vanessa Fourie

    December 12, 2018 at 4:26 am

    I am interesting to do that

    Reply

Leave a Reply Cancel reply

Thank you so much for leaving a comment on Resin Crafts Blog! For technical questions you can email our customer service at: msanchez@eti-usa.com or via telephone @ 1-800-368-9323.
Recipe Rating


Primary Sidebar

Welcome!

Pin With Us

Categories

Resin Crafts Blog is a participant in the Amazon Services LLC Associates Program. As an Amazon Associate we earn from qualifying purchases.

Copyright © 2025 Resin Crafts

We use cookies to ensure that we give you the best experience on our website. If you continue to use this site we will assume that you are happy with it.OkNo