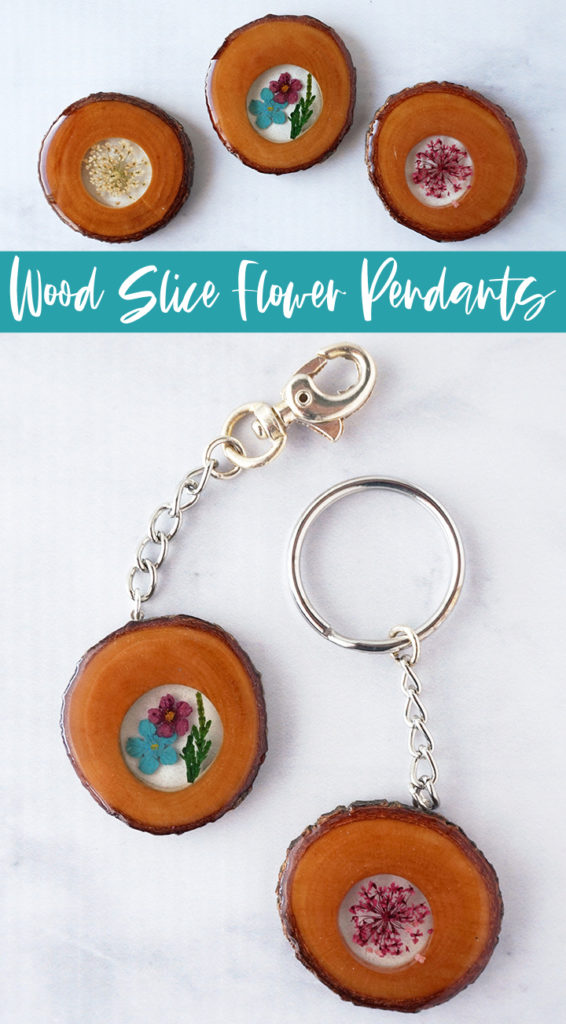
These one-of-a-kind, rustic Wood Slice Flower Pendants are made of a natural wood slices with pressed flowers suspended in the center using resin!
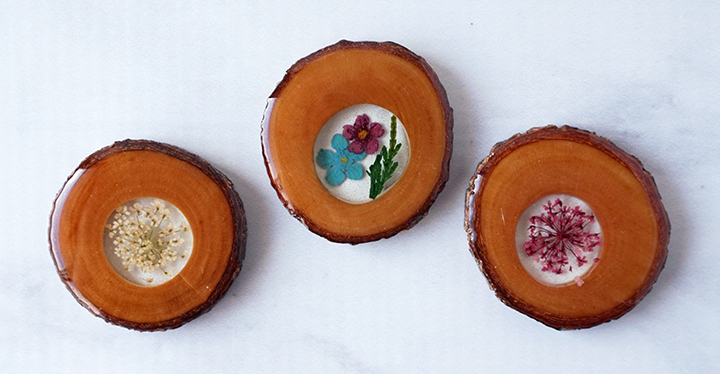
Hello, amazing Resin Crafters! Lindsay here to share a nature-themed resin project with you! Did you know that one of the best ways to preserve natural items is with resin? These eye-catching pendants are made using wood slices with colorful, pressed flowers suspended in the center using resin. They are surprisingly simple to make, and would make gorgeous jewelry and keychains for your own collection or to give as a gift!
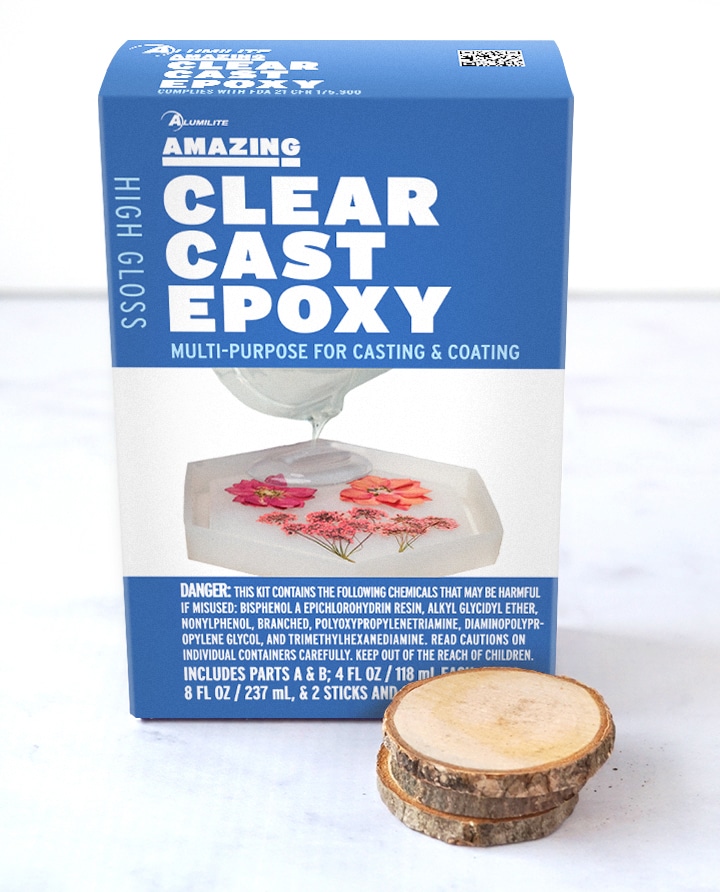
Supplies needed to make your own Wood Slice Flower Pendants:
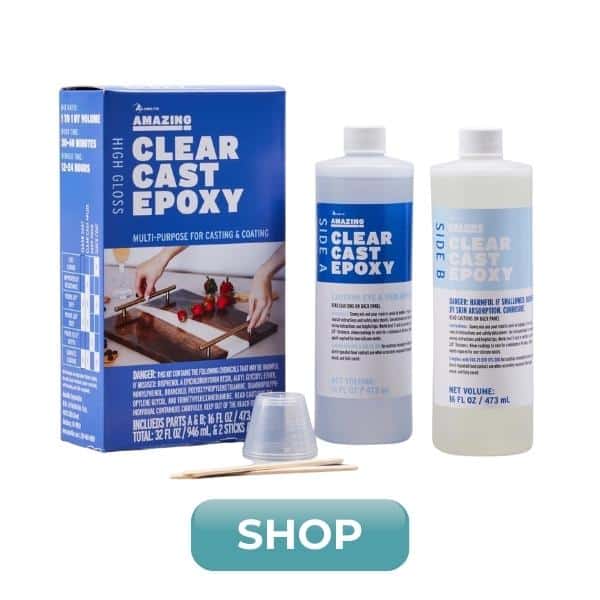
- Alumilite Amazing Clear Cast Epoxy
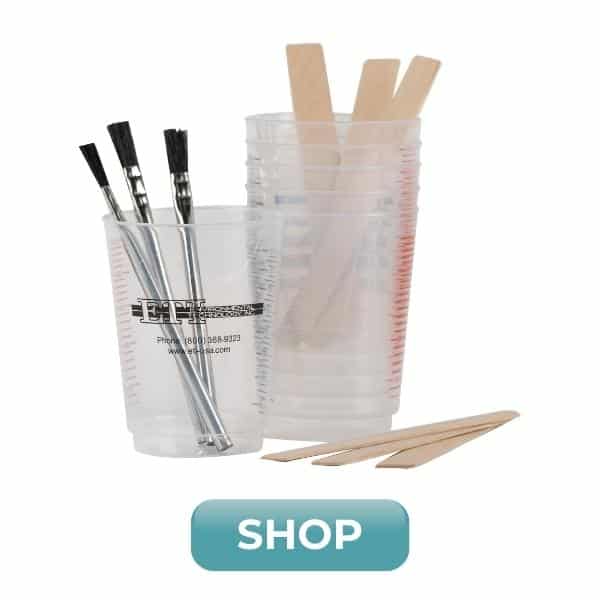
- Mixing Cups
- Gloves
- Stir Sticks
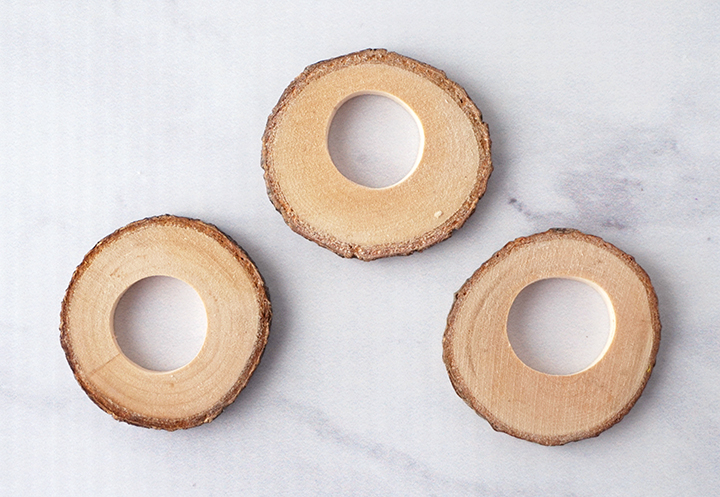
- 2-3″ Wood Slices
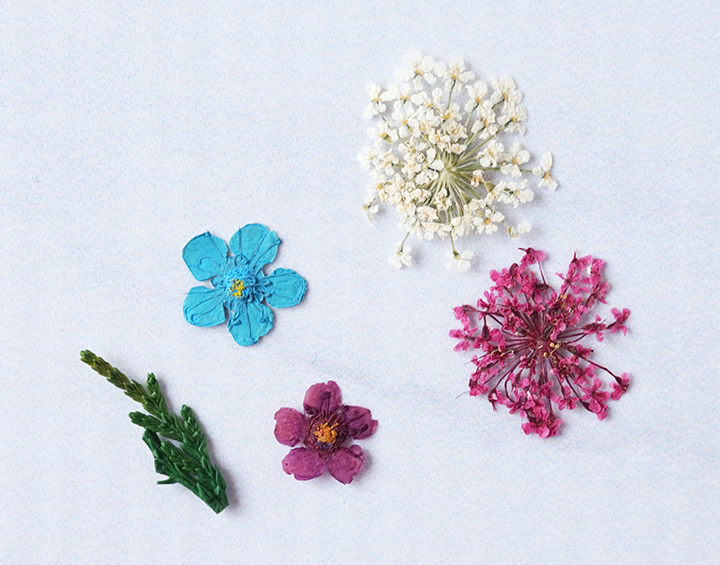
- Small Flowers, pressed and dried (can do it yourself or find them online)
- Clear Packaging Tape
- Small Jewelry Bails
- Jump Rings
- Jewelry Chain
- Jewelry Pliers
- Key Rings
Prep Work:
To keep your flowers looking bright and beautiful, spray them with Envirotex Spray Clear Sealer and let the sealer dry completely. It will seal the flower’s surface and also makes the flower sturdy enough to handle when you add it to the resin.

Prep Work:
Lightly sand the faces of the wood slices. You want them as smooth as possible. Be careful not to sand the edges – the bark is beautiful and adds character to the finished piece!
Step 1:
Use a drill bit or a Dremel tool to cut a circle out of the middle of the wood slices. The holes I cut measured about an inch. Sand the inside edges well. Spray the wood slices with a thin coat of Envirotex Spray Clear Sealer to help prevent bubbles later.
Step 2:
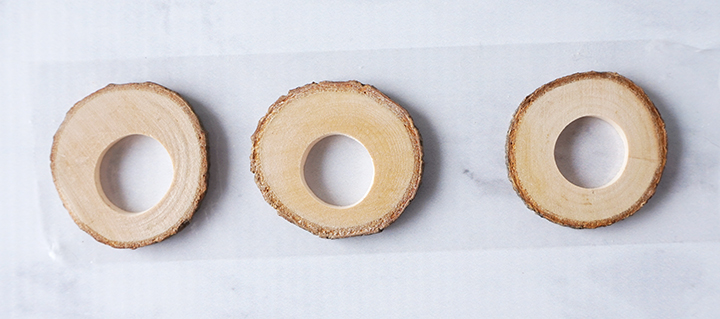
Cut a 6-7 inch piece of packaging tape. If you cut it too long (like I did), just fold the end over to make it easier to grab onto without getting stuck to it! Stick the wood slices to the tape and use a brayer tool or your hands to press them down well.
Turn the tape/wood slices over and use something like a credit card, a scraper tool, or even your fingernail to really get the tape stuck to the underside of the wood. This will keep any resin from seeping out.
Step 3:
Prepare the Amazing Clear Cast. according to package directions. You only need a little bit of resin to start with! Be sure to work in a well-ventilated area and wear disposable gloves. Pour in equal parts resin and hardener to the mixing cup. Stir the resin mixture together with a stir stick for two minutes, making sure to scrape the bottom and sides of the mixing cup. Pour the resin into a clean mixing cup and stir the resin again for another minute or two with a clean stir stick.
Step 4:
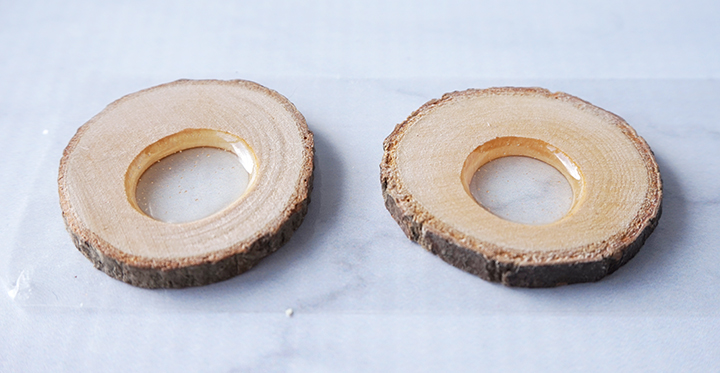
Carefully pour resin into the center of each wood slice using a stir stick. Try your best not to overfill! Let the resin sit for a minute, and then use a straw, lighter, or a toothpick to remove any air bubbles that come to the top.
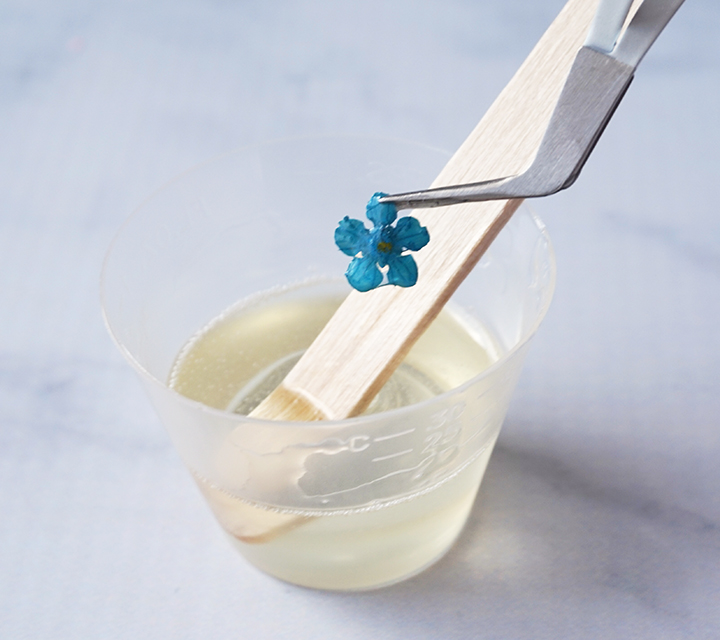
Step 5:
Time to add the flowers! To reduce the amount of bubbles, dip the flowers into the resin before adding them to your project. Since they are so delicate, I recommend using tweezers to hold an edge of the flower when you dip it into the resin.

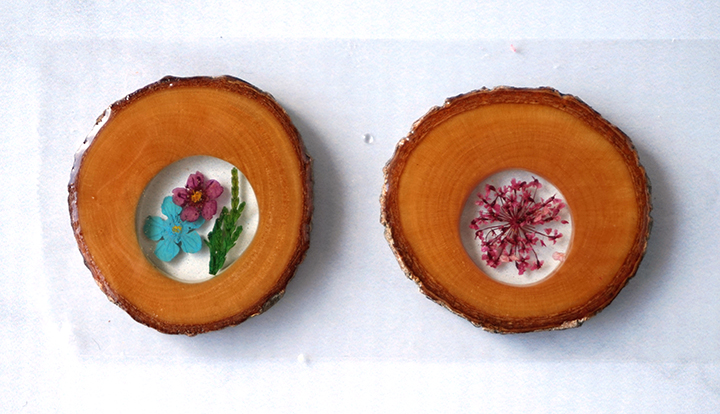
Step 6:
Add the flowers to resin in the center of the wood slices. Get creative with multiple flowers and leaves, and arrange as necessary to get the look you want. Fill the wood slices the rest of the way with resin and pop any bubbles that rise to the surface.
Leave the resin to cure in an undisturbed area for 12-24 hours.
Step 7:
Mix up another small amount of resin and cover the entire top of the wood slice. This will give the piece an even, domed top with a glossy finish. Just be careful to not go over the edges!
Leave the resin to cure in an undisturbed area for 12-24 hours.
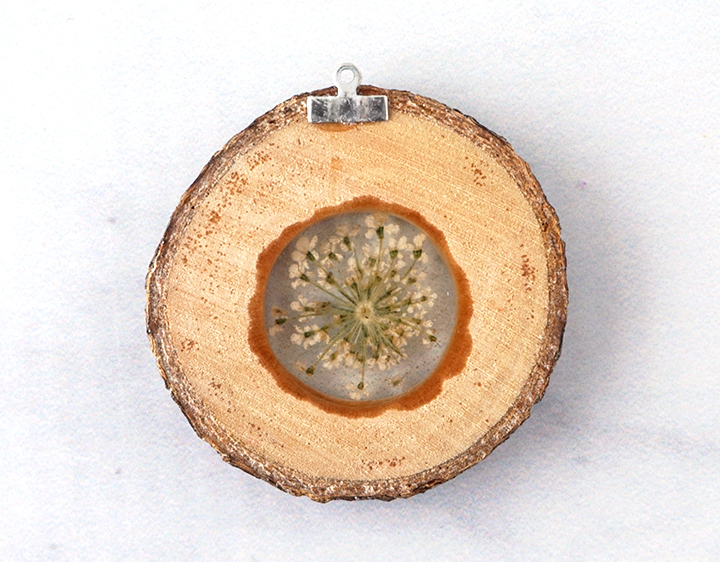
Step 8:
Carefully peel the wood slices away from the tape. If there is any sticky residue left behind, you can lightly sand it away. Attach a bail to the back of the wood slice with a strong adhesive. Let it dry completely, and then attach a jump ring to the pendant.
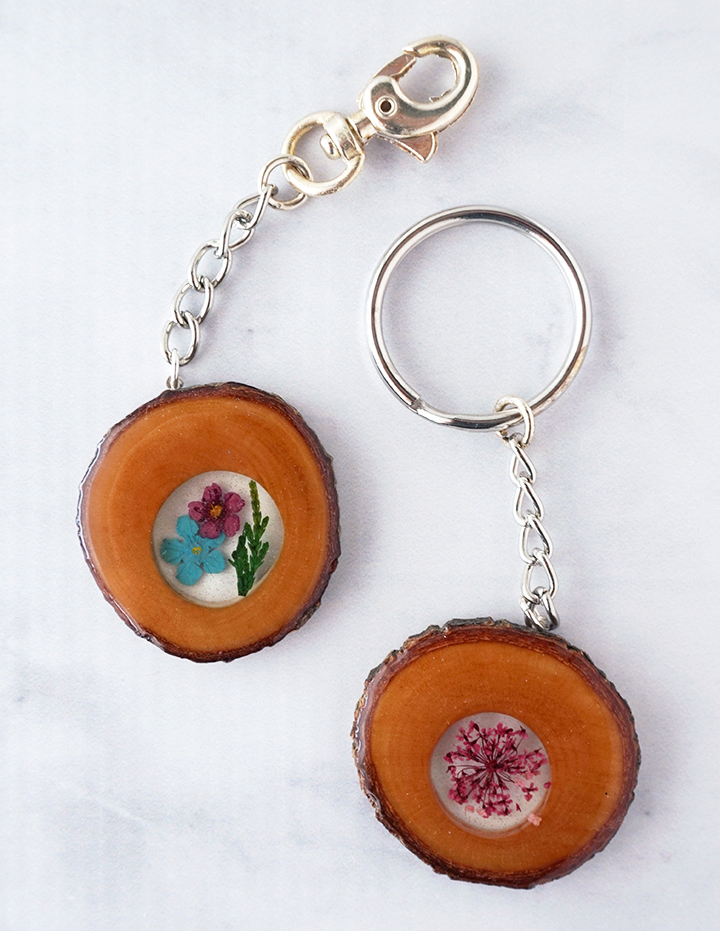
Step 9:
Attach a keychain to the jump ring, and use jewelry pliers to close it. Not sure how to do that? The tutorial for these DIY Resin Flower Keychains will show you how!
Attach your keys to these keychains, or use them as zipper pulls. Another great option is to attach a chain to the pendants to create a one-of-a-kind necklace. Because of all the different variations of flower and wood slices, no Wood Slice Flower Pendant will be the same!
Like this project? Don’t forget to Pin, Like, and Share!
Lindsay is a crafter, graphic designer, and glitter enthusiast from Utah. She’s passionate about homeschooling her creative daughter, traveling, and spending time in the craft room. Lindsay shares DIY project tutorials, printables, recipes, kids crafts, and more on her blog, ArtsyFartsyMama.com, where she inspires readers to live a creative life.


Thank you for your design. But .I did that a lot but resin out from tape and fall.what can I do
Hi Nancy, so sorry you had trouble! I would recommend using a very sticky tape on the back, and make sure to use something like a credit card or even a fingernail to make sure it is stuck on well. Any leakage is usually from the tape coming un-stuck from the wood. However, a leaked project isn’t ruined! You can sand the leaked resin from the back of the wood and make sure to keep whatever is left in the center opening. Then you can re-pour resin in the center and it shouldn’t leak.
Hi! Can i pour resin just over the flowers?
Hi Jade, you can definitely pour resin over flowers! Here’s one of our tutorials: https://resincraftsblog.com/diy-resin-flower-keychains/