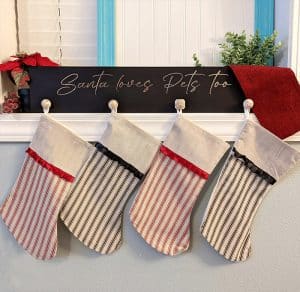
How to Make an Epoxy Knob Stocking Holder
Need a place to hang stockings because you don't have a mantel? Make a DIY epoxy knob stocking holder like this one!
Materials
- Knob molds (and hardware)
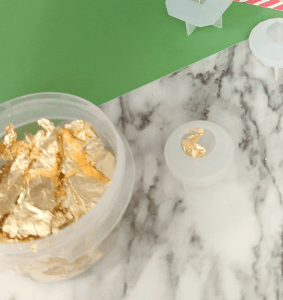
- Gold leaf
- Alumilite Amazing Deep Pour Epoxy
- White opaque pigment
- Mixing cups
- Stir sticks
- Nitrile gloves
- Protective eyewear
- Strong adhesive (like super glue)
- Piece of wood
- Paint
- Vinyl
- Drill
Instructions
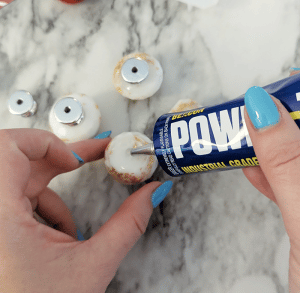
- Before working with epoxy, don't forget to put on gloves and protective eyewear. Remember that the deep pour resin can take 2-3 days to cure and demold, and up to 5-7 for a complete cure, so plan enough time for this project.
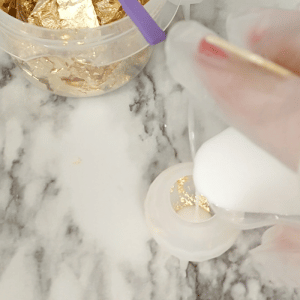
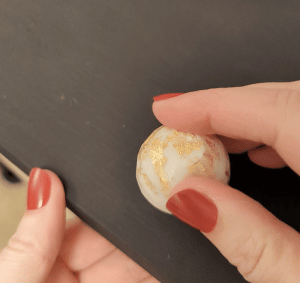
- Add a few pieces of gold leaf to the inside of each mold. Repeat with each mold. If you don't want any gold flakes on your knobs, you can skip this part.
- Mix resin according to directions. You'll notice that the A bottle is bigger than the B bottle. This is because the ratio is 2:1 A to B. Measure A and B into two different measuring cups. I needed about 15 mL of resin per mold, so that's 60 mL total. So you need 40 mL of part A and 20 mL of part B.
- Pour them both into another mixing cup and stir for 2-3 minutes, until any cloudy swirl is gone and the mixture is clear. Then mix for 2 more minutes.
- Add a few drops of opaque white and stir until evenly mixed. If you don't want white, add your preferred colorant here.
- Distribute the resin to the molds. After about 15 minutes, check for any bubbles on the surface and pass a heat gun over the top. This epoxy is pretty runny, and designed to release bubbles really well - it's what makes it so great for deeper pours!
- When the resin has cured, remove the knobs from the molds.
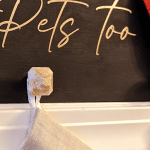
- Attach the knob hardware with a strong glue and let it harden 24 hours or at least overnight.
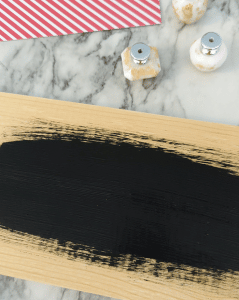
- While the knobs are curing, work on the stocking holder part of the project. Measure wood so that all the stockings you need will fit across it.
- Paint in desired color - I used black because I want the white and gold knobs to really stand out. You can paint with a brush or spray paint, whichever you prefer.
- After the paint dried for a day, I added gold vinyl that says "Santa loves Pets too." You can leave yours blank, add a decorative border, or put your family name on it, with vinyl or paint.

- Mark out where each of the knobs will be installed, and drill a hole in each spot so the screw can fit through.
- Add the knobs and screws to secure them on, and hang the stockings. And there you have it! This makes such a holiday showpiece for your home.