Ornate Mini Resin Frame Art Magnets DIY
Hi Resin Crafters, it’s Natalie from Doodlecraft, showing another creative and unique way to use resin. Ornate frames are over-the-top gilded and typically seen in art museums. That makes these ornate framed art magnets a fun addition to the fridge, school locker or miniature dollhouse! Pick your favorite works of art or have the kids draw a custom piece to fit.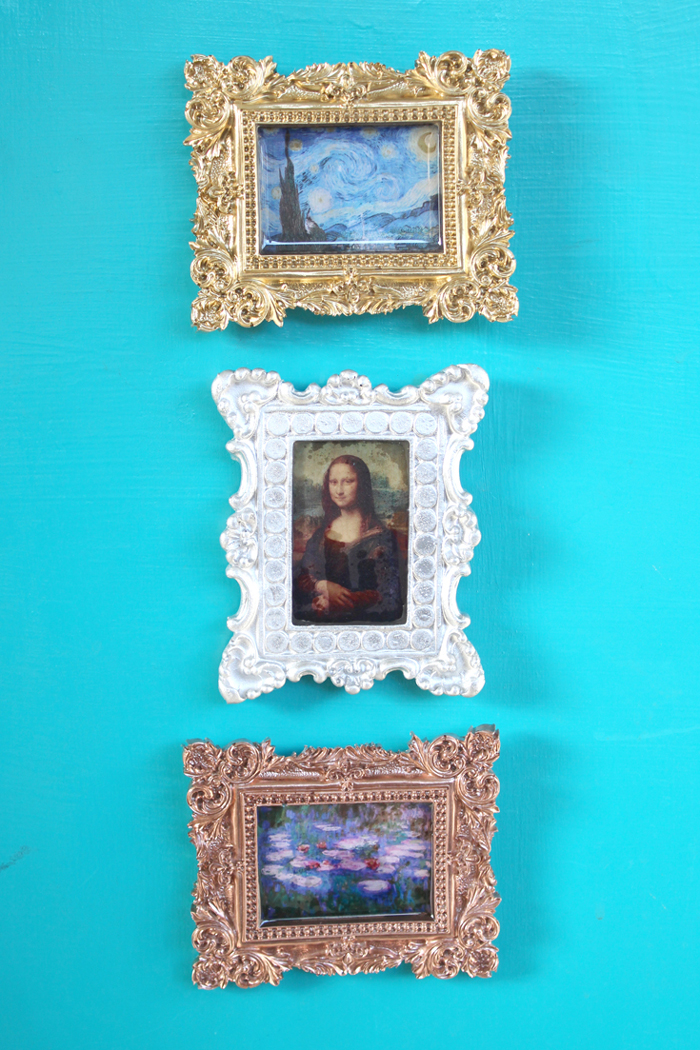
Supplies needed:
Ornate Frame Mold
Printed Art Picture or Custom Art
EnviroTex Lite High Gloss Resin
Chipboard
Hot Glue/Gun
Magnets
E6000 Glue
Metallic Spray Paints
Disposable work surface, mixing cups, stirring sticks, gloves
Heat gun/mini torch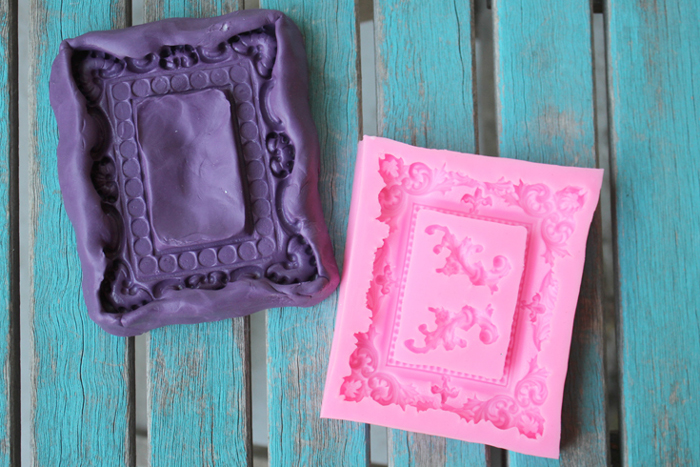 The pink silicone mold was purchased, but the purple one was made using EasyMold Silicone Putty and a small frame. Directions for mold making on this post.
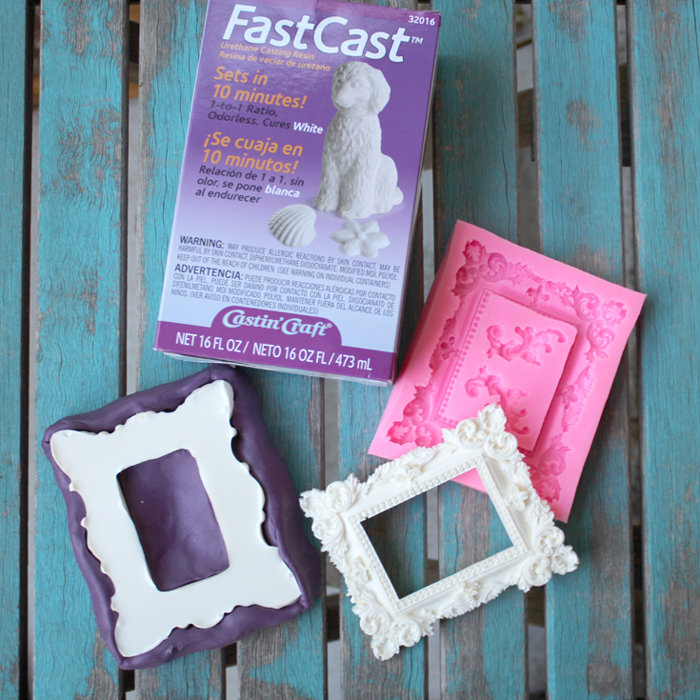 Start by filling the molds with water and then dumping the water from the molds into a measuring cup. Then mix the Fast Cast according to package directions in the quantity needed. Fast Cast works super quickly and sets in about 15 minutes. Pop the frames out of the molds.
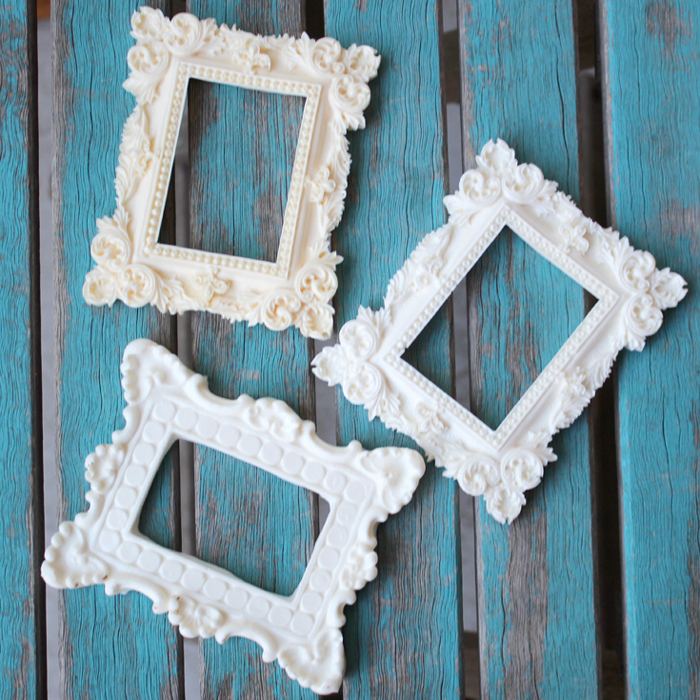 Next, use metallic spray paint to color the frames.
 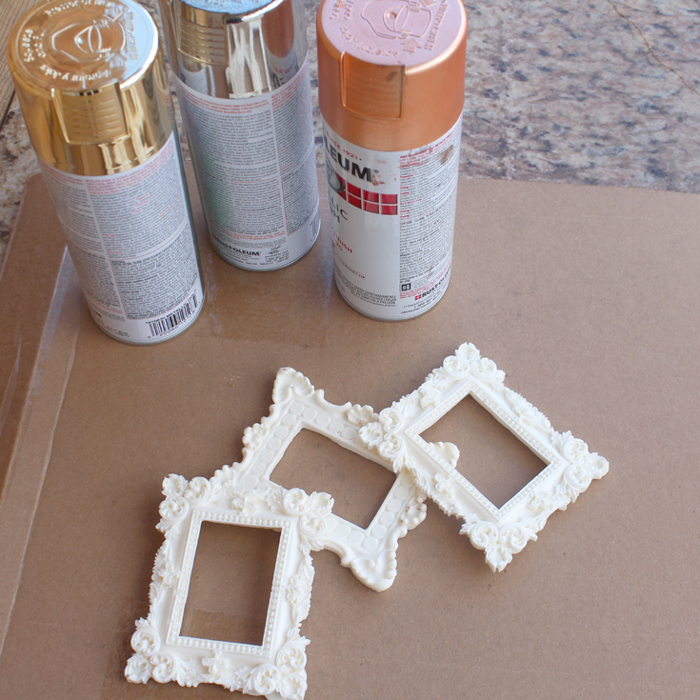 Gold, silver and copper are great metallics for ornate frames, let them dry completely.
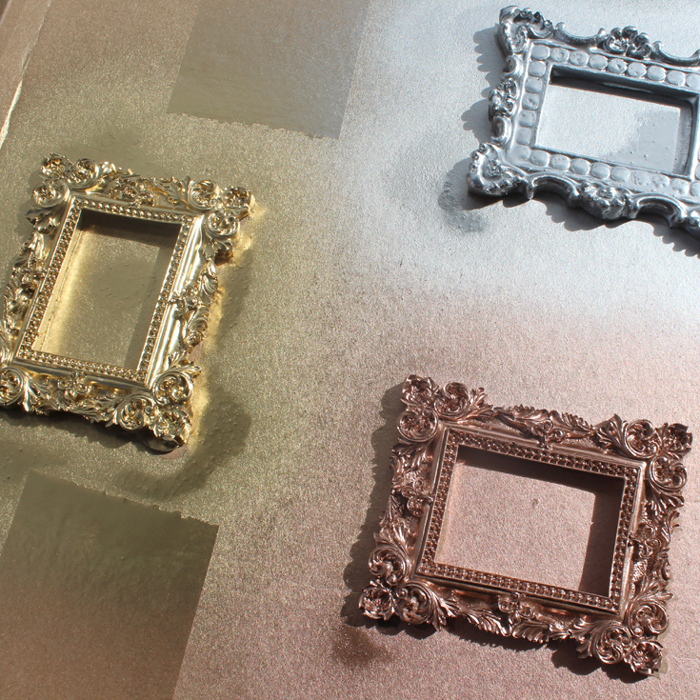 Print off favorite art pieces or draw your own to fit the inside of the frames. These would be so cute with a child’s first artwork scanned and sized to fit.
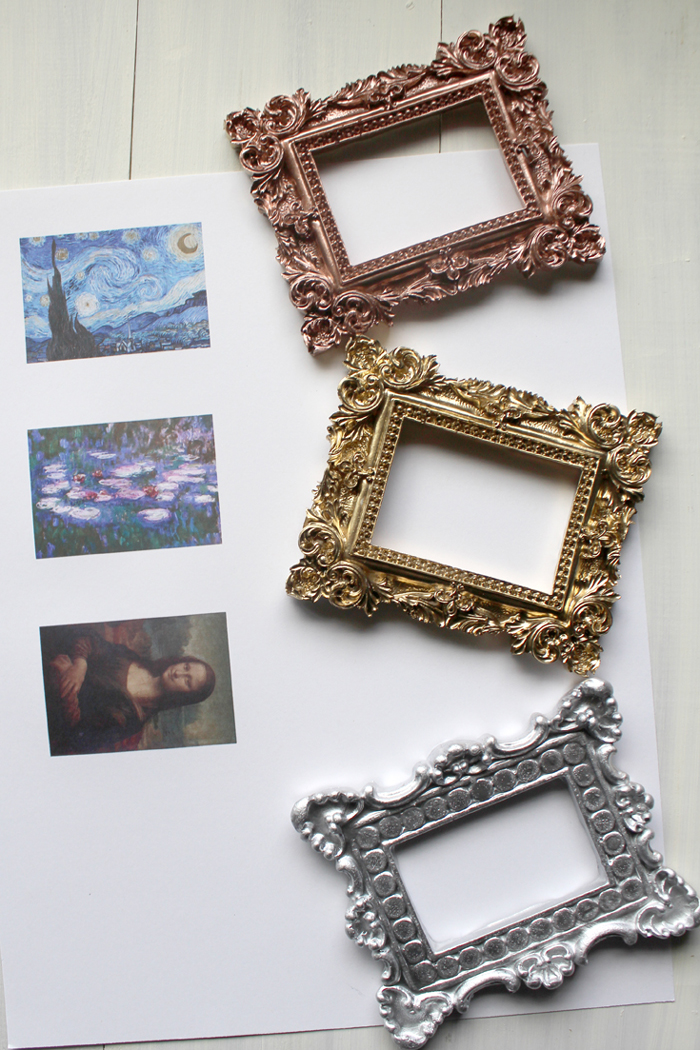
Cut a piece of sturdy chipboard 1/4 inch bigger than the pictures. Coat the chipboard with Ultra Seal and let it dry. 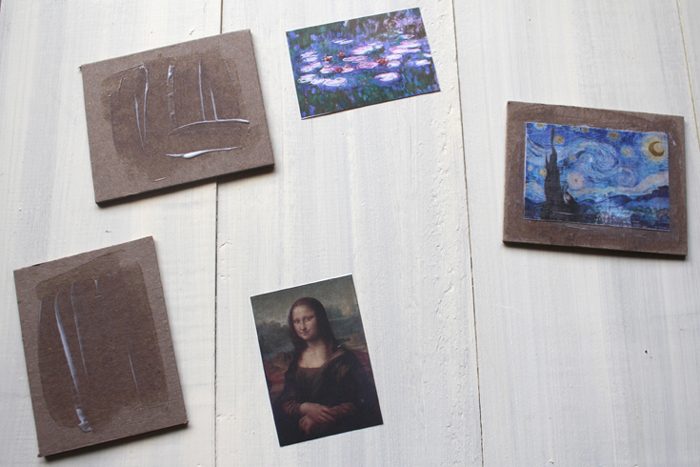 Then use Ultra Seal to adhere the art picture to the chipboard and coat the picture with Ultra Seal and let it dry completely.
 Next, pipe a thick bead of hot glue around the edge of the frame. Make sure it is a solid line so that none of the EnviroTex Lite High Gloss resin will leak out.
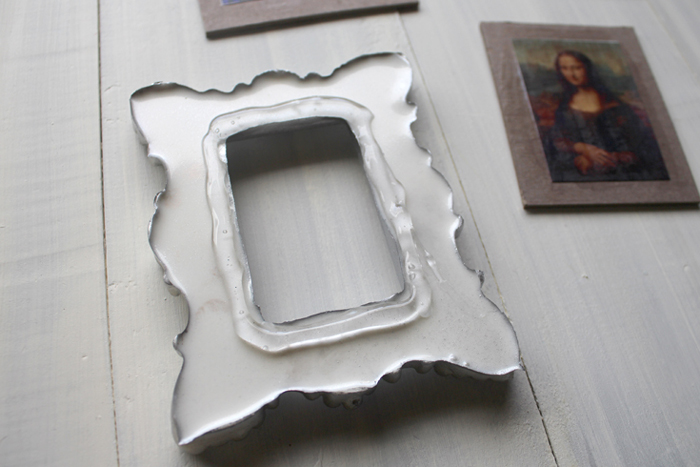 While the glue is still hot, carefully lift the frame and set firmly on the chipboard/picture.
 Repeat the process for all frames and pictures. They look great as is, but here’s where they get kicked up a notch!
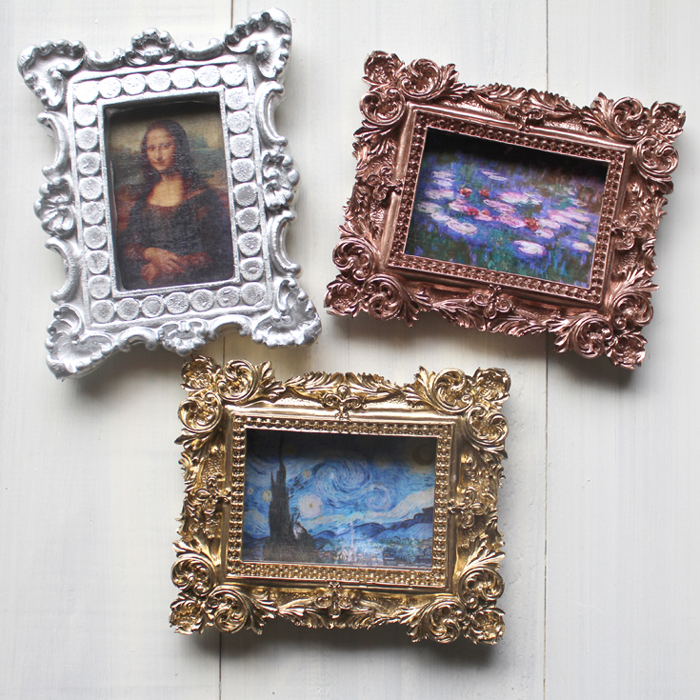 Set up a work space for the high gloss resin. Read the directions thoroughly before mixing the resin.
 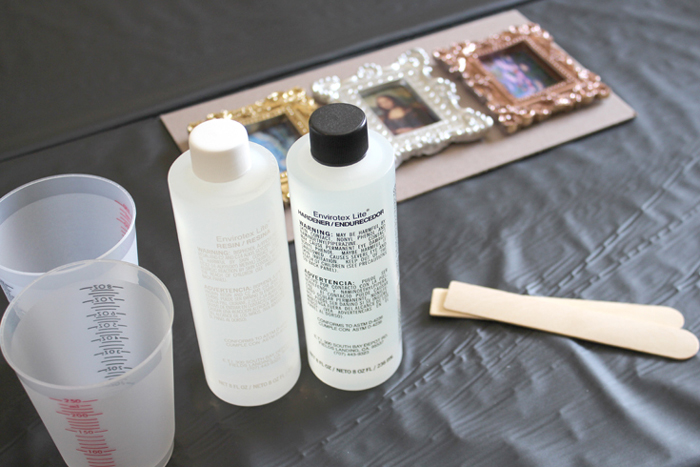 Mix the resin in the 2 phase manner directed.
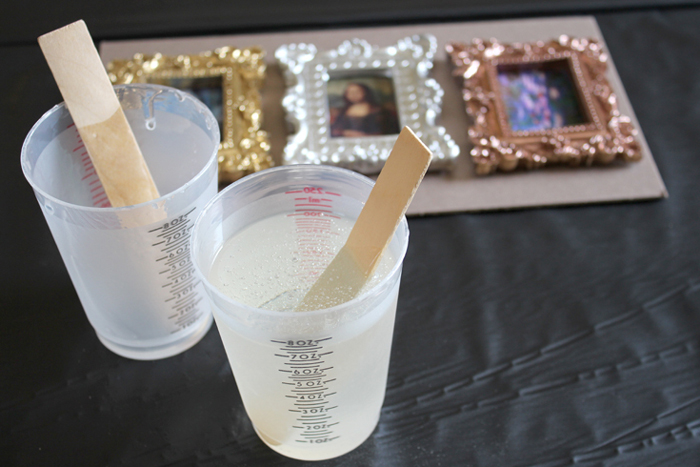
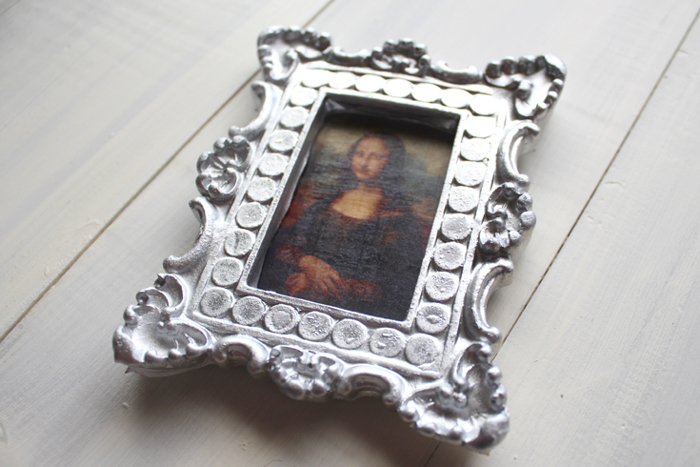
Next, pour the high gloss resin into the frame, this will act as shiny glass in the ornate frame.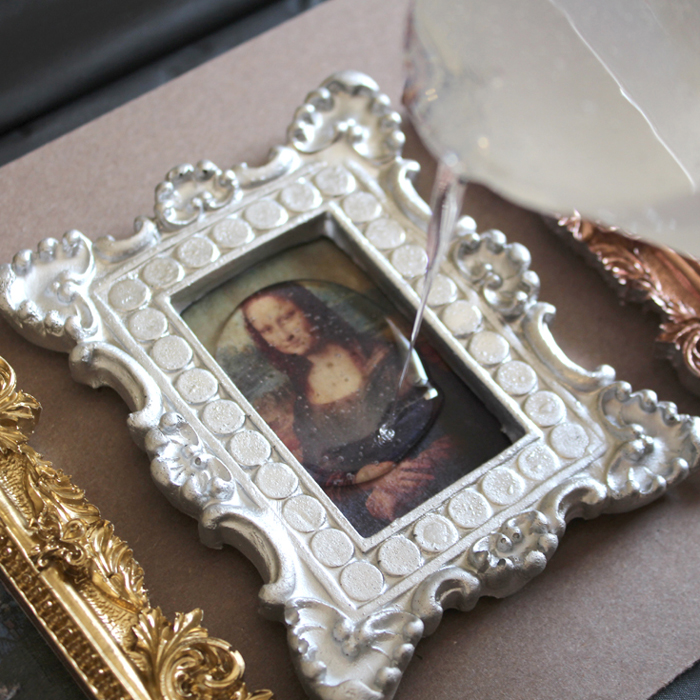 Let the resin sit for about 20 minutes and the bubbles will surface.
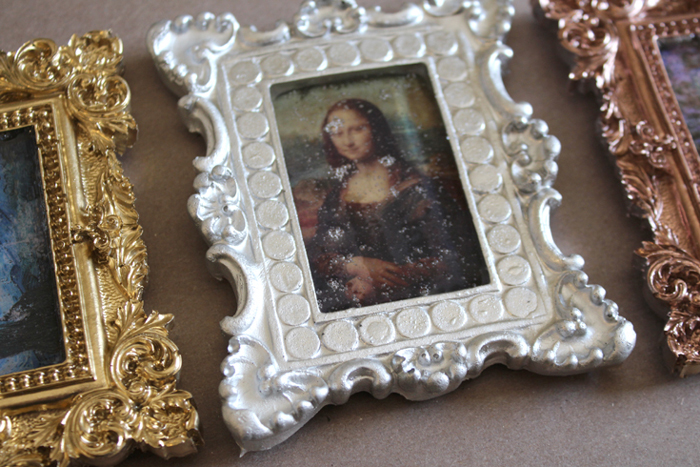 Then use a heat gun or mini torch to heat and remove the bubbles. Then let the resin cure for 24 hours.
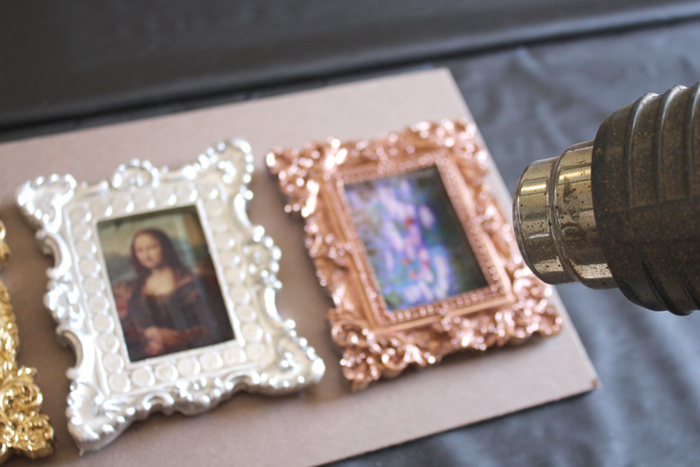
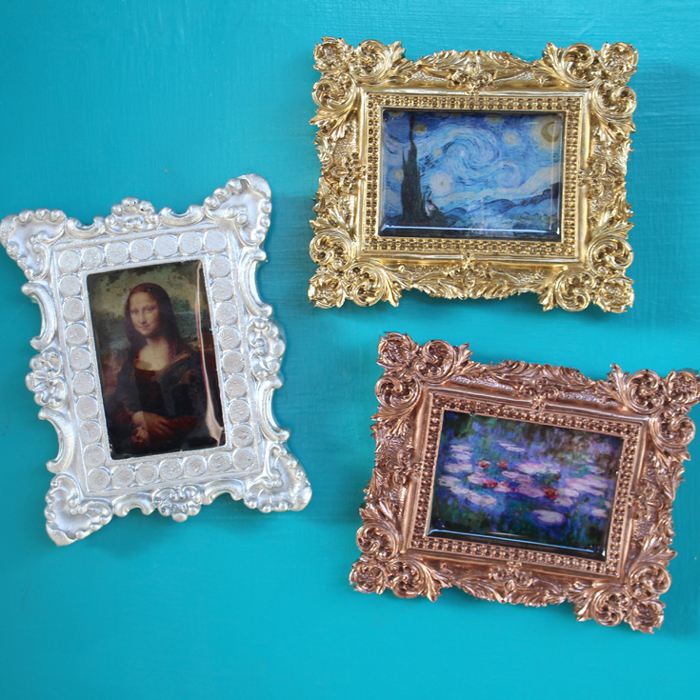
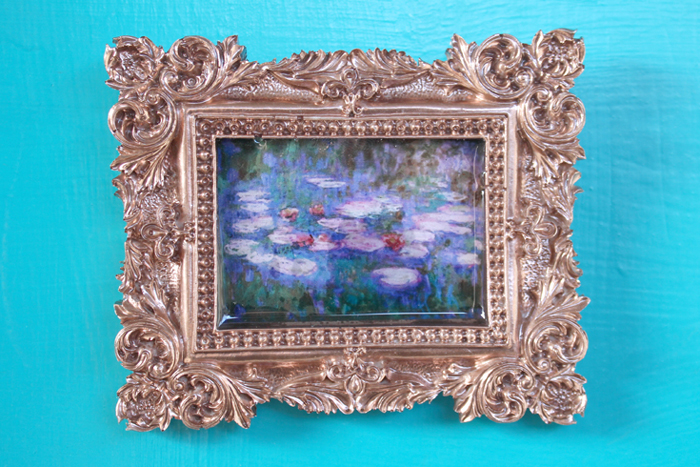
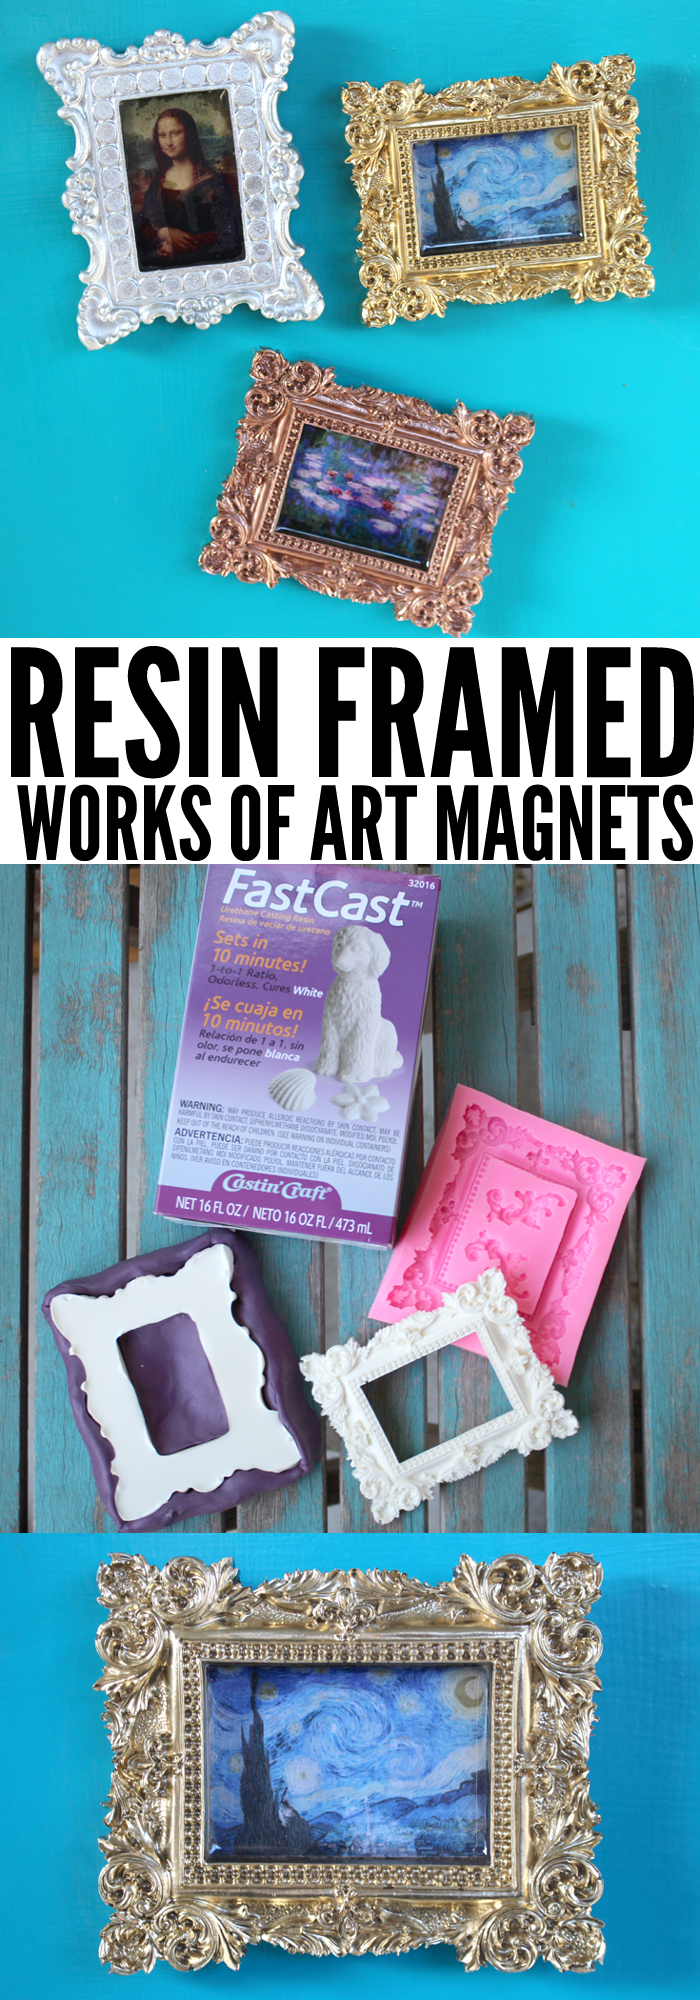
This copper framed piece is Water Lilies by Claude Monet.
 When the resin is cured there will be no odor. Then they are ready to adhere magnets to the back using E6000 glue.
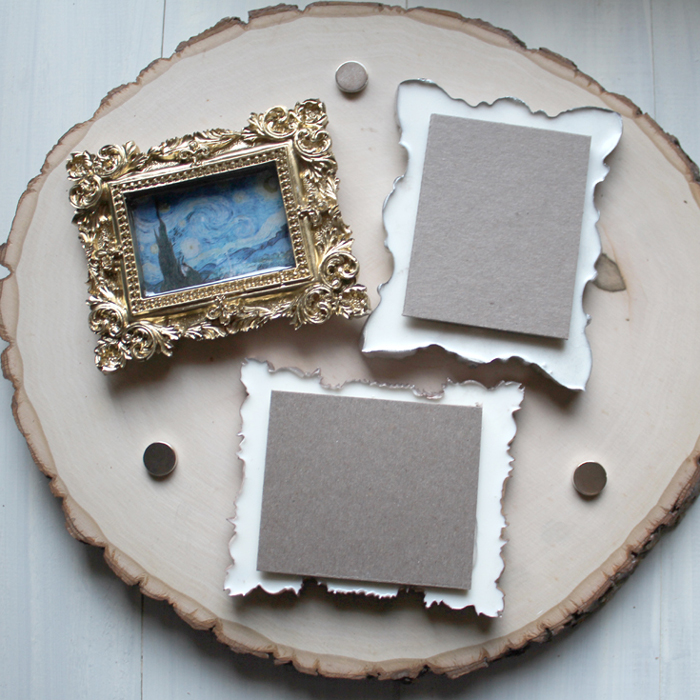 This is one of my favorites, The Starry Night by Vincent Van Gogh.
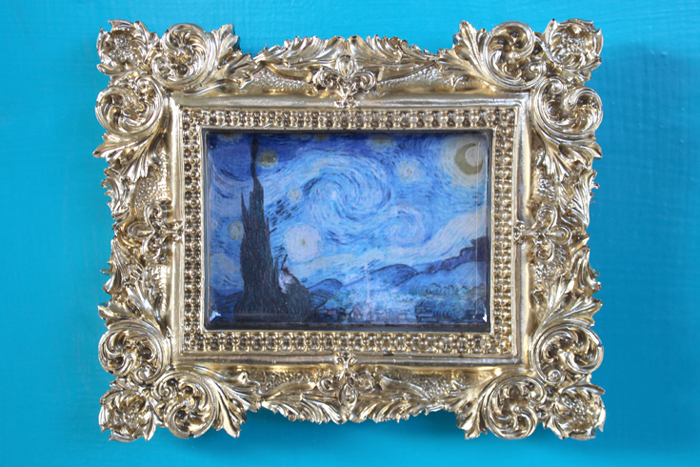 And of course, Mona Lisa by Leonardo Da Vinci. What works of art would you put in an ornate frame? Let me know in the comments!
Natalie Shaw is a Craft/DIY blogger at Doodlecraftblog.com. She loves sci-fi, fantasy and video game geekery and that comes out in many of her projects. She posts budget conscious DIY’s, crafts, jewelry, kid friendly projects, upcycled treasures and other fun on her blog 5 days a week.


Wow, nice post!Thank you for sharing this one. Really loved the idea.