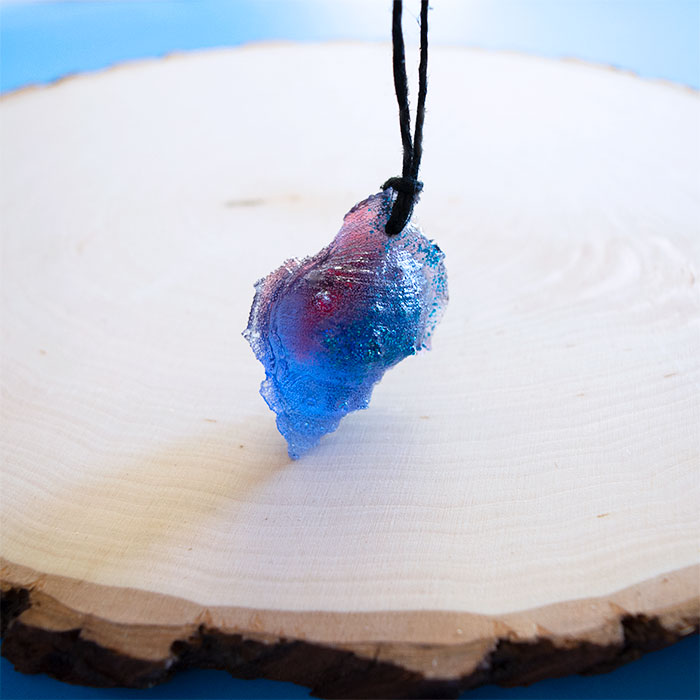
Hi Resin Crafters! This is Kelli, from the Craft Shack popping in again today to share a super fun summer style resin craft. Very few things say summer more to me than the beach. These fun seashell pendants are simple to make, and you can make your own custom silicone mold to reuse over and over again. It’s simple to do!
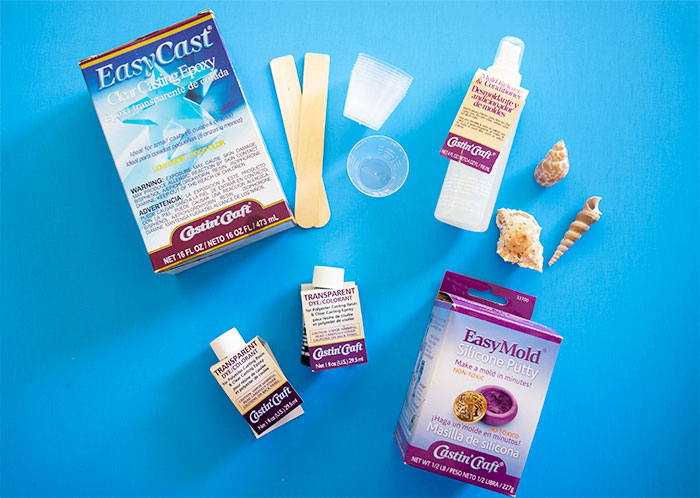
Here’s what you’ll need to make Custom molds and Seashell Pendants:
- Easymold Silicone Putty
- EasyCast Clear Casting Epoxy
- Universal Transparent Dyes (I used Red and Blue)
- Seashells
- Gloves and Eye protection
- Mixing Cups, and Stir sticks
First, you’ll need to make the seashell molds. Start by taking equal parts of the two silicone putty components. Mix part A with part B and knead until there is no more visible white. Once it’s mixed, you only have 3 minutes to work, so you’ll need to work quickly.
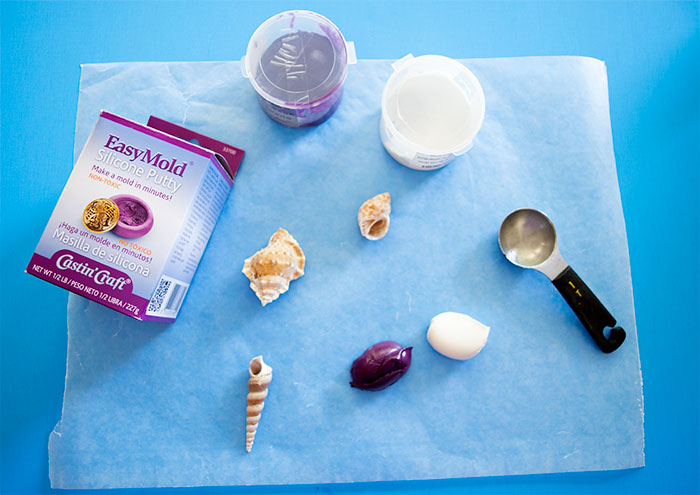
Take your mixed putty, and form it around the seashell, leaving an opening in the putty where the seashell opening is also. Squish it onto the seashell real good to give your seashell pendants great definition.

Before your three minutes is up, be sure to press the mold onto the table to form a flat side so that your mold doesn’t tip and fall while you’re filling it later. If you don’t get a flat side on your mold (I didn’t on some of mine!) don’t worry, you can prop the mold up ok without it. It’s just simpler with the flat end.
Allow the mold to cure for at least 25 minutes. When it feels firm and dry, you can bend it carefully and pull your seashell out. Don’t use too much force, or it will tear. Gently wiggle the seashell until it is freed from the mold. Rinse your mold to wash out any leftover seashell particles and allow it to air dry completely.
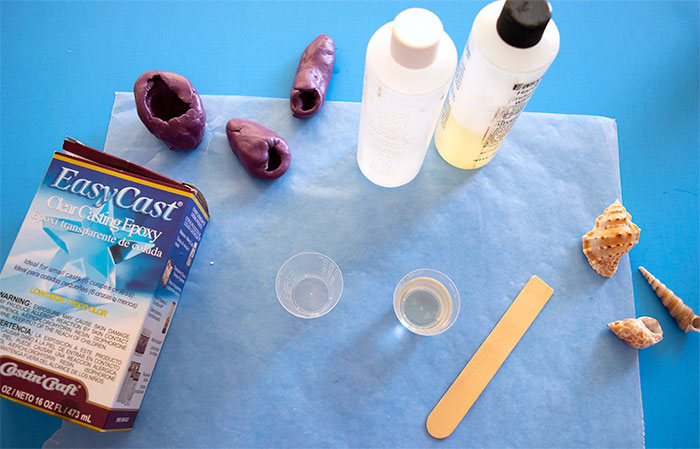
Next, lets make our Seashell Pendants! Mix your epoxy to cast in the molds. Mix equal parts of the Resin and the Hardener. Stir for 2 minutes. Pour mixture into a clean cup, and stir for an additional minute. Be sure to always wear gloves and eye protection when handling Epoxy. Once your epoxy is mixed you can tint or dye it to whatever colors you want to make the shells.

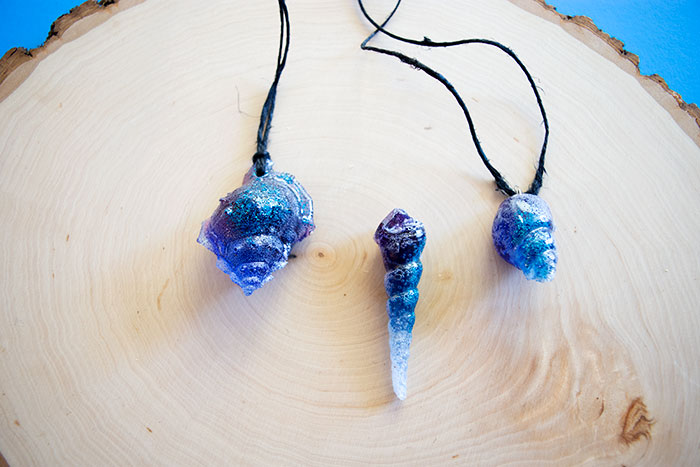
I wanted my seashell pendants to be transparent, so I used transparent dyes. I mixed blue and red and added a little bit of glitter too for some sparkle in my shells.
Pour the epoxy into the shell mold. Tap it lightly to free any bubbles and use a kitchen torch, or heat gun gently over the epoxy to pop any bubbles that surface.

Allow the shells to cure overnight.
After the shells have cured, gently remove them from the molds. If your shells look cloudy, you can spray them with some Castin’ Craft Resin Spray Finish to brighten them up again.
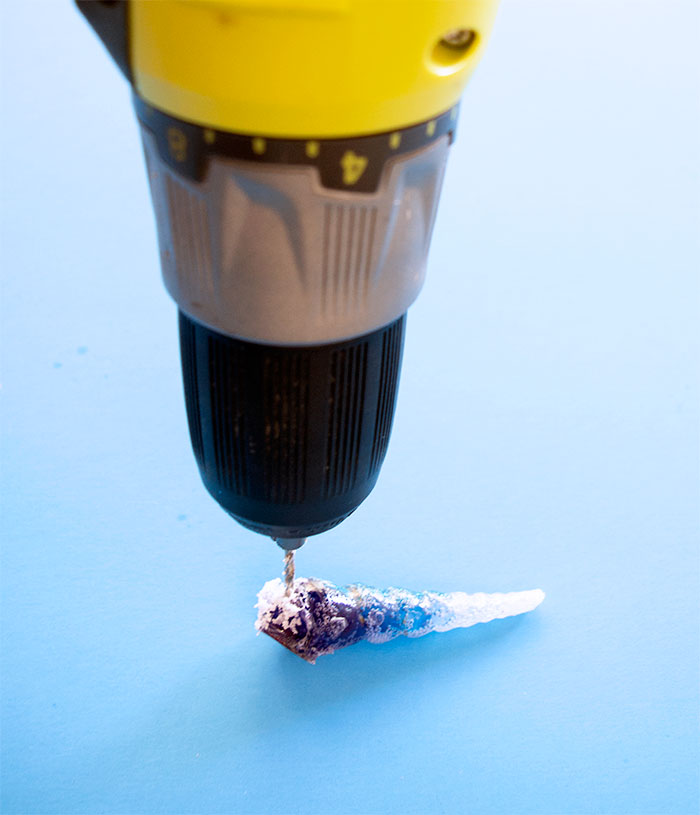
Use a hand drill with a small bit to put a hole in one end of your shell.
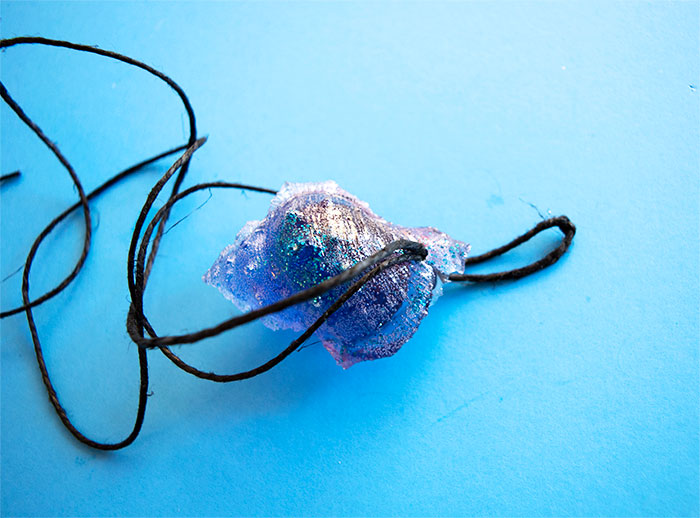
Thread a string, or jewelry findings through the hole to create a necklace with your fun seashell pendants.
Or you could just use the pretty transparent seashells for decoration. They would look pretty with a sea foam green colored dye, like sea glass seashells! I love that the red and blue resin mixed when I poured them into the molds to create a pretty purple ombre effect. What color would you make your seashells?
After studying Culinary Arts in Portland Oregon, Kelli went back home to the sunny South West where she decided she wanted to do different kinds of Art. This busy mom of three spends all of her available free time creating in her Craft Shack “she shed” where she can be found wood burning, repurposing old stuff, crafting, and painting just about anything she can get her hands on. She loves to learn new craft techniques and frequently finds inspiration in the world around her. Her motto in life is that you should never be too busy to make something pretty!


[…] Pop on over to the Resin Crafts Blog to check out how to make these fun Summer Sea Shell molds and pendants: […]