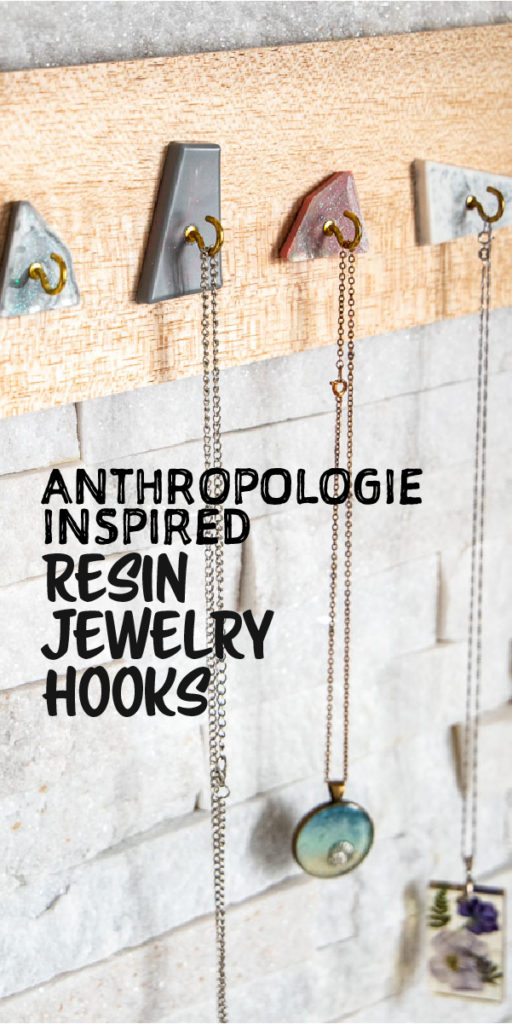
I was recently scrolling through Pinterest and came across some pretty jewelry hooks from Anthropologie. I immediately loved the simplicity and retro vibe of them. But when I clicked through I saw that they had been discontinued.

Resin to the rescue!
I had to try and see if I could create similar faux-marble hooks using jewelry resin. I use my rustic glam jewelry organizer every day but could use something by my laptop downstairs for when I take off my rings at the end of the day. I could also ask Sonja to make me a resin ring cone though 🙂
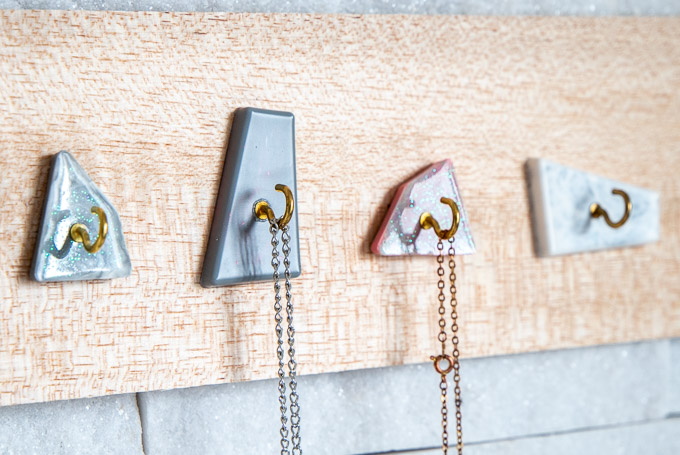
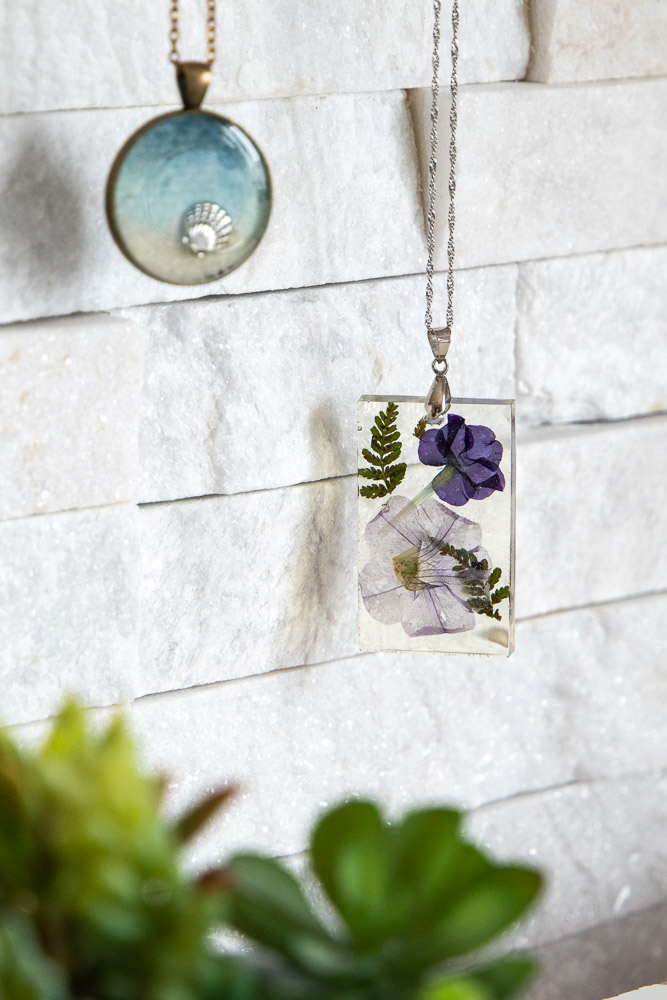
I think the retro vibe really came through because of the color palette- so I tried to stick with soft pink, gray and turquoise. These hooks will be perfect for hanging some of my resin jewelry such as these pendants with flowers, these sparkly Christmas ones, or these resin pendants with lavender.
Materials needed to make Anthro-Inspired Resin Jewelry Hooks
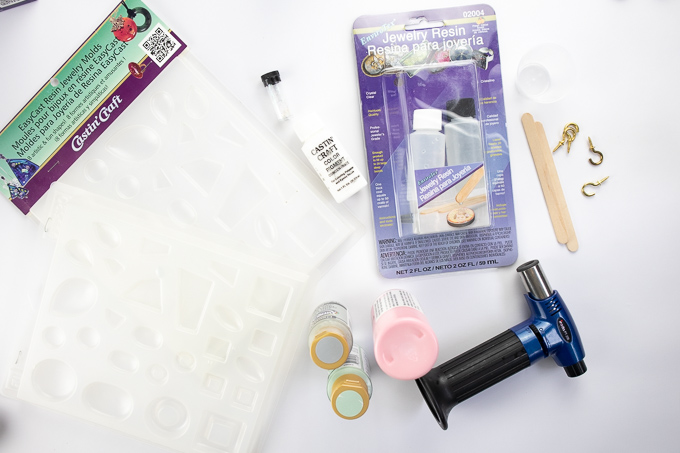
- EnvirotexLite Jewelry Resin
- Acrylic paints in Pink, Turquoise, Grey
- Castin’ Craft White Opaque Pigment
- Castin’ Craft EasyCast Resin Jewelry Molds
- Measuring cups, wooden stir sticks, gloves and paper towels
- Toothpicks
- Kitchen torch or straw
- Cup hook
- Double sided Velcro-style Command strips
How to make Faux-Marble Jewelry Hooks
Be sure to read all the instructions on the package before starting. Work in a well-ventilated area. Always wear gloves and protect your working surface.
Begin by mixing together equal parts of Resin and Hardener in a small measuring cup. Stir completely for two minutes.
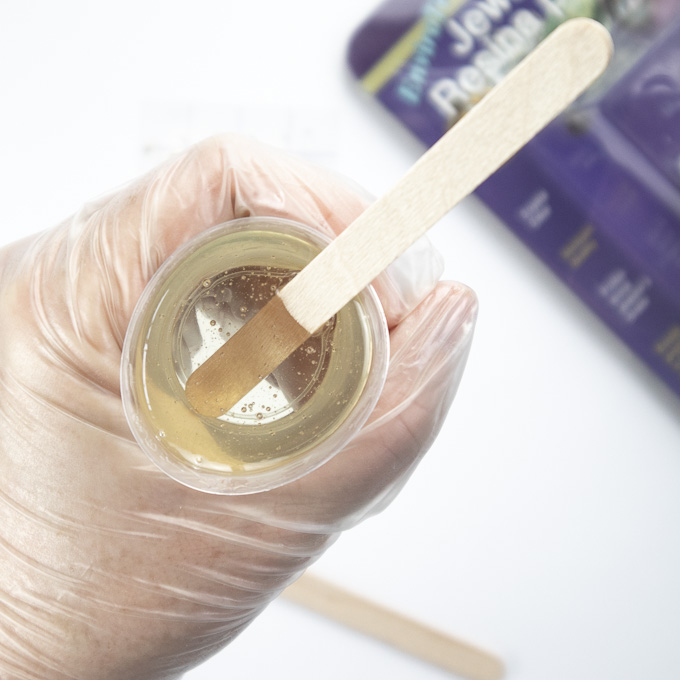
Transfer the mixture into a second measuring cup and continue stirring for an additional minute.
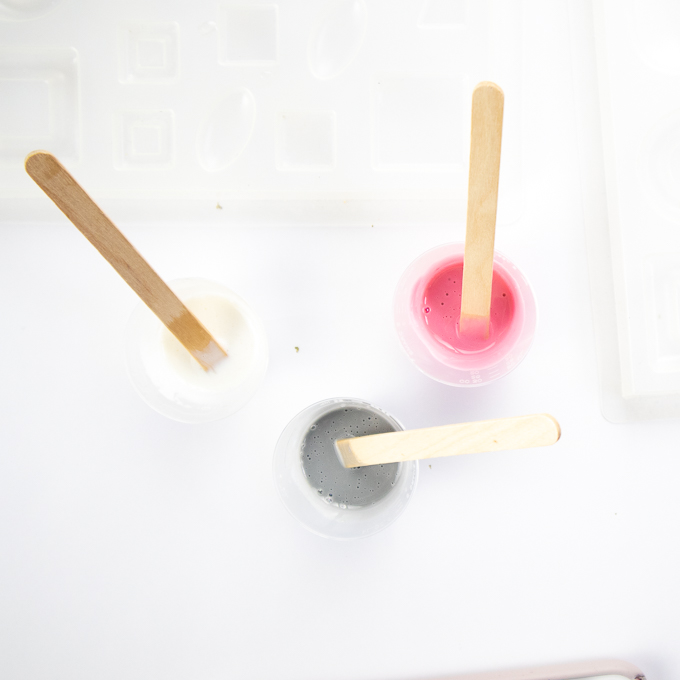
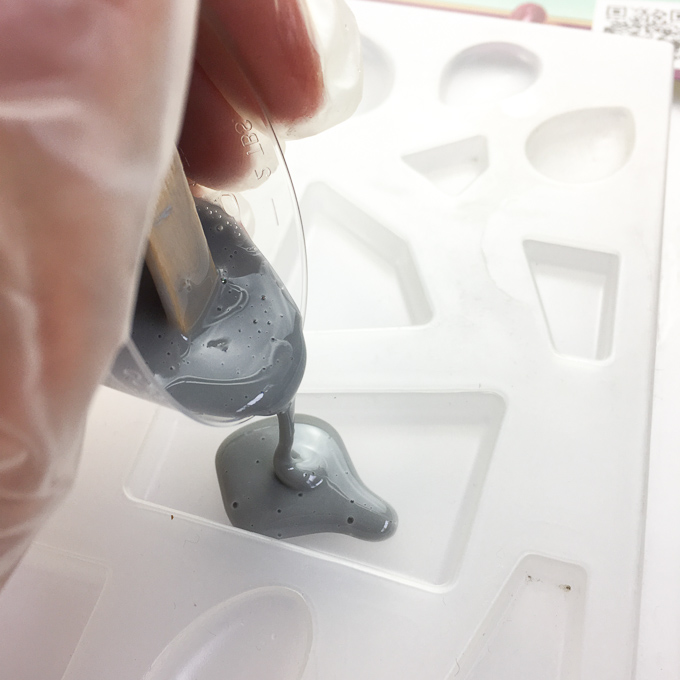
Divide the mixed resin into three separate cups. Into separate cups drop a few drops of white, pink and grey paint. Stir each completely with separate stir sticks.
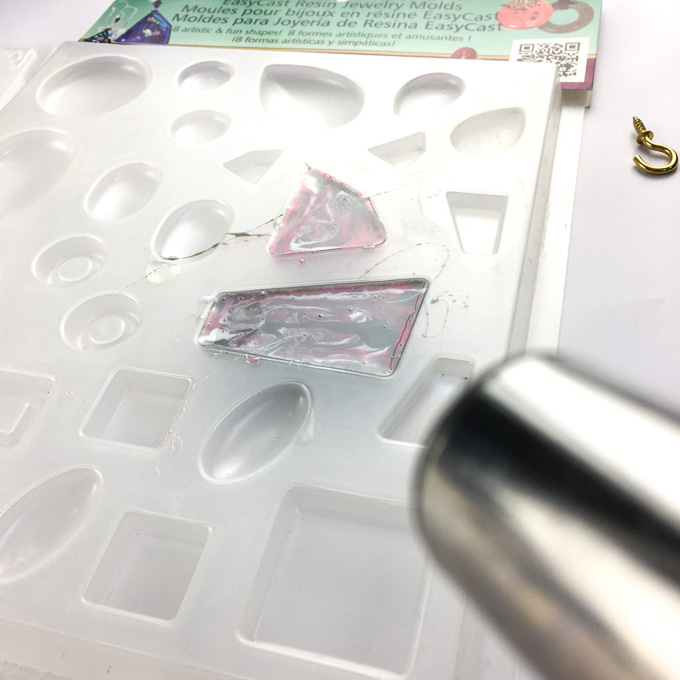
Pour each of the tinted resins into separate mold compartments, about ¾ full.
In the white compartment, drop in some gray resin. Use the stir stick to swirl the the gray and white resin together. Don’t over-do it or else it’ll end up just one light-gray piece.

In the pink compartment, add some gray resin and swirl around. I also ended up quickly mixing a touch of turquoise paint in with the cup of leftover pink resin, and added it to the pink resin compartment.
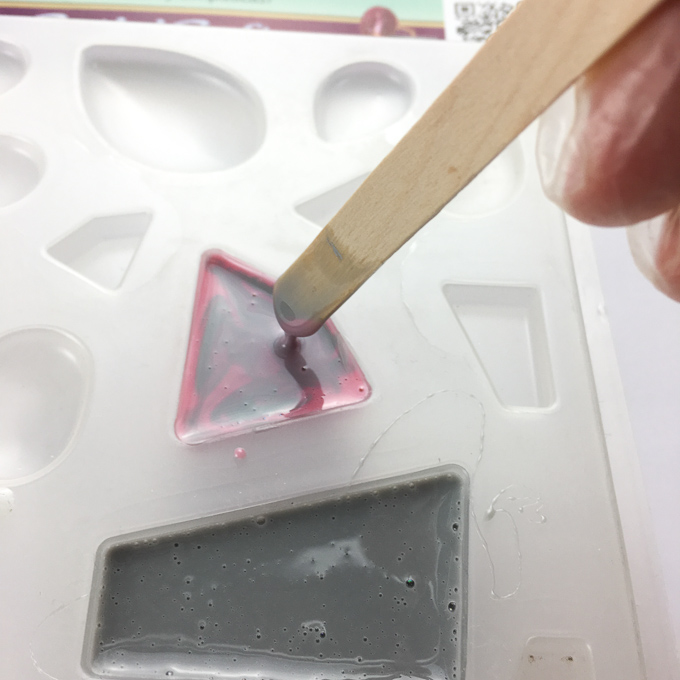
In the gray compartment, add some pink resin and swirl around.
Continue layering in the different colors until each compartment is full.
You can use a toothpick to add additional detail – pull in the coloured resins from the edges of the compartments and create swirls and lines.
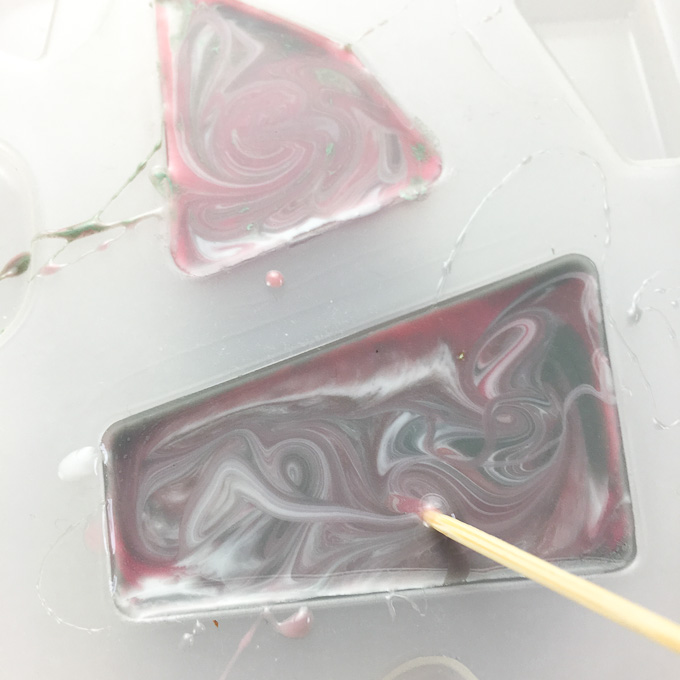
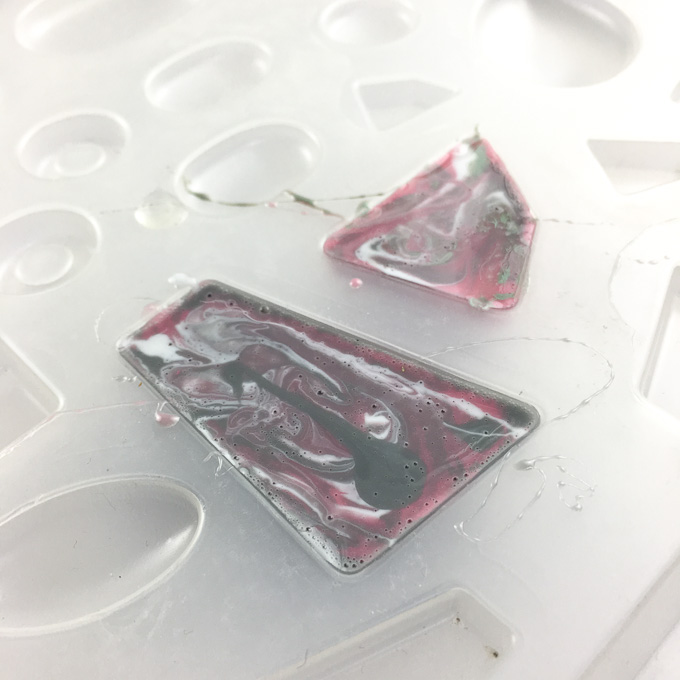
Continue until the mold is filled. Consider sprinkling a bit of clear glitter in a couple areas of the mold.
After about 15 to 20 minutes, blow off any air bubbles that have risen to the top of the mold. Use either a small kitchen torch or your breath through a straw for this.
Make sure that the molds are on a level surface and covered to prevent any dust from settling in. Let the resin cure overnight.
Adding the Hooks to the Resin
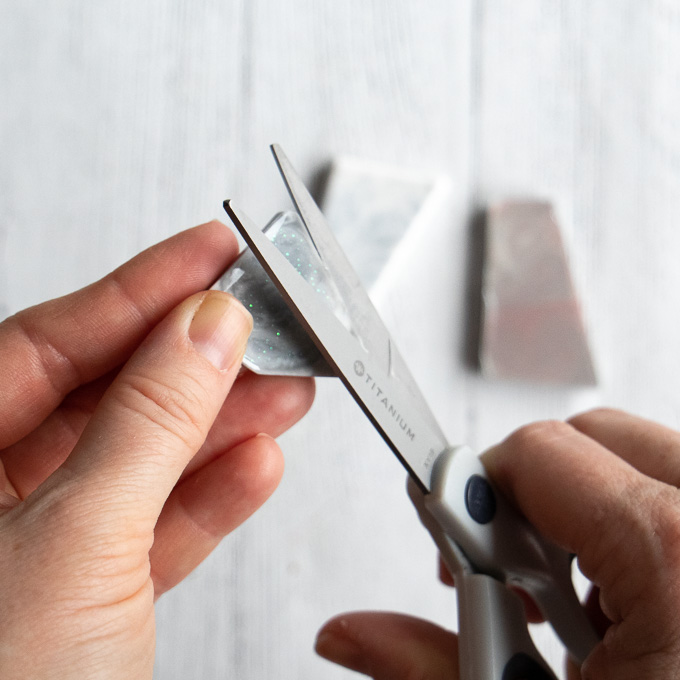
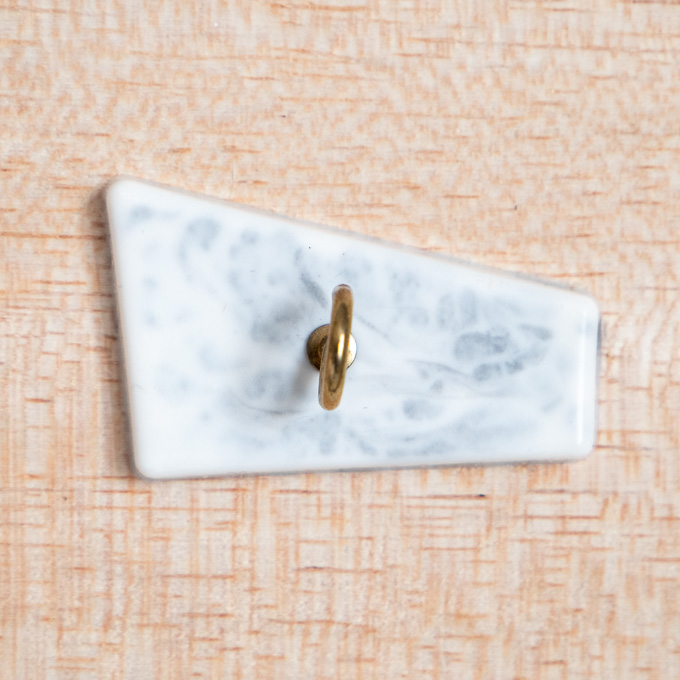
Remove the faux marble pieces from the mold. Lightly tap on the edge of a table if they need help coming out.
If needed, carefully trim down the edges of the resin with scissors to remove any sharp edges.
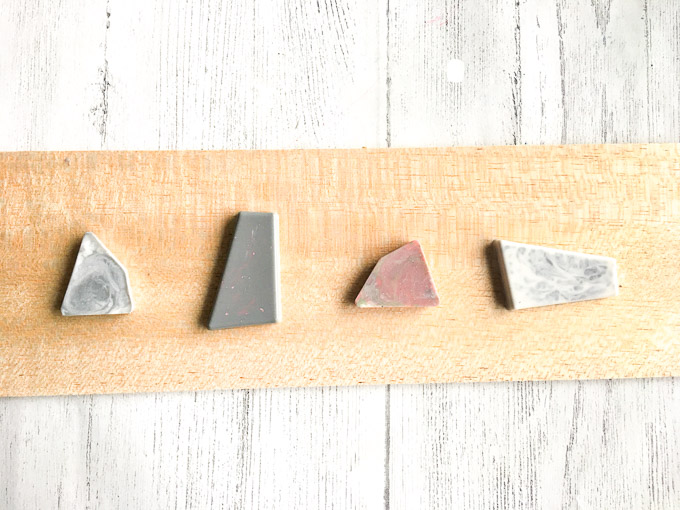
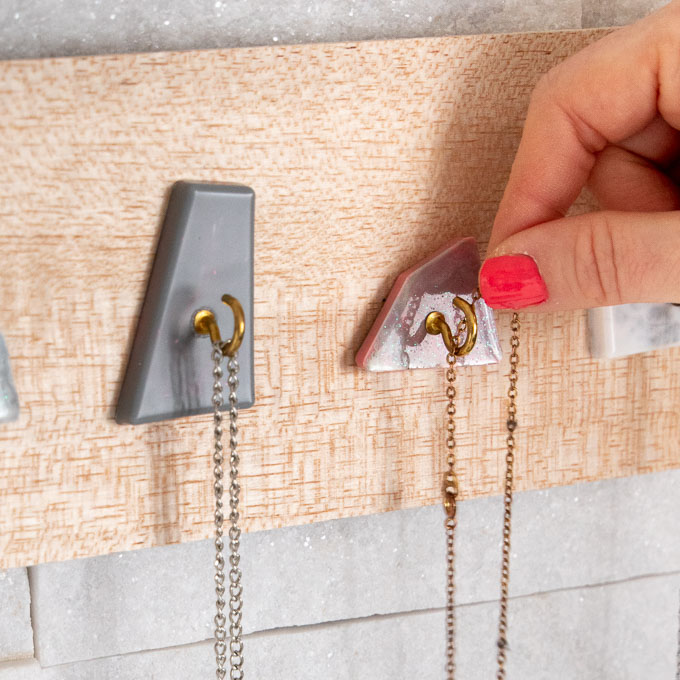
Rather than hanging each hook separately on the wall (as the original ones were), I decided to mount them together on a piece of wood.
Cut a piece of 6″ wide balsa wood to 12″ long. Arrange the faux marble resin pieces until you are happy with how they look.
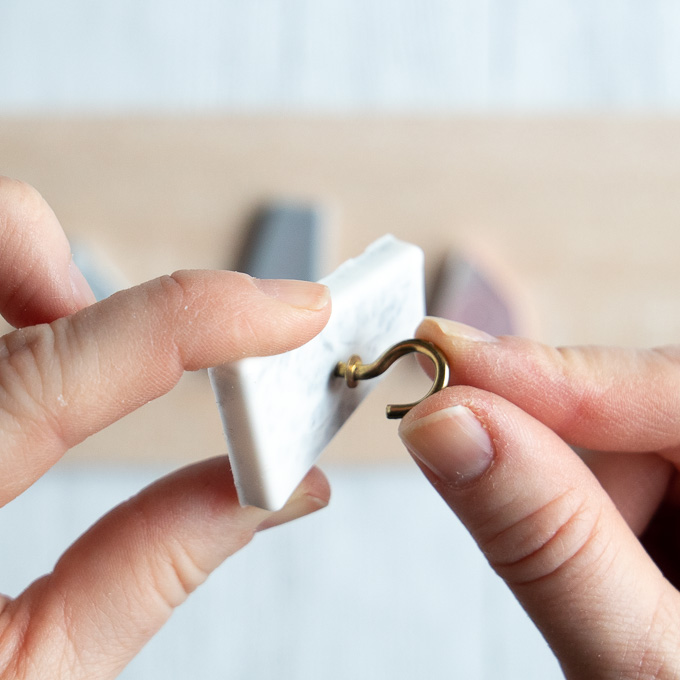
Drill holes through the resin and into the balsa wood. Make sure the drill bit is just large enough for the cup hook screw to go into.
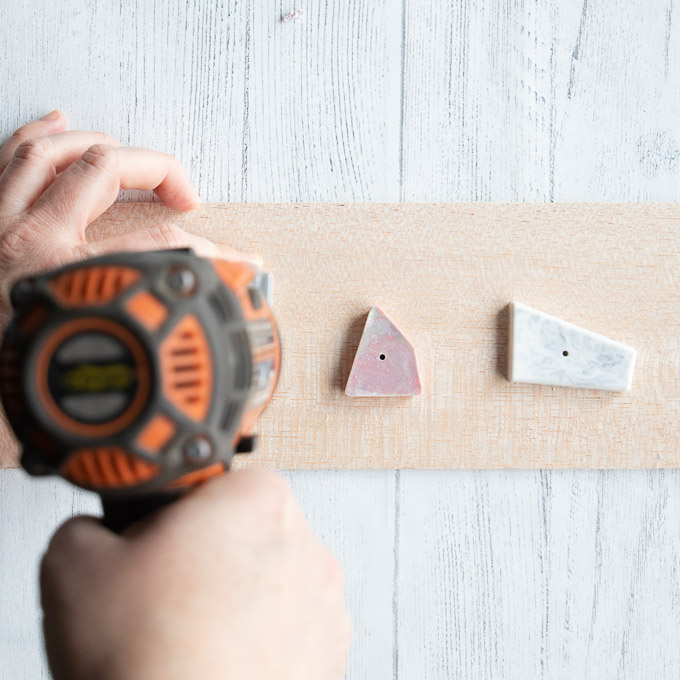
Screw the cup hook into the resin piece.
Place some E6000 glue on the the back of the resin piece and then screw into the wood.
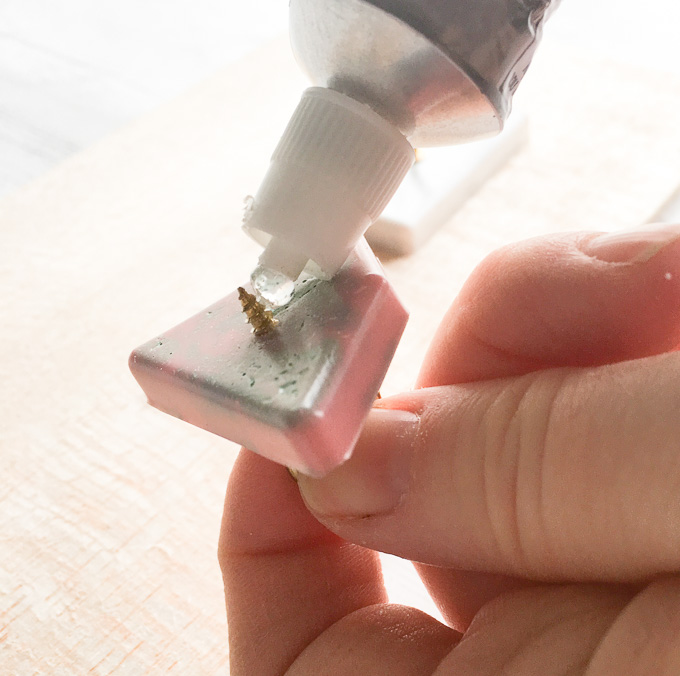
Set aside and let dry.

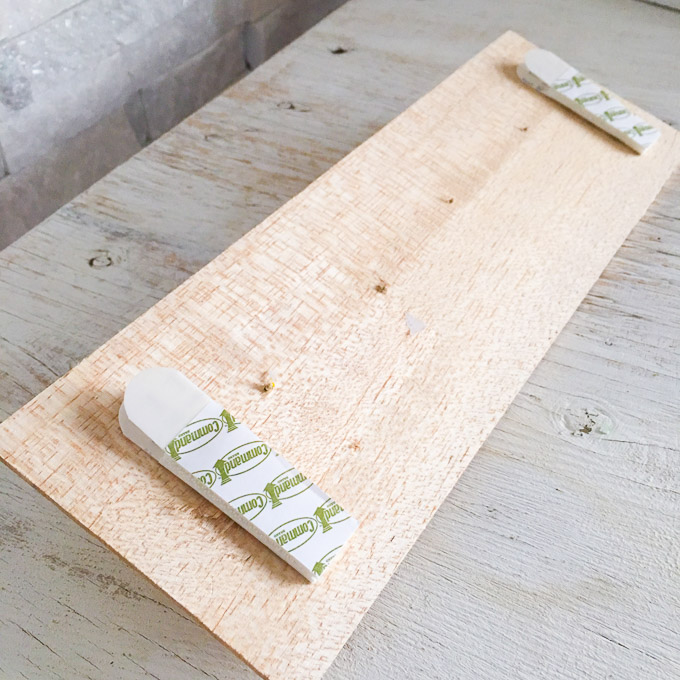
Mounting the Hooks to the Wall
I purchased some velcro-style mounting strips and attached them to the back of the hanger.
Although not exactly the same as the Anthropologie version, I’m quite happy with how these jewelry hooks turned out.
Our seashore resin pendants look particularly pretty hanging on here as do our pressed spring flower pendants as well.
Happy resin crafting friends!
Jane and Sonja are sisters, moms and lifelong craft addicts both living near Toronto, Canada with their families. They share their love of creativity, nature and coastal DIY ideas on their blog Sustain My Craft Habit. They craft and decorate their homes using repurposed and upcycled items and materials found in nature.


Leave a Reply