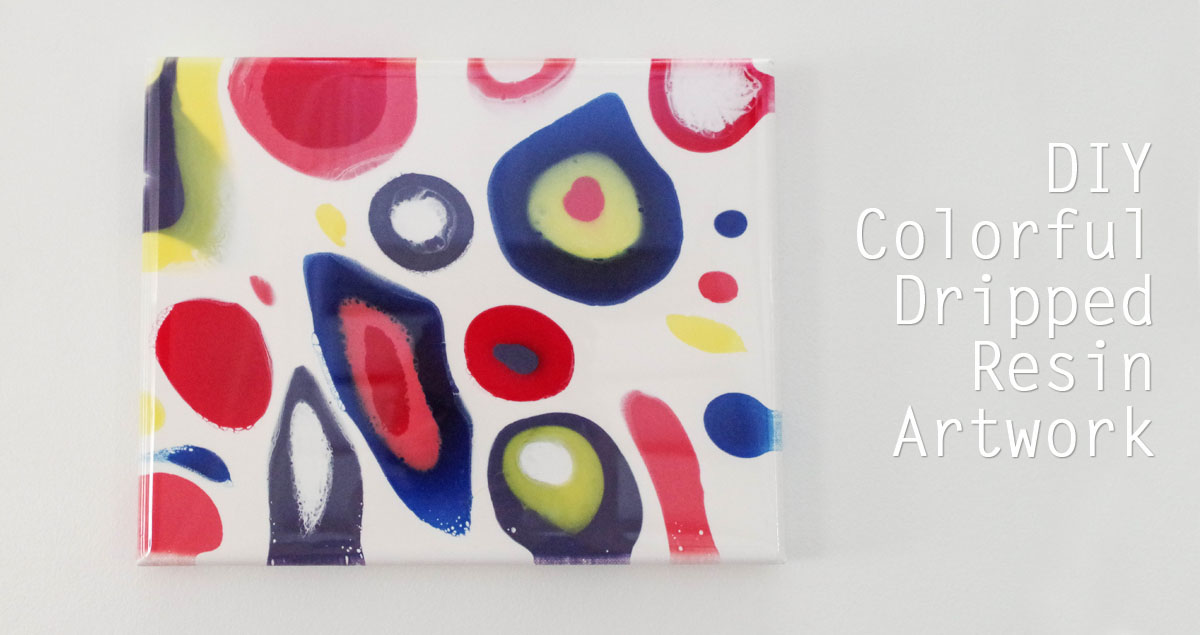
Hello resin crafters! I’m Sheri from Hazel + Gold Designs and I’m excited to share this technique for making Colorful Dripped Resin Artwork! I had tried this drip technique in some Sparkling Dripped Resin Pendants a few weeks back and wanted to see what would happen if I created artwork using the same dripping method. I was pleasantly surprised by how well it worked out, though there were a couple surprises. Here are all the details!
Colorful Dripped Resin Artwork
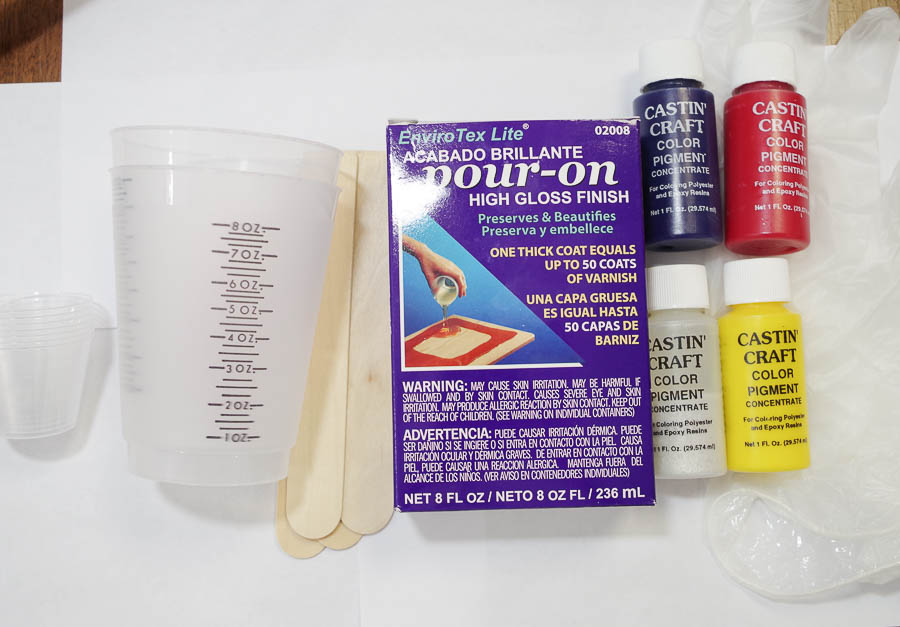
Supplies:
- Envirotex Lite Pour-On High Gloss Finish
- Art Canvas
- Disposable work surface to catch excess resin (I used cardboard box)
- Disposable Measuring Cups large and small
- Wooden Stir Sticks
- Castin Craft Opaque Pigments
- Disposable Vinyl gloves
- Micro Butane Torch
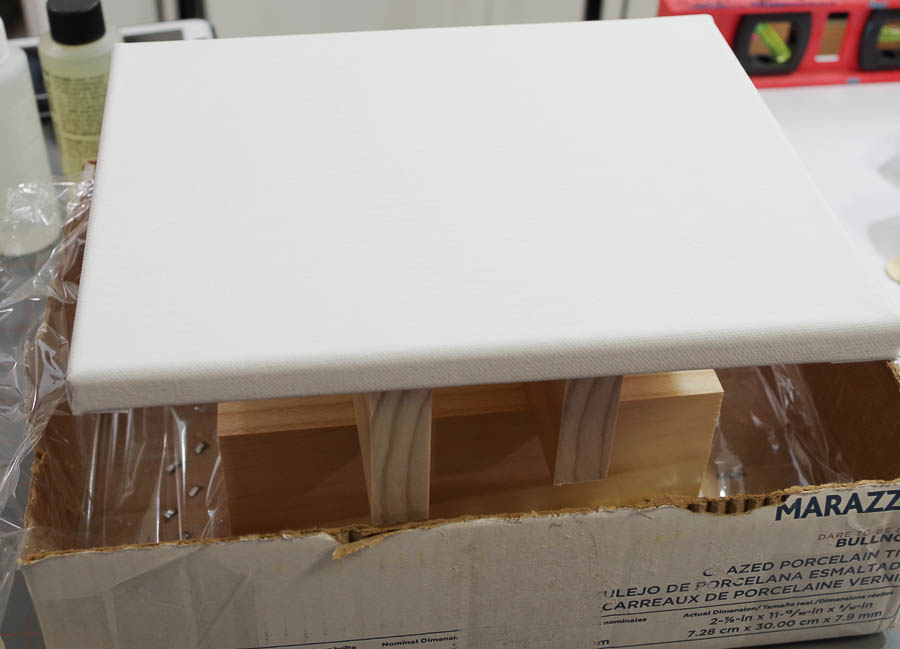
Prep Surface:
The first step is to make sure you have a good surface to work on. Resin can be messy, so I typically have something to cover the table I’m working on, then use an old, shallow cardboard box underneath my art canvas to catch all the excess resin. I tape up any open seams in the box and use some wooden blocks or something to elevate the canvas over the box.
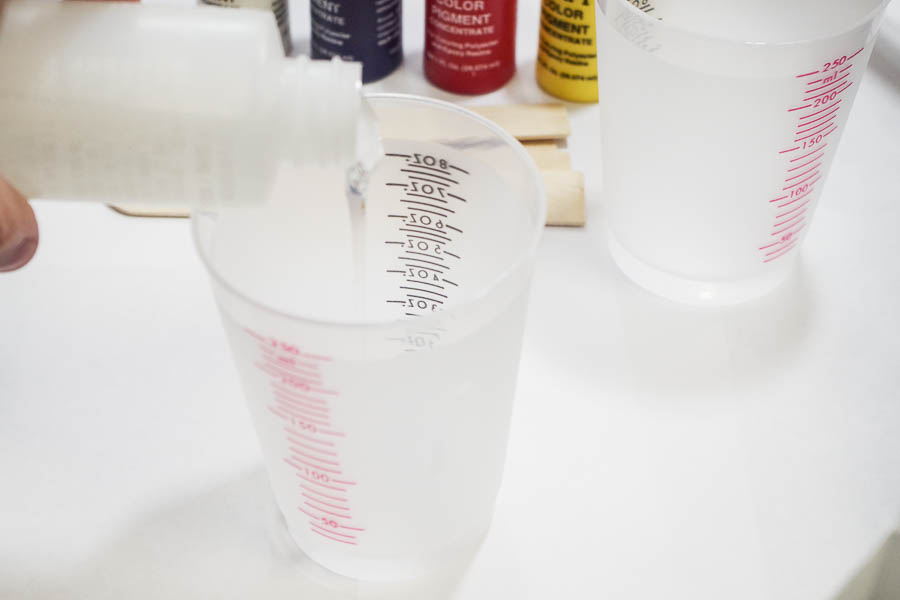
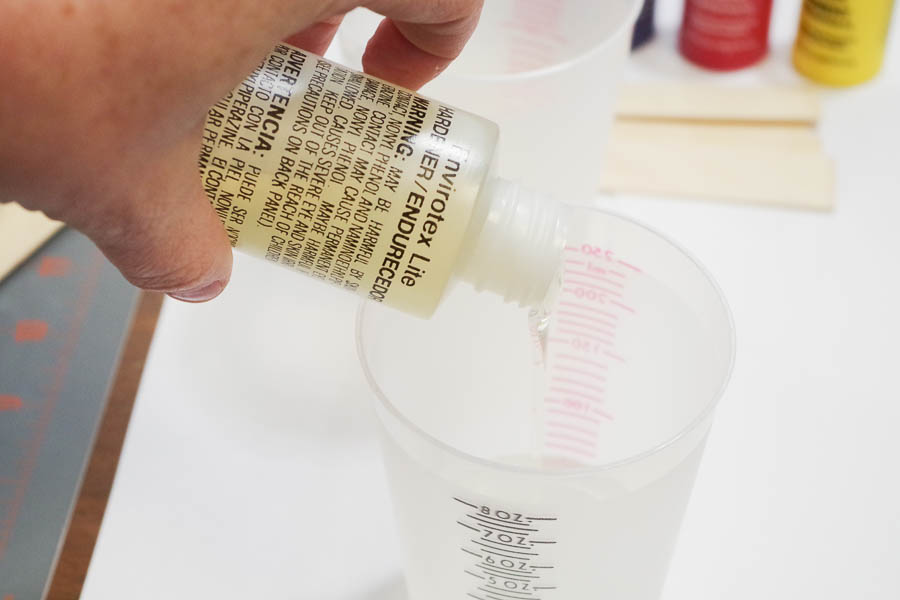
Before you start mixing make sure you put on your vinyl gloves.
Mixing Resin:
You definitely want to read through the instructions before you start mixing your resin. Make sure you’re in the right type of space and are prepared with all the supplies and time you need.
Mix equal amounts of Part A and B into a large mixing cup. I did two batches because I was going to make a lot of white resin and small amounts of each color. I did 2oz. of each part in two different large mixing cups. This equaled to 4 oz. in each cup. Mix thoroughly!

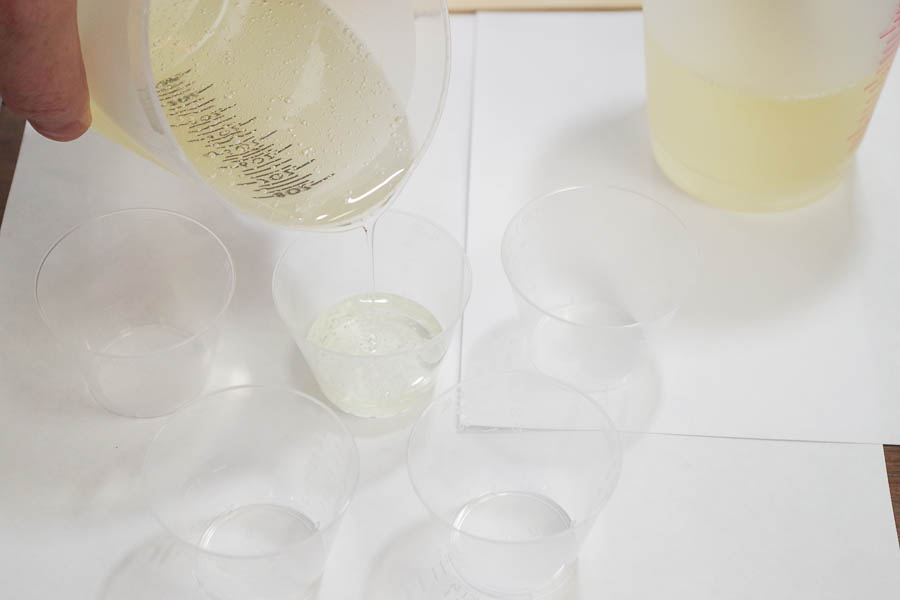
I poured one of the large cups into five separate small cups. Then used the pigment dyes to color each of those a different color by dropping a couple drops in each. Stir thoroughly. Add white pigment to the other large batch of resin.
Pouring Resin:
Alright, time to pour! In my experience you only have about 20 minutes or so to work with the resin before it starts the curing process, so while you don’t have to hurry super fast, you do need to be sure to move fairly quickly. Especially if you are doing a larger piece.
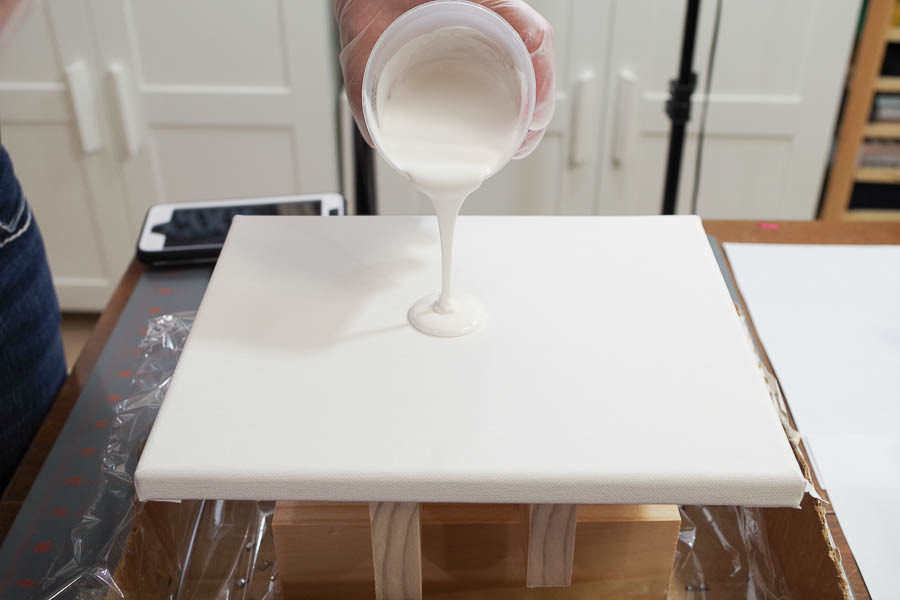
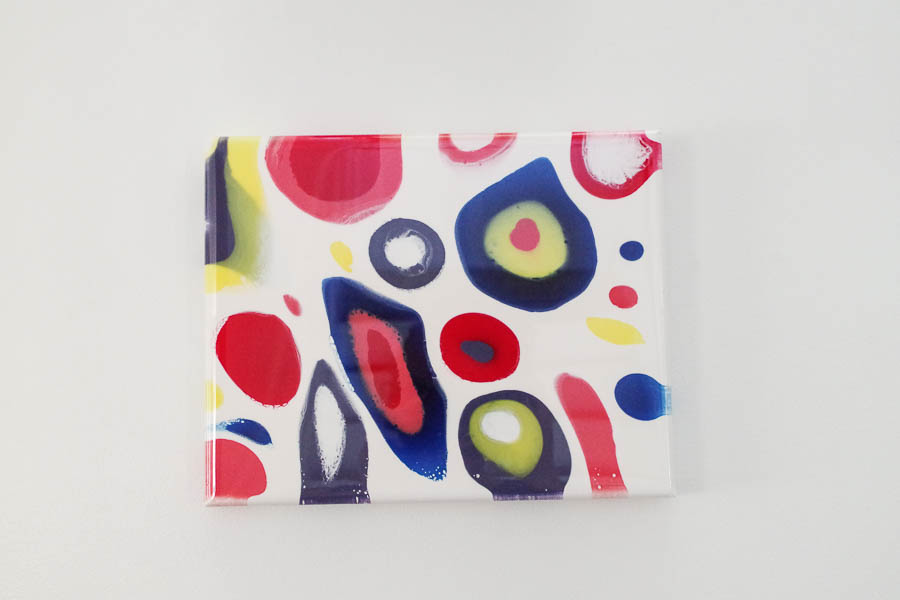
I poured most of my white resin onto the canvas and let it spread until it covered the entire thing. I even used my stir stick in some places to make it move.
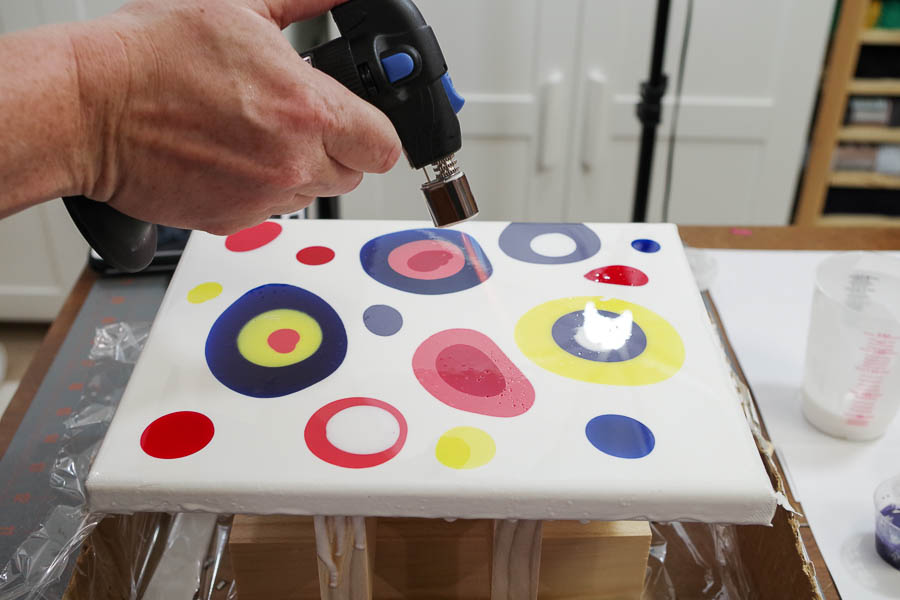
Next, I just randomly dripped resin into different places on the canvas. I dripped some colors onto the white, then colors inside other colors, and even white inside. I really didn’t have a plan and just went with what seemed right.
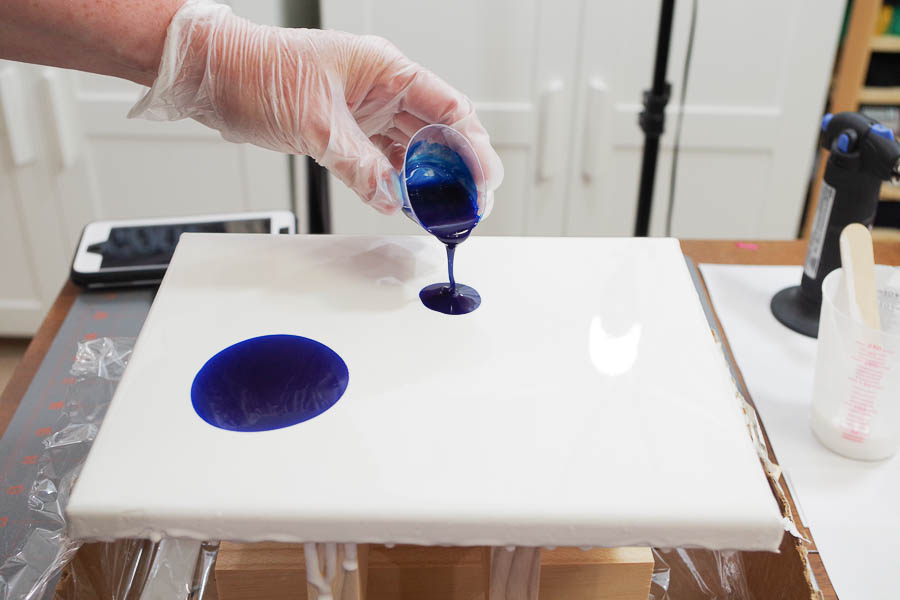
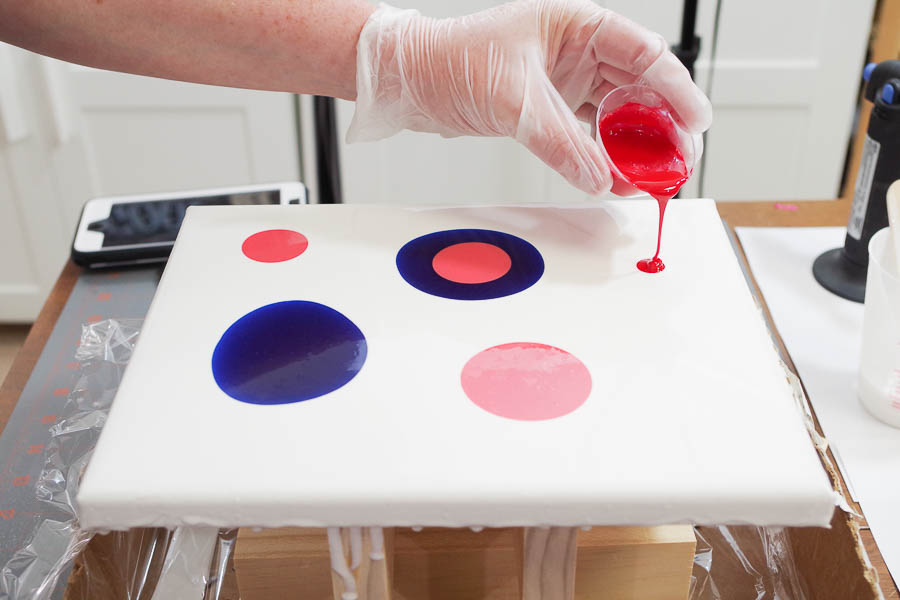
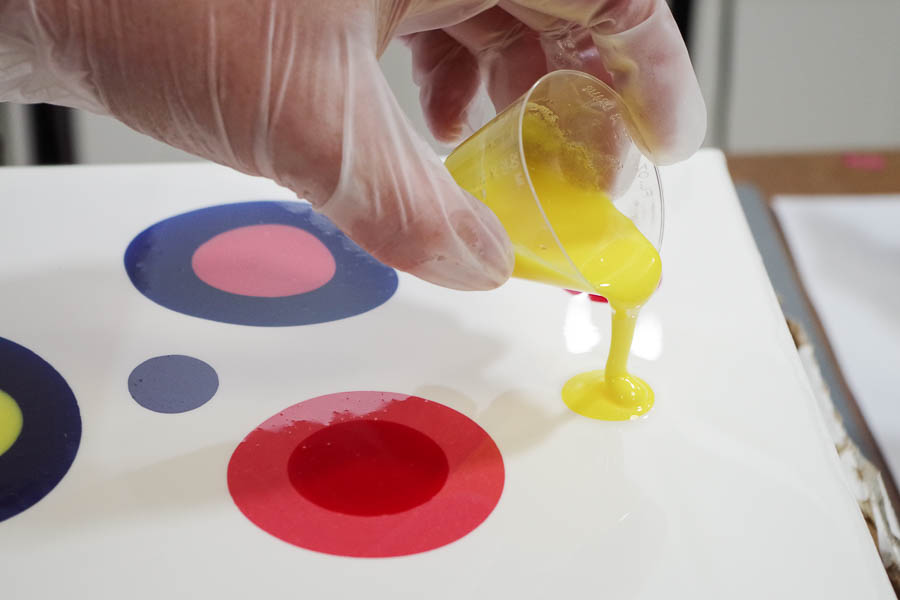
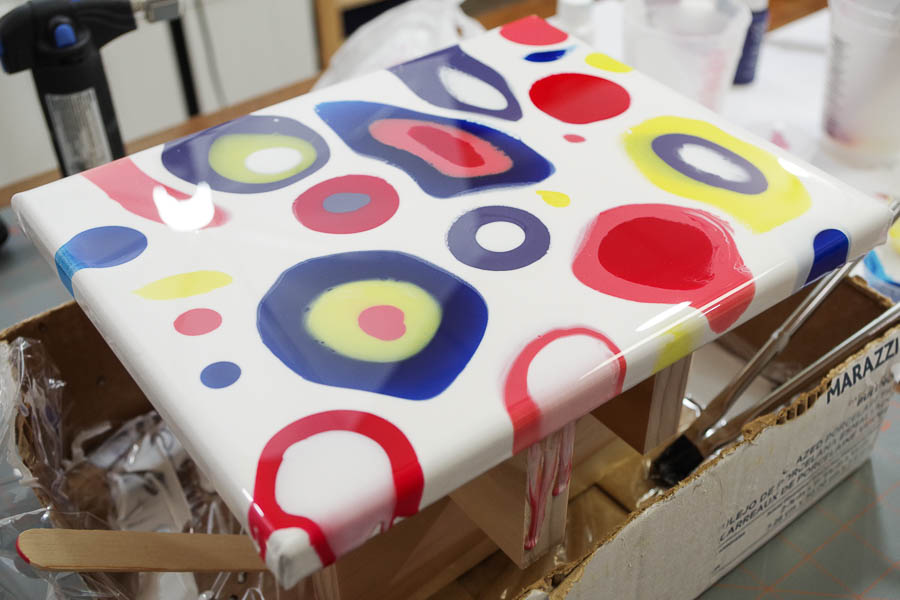
One thing that surprised me was how much the resin moved after it was poured. It will not stay in perfect circles, which is what I was picturing in my mind. It moved and really had a mind of its own.
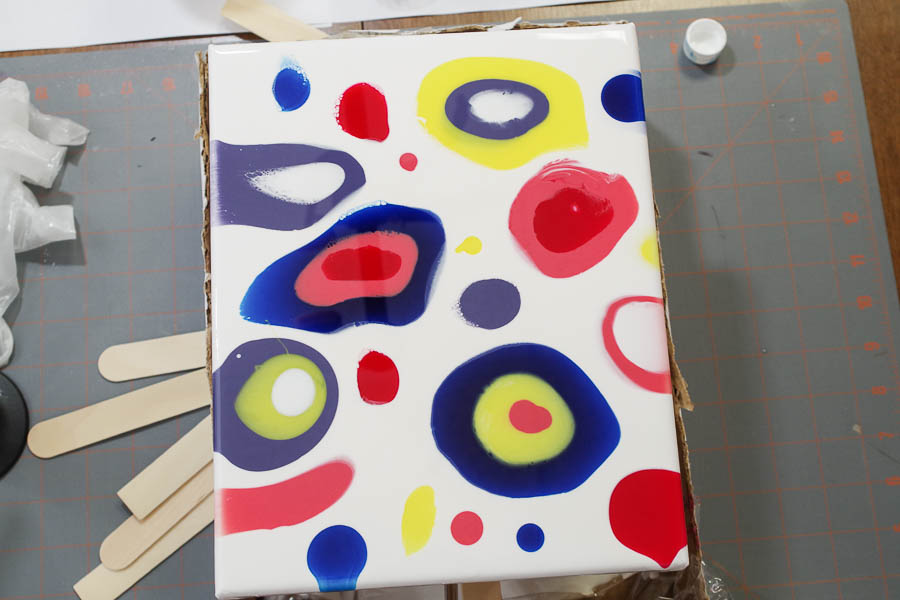
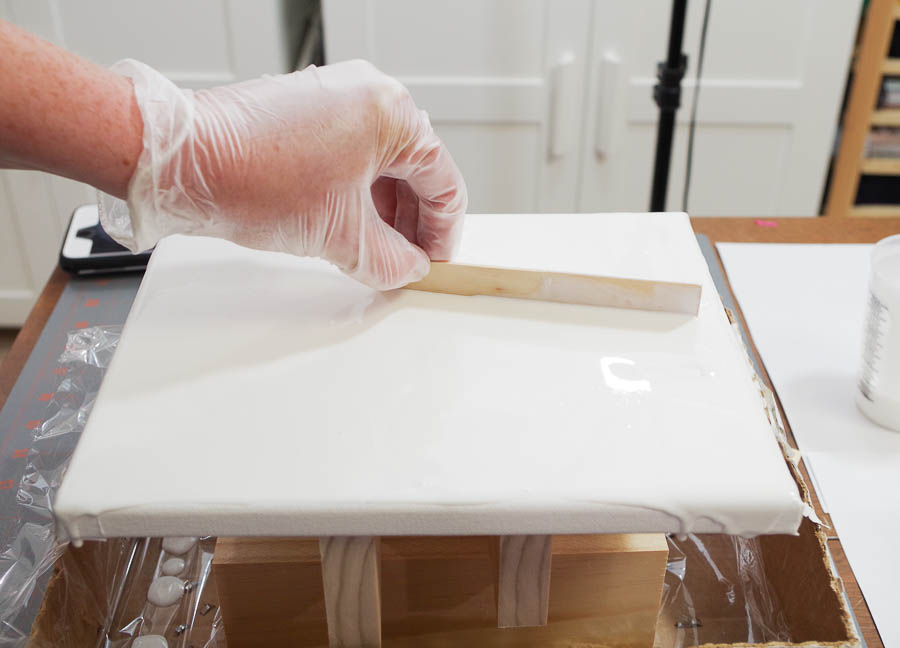
Once you have all your colors poured as you want them, use your micro butane torch to pop any bubbles on the surface. The resin again may move and sometimes blend as you move the torch quickly over it, another surprise, but it still looks pretty cool!
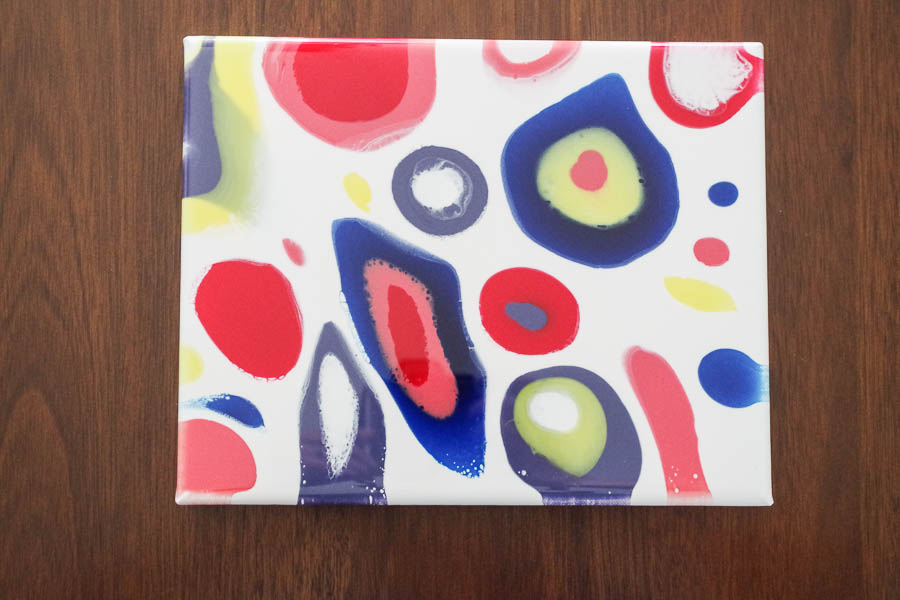
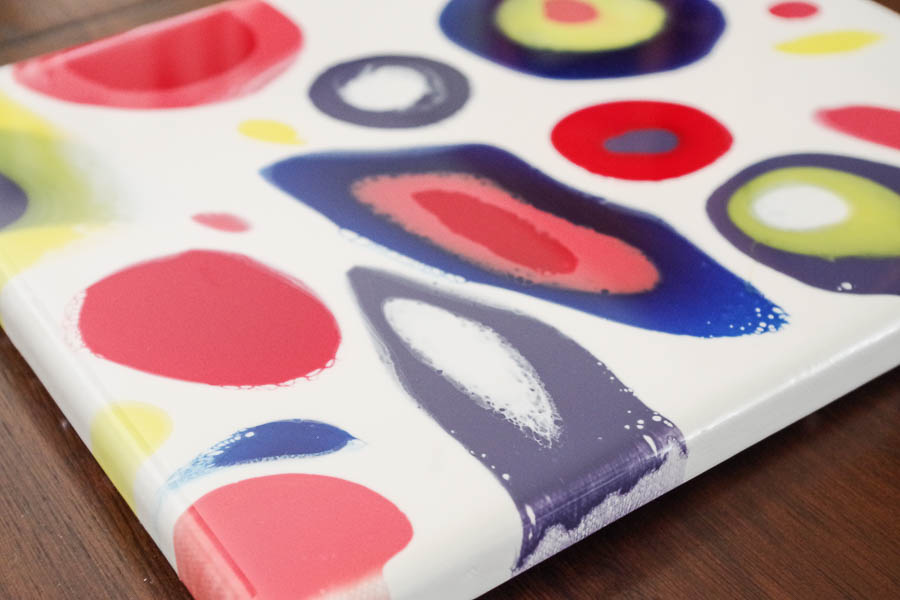
Let your resin cure for 24 hours.
And there you have it. A gorgeous piece of artwork! Especially close up.

I love how endless the possibilities are with methods like this Colorful Dripped Resin Artwork. I hope you like this tutorial. Would love to hear what you think in the comments below.
Feel free to pin this to share on Pinterest!

Check out all the details on how I created this awesome modern art with Envirotex Lite resin and how you can make one too!
Sheri is a Maker and DIY blogger at Hazel + Gold Designs. She is usually in the middle of multiple projects at once and finds great satisfaction and joy in creating something new. She is constantly learning new skills, putting them to the test, and sharing her experience and knowledge with others. Her favorite hobbies are crafting, painting, crocheting and basic woodworking. Her goal is to inspire others to step out of their comfort zone, learn a new skill and have the confidence to make their life a little more beautiful!


Hello. I’m new to resin art but love the process so far. Should I mix the resin and let it sit for about 20 mins before pouring to avoid over bleeding? Is it also advisable to add gold lines after three hours of pouring? I would love to know the answers. Thank you so much!!
Hi Diane! So glad you’re enjoying it! 🙂 You wouldn’t want to wait because it will already start to set and then it won’t create the same effect.