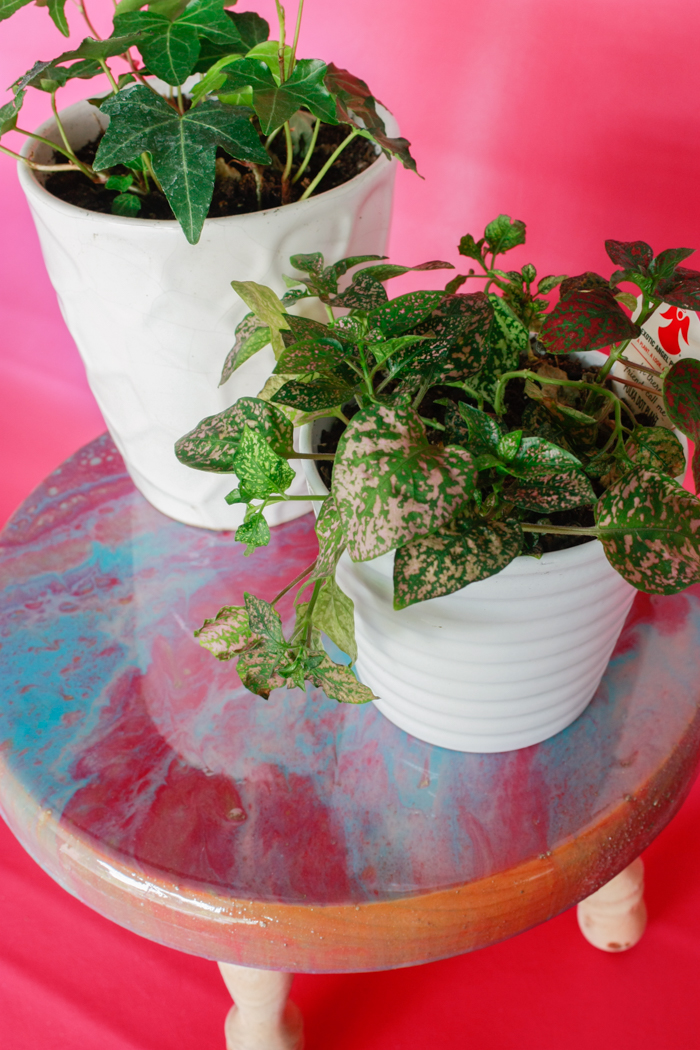
Create a beautiful plant stand using the poured resin technique!
Hey Resin Crafters, Amber Oliver here with another fun project and to share this creative technique! Have you seen the paint and resin pouring phenomenon on social media? I get sucked into watching those pouring videos on Instagram because they are so mesmerizing; I knew I had to try this technique!
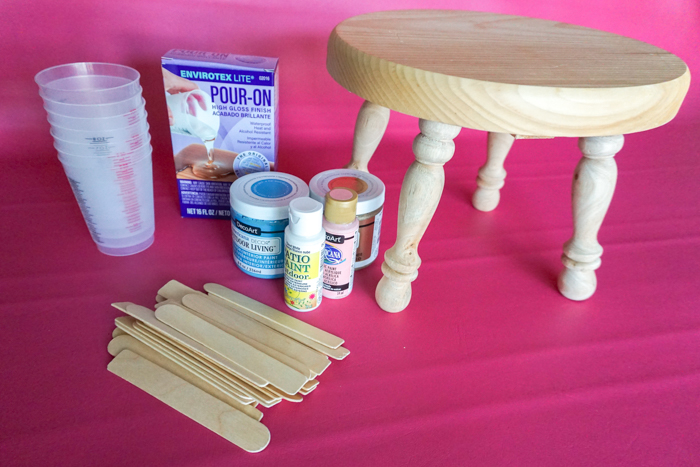
Supplies Needed For Poured Resin Plant Stand:
- EnviroTex Lite® Pour On High Gloss Finish
- Acrylic paint
- Mixing Cups
- Stir Sticks
- Latex or disposable gloves
- Cardboard box
- Wooden stool
Step 1: Start by preparing your work area and stool. I used a cardboard box with extra cardboard in the bottom. I also wrapped each of stools legs with plastic shopping bags to protect them.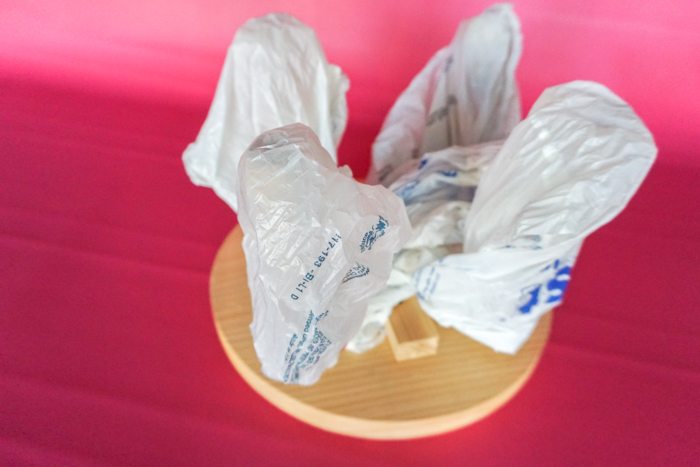
Step 2: Line up your paint and cups (with a stir stick in each!) so they are ready.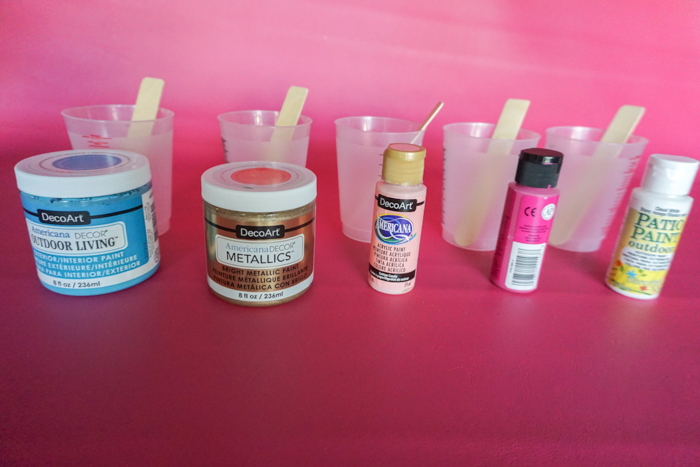
Step 3: Start by mixing EQUAL parts of the Hardener and the Resin. Stir for two minutes (be sure to scrape the bottoms and sides) then pour from the first cup into a second and mix with a new stir stick for another minute. 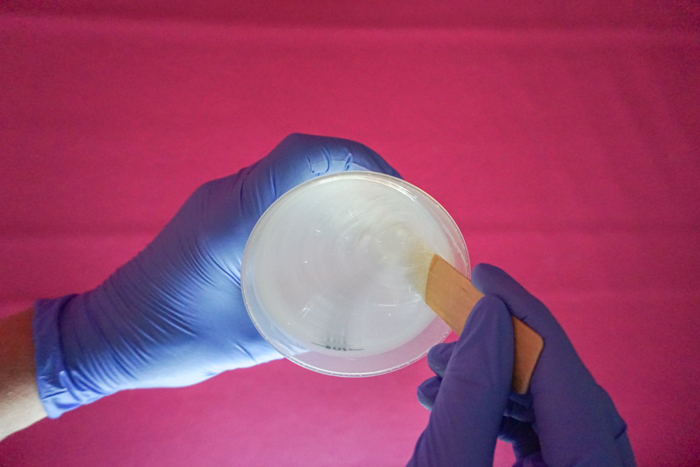
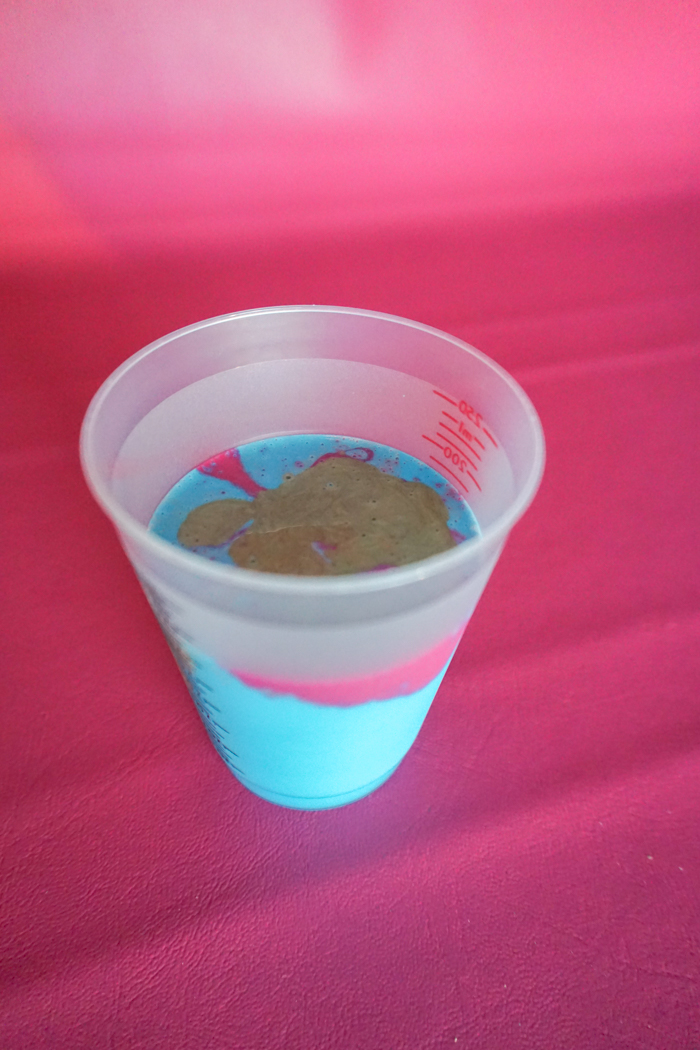
Step 4: Now you’ll want to move quickly: pour the resin into individual cups for each color of paint you’d like to use for your poured resin.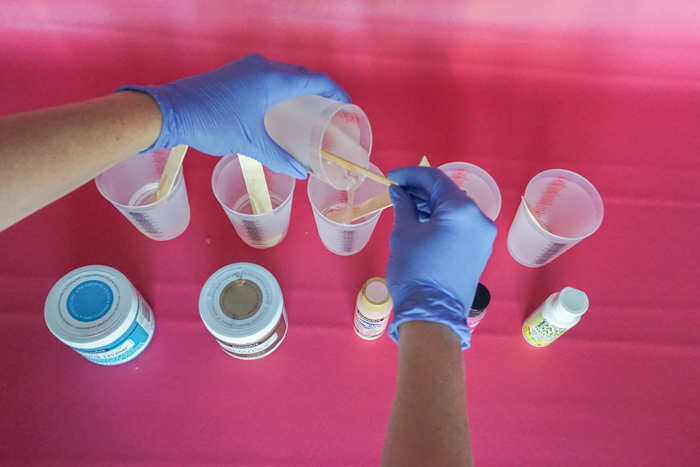
Step 5: Next add a few drops of acrylic paint into each of the cups and mix! You don’t need much paint for this (roughly 10 to 1).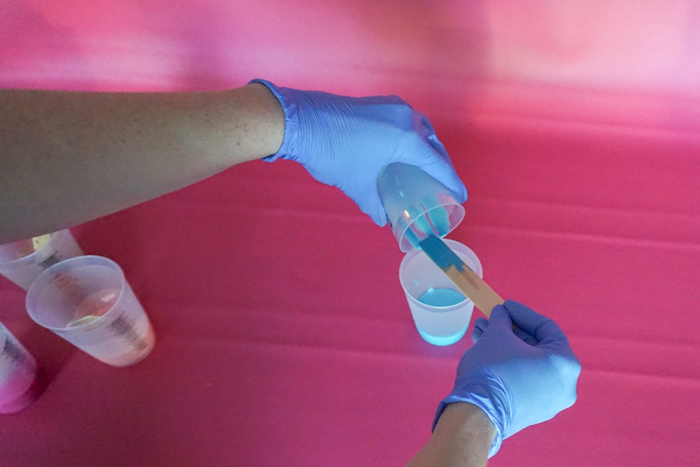
Step 6: Now you’re ready to pour ALL your paint colors into ONE cup! 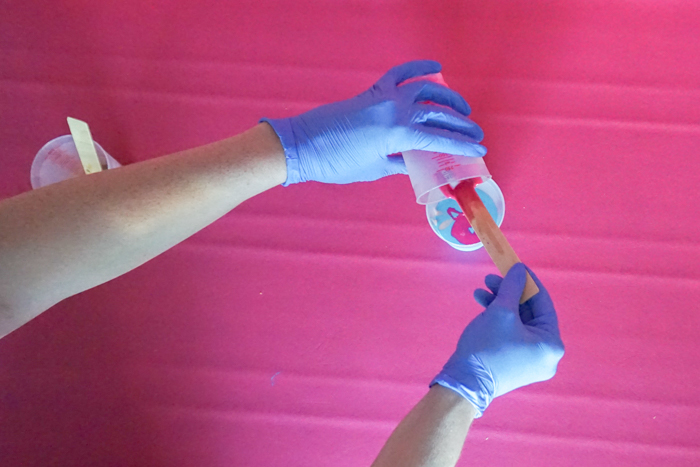
Step 7: Here comes the fun part! Now you get to pour onto the stool! Start pouring slowly from the center and let the resin spread. 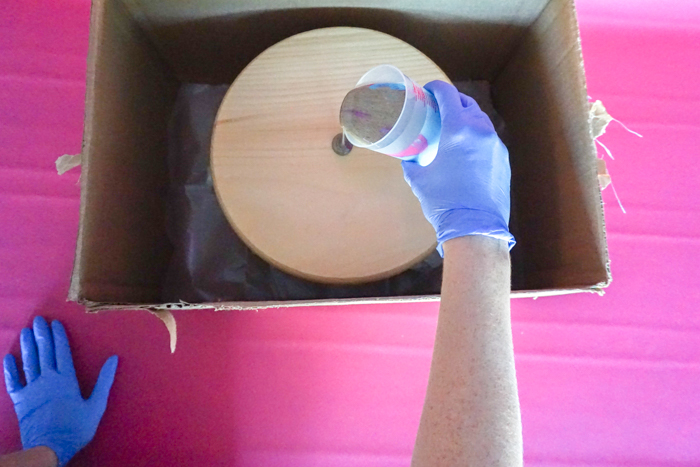
Step 8: You’ll have to tilt the surface to that it gets covered completely (that’s why it’s important to wear gloves!)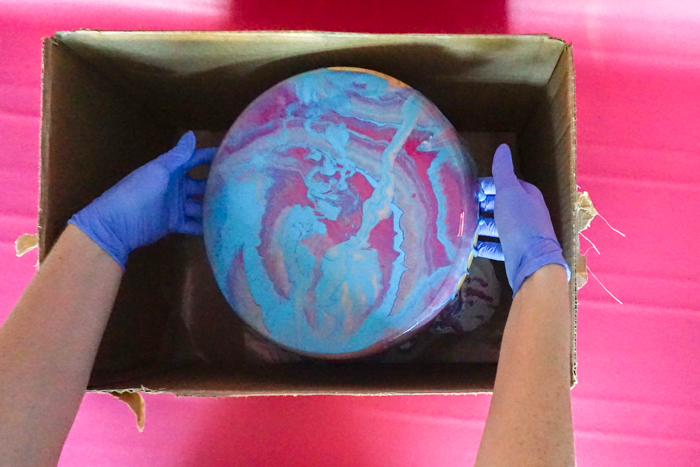
Step 9: After about 20 minutes, you’ll want to wipe underneath the edge. This is also a good time to check for air bubbles! You’ll see bubbles appear on the surface of the resin – you can use a butane torch to pop these or simply breathe on it like I did! It’s the CO2 in your breath that releases the bubbles – not the heat! Then allow to dry (per the package instructions). 

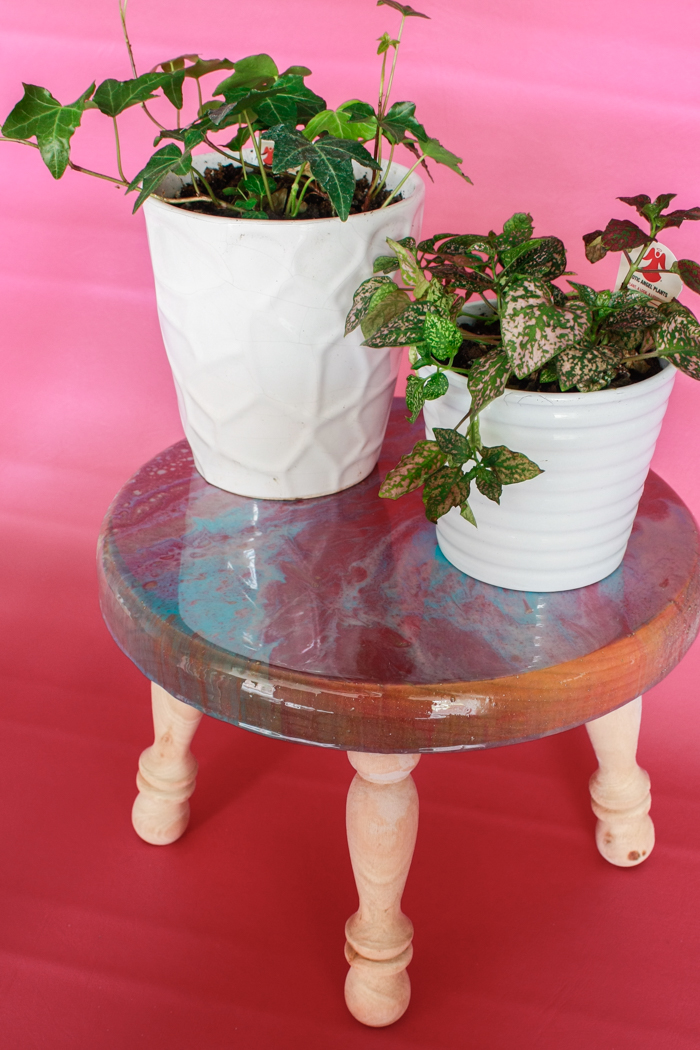
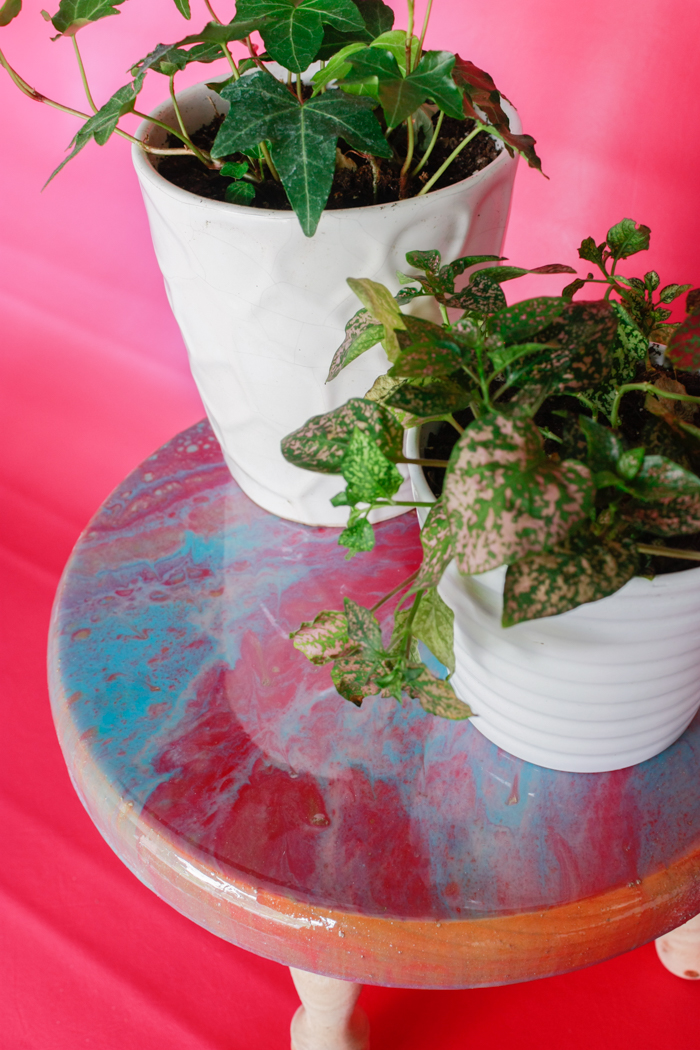
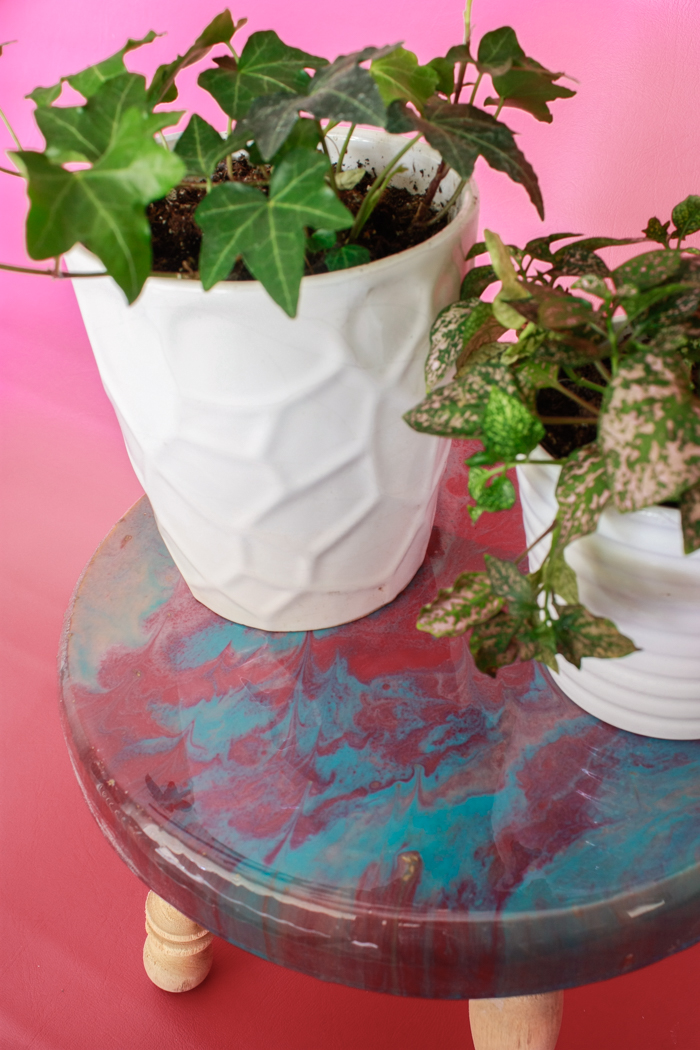
Now that I’ve tried the poured resin technique – no surface in my house is safe! I want to try this again with more colors 🙂 I couldn’t believe how simple it was and it’s really fun because I never know what it will actually look like until you start pouring.
Amber Oliver is a DIY and lifestyle blogger who shares easy DIY tutorials, colorful crafts, and more on her blog, Amber Oliver. She’s a native Oklahoman living “in the loop” in Houston, TX with her husband and dog. She’s an avid reader, world traveler, loves Tex Mex food, and creating everything from woodworking projects to websites. She focuses on budget friendly projects for the home and empowering women to try new things.


This is so pretty and so cool! I love it and want to do it!!
I’m seeing this almost five years later, but oh well…lol. Thanks, I’ll use the methods you suggested. My wife got upset with me since my previous pours got other items sticky (I should have used a cardboard box from the get-go). But, I’ll give it a try what you did!