Resin Galaxy Constellation Clock DIY
Hello Resin Crafters, it’s Natalie from Doodlecraft sharing the perfect resin craft to ring in the new year! This Resin Clock DIY is perfect to clink glasses to at midnight. It’s fun to make and can be completed, minus the resin curing, in just an afternoon. 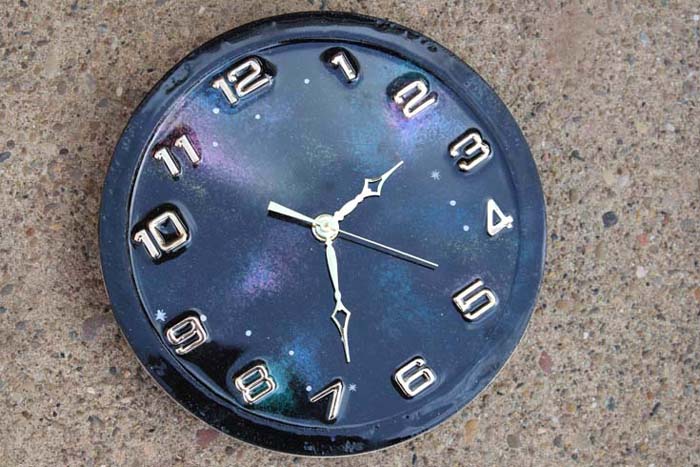 Pick your favorite constellations to add to the clock face and let’s get started on this clock DIY.
Supplies needed:
Envirotex Lite Pour-On High Gloss Resin
Wood Clock Face
Clock Maker Hardware
Clock Numbers
Black, White, Pink, Blue, Aqua, Yellow Craft Paint
Stencil Brush
Disposable work surface, Mixing cups and Stirring Sticks
Hot glue/gun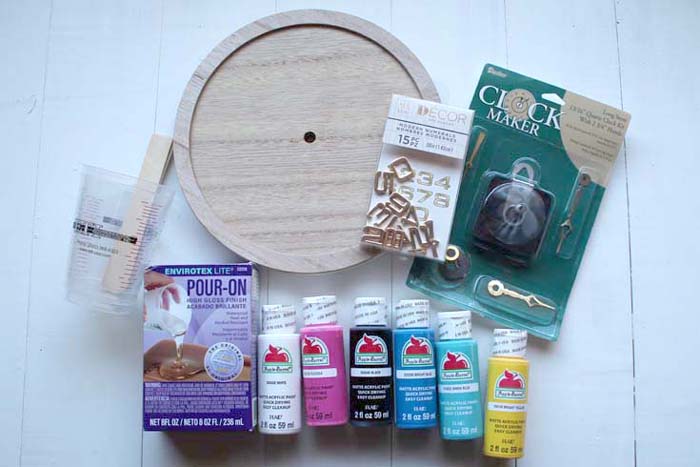
Begin by painting the wood clock face black. Let it dry completely and then use the stencil brush to dab on colors.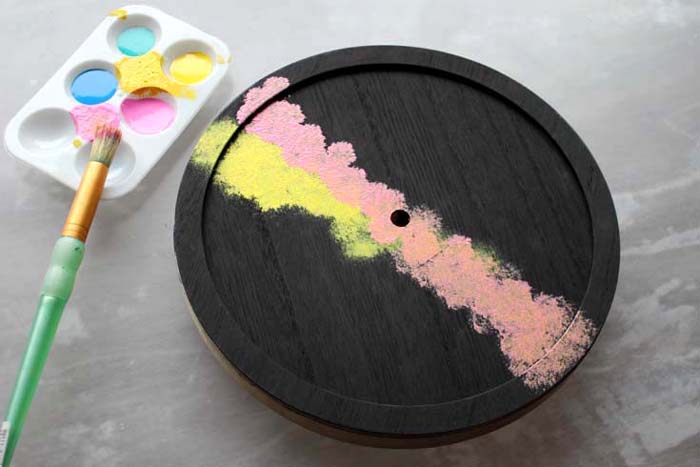
Add lots of brilliant colors to the clock face, then let it dry.
Next, stencil brush some black paint all over the top of the clock face, leaving just peeking colors showing.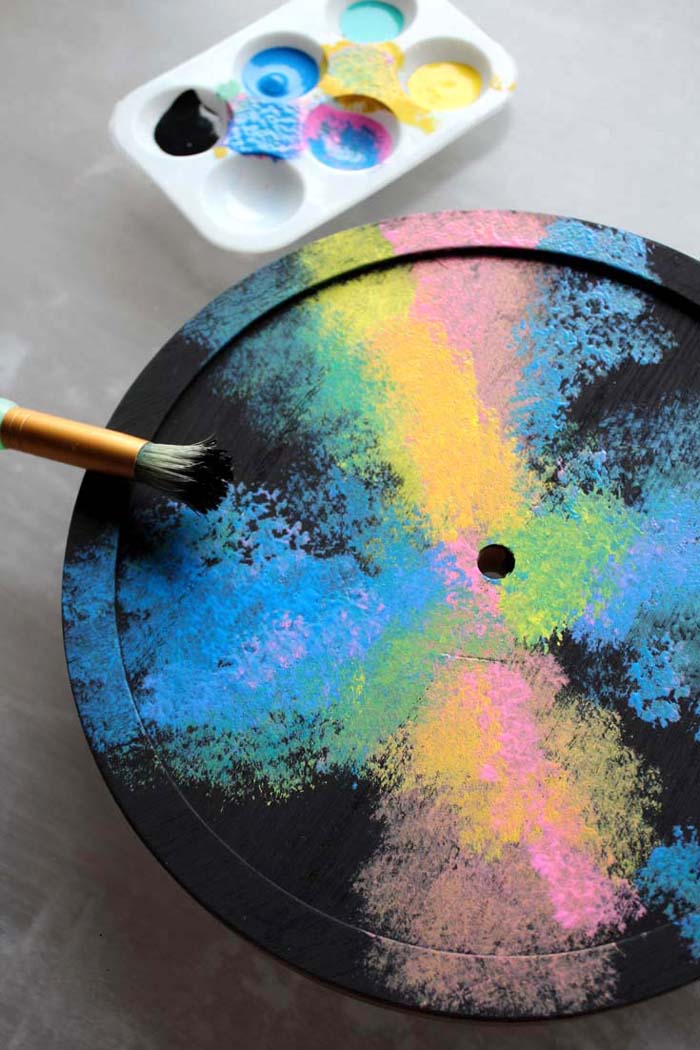
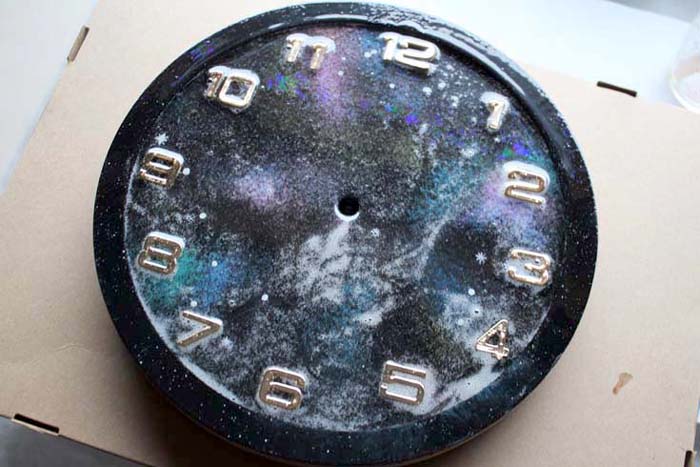
After the paint dries, put some white paint on the paintbrush and flick it on the clock face to make stars.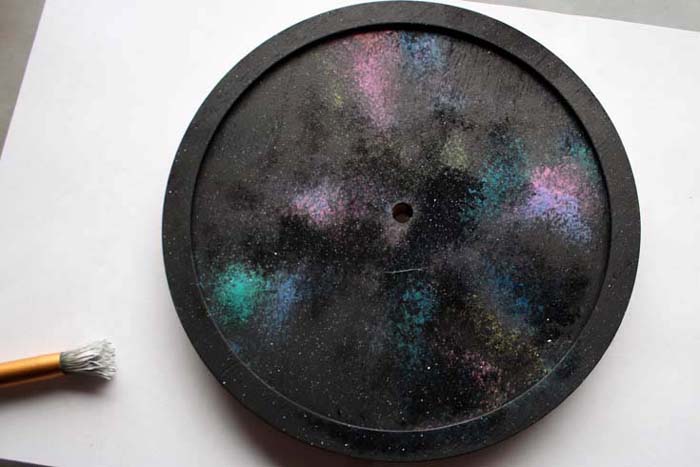
Then use a small paintbrush to paint in some stars and dots in the perfect constellation clusters.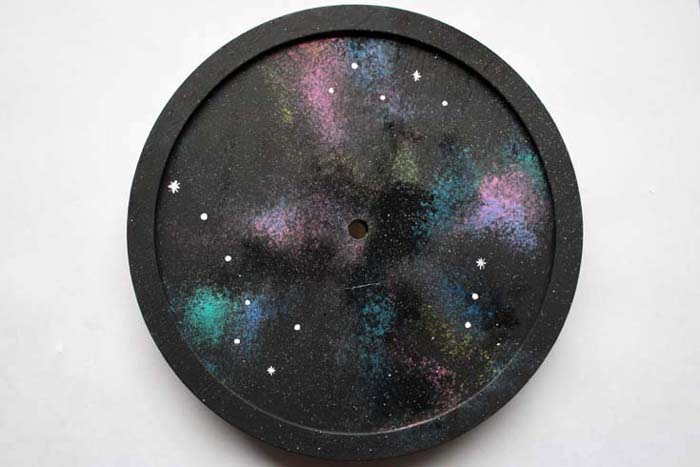
After the paint is dry, hot glue the numbers on the clock face.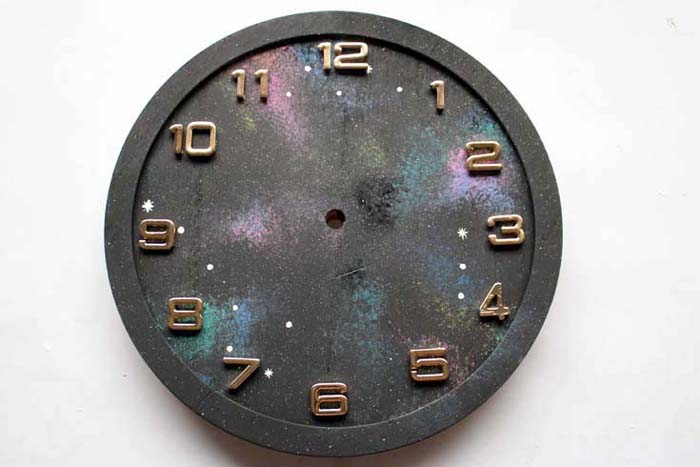
Resin Time!
Now mix up the resin. Read the directions carefully and mix an ounce of resin with an ounce of hardener. Stir for 2 minutes, then pour into a second mixing cup and use a new stirring stick to stir for 1 more minute.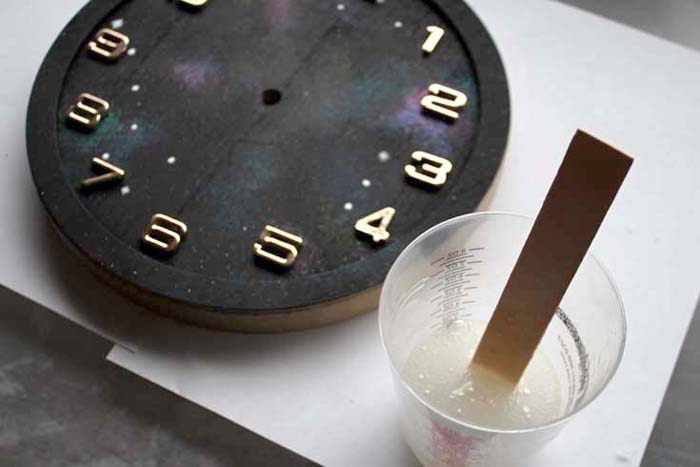
Place the clock on a disposable work surface, then pour the mixed resin all over the clock face.
Let the resin sit for just about 5 minutes, then blow gently over the surface with a straw to pop all the formed bubbles.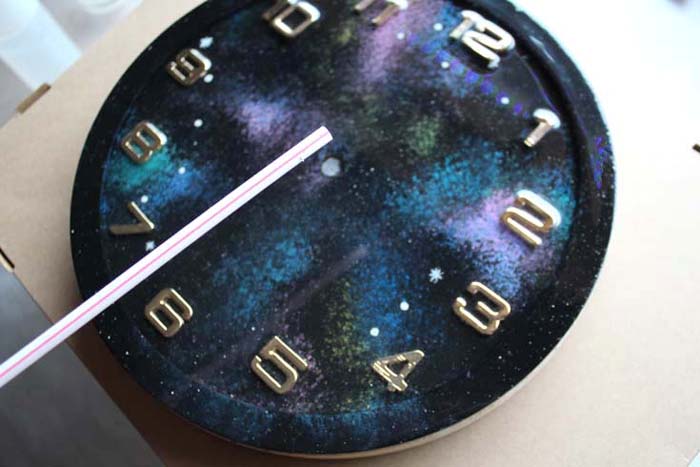
Now let the resin cure for at least 24 hours.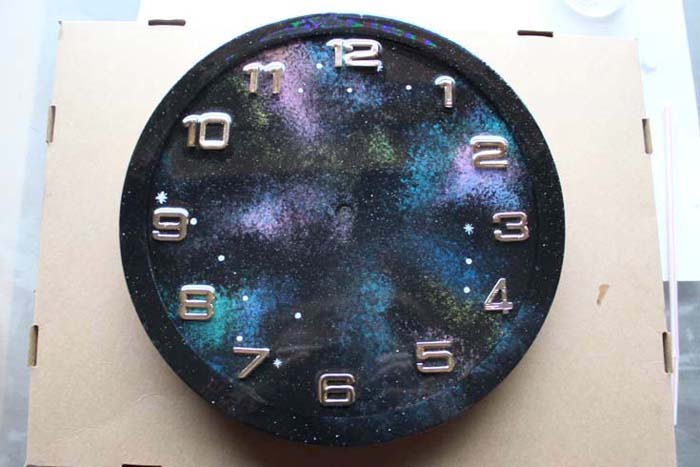
The next day, drill the center hole with a drill bit. Then assemble the clock hardware according to the package directions.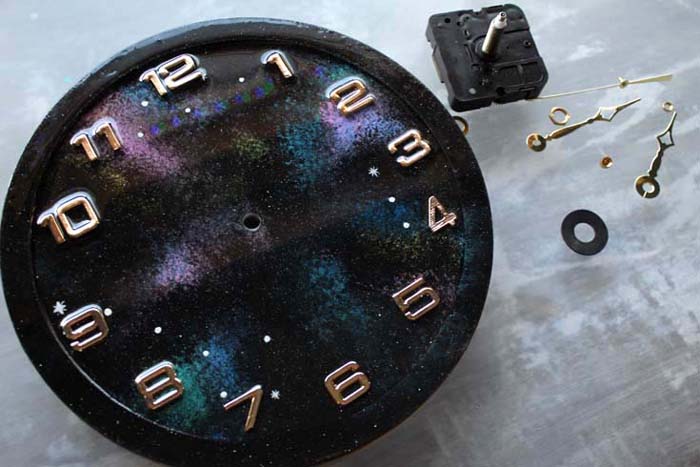
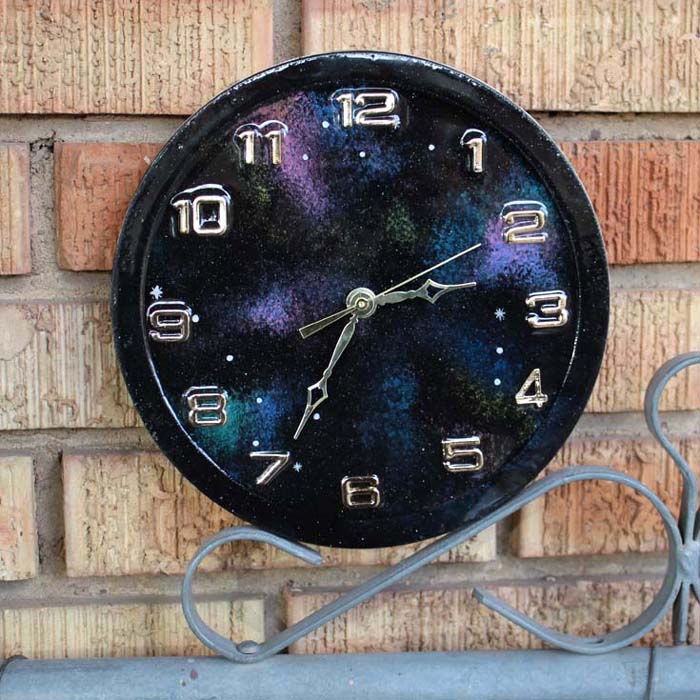
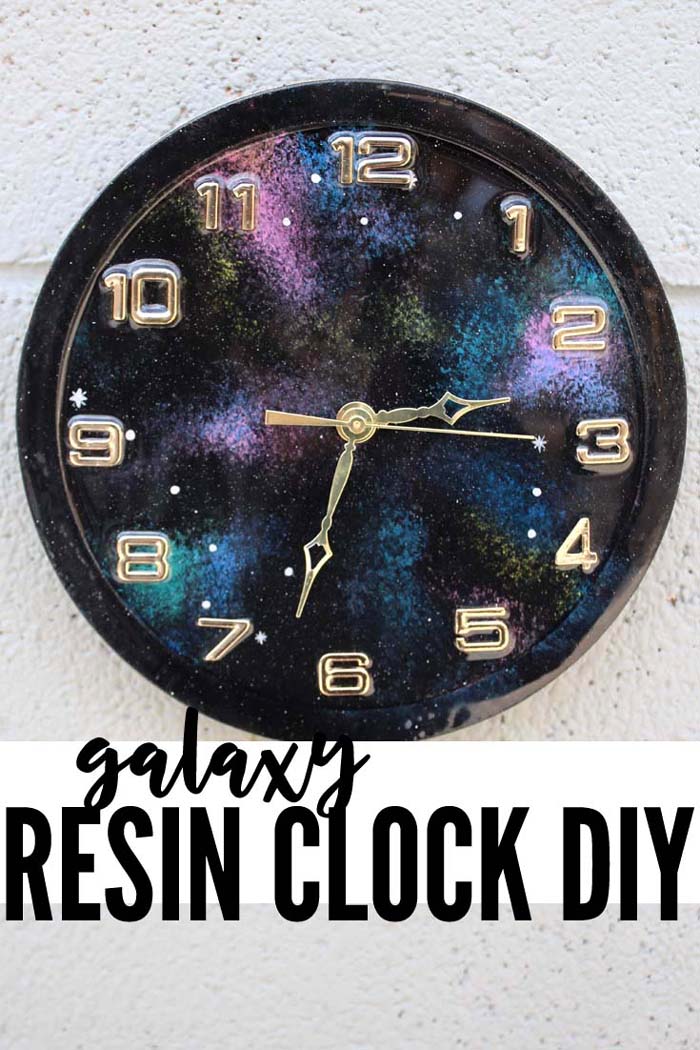
Now you are ready to ring in the new year 2019 with a fabulous galaxy clock! 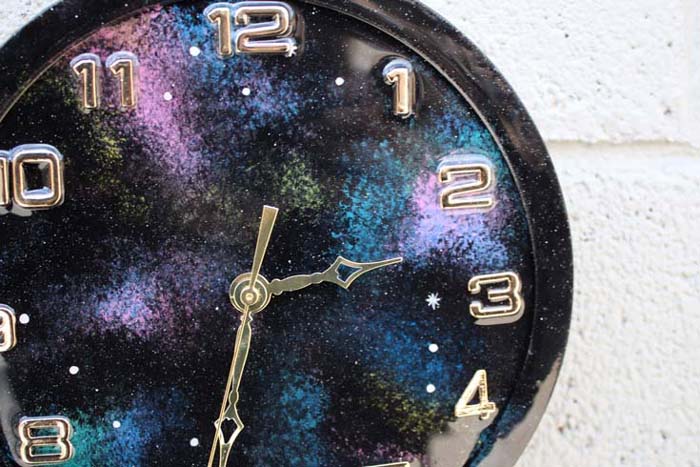
Make the new year ring with a clock that is out of this world!
Natalie Shaw is a Craft/DIY blogger at Doodlecraftblog.com. She loves sci-fi, fantasy and video game geekery and that comes out in many of her projects. She posts budget conscious DIY’s, crafts, jewelry, kid friendly projects, upcycled treasures and other fun on her blog 5 days a week.


Leave a Reply