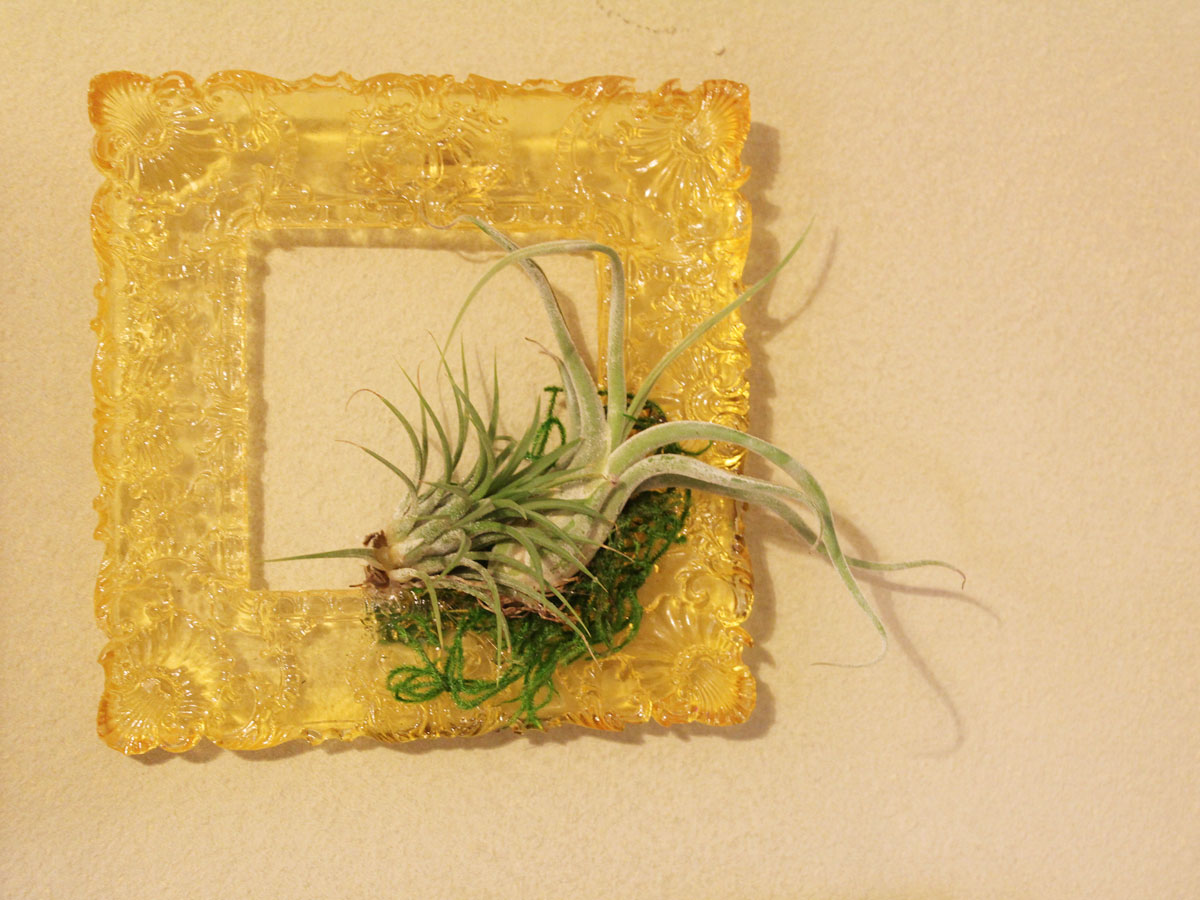
I’m one of those people that like to hoard stuff that you can always buy again from a store, like this cute pink frame. Obviously, I know I could use this frame or buy another from any store, but I thought it would be fun to try to replicate it with resin. I can’t believe I was able to replicate this frame out of resin! This DIY resin frame looks like a piece you’d buy out of a big box store!
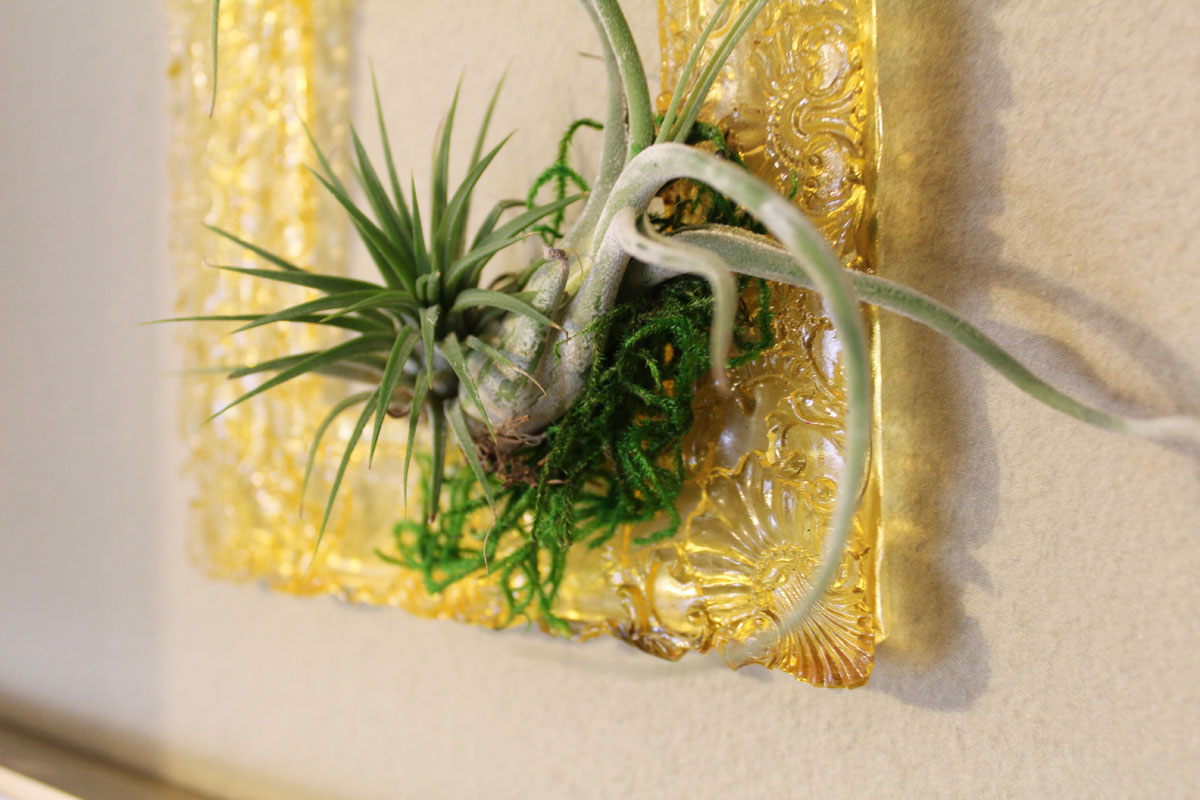
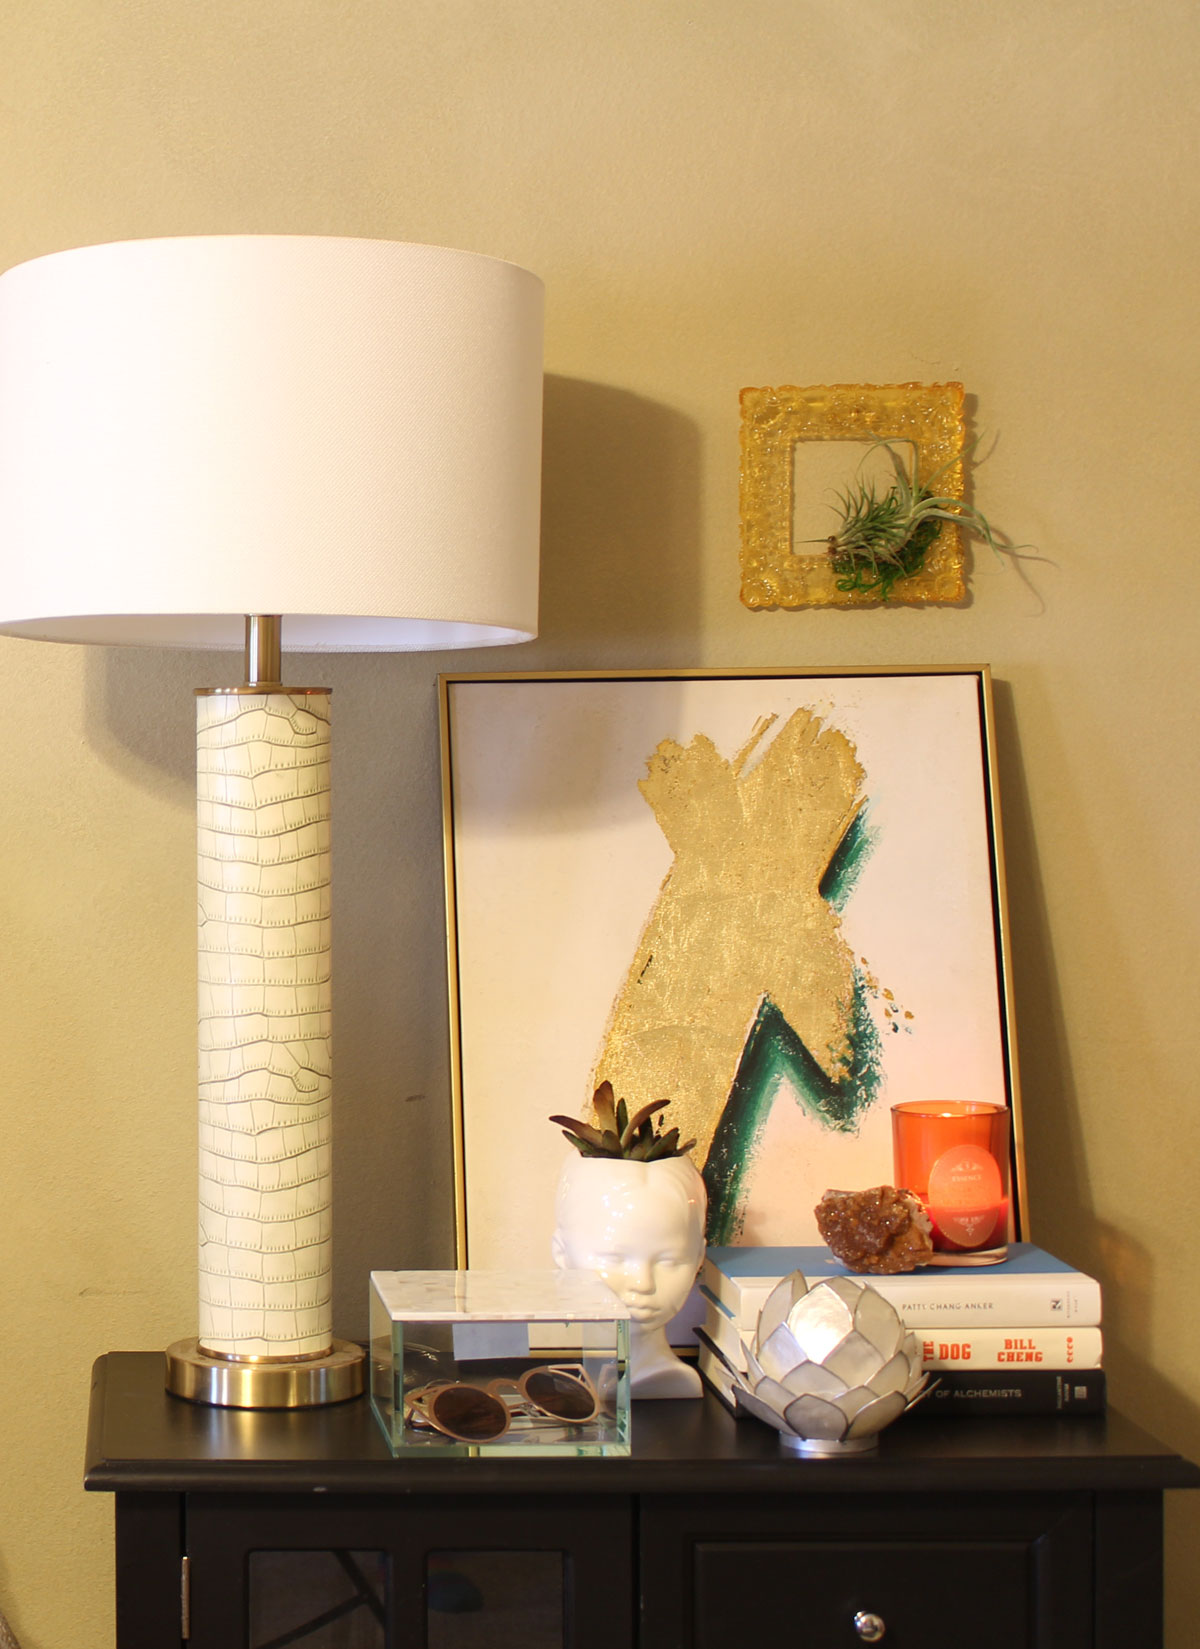
I’m using my frame to display some of my air plants, but you can use yours to frame art and photos if you first glue a piece of glass or acrylic to it.
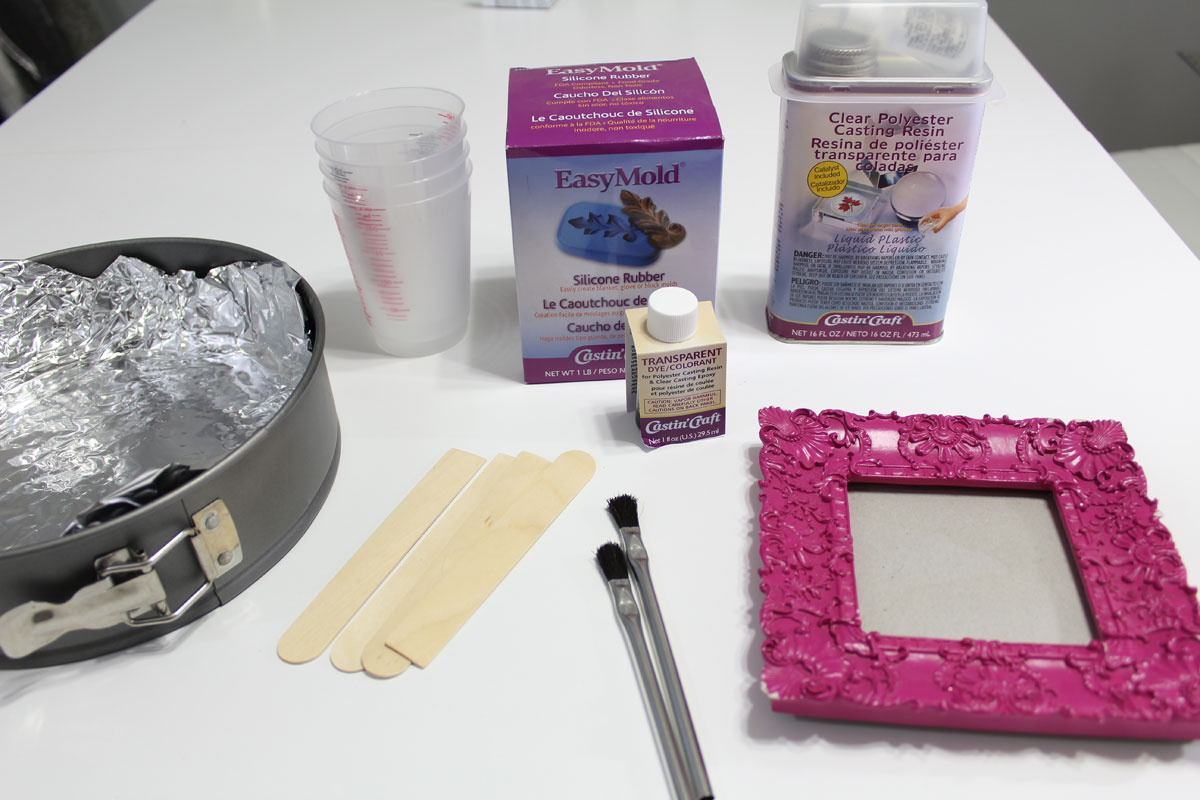
Supplies
- Old frame
- EasyMold Silicone Rubber
- Clear Polyester Casting Resin
- Transparent Dye
- Stir Sticks
- Mixing cups
- Container (big enough for frame to sit in)
- Air Plants (not shown)
- Moss (not shown)
- Super glue (not shown)
- Hanging hardware (not shown – I used a sawtooth hanger)
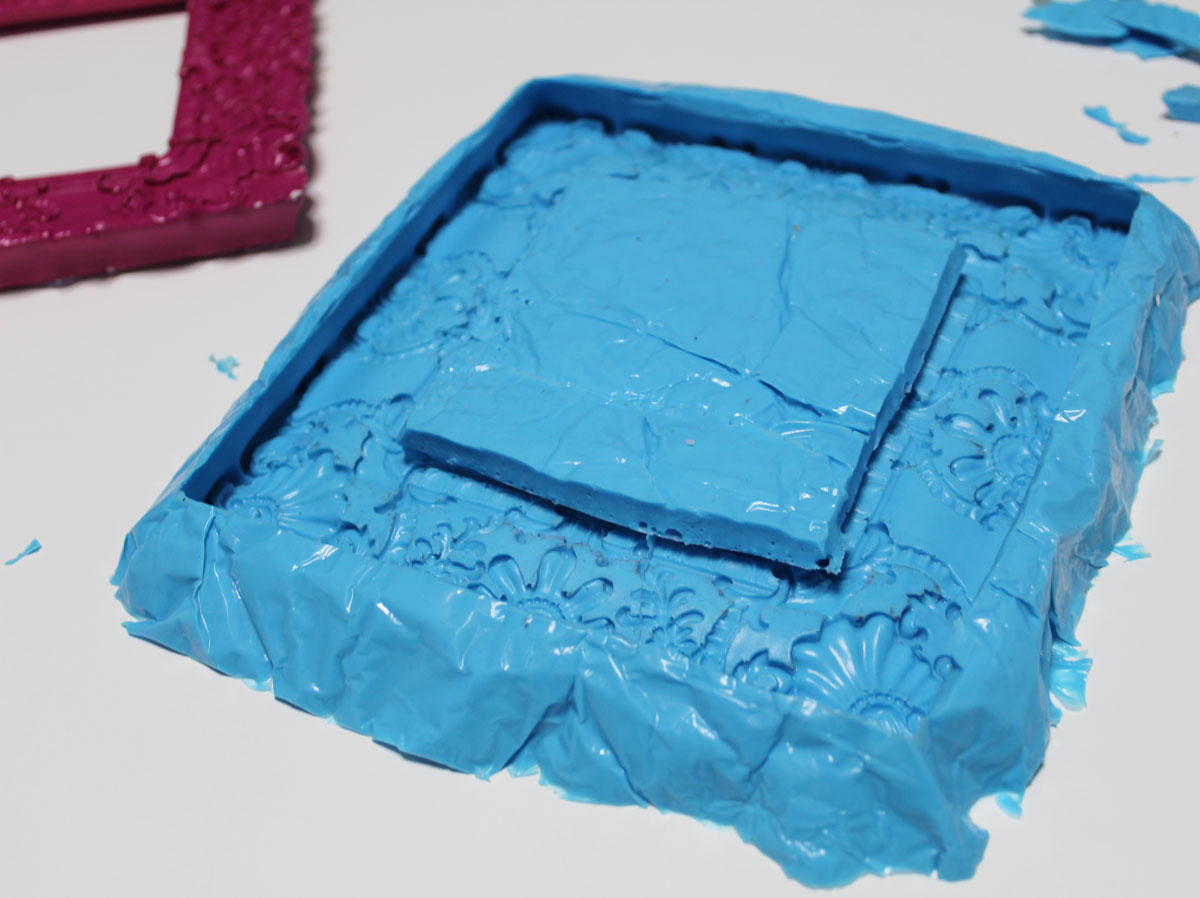
Making the Mold
- First thing to do is remove glass and cardboard backing from frame and glue frame in place into your container. I used a baking pan, so I lined it with aluminum foil.
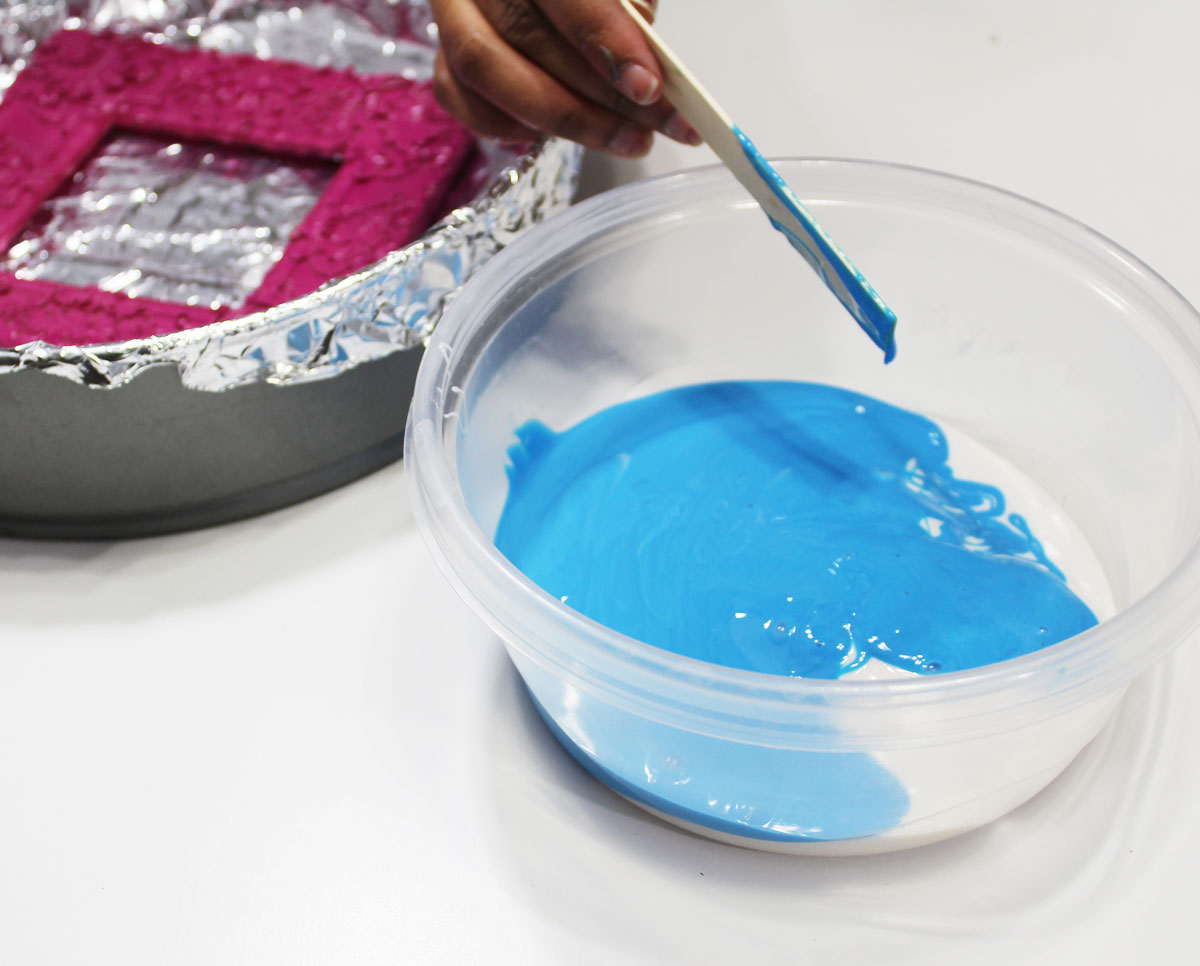
- Next, you’re going to make your mold. Measure equal parts of part A and part B of the EasyMold Silicone Rubber. I found out how much Silicone Rubber I needed by filling the space around the frame with rice first and measuring the volume of rice that I used.
- Then, you blend part A and part B of the Silicone Rubber until it’s a uniform color.
- Let your mold completely dry before removing the frame from it.
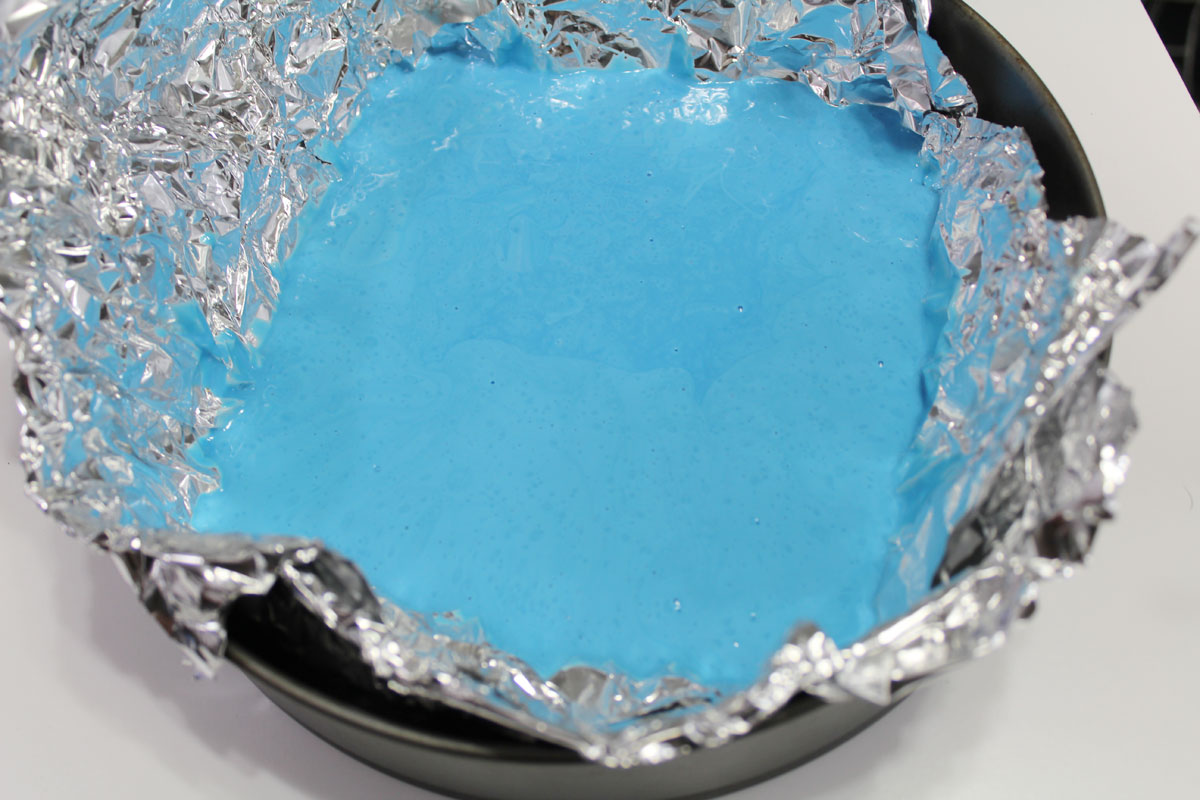
Making the mold was fun! Seeing the impression of the frame details in the mold was really cool. Now I can use the mold to cast new frames out of resin, plaster, and even metal!
Casting the new resin frame
Work in a well-ventilated area when working with the Clear Polyester Casting Resin.
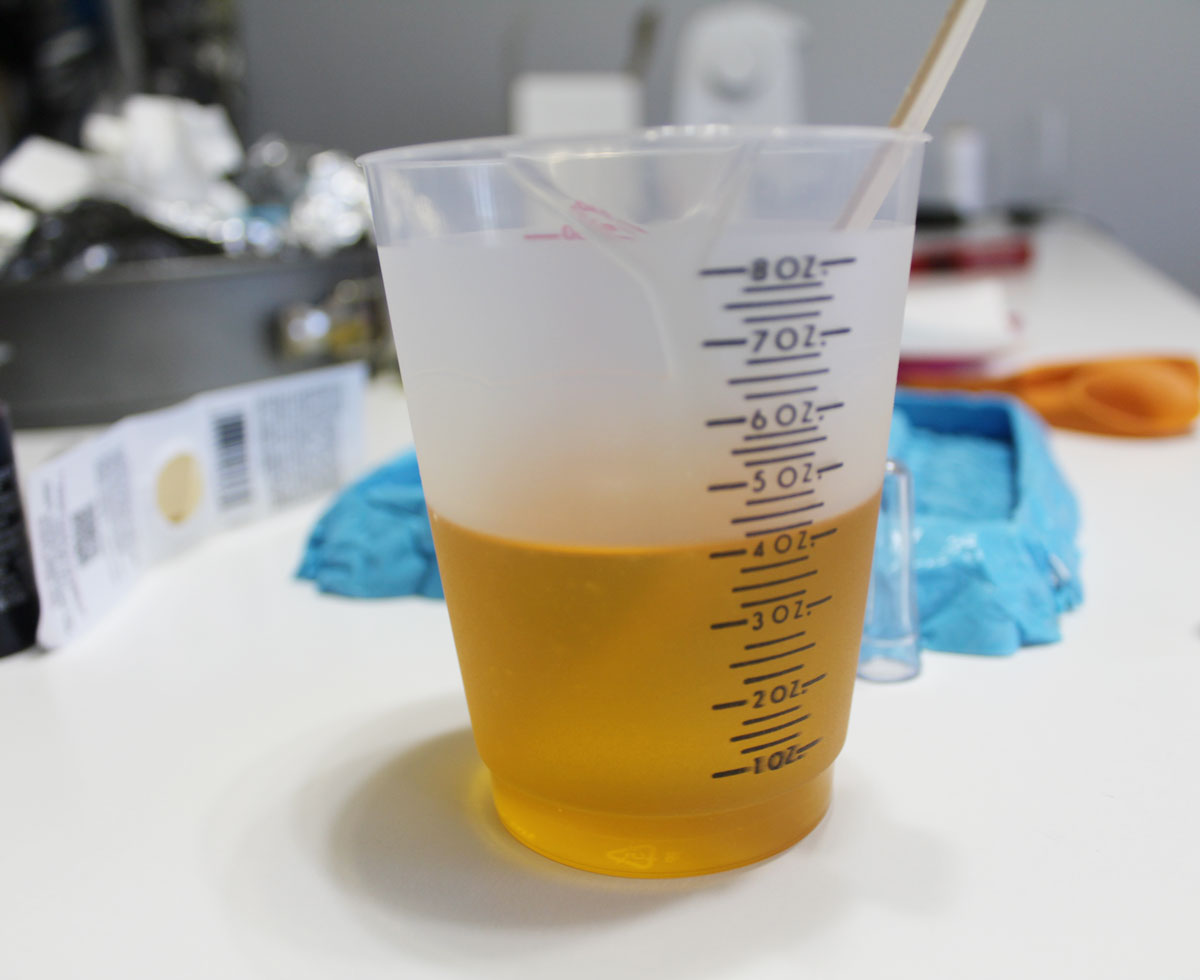
- Use rice to measure how much resin you’re going to need to create your new frame. Then, measure that amount of resin in a mixing cup.
- The label on the resin shows how many drops of catalyst (that came with the resin) you need to add to the resin. The amount of catalyst depends on how thick the layer of resin will be. My frame is ½”, so I had to use 6 drops of catalyst per ounce of resin.
- Add your dye (or leave it clear, if you’d prefer). You’d basically play around with drops of dye to get the correct formula you’d like. Add one drop at a time.
- Mix thoroughly for 60 seconds, making sure to scrape the sides and bottom of the mixing cup.
- Pour resin into the mold and let completely dry before removing. I let mine dry for 24 hours before removing it from the mold.
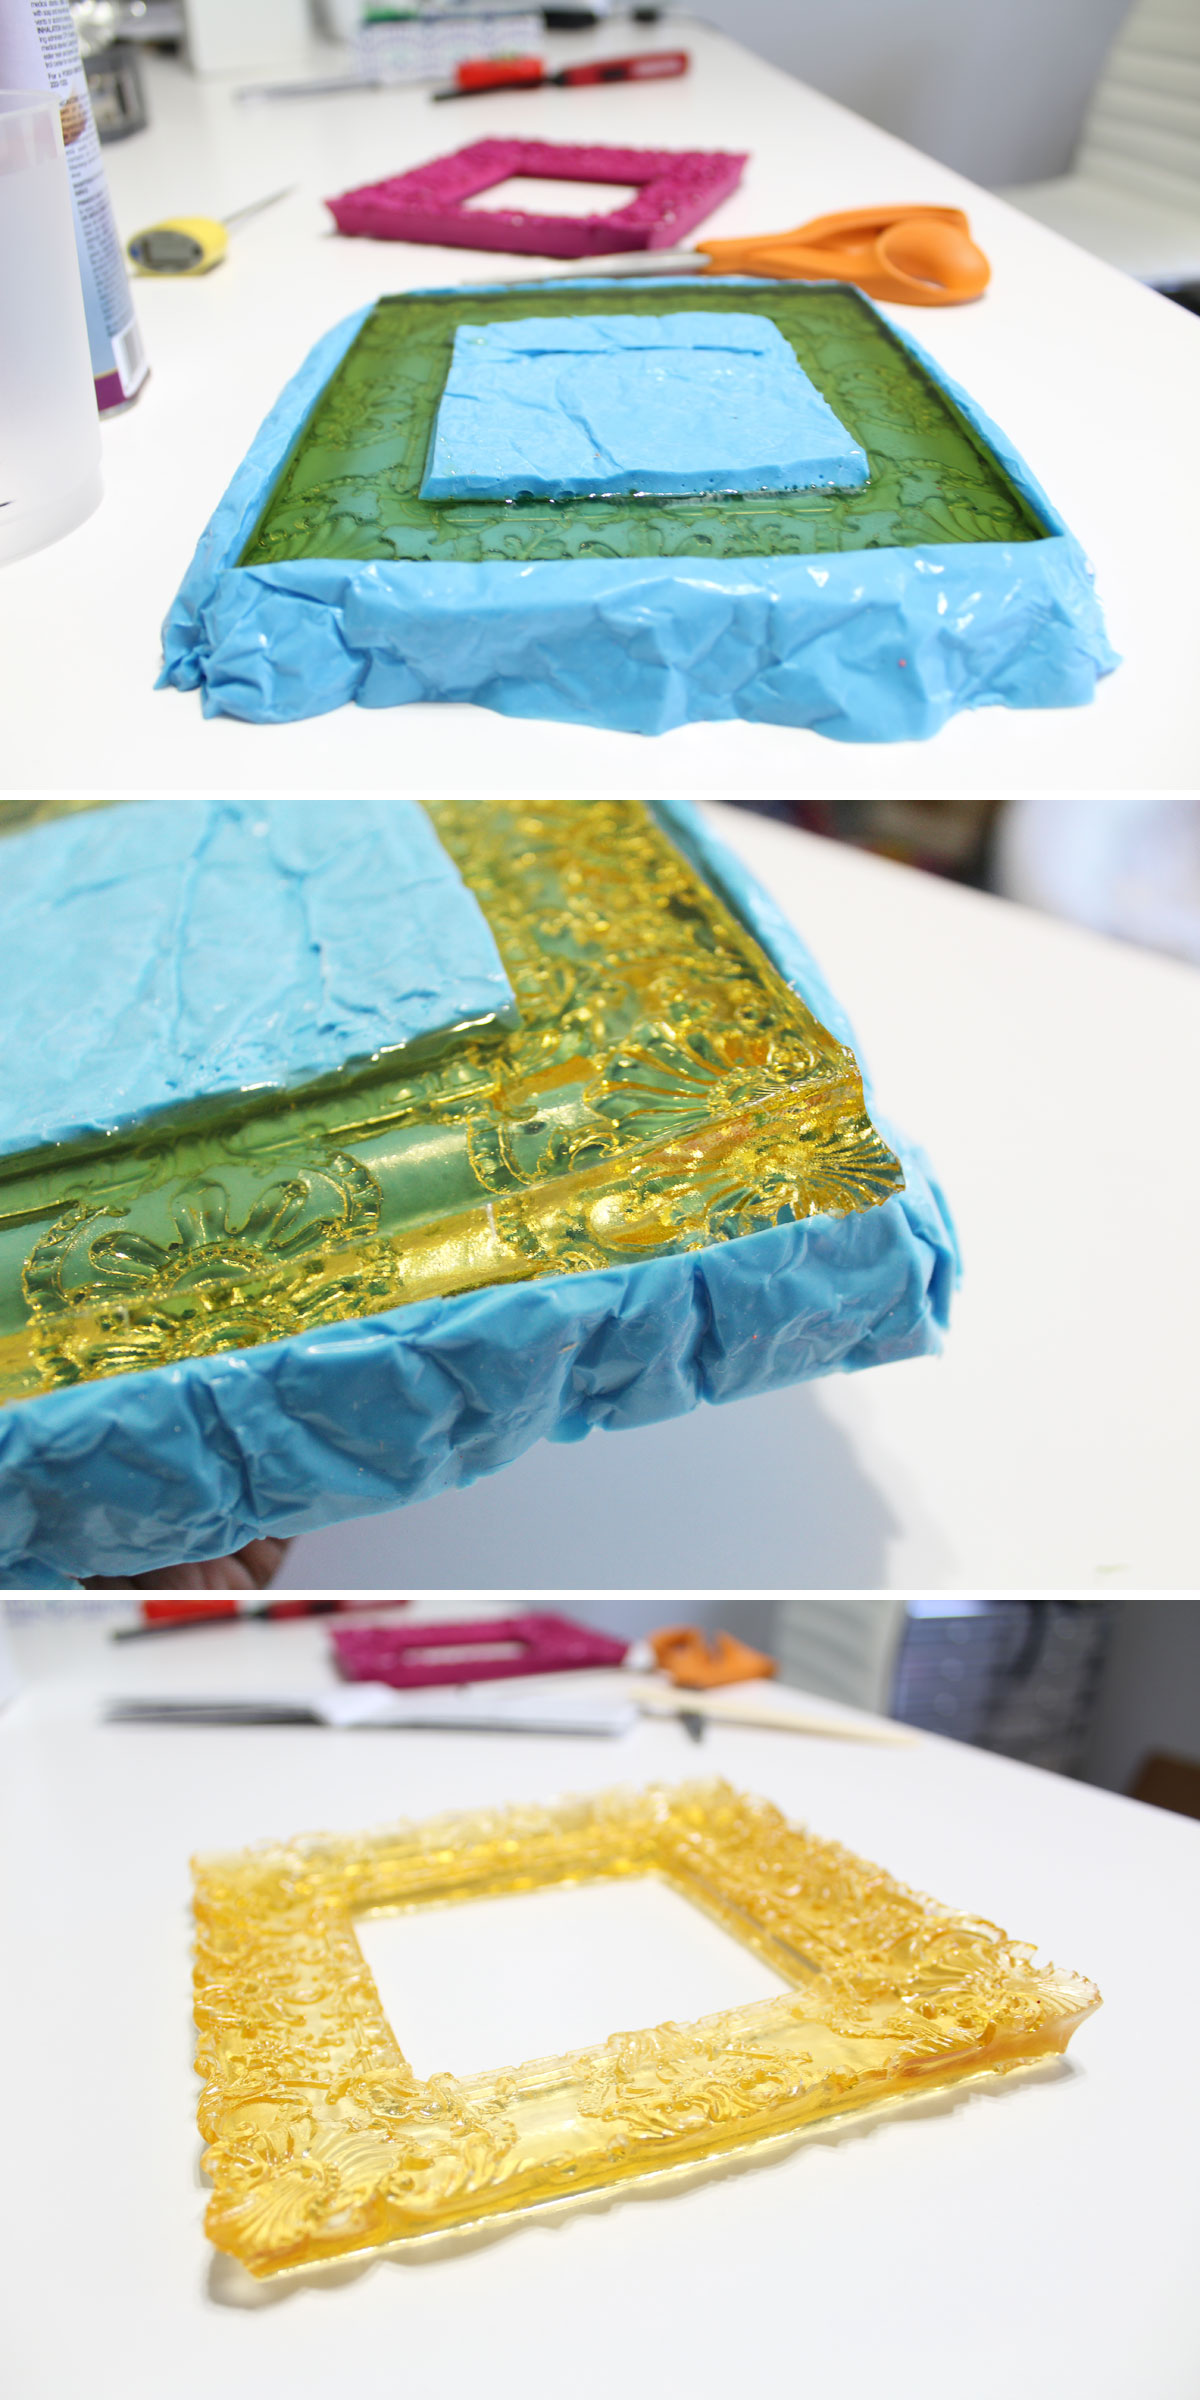
The Clear Polyester Casting Resin was really easy to use and I was very impressed with the way it hardened and took to the mold. All the great details of the original frame are visible.
Adding the dye was a great touch. I love the Amber coloring and using 3 drops per 2 oz gave me the perfect golden yellow color. In the future, I’ll experiment with more drops of Amber for an even more golden color.
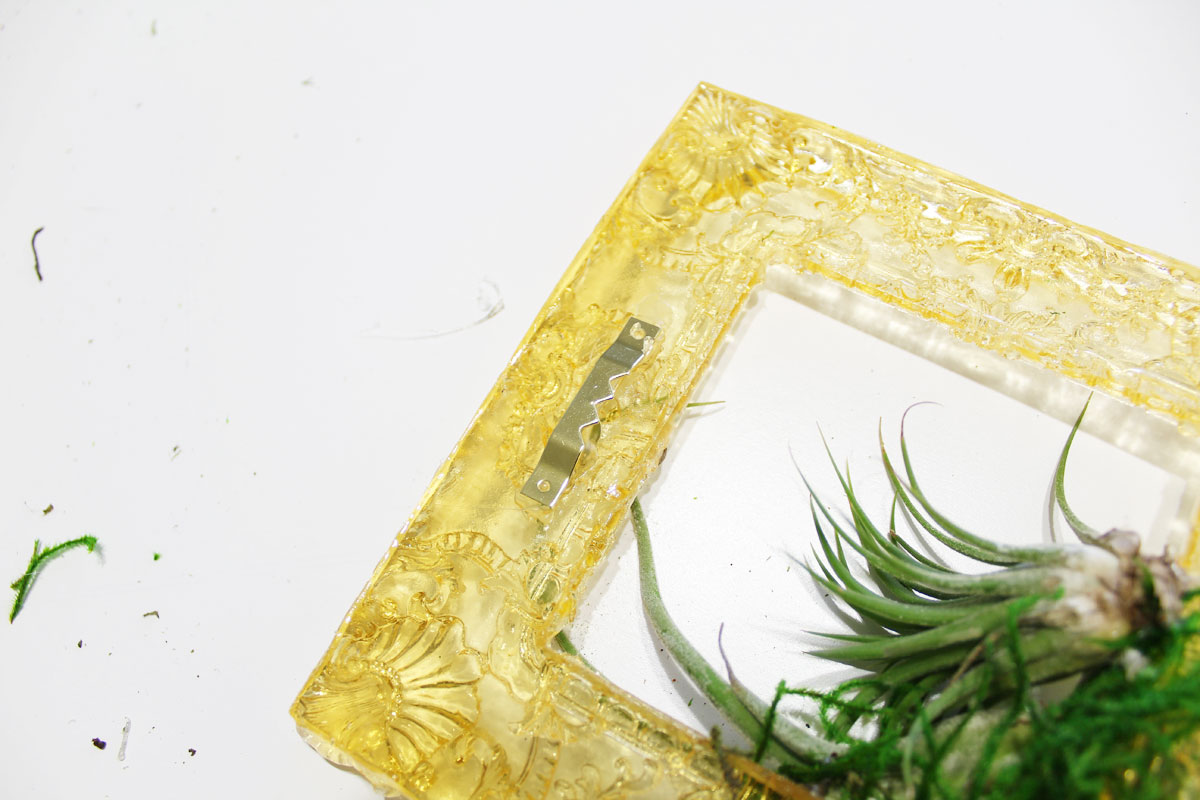
Frame the Succulents
This was the easiest part. I simply used hot glue to attach the moss to the inside corner of the frame and then the air plants on top of the moss. Then, I hot glued a sawtooth hanger to the back of the frame.
I used a nail to hang it on the wall over my bedside table and when I’m ready to give my air plants a bath, I’ll just remove the entire frame, mist the succulents with water in my sink and leave the entire thing in the sink to dry (so I don’t damage my wall).
I LOVED this project. Even though it spanned a couple days, it was well worth it. I love hand-making projects that can be gifted to friends and displayed around their homes. This is the perfect gift for a friend that loves plants.
You can replicate your favorite frame for your own DIY resin frame for displaying air plants, hang them as a set without anything attached, or add glass (or acrylic) for showing off your favorite photos or art. The best part is that you can literally use your mold over and over to make an endless amount of frames.
I hope you’re inspired to start crafting! I can’t wait to share my next project!
Whitney is a New Orleans based decorator blogging about all things home. She loves to sew and create fabulous pillows and other furnishings. When Whitney’s not working on design projects, she’s reading sci-fi novels, working in her garden, or making updates in her new home.


I want to use an expensive frame to mold, will the silicone rubber cause damage
Hi Judy! If the frame is made of a porous material then it would need to be sealed first with a high quality acrylic spray so that the silicone does not soak in and become irremovable. We would recommend doing a small sample in an inconspicuous spot before proceeding to the entire frame. If you have any issues or other questions please feel free to give us a call at 707-443-9323. Have a great weekend!