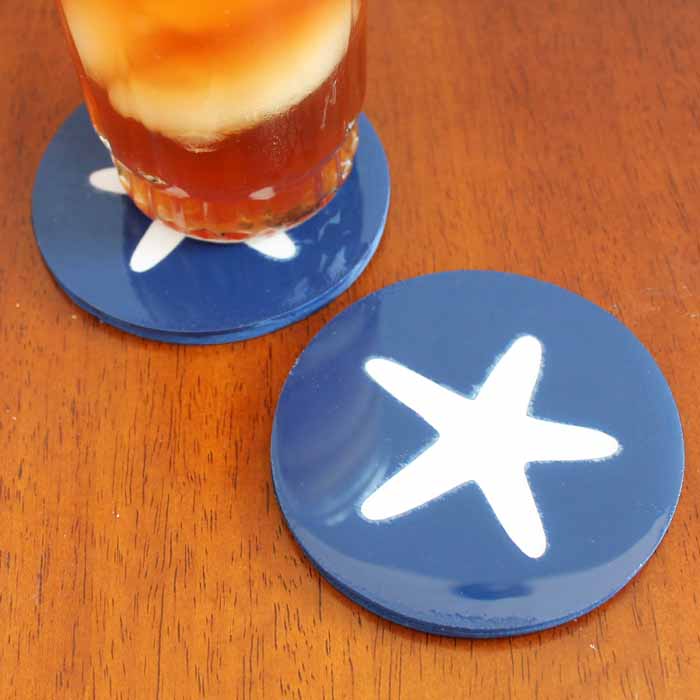
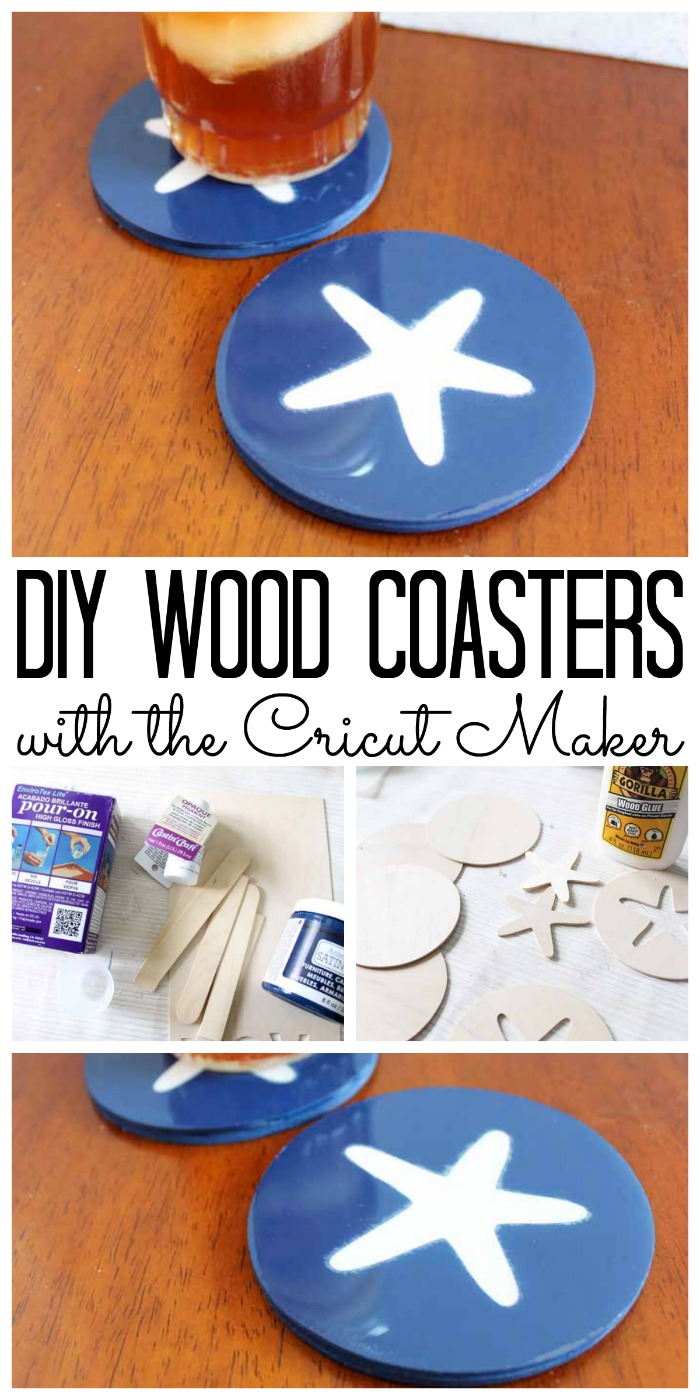
I have been wanting to make some DIY wood coasters ever since getting the Cricut Maker. You see it cuts thin wood pieces and is perfect for projects like these. Just add some accents and protection over the top with EnviroTex Lite® Pour On High Gloss Finish and you have pretty and functional coasters you can be proud of.
Supplies needed to make these DIY wood coasters:
- Basswood 1/16″ thick
- Cricut Maker
- Craft paint
- Wood glue
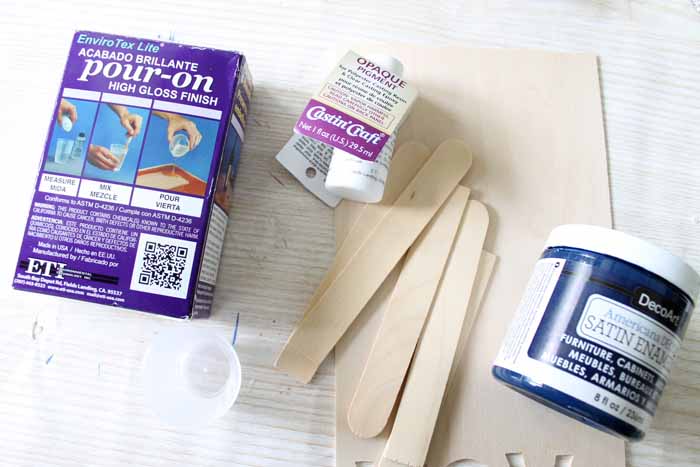
- EnviroTex Lite® Pour On High Gloss Finish
- Castin’Craft Opaque Pigment in the color of your choice
- Stir sticks
- Measuring cups
- Mixing cups
Instructions:
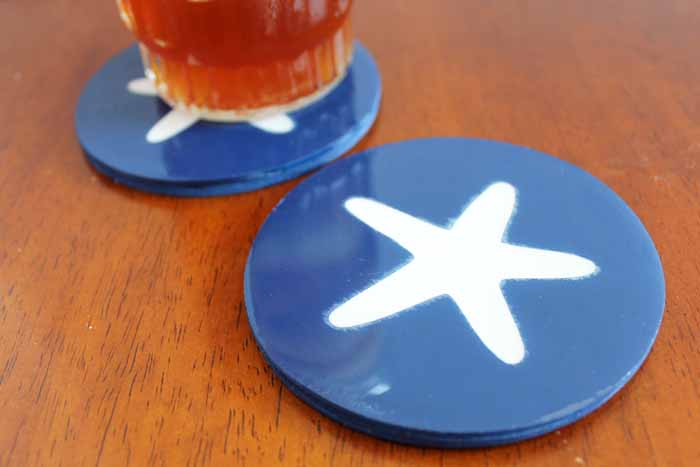
Start by cutting your wood pieces with the Cricut Maker. For each coaster you will need two round circles with no cut out and one round circle with your shape cut out. We are using a starfish for our example but feel free to design this project with any shape that you like. You will need to use the knife blade in the Cricut Maker for cutting this wood.
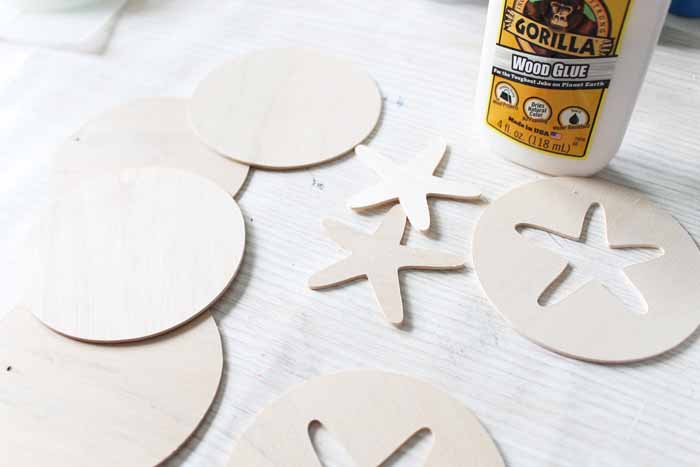
Use wood glue to stack your pieces up. Two round circles then the circle with the cut out on top. Be sure to cover the entire thing with glue as shown so the resin does not leak under when poured. Press them down well and allow to dry completely.
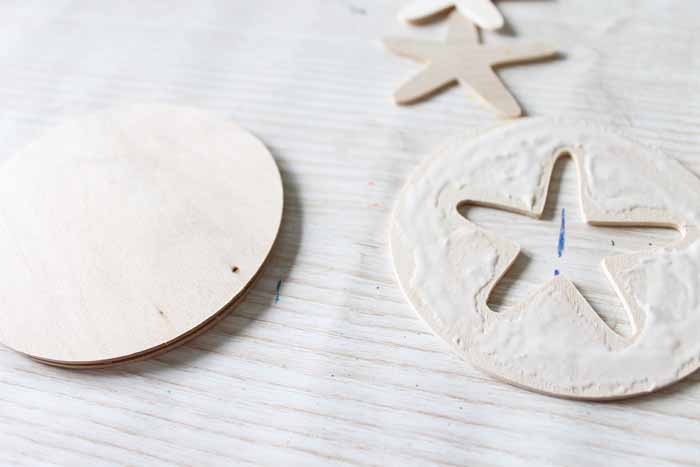
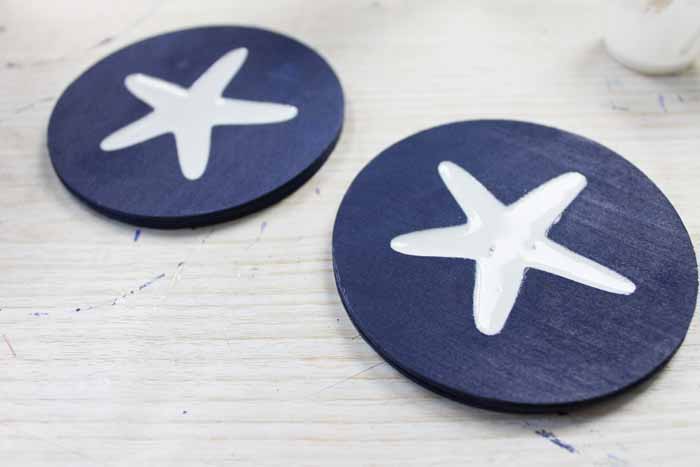
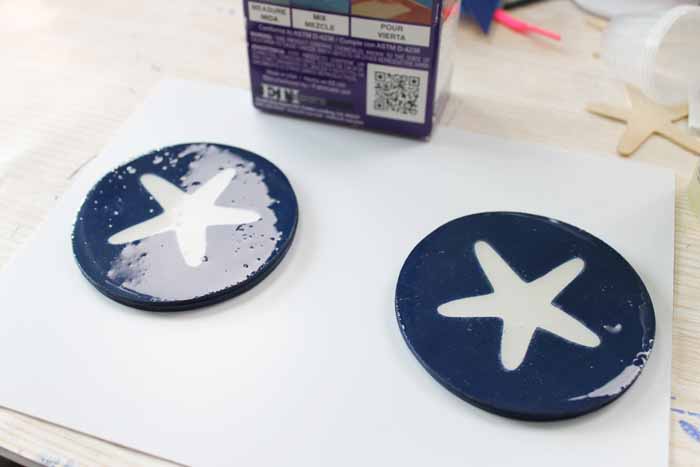
Then paint the entire thing with craft paint. Paint the inside of the cut out with the craft paint as well. Allow to dry. Then mix up some EnviroTex Lite® Pour On High Gloss Finish and add in the pigment color of your choice. Pour mixture into the inlay to get a contrast on your DIY wood coasters. Pop any bubbles and allow to cure completely.
Be sure to follow all mixing instructions when working with epoxy resin. The most common mistakes are not mixing properly.
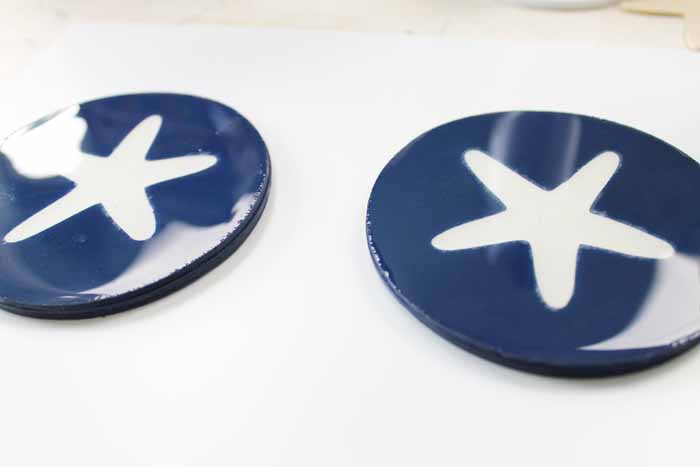
Once that has cured, you can now pour a clear coat of EnviroTex Lite® Pour On High Gloss Finish over the top of the entire thing. Once again, measure and mix well according to the package instructions. Then pour on just enough to reach the edges.
Pop any bubbles and allow to cure overnight. You may want to check a few times to make sure no resin pours over the edges before curing.
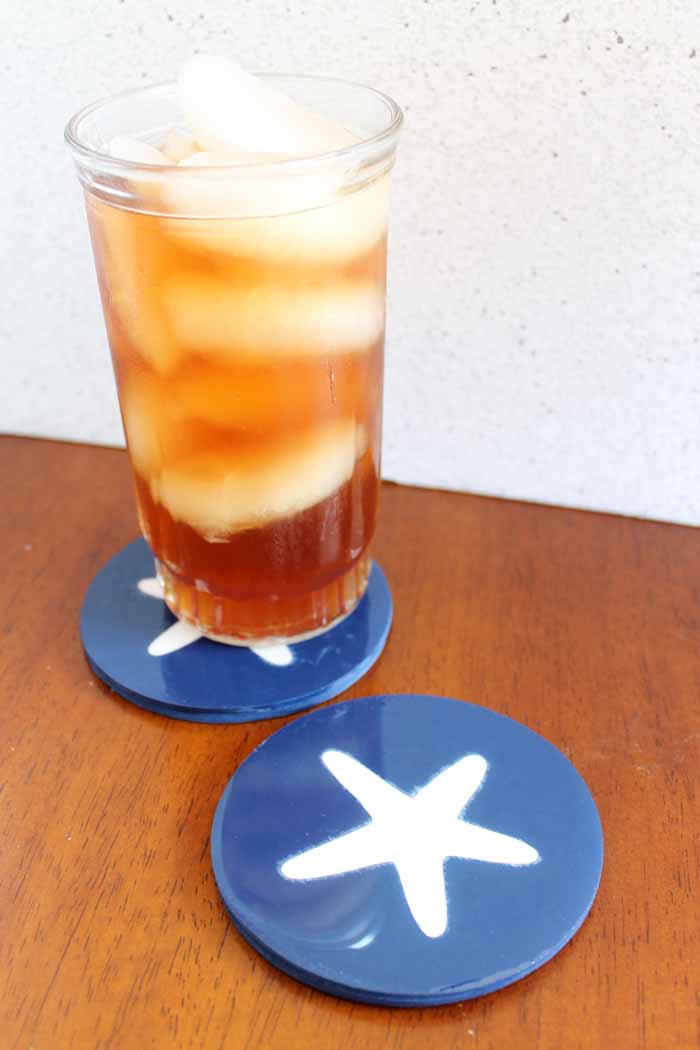
Once cured, your DIY wood coasters are ready for any room in your home.
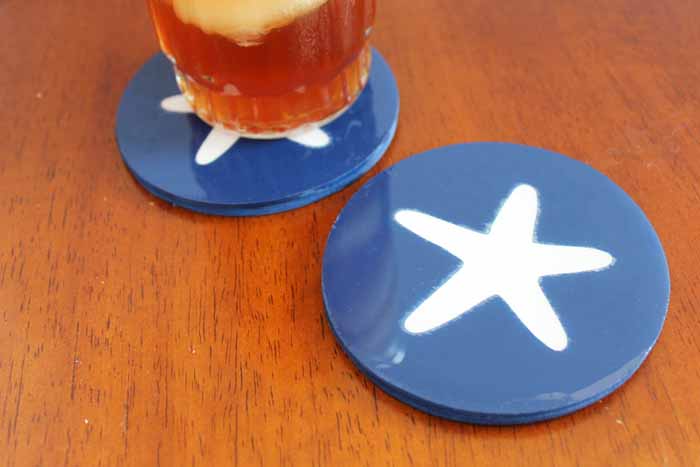
The protective finish will hold up for a long time and you will love being able to make customized coasters right in your own home with the Cricut Maker.
Whip up a batch to match your home decor, for gifts, or even just for a themed party!
Be sure to make some DIY wood coasters soon!
Angie has been blogging for over seven years at The Country Chic Cottage where she does a variety of crafts and home decor projects. You can even find a weekly recipe! She lives on a farm in rural Tennessee with her husband and three children. Painting is a favorite of Angie’s because it is a quick and easy way to make a big impact for very little money.


This is so cool! I have some redwood slices that I want to pour over. Not painting them, but they have fun vinyl stickers on them, to be covered. How do you manage to not pour over the edges? And if they’re not painted, can resin be applied to the edges with a brush, or perhaps a clear coat of some kind? This will be my first time using a pourable resin. I don’t want to have dripping. Love your blog, and thank you.
HI Grace! It’s inevitable that some will go over the edges. And yes you can apply some resin to the edges with a craft brush and also use the brush to catch any drips that go underneath.