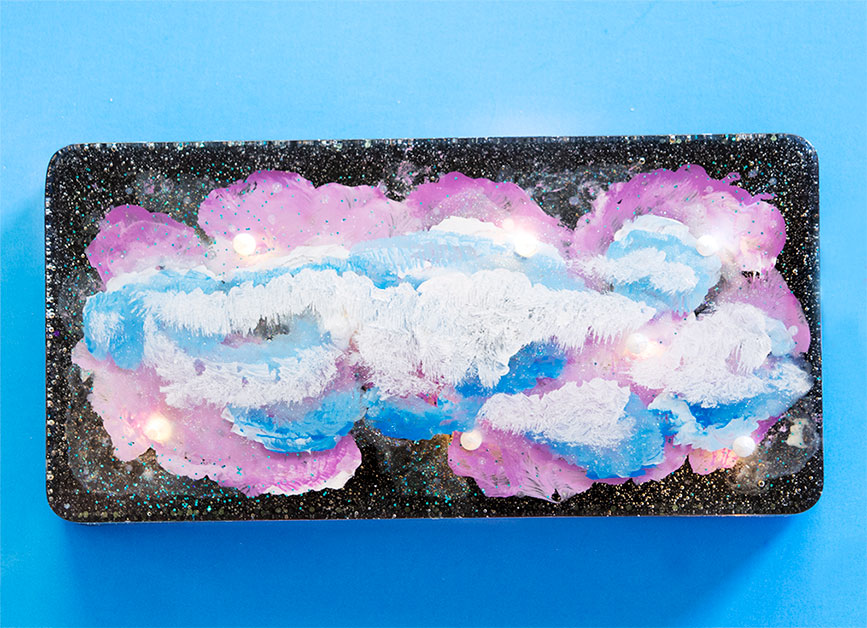
Hello Resin Crafters! Did you know that you can create fun effects and art pieces by simply layering resin with paints and other items? Each layer of the resin, when allowed to cure for a few hours, can hold a separate layer of the design. Using layered EasyCast Clear Casting Epoxy you can create a fun, light up galaxy for your desk or use it as an awesome one of a kind nightlight. Layered Resin projects take some time to complete. Depending on the number of layers you want, it can take days. But the amount of active project time is really not very long.
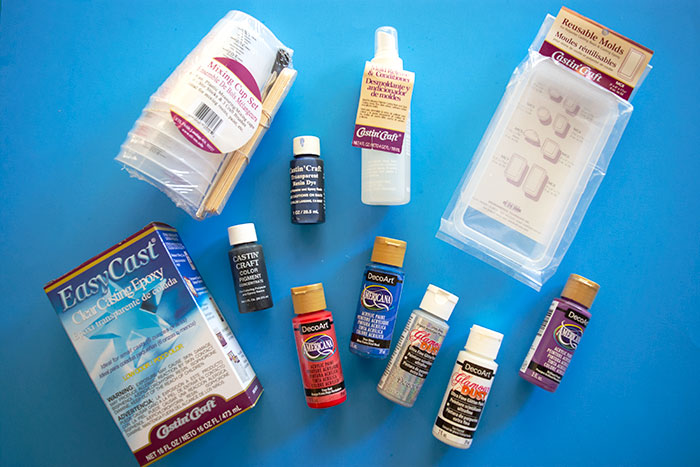
Layered Resin Galaxy Supply List:
- EasyCast Clear Casting Epoxy
- Re-useable Rectangle Mold (MC-8)
- Mold Release and Conditioner Spray
- Acrylic Craft Paint (at least three colors)
- Paint Brushes
- Glitter
- Black Acrylic Paint or black opaque Resin Pigment
- Mixing Cups, Stir Sticks, Gloves, and Eye Protection
- A small strand of wire LED lights
- Drill and small drill bit
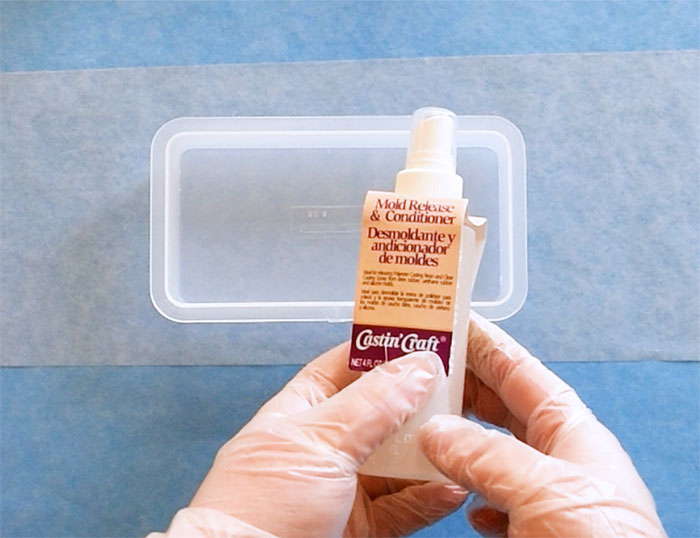
The first step in layering resin is to choose and condition your mold. I am using a 3″ x 6″ re-useable plastic mold for my desktop galaxy. You can choose a mold in any shape or size, but the mold should be at least an inch deep to get the layered effects. Use a Mold Release spray inside the mold and allow it to dry completely before use. This very important step will help to release the cured resin project when you are finished.
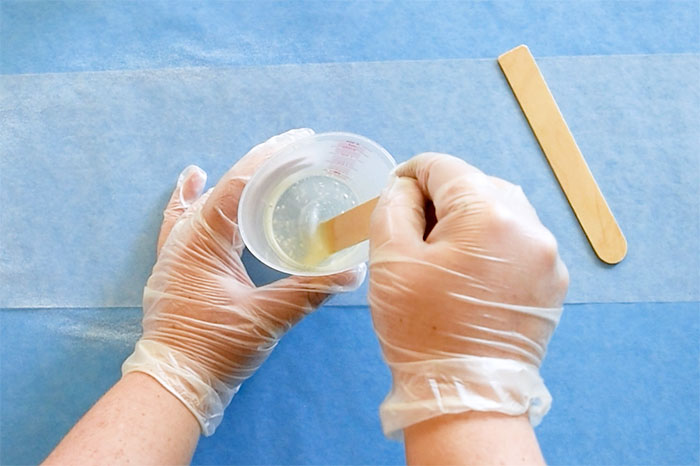
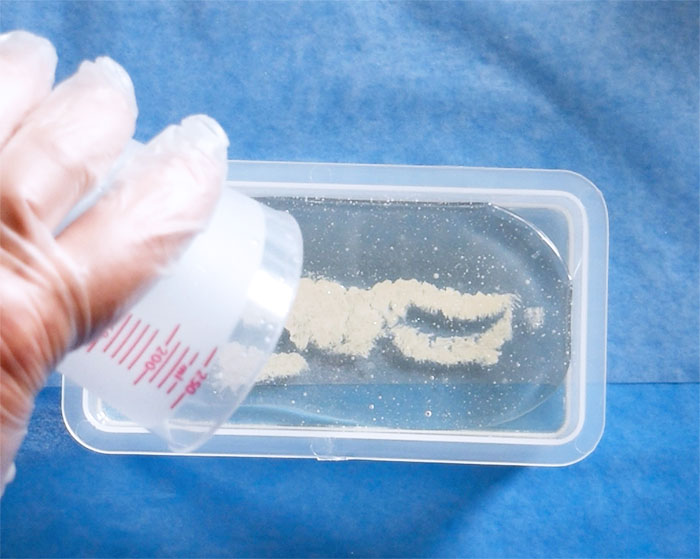
Start by mixing a small amount of EasyCast Clear Casting Epoxy to add to the bottom of your mold. This first layer should be clear. I used 2 oz of resin for my first layer. Mix carefully according to package directions. To achieve the best result, combine equal parts of the Resin and Hardener in a cup and stir for two minutes. Be sure to scrape the sides and bottom of the cup. After 2 minutes, pour the mixture into a clean cup, and stir again for one additional minute. After pouring the Epoxy into the mold, remove any bubbles that form using a heat gun, small torch, or your warm breath. Allow this layer to cure for at least 4 hours.
Once the resin has cured for several hours, it should have a fairly solid top. It doesn’t need to be fully cured to continue. Using a glitter or glitter paint, add dots for stars on top of the semi-cured resin. Allow the glitter paint to dry before continuing.

Pour another small layer of Epoxy onto the first. Use the same mixing techniques. I used 1.5 oz of resin for each additional layer I added after the first. Be sure to remove the bubbles each time you pour a new layer of the layered resin.
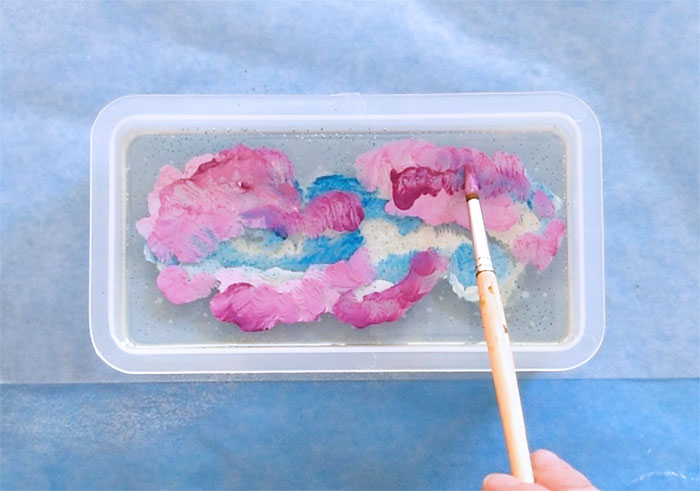
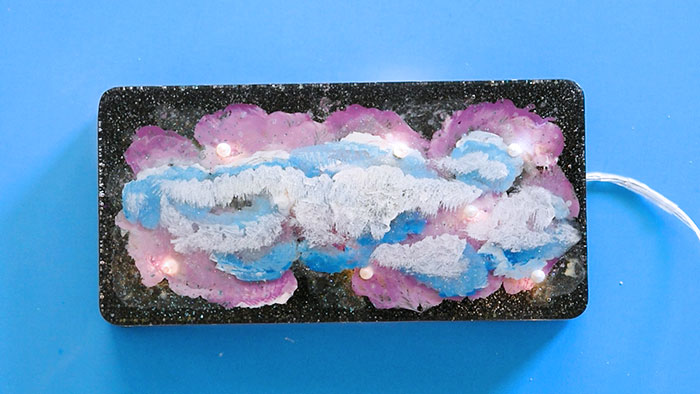
After the second layer of resin has cured for several hours, take a paintbrush and add the first layer of the galaxy details. Start with the lightest color you choose. I think of the details as clouds. Galaxy clouds. I used white paint for my first layer. Add some additional glitter stars if you wish.
Continue with the layered resin and details. Allow each layer of fresh Epoxy to cure for at least 4 hours before painting the details on.
If all of this is very confusing, you can watch a video here to help clarify:
The last layer of epoxy should be tinted black. I used black acrylic paint to tint the resin. You can use an opaque resin pigment as well. A little goes a long way. I used 2 oz of black tinted resin for the top layer. After the black layer, allow the entire layered galaxy to cure for at least 24 hours before removing it from the mold.
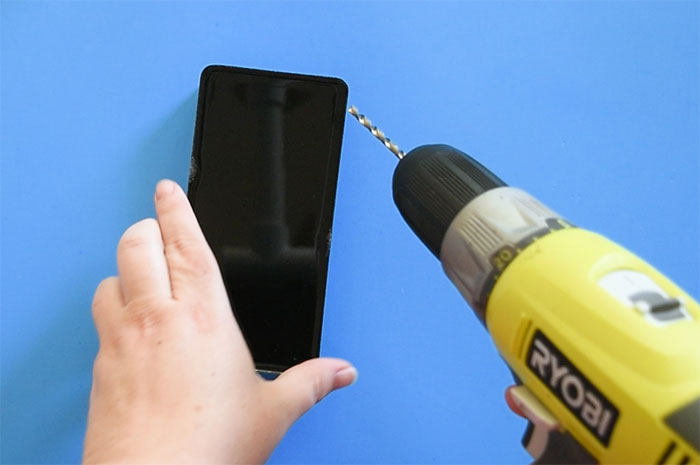
Once it is fully cured, you should be able to pop it right out of the mold by pushing gently on the back of the mold. Use a drill and a small drill bit to add several holes into the layered resin. Be sure not to drill all the way through. I varied the depth of my holes, but none of them went more than 3/4 of the way through the mold.
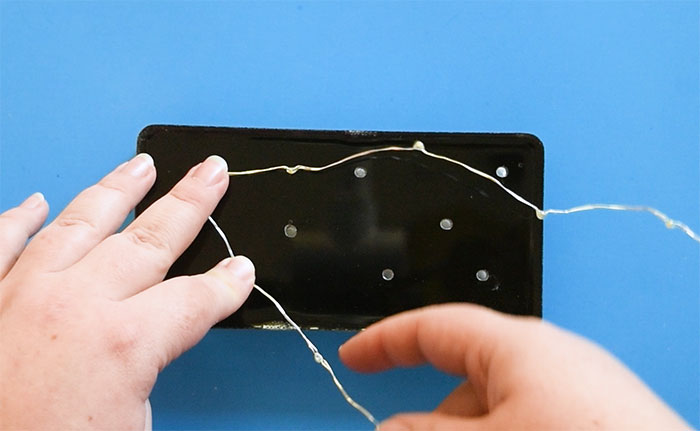
Poke small wire LED lights into each hole. When you turn them on, they make the whole galaxy sparkle like it’s full of real stars!
Use your pretty new lighted layered resin galaxy as a desktop decoration and conversation piece, or it can function as a fun nightlight for a child’s bedroom.
After studying Culinary Arts in Portland Oregon, Kelli went back home to the sunny South West where she decided she wanted to do different kinds of Art. This busy mom of three spends all of her available free time creating in her Craft Shack “she shed” where she can be found wood burning, repurposing old stuff, crafting, and painting just about anything she can get her hands on. She loves to learn new craft techniques and frequently finds inspiration in the world around her. Her motto in life is that you should never be too busy to make something pretty!


Leave a Reply