These Dyed Seashell Resin Coasters are easy to make, and look beautiful with or without a drink!

Hello, Resin Crafters! Lindsay from Artsy-Fartsy Mama here with a new and colorful resin project for you to try! Coasters are one of my favorite kinds of projects to make with resin. While walking through the craft store, I came across a package of colorfully dyed seashell chips that I knew would be perfect to use in a set of coasters. Needless to say, they did not disappoint! These coasters are incredibly easy for anyone to make, and are a gorgeous piece of art to add to your coffee table or desk.
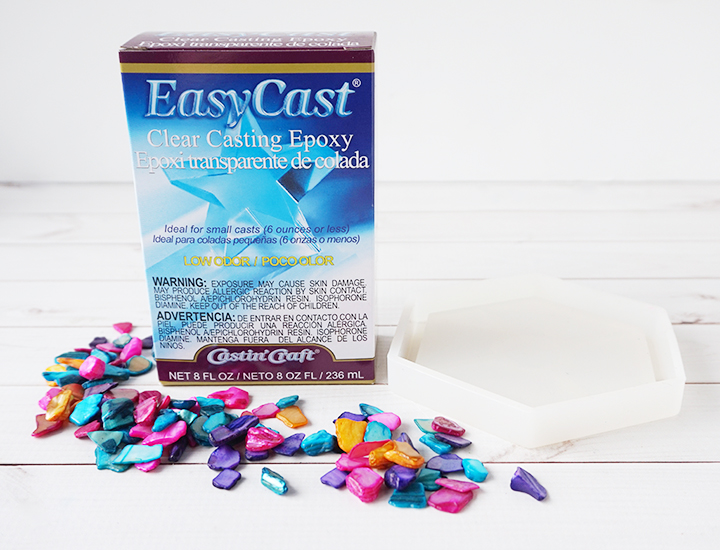
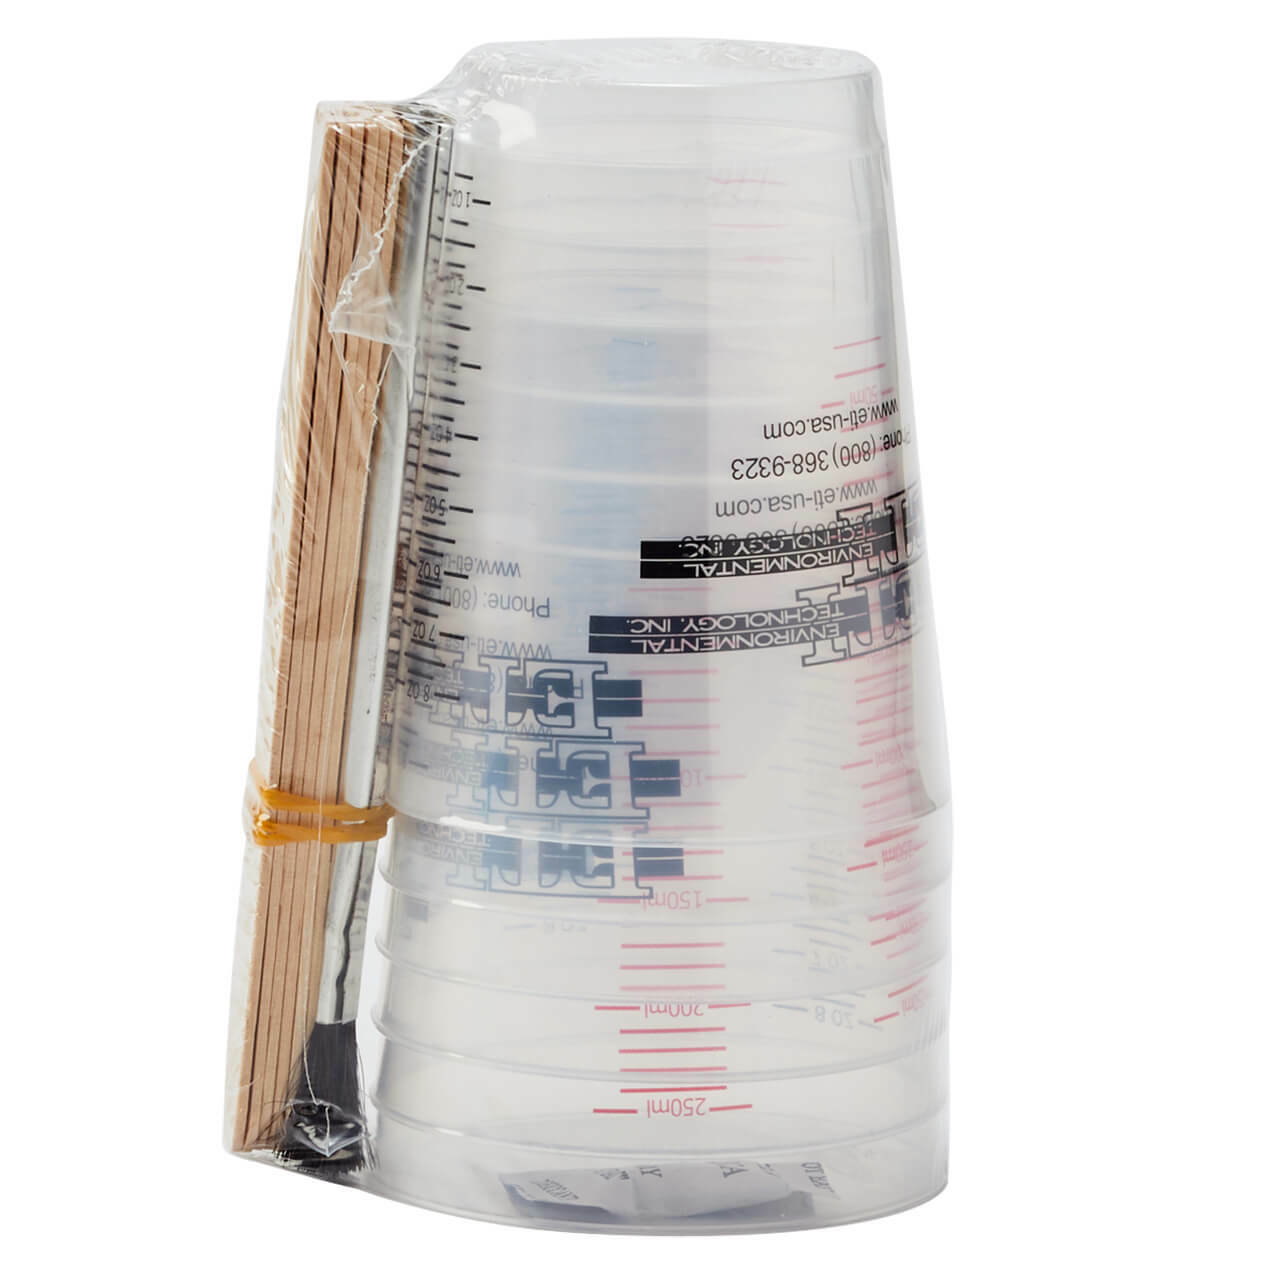
SUPPLIES NEEDED FOR Dyed Seashell Resin Coasters:
- EasyCast Clear Casting Epoxy
- Measuring Cups
- Stirring Sticks
- Resin Brush
- Disposable Gloves
- Silicone Coaster Molds – I used hexagons, but you can use any shape!
- Dyed Seashell Chips
STEP 1:
Prepare the EasyCast Clear Casting Epoxy according to package directions. Be sure to work in a well-ventilated area and wear disposable gloves.
Add equal parts resin and hardener to the mixing cup (I used about 3 oz of each). Stir the resin mixture together with a stir stick for two minutes, making sure to scrape the bottom and sides of the mixing cup. Pour the resin into a clean mixing cup and stir the resin again for another minute or two with a clean stir stick.
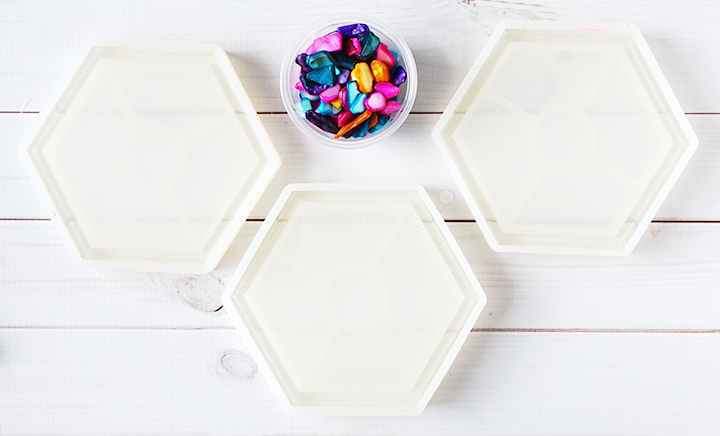
STEP 2:
Pour resin into each of the coaster molds, being careful not to overfill. Let the resin sit for a few minutes, then use a straw, lighter, or heat gun to remove any air bubbles that rise to the top.
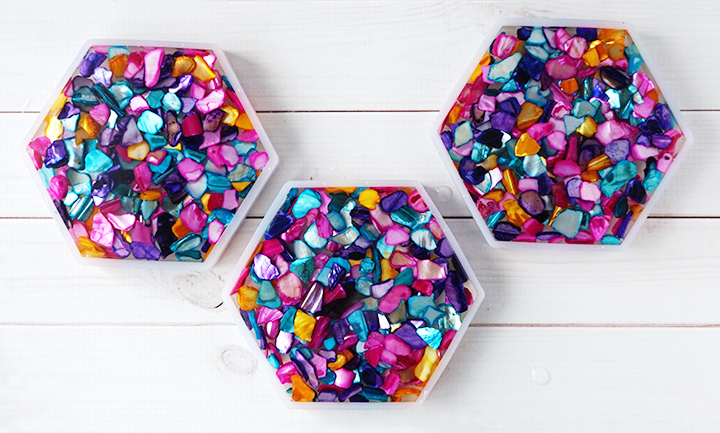
STEP 3:
Fill up a small mixing cup with some of the dyed shell chips. Pick out any that are too large or don’t belong (for example, I found a couple of lava rock pieces in mine). Pour the shells evenly over the resin, a little bit at a time. Use a clean stir stick or a resin brush to move the pieces around, press any pieces down, and to coat with resin. You don’t want any shells sticking up out of the resin, otherwise the coasters won’t lay flat when finished.
STEP 4:
Pop any bubbles that rise to the top using a lighter, heat gun, or by blowing through a straw. Leave the resin to cure in an undisturbed area for 24 hours. You will know that the resin is completely cured when it is no longer tacky.
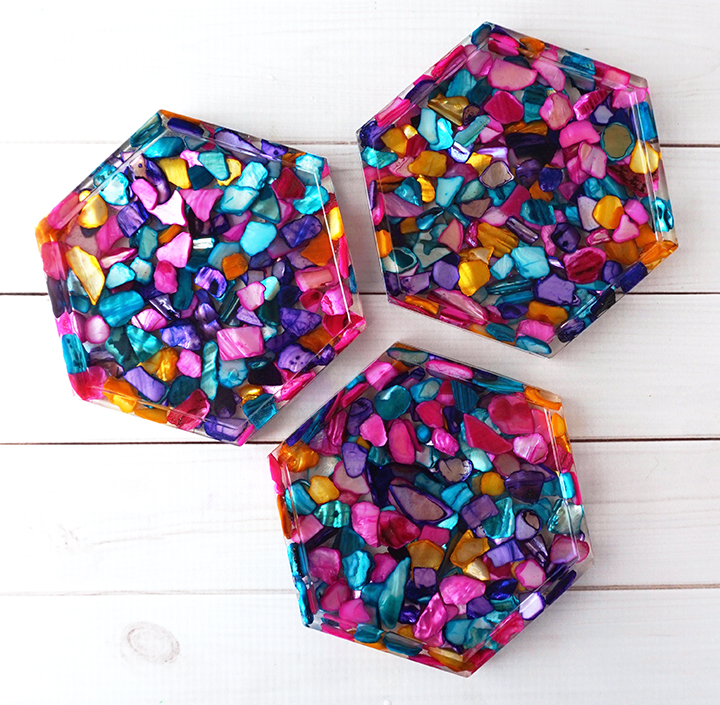
STEP 5:
Carefully remove the coasters from the mold and admire your work. I love how each coaster turns out a little bit different! Remove any over-poured resin with scissors, and sand down edges if necessary.

I am SO excited about these coasters! I especially love how they almost look like stained glass with all of the colors and shimmer. You can make these gorgeous coasters to add some color to your desk or coffee table at home, and they are a simple project that you can make to share as a gift with someone special.
Lindsay is a crafter, graphic designer, and glitter enthusiast from Utah. She’s passionate about homeschooling her creative daughter, traveling, and spending time in the craft room. Lindsay shares DIY project tutorials, printables, recipes, kids crafts, and more on her blog, ArtsyFartsyMama.com, where she inspires readers to live a creative life.


The shell dont goes up when you fill the resin over it? Why you dont mix the resin and shell before filling it into the mold?
Hi Caroline! Yes, the shells stayed in place when I poured more resin over top. The reason I didn’t mix it altogether before pouring it into the mold was to get a little more control of the air bubbles.
I have read all your blogs and I love the resin works you make!
Thank you so much!
These are so beautiful, where can i get these colourful chips please
Hi Jacky! I found the dyed seashell chips at Hobby Lobby.