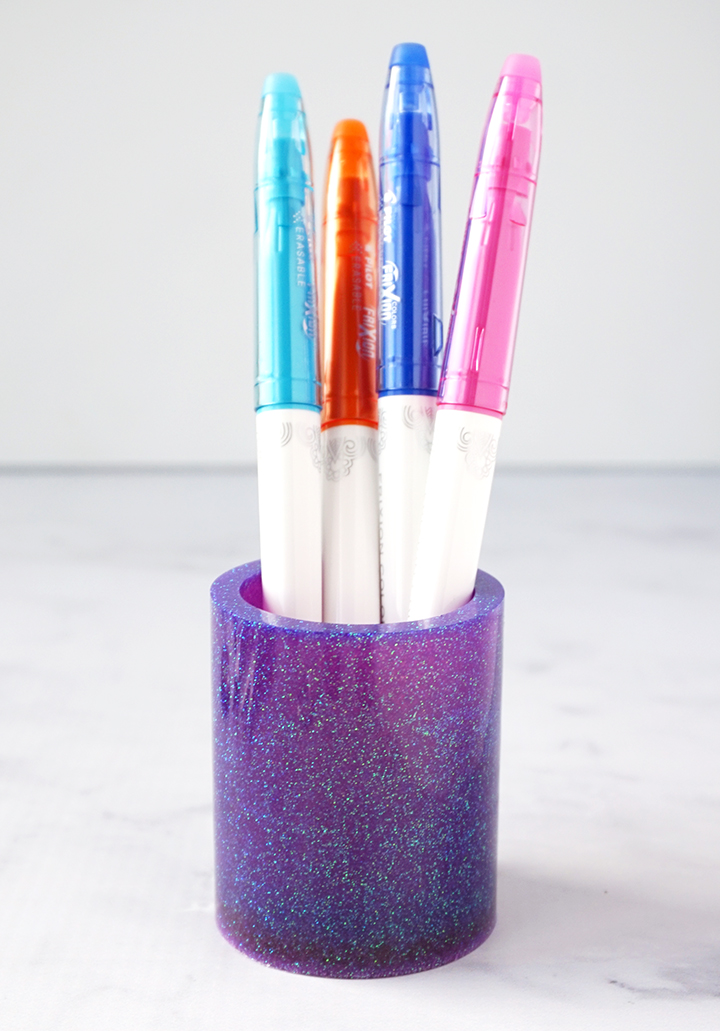
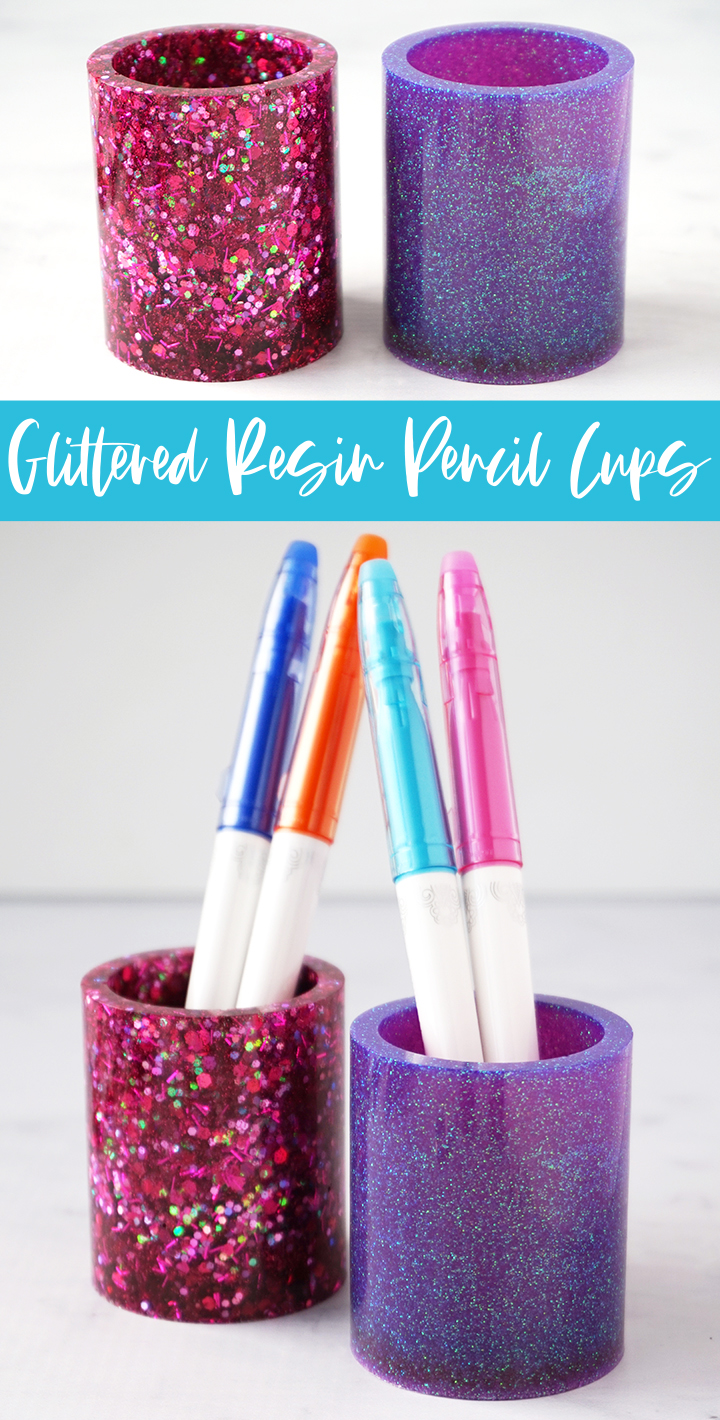
Make a Glittered Resin Pencil Cup to keep your pens, pencils, and markers organized in your workspace!
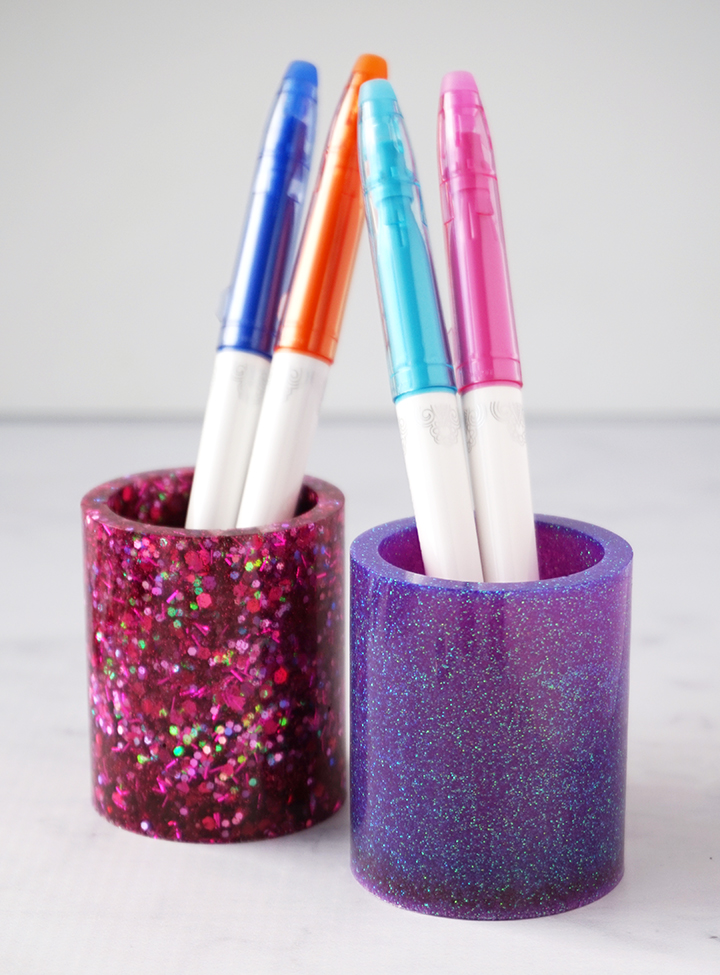
Hello, Resin Crafters! Lindsay here with a sparkling new resin project to share with you! I’m always looking for ways to organize my workspace, and a Glittered Resin Pencil Cup like these are the perfect size to hold all of those pens, markers, and pencils I have lying around. All you need is some resin and your favorite glitter to create a one-of-a-kind pencil cup for your own desk or to give as a gift!
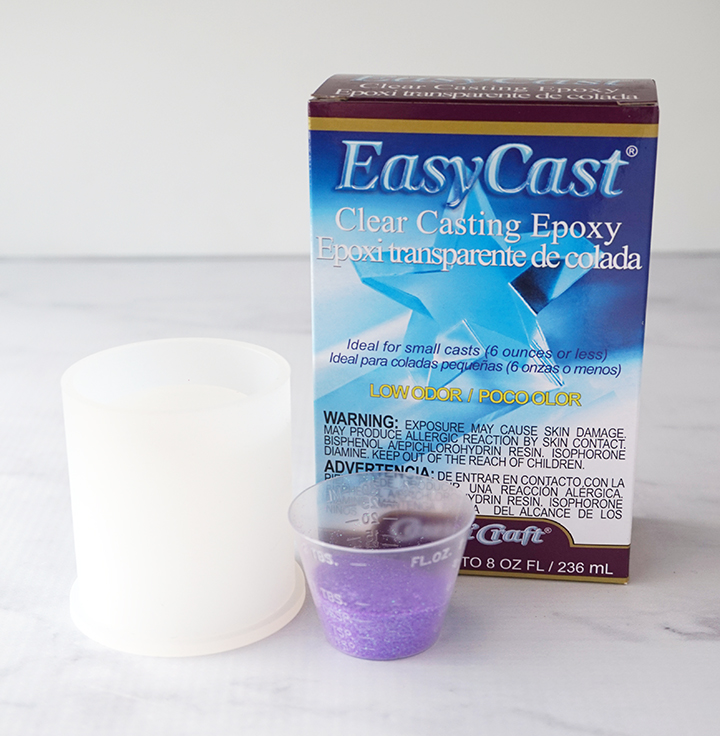
SUPPLIES NEEDED TO MAKE A PENCIL CUP:
- EasyCast Clear Casting Epoxy
- Mixing Cups
- Gloves
- Stir Sticks
- Fine Glitter – I used a purple holographic glitter
- Round Pencil Cup Silicone Mold
STEP 1:
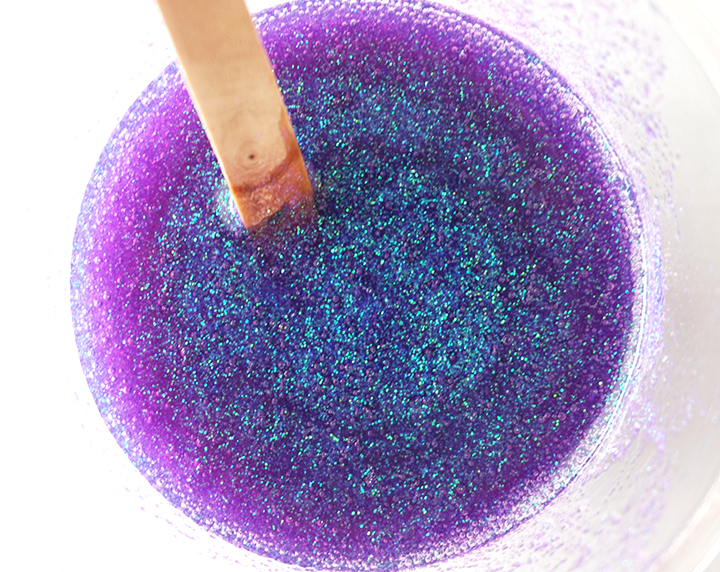
Prepare the EasyCast Clear Casting Epoxy according to package directions. Be sure to work in a well-ventilated area and wear disposable gloves. Pour in equal parts resin and hardener to the mixing cup.
Stir the resin mixture together SLOWLY with a stir stick for two minutes, and then pour the resin into a clean mixing cup. Stir the resin again for another minute or two with a clean stir stick. Add in a generous amount of glitter and stir again until combined. Let the resin sit for a minute or two to let the air bubbles rise to the top, and then pop them using a heat gun or by blowing through a straw.
STEP 2:
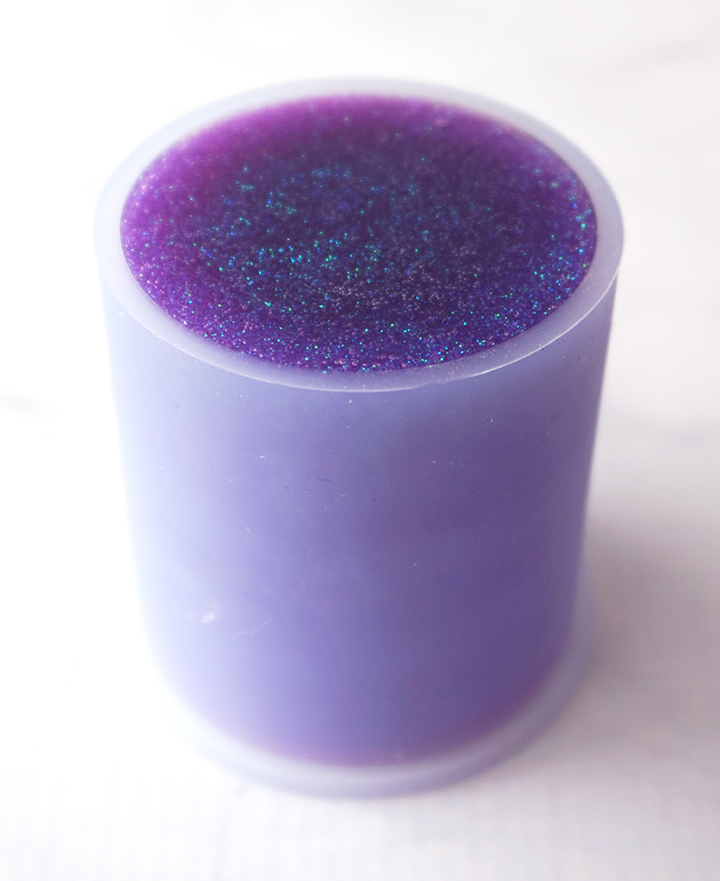
Make sure the pencil cup mold is clean, dry, and doesn’t have any lint or dust hiding in the folds. You can also use Mold Release and Conditioner to clean, condition, and extend the life of your molds.
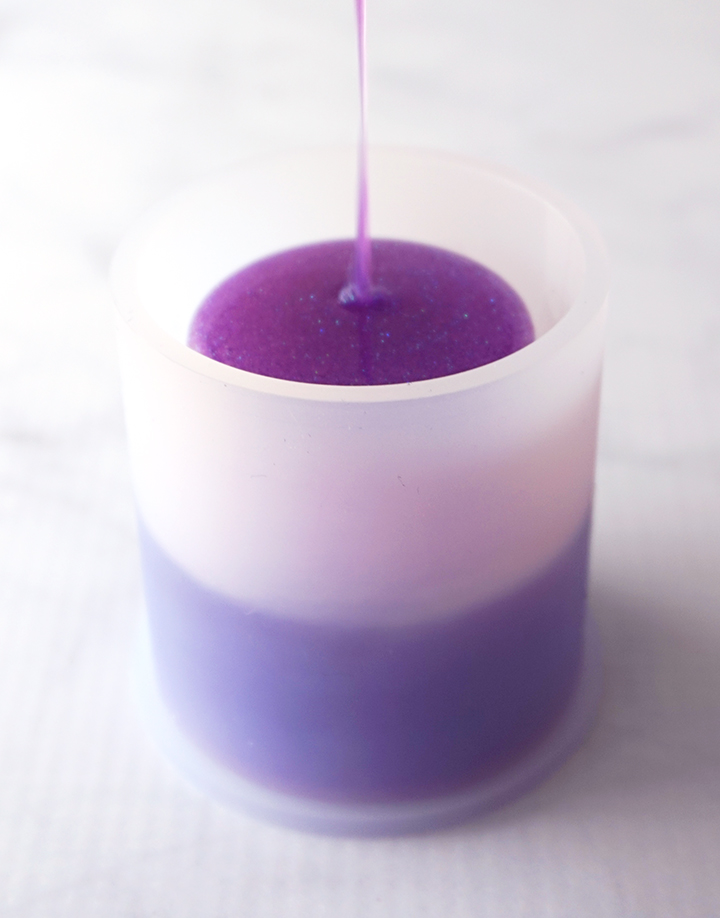
Pour the resin into the mold. Because this is a deeper mold, you are more likely to get bubbles in your project. Here are my best tips for preventing bubbles:
- Warm your resin and the mold. Dip the resin bottles in warm (not hot) water, and work in a warmer room.
- I already mentioned this in the previous step, but stir the resin mixture slowly. The faster you mix, the more air you are incorporating into the resin, which means more bubbles! After mixing, use your stir stick to move bubbles towards the sides and you can pop them that way. I also recommend letting the resin sit for a few minutes. This gives the resin some time to “de-gas”… the bubbles will come to the top where you can easily get rid of them.
- When pouring the resin into the mold, pour slowly from higher up. I also poured onto the center part of the mold and let the resin slowly drip down into the mold. When the mold is about 1/4 full, stop pouring and slowly tip the mold and rotate it around to let the resin fill in any empty spaces created by bubbles. Repeat this at both the 1/2 and 3/4 mark.
- When the mold is full, use a butane torch, lighter, or blow through a straw to remove bubbles that come to the surface. Check the mold again after about 10 minutes to remove any other bubbles that appear.
STEP 3:
Leave the resin to cure in an undisturbed area for at least 24 hours. You will know that the resin is completely cured when the surface is no longer tacky.
STEP 4:
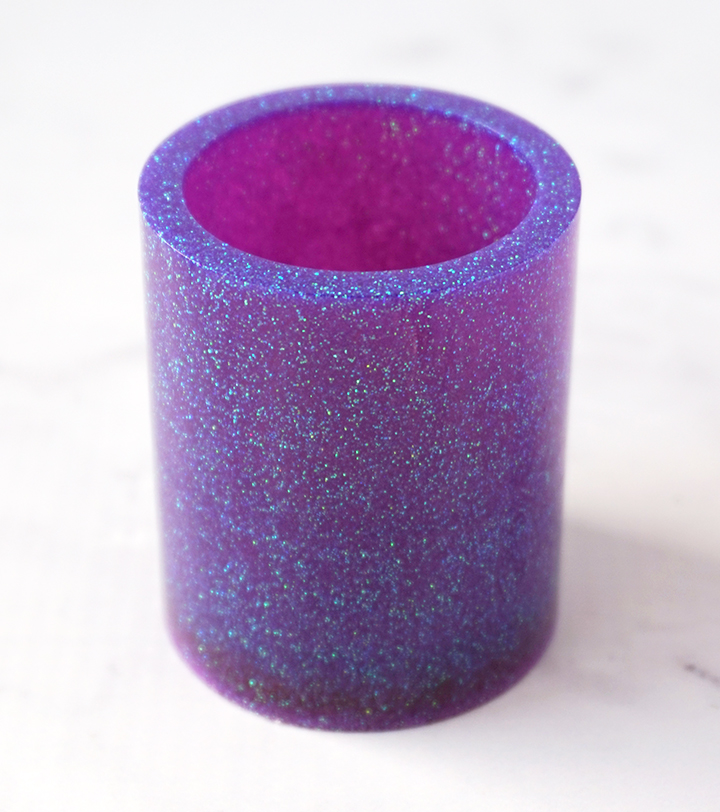
Carefully remove the pencil cup from the mold. This can be a little bit tricky, but be patient and work slowly. You could also add a tiny bit of baby oil to the inside of the mold while removing the resin if you are having trouble getting it to slide out.
Use scissors to cut away any over-poured resin and sand down any rough edges.
STEP 5:
Fill the Glittered Resin Pencil Cup with your favorite pens, pencils, markers, or other office supplies.
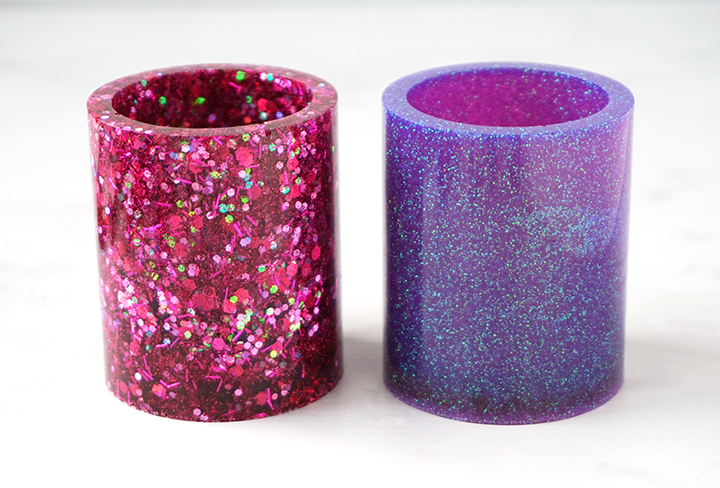
I love how you can get such a different look just by using different glitter! There are so many fun options out there, this is such a simple project to brighten up your workspace! I think these pencil cups would also be a cool teacher gift idea! Who would you make this project for?
Don’t forget to Pin, Like, and Share!
Lindsay is a crafter, graphic designer, and glitter enthusiast from Utah. She’s passionate about homeschooling her creative daughter, traveling, and spending time in the craft room. Lindsay shares DIY project tutorials, printables, recipes, kids crafts, and more on her blog, ArtsyFartsyMama.com, where she inspires readers to live a creative life.


Where can I get the pencil cup mold??? I have used a shot glass mold, but it’s not tall enough to hold pencils or pens please help, I’ve looked everywhere! Thanks, Sue Bennett
Hi Sue! I found this mold on Amazon.