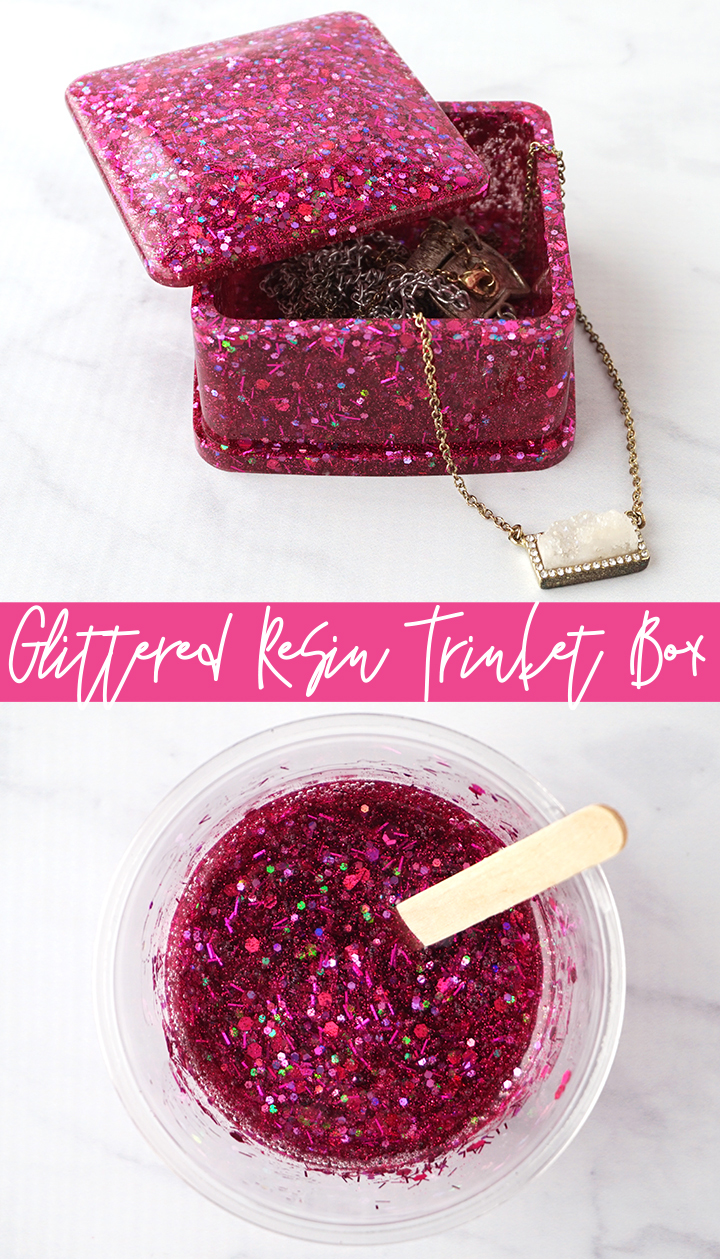
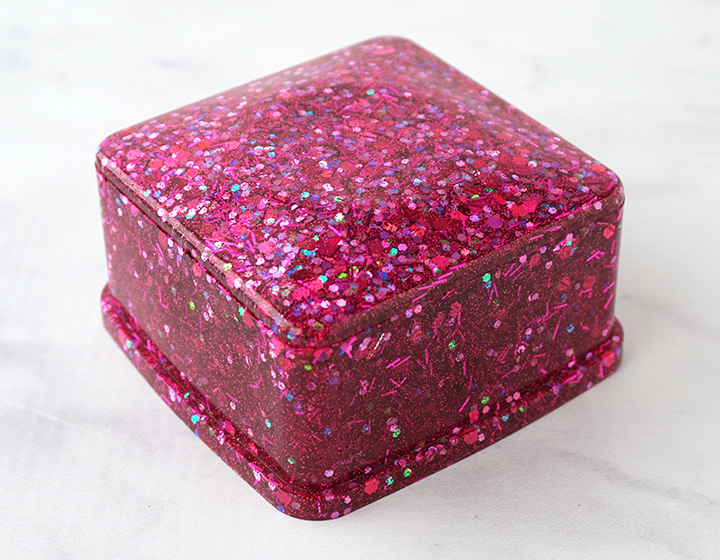
Create a Glittered Resin Trinket Box using resin and your favorite glitter to store your jewelry pieces and tiny trinkets!
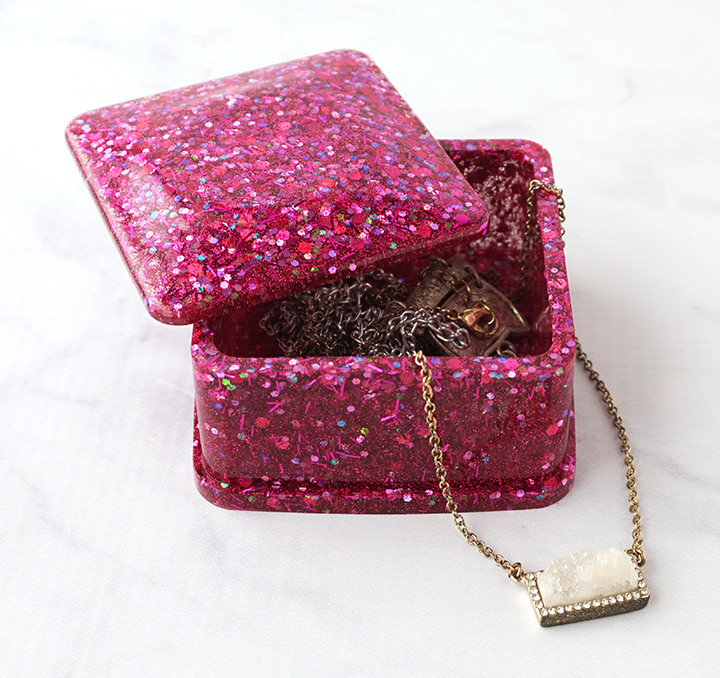
Hello, Resin Crafters! Lindsay here with a new, glittery, resin project to share with you! I’m always looking for creative ways to keep my smaller jewelry pieces in one place, and this Glittered Resin Trinket Box is the perfect size! It’s also great for teachers or anyone who works in an office to store those tiny office supplies (paper clips, push pins, etc). All you need is some resin and your favorite glitter to create a one-of-a-kind box for yourself or to give as a gift!
Supplies Needed to Make a this Trinket Box:
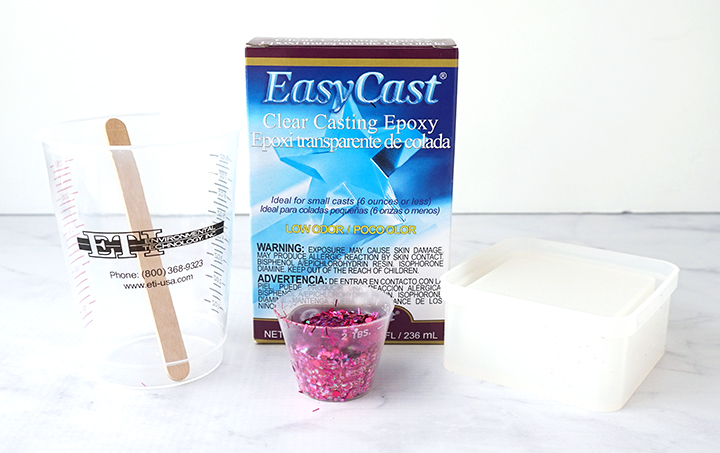
- EasyCast Clear Casting Epoxy
- Mixing Cups
- Gloves
- Stir Sticks
- Fine Glitter – I used a bright pink confetti glitter
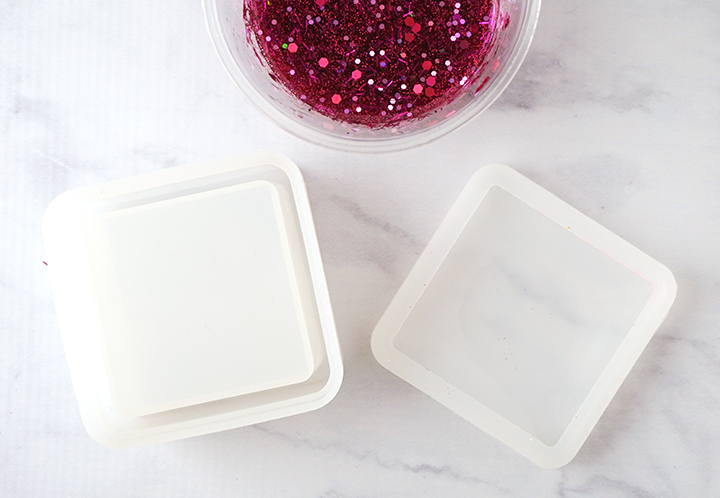
- Square Trinket Box Silicone Mold
- Toothpicks (optional)
STEP 1:
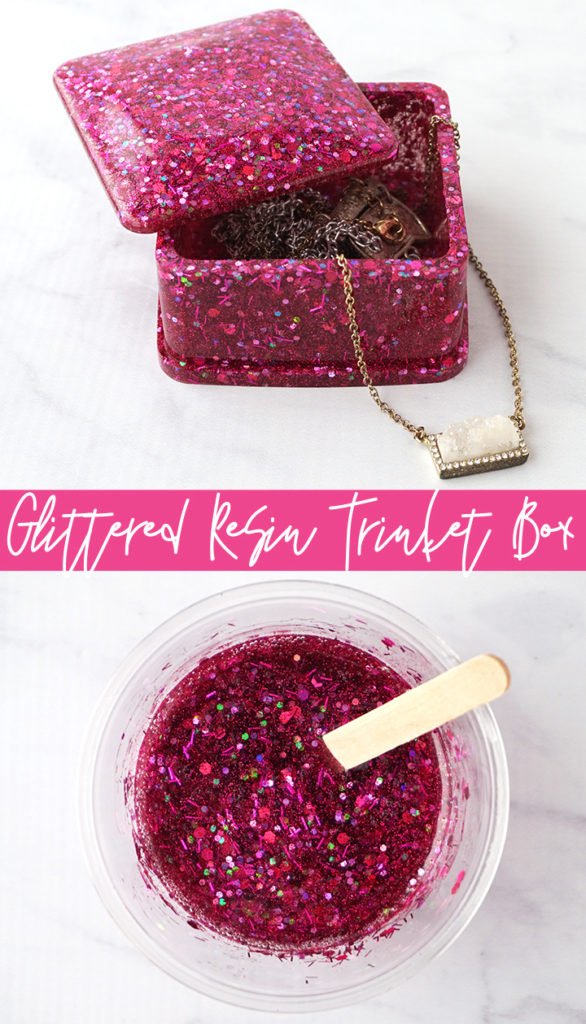
Prepare the EasyCast Clear Casting Epoxy according to package directions. Be sure to work in a well-ventilated area and wear disposable gloves. Pour in equal parts resin and hardener to the mixing cup.
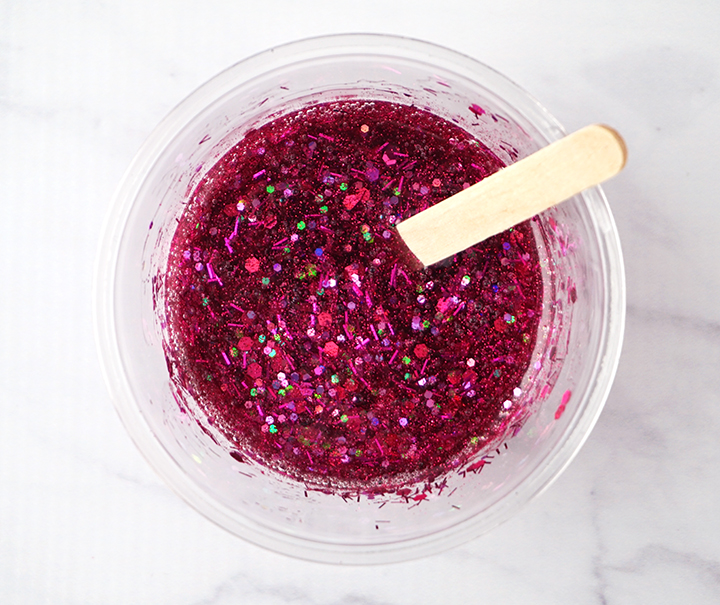
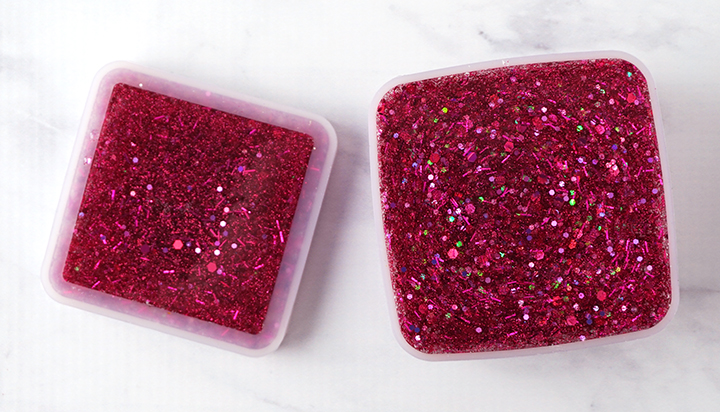
Stir the resin mixture together with a stir stick for two minutes, and then pour the resin into a clean mixing cup. Stir the resin again for another minute or two with a clean stir stick. Add in a generous amount of glitter and stir again until combined.
STEP 2:
The trinket box mold comes with two pieces: the box and the lid. Make sure the molds are clean, dry, and that there isn’t any lint or dust hiding in the folds.
STEP 3:
SLOWLY pour the resin into the molds. Pop any bubbles that rise to the top using a lighter or by gently blowing through a straw.
STEP 4:
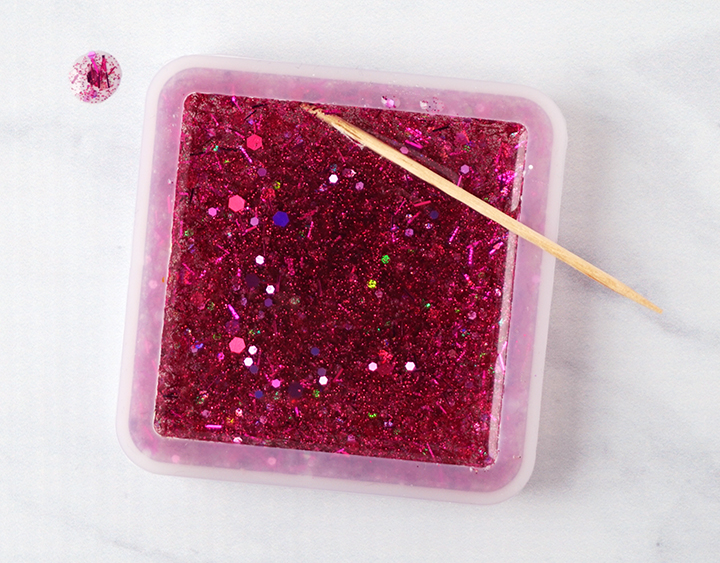
The edges of the lid mold can easily trap air bubbles. Use a toothpick to get under the edges and carefully move the resin around to remove the bubbles.
Leave the resin to cure in an undisturbed area for 24 hours. You will know that the resin is completely cured when it is no longer tacky.
STEP 5:
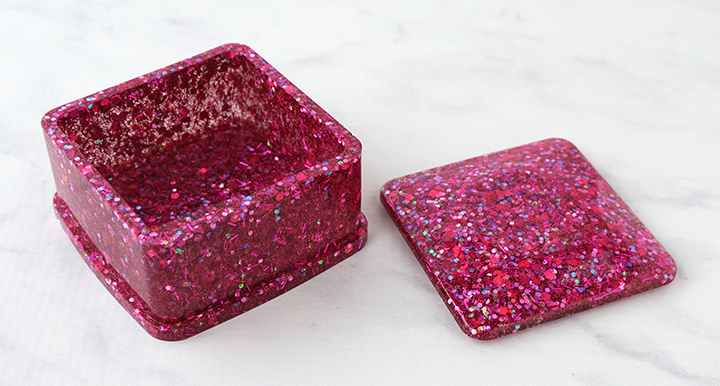
Carefully remove the trinket box and lid from the molds. Use scissors to cut away any over-poured resin and sand down any rough edges.
STEP 6:
Place the lid on the box and make sure that it fits perfectly. Sometimes if the the resin is a little soft when removing it from the mold, the lid won’t fit right. If you do this step right after removing it from the mold, it will move back into place.
Don’t forget to Pin, Like, and Share!
Lindsay is a crafter, graphic designer, and glitter enthusiast from Utah. She’s passionate about homeschooling her creative daughter, traveling, and spending time in the craft room. Lindsay shares DIY project tutorials, printables, recipes, kids crafts, and more on her blog, ArtsyFartsyMama.com, where she inspires readers to live a creative life.


Thank you for sharing. Cant wait to try it.