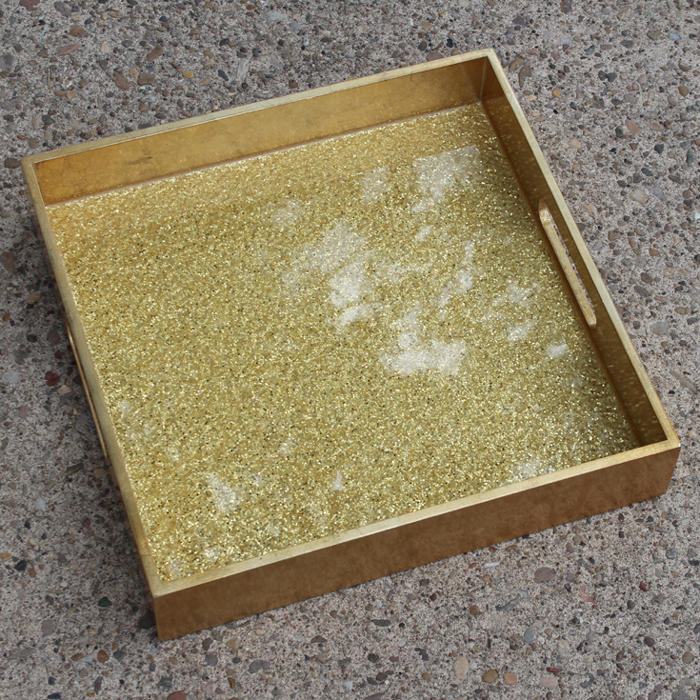
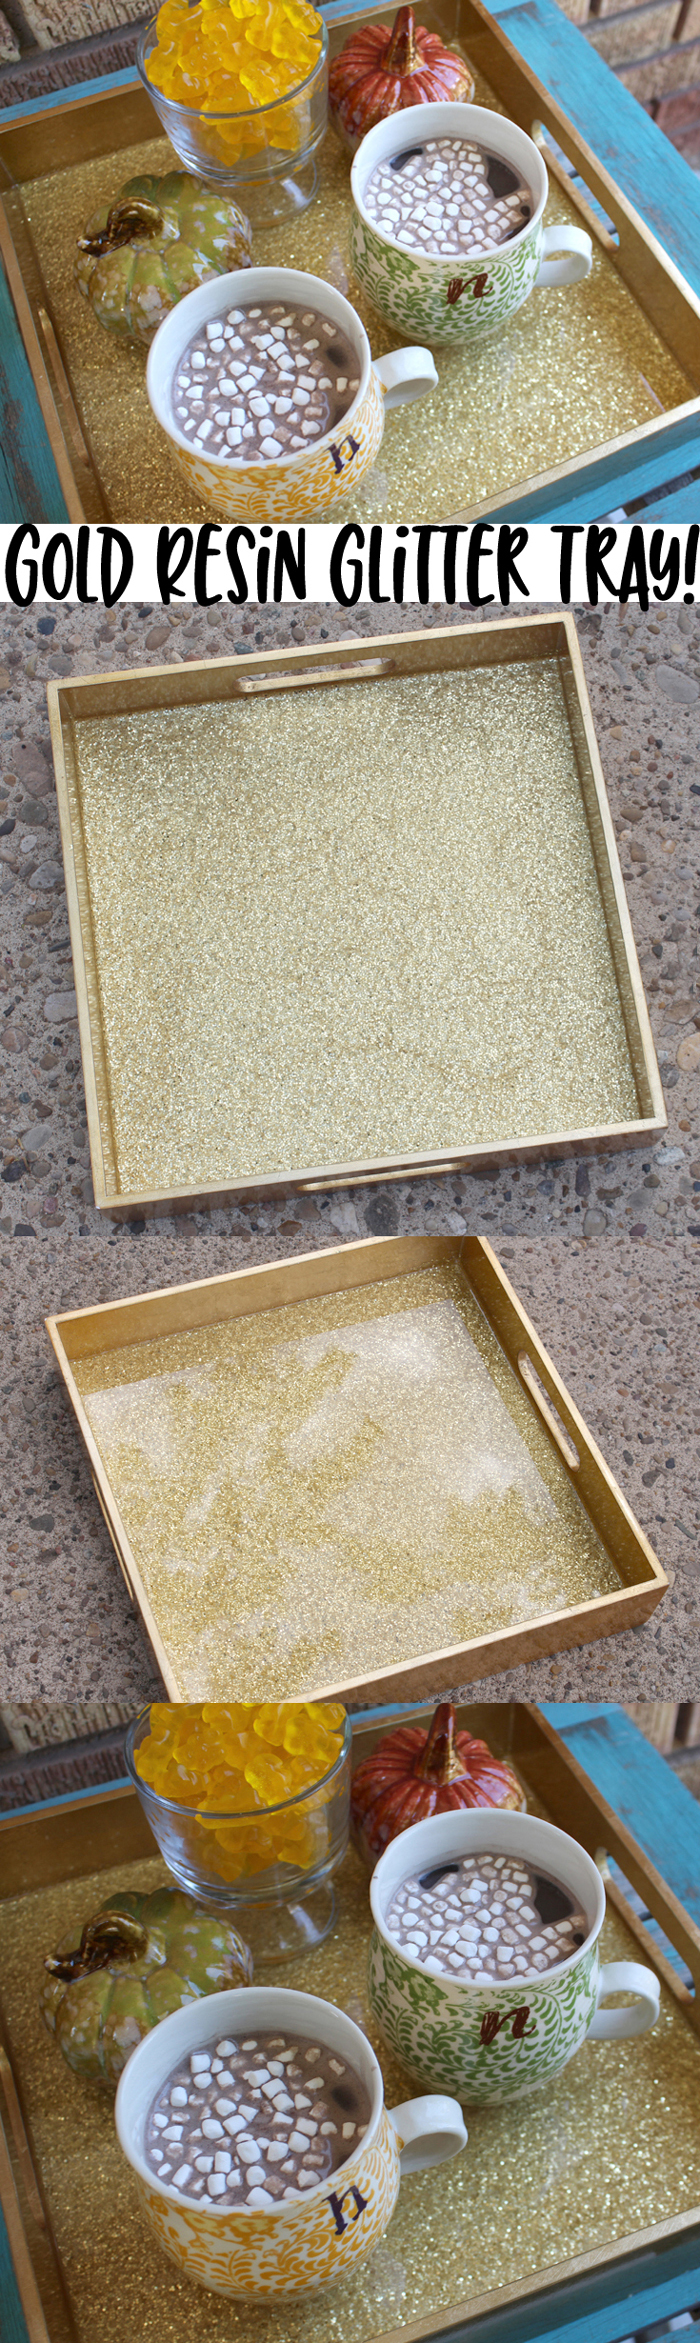
Gold Glitter Resin Tray Tutorial
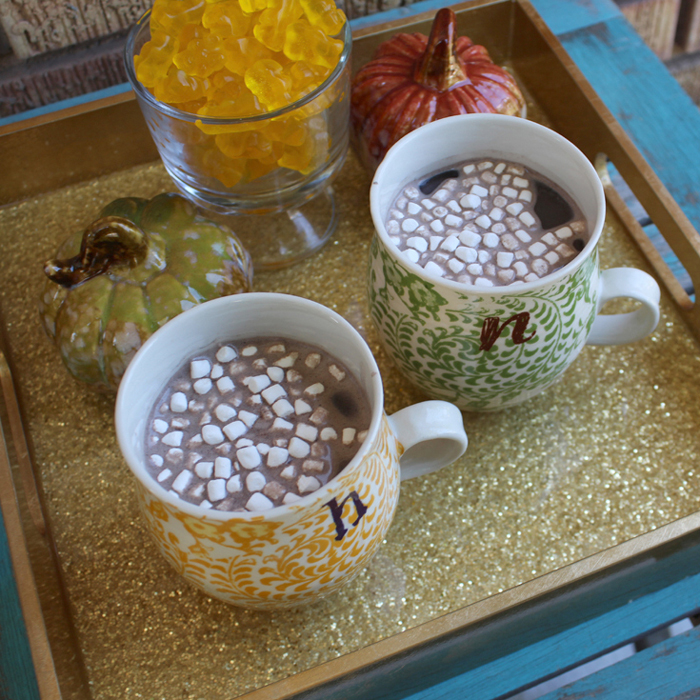
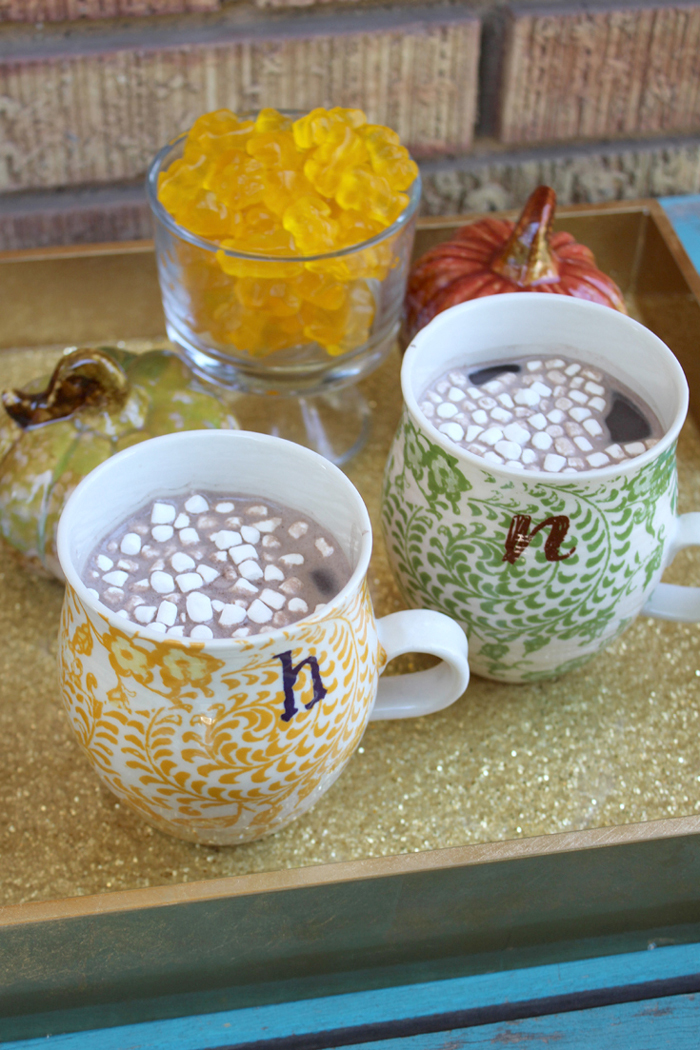
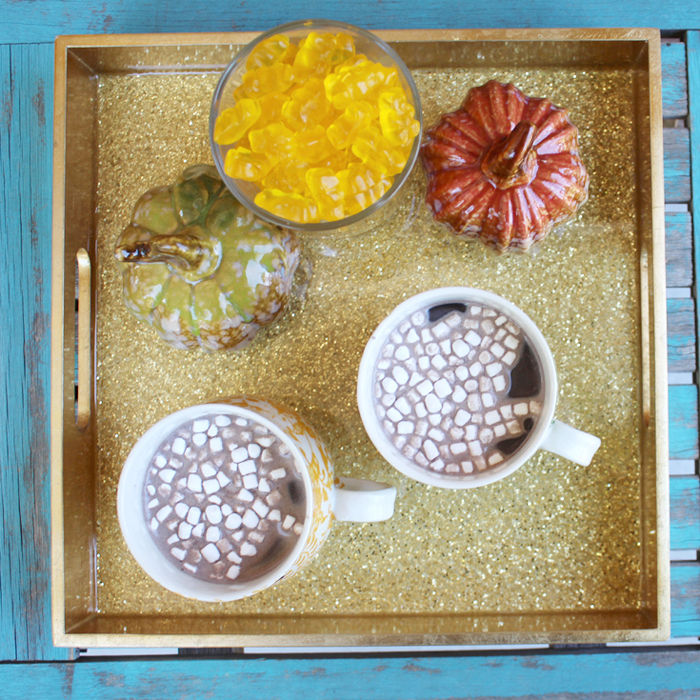
Hi everyone, it’s Natalie from Doodlecraft showcasing another fun resin craft. Gold glitter and sparkles are perfection for Autumn and that transition into Winter. This glitter tray is the perfect bed tray for hot chocolate or other goodies.
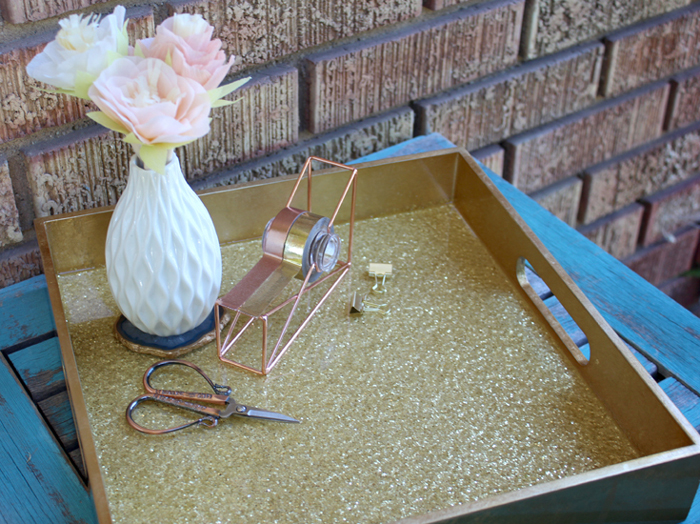 The tray works great in the house as a catch all too. How can you resist all that lovely glitter.
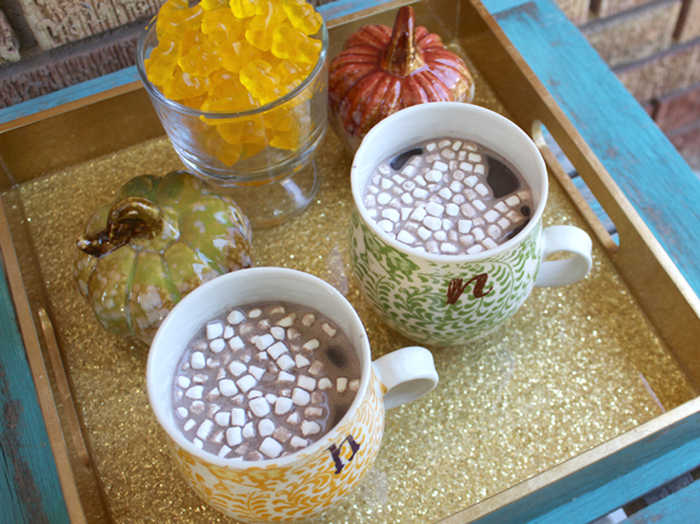
Supplies:
Old Lacquered Tray (pick one up at a thrift store)
Gold Glitter
Mod Podge
Envirotex Lite High Gloss Resin
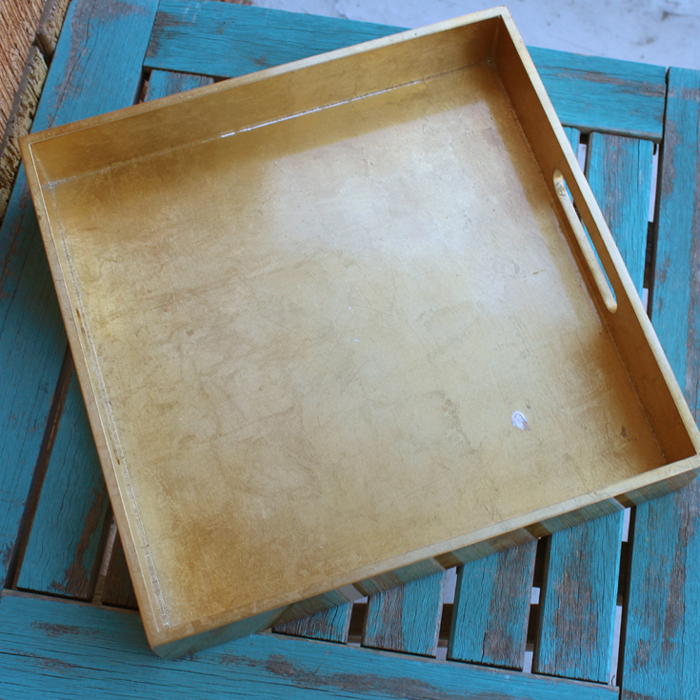
Begin by mixing one part Mod Podge and one part glitter in a paper cup. Then pour and paint the glitter mixture all over the inside of the tray. If you aren’t a big fan of gold, you could do this in any color you can imagine.
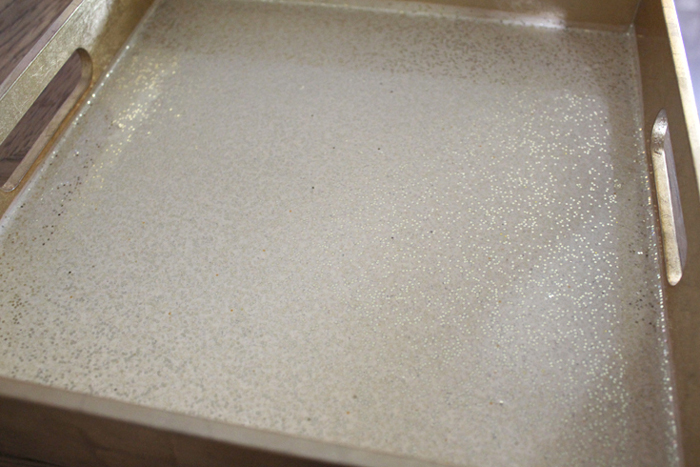
Let it dry completely. It looks fabulous and sparkly, but it feels rough like sandpaper. Let’s take this project up a notch with some high gloss resin.
Now take the tray to the garage or in a well ventilated undisturbed part of the house. Read the directions on the box. I used the 8 oz. kit and it was perfect for this 12 inch square tray. Mix the high gloss resin according to package directions.
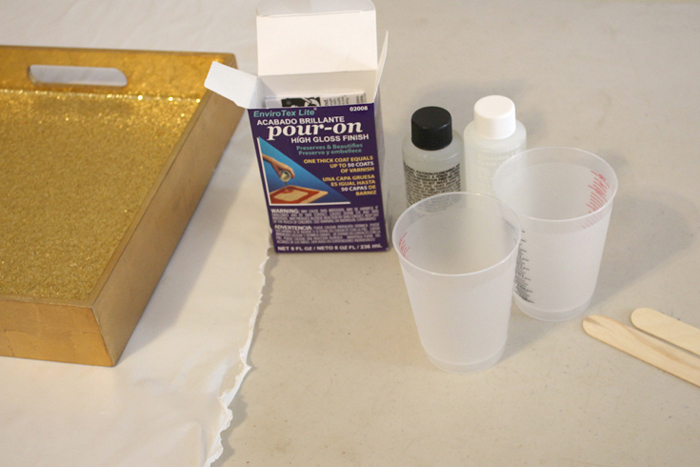
It’s a one to one ratio and mixes in a 2 part session.

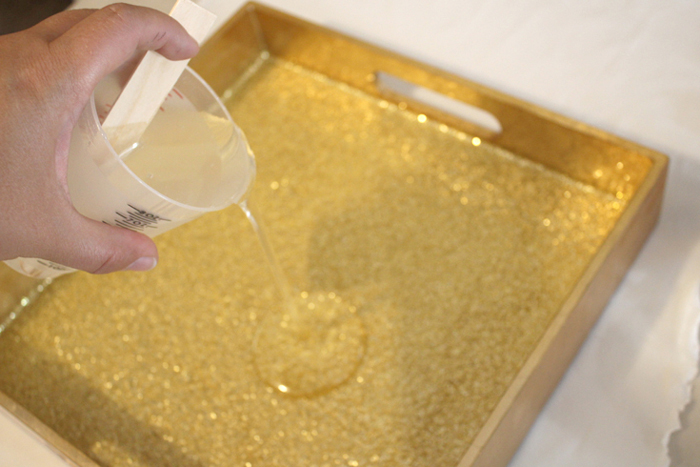
Once mixed, pour all over the base of the tray, right in the center. Lift and tilt the tray until clear gloss runs to all the edges and corners. Then cover with a board or something to keep dust out. Check it after 20 minutes and use a heat gun or small torch to remove any bubbles that have formed.
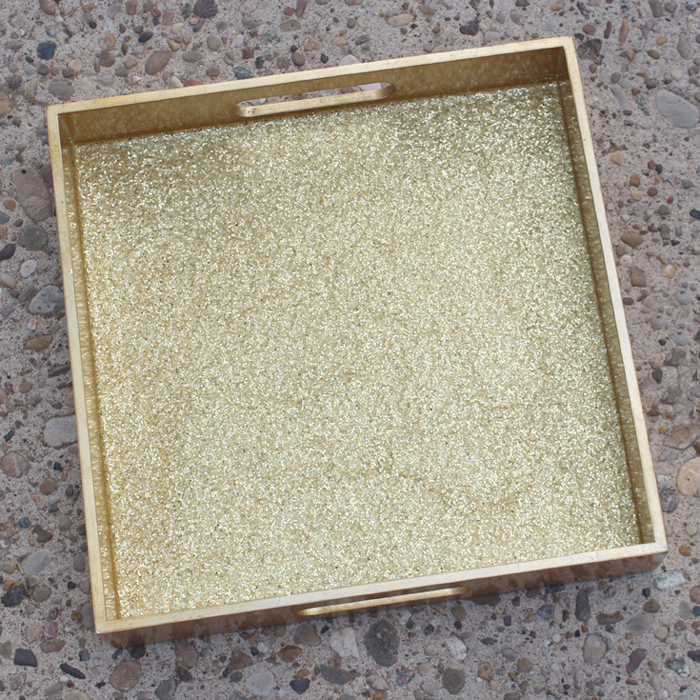
Let it set overnight. Then check it out! Super shiny and smooth like glass.
Set up a hot chocolate bar and some goodies and enjoy by the fire. Perfect for breakfast in bed or a midnight snack!
That sparkle will look perfect all year long!
This would make a great handmade holiday gift too!
Natalie Shaw is a Craft/DIY blogger at Doodlecraftblog.com. She loves sci-fi, fantasy and video game geekery and that comes out in many of her projects. She posts budget conscious DIY’s, crafts, jewelry, kid friendly projects, upcycled treasures and other fun on her blog 5 days a week.


[…] Click Here […]