A few months ago I showed you how to make some easy no-slip socks. Today we’re changing it up a little to make holiday socks with Fiber-Lok.
As you may already know, Fiber-Lok is a fantastic product for adding a no-slip coating to the bottom of rugs or hallway runners. It’s a natural rubber, and brushes on easily to help rugs stay in place.
It can even extend the life of rugs by replacing the worn rubber that can come loose after years of use.
Additional uses include sealing latch-hook crafts, securing crocheted coasters or trivets, and preventing fabric edge fraying.
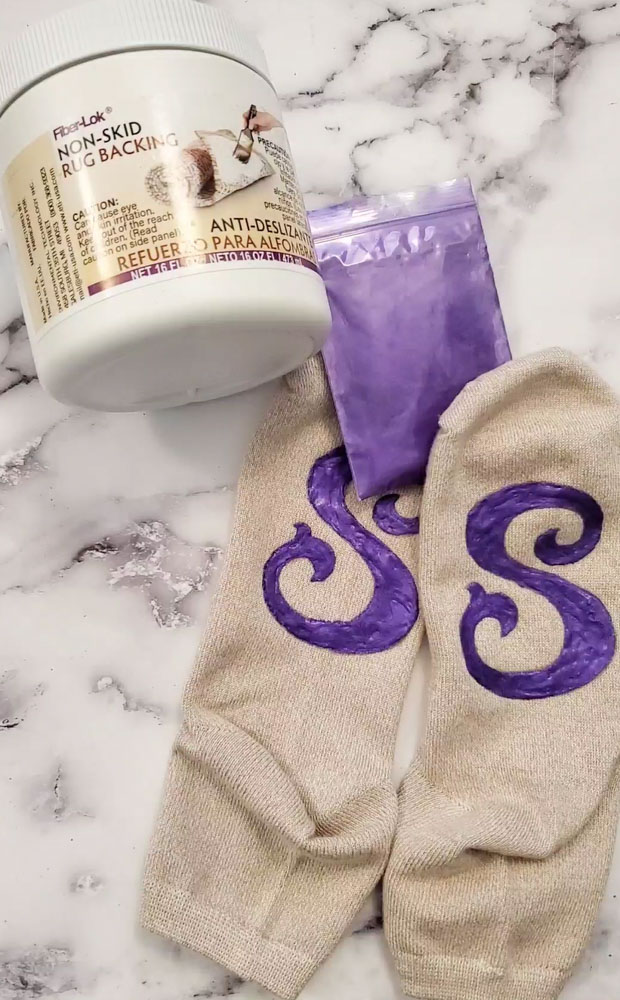
My last custom sock designs included little hearts and initials. Today I’m showing you the stencils I made using pine trees and bows.
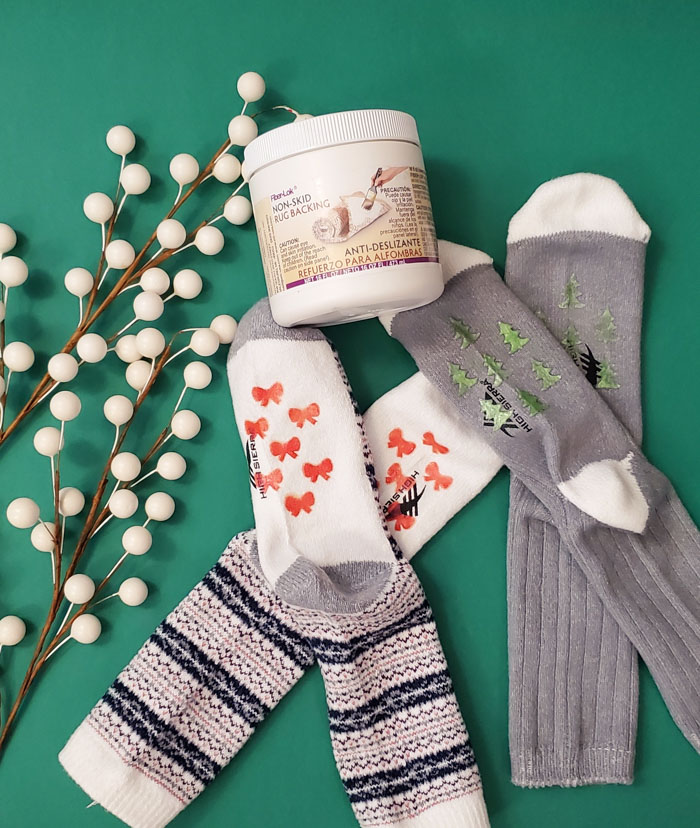
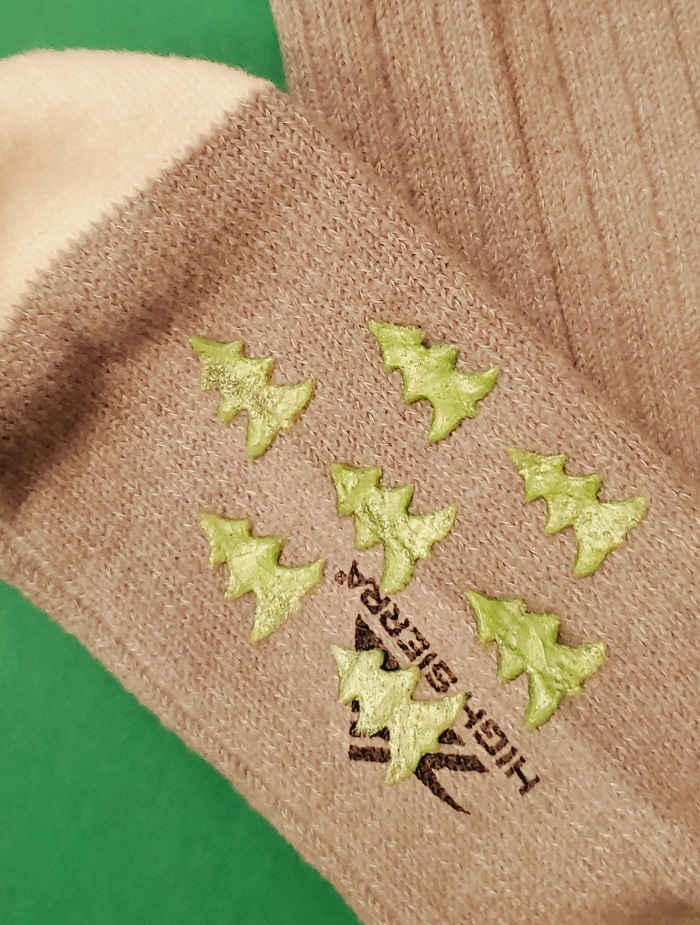
I think the most fun part is deciding what resin powder color to use, as the Fiber-Lok normally dries clear. I used red and green – but you could go “non-traditional” of course.
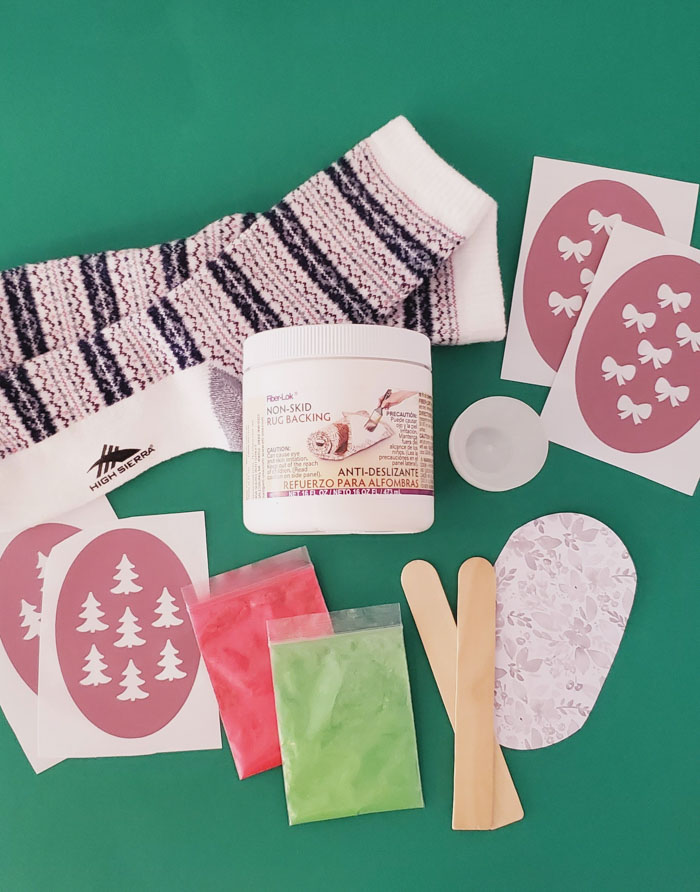
Step 1 – Measure the bottom part of the sock and cut cardstock to fit inside the sock. This serves two purposes. It holds the shape of the sock for you, creating a flat surface to work on. It also keeps the rubber from possibly soaking through to the other side of the sock.
Step 2 – Cut a stencil from adhesive vinyl. Keep in mind that a simple pattern will transfer more easily than a complex one. This can be done by hand with a craft knife, but a cutting machine like a Cricut will be the fastest.
Step 3 – Position the vinyl on the bottoms of the socks.
Step 4 – Color the Fiber-Lok. Use a stir stick to add about a tablespoon of Fiber-Lok to a small mixing cup. Add about a quarter teaspoon of PolyColor resin powder and mix well. The color will dry darker than it appears now.
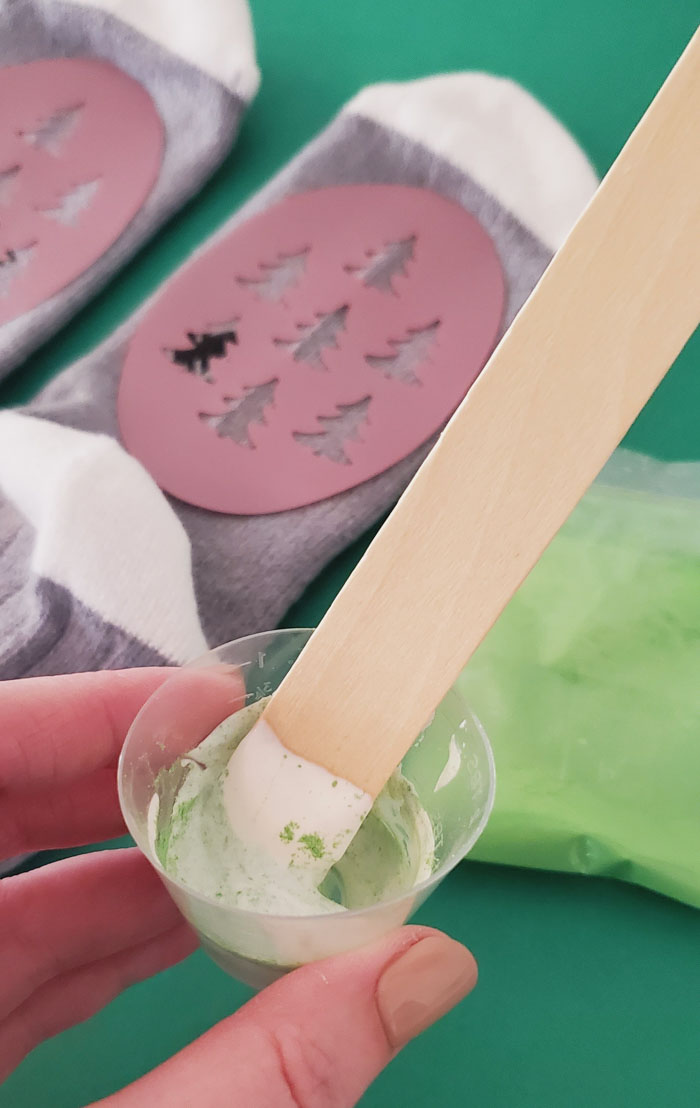
Step 5 – Spread a thin layer of un-colored Fiber-Lok on the stencil first. Some may seep under the stencil, but that’s ok because it dries clear.
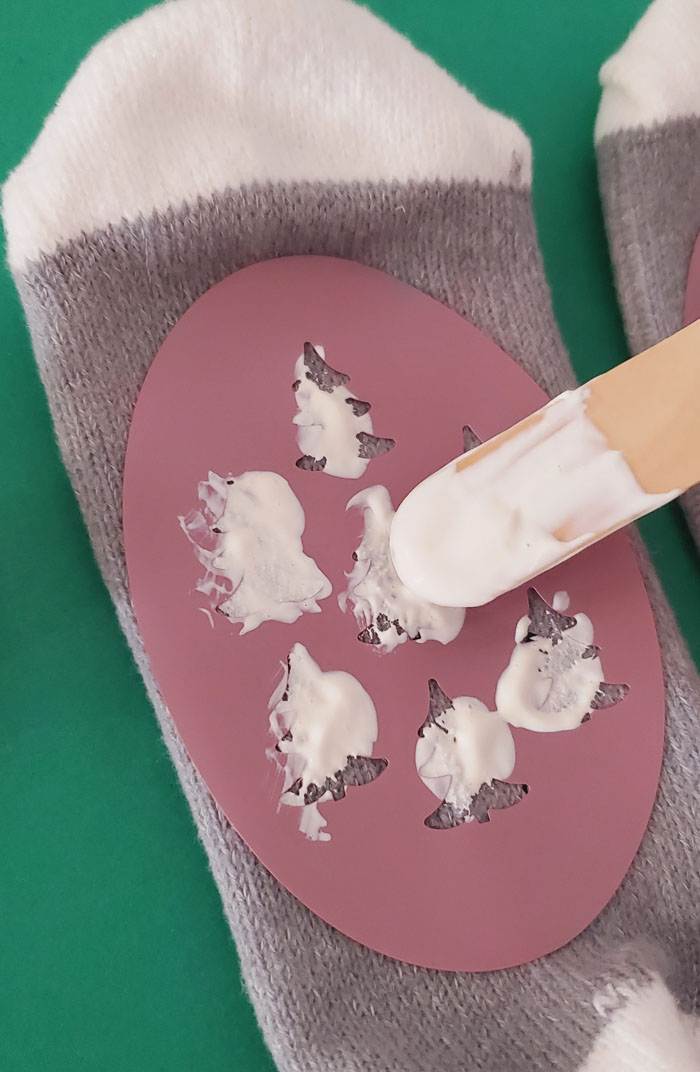
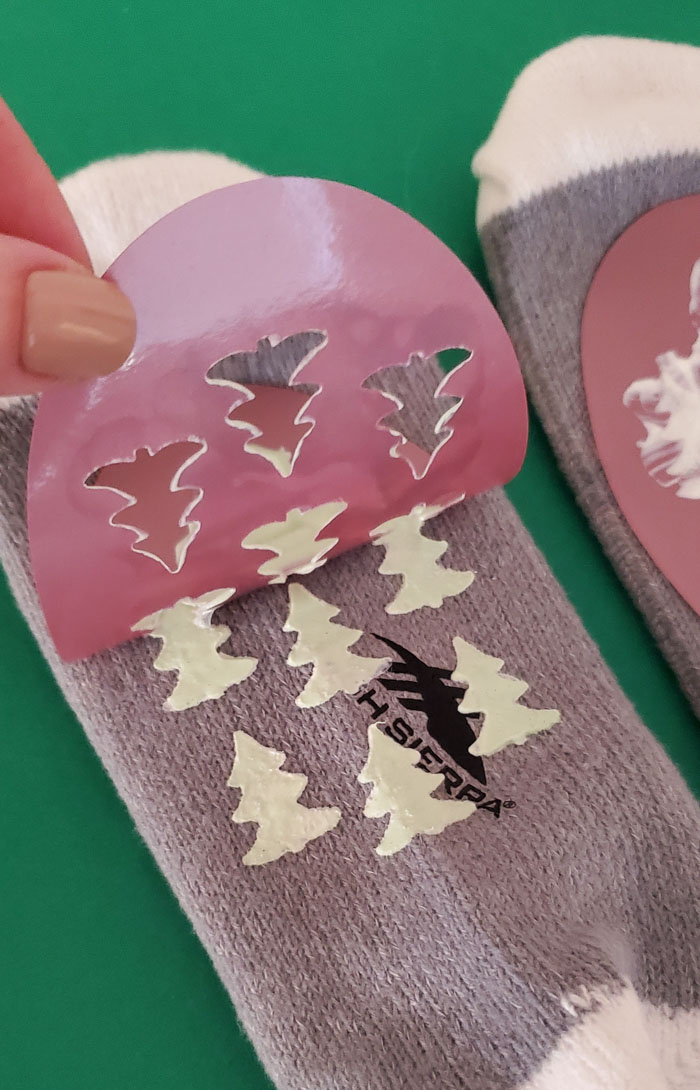
Step 6 – Spread a thicker layer of the colored rubber on the stencil and then lift up immediately.

**If allowed to dry, the stencil will become stuck to the sock and not separate.
Step 7 – Let dry about 24 hours or at least overnight. And allow one week before washing.
Then wrap them up, or fill them with treats, or combine them with a mug and cocoa mix for a cozy gift.
Have any questions about the process, please ask in a comment!
Stephanie is a crafty wife and mom living in the Pacific Northwest. She shares her creative ideas -along with a bit of “making it up as she goes” – on her blog, Crafting in the Rain.


Leave a Reply