Hello again, Resin Crafters! It’s Kelli from the Craft Shack and I’m excited to share this fun project with you! We love to read around here, and bookmarks are often in short supply. I usually find myself just grabbing a slip of paper to mark my place. I’ve wanted to make pretty fabric bookmarks for a long time, but sewing is not something I’m really great at, and just leaving the fabric plain doesn’t work either, it frays and falls apart eventually. But I found the neatest trick recently to solve this problem! You can coat your favorite fabrics with Resin! I made these Resin Coated Fabric Bookmarks out of some fun fabric scraps. They retain their flexibility somewhat, but they don’t fray or fall apart, and no sewing is needed. Add a fun little pompom or embellishment for a little more flair and you have a super adorable, and durable bookmark!

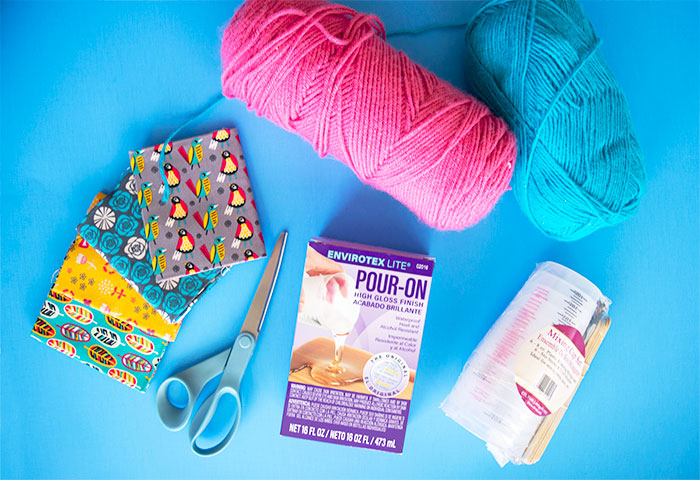
Supplies needed to make Resin Coated Fabric Bookmarks:
- EnviroTex Lite Pour on Epoxy
- Mixing Cups, Stir sticks, and disposable craft brushes
- Silicone Mat or other non-stick surfaces
- Fabric Scraps (darker colors work best)
- Scissors
- Hole Punch
- Embellishments (such as yarn for PomPoms)
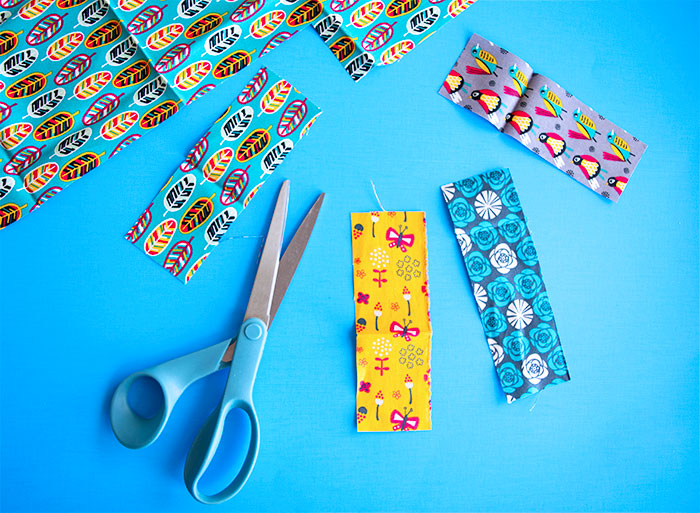
First, you’ll need to decide how large you want your Resin Coated Fabric Bookmarks to be. Cut your fabric scraps to the desired size. (Mine are 2″ x 6″) Darker fabrics work the best. If you want to get an idea of what your fabric will look like when it’s coated with Resin, get it wet first. The color of the wet fabric is similar to what it will look like once coated in Resin. Be sure to dry your fabric completely before using it here, however. And don’t worry about any strings yet, those will be taken care of later. Iron the fabric before you begin, if needed.
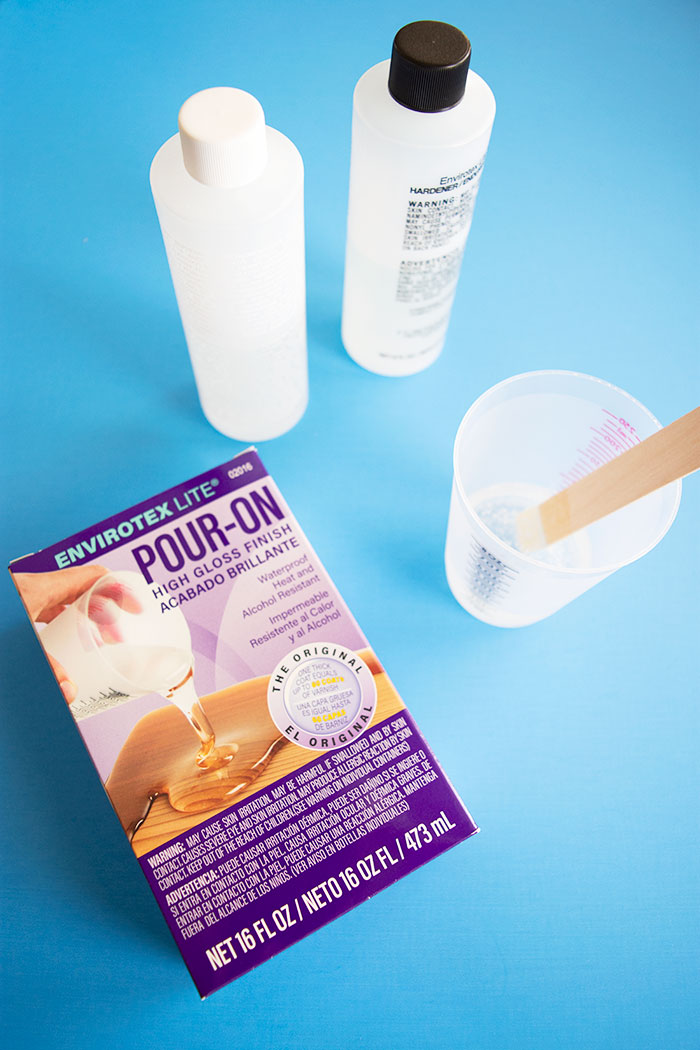
Next, prepare your EnviroTex Lite Pour on Epoxy. Follow the instructions on the package carefully. It’s important to mix it very well. Pour equal parts of the Resin and the Hardener into a mixing cup. Stir for 2 minutes, making sure to scrape the sides and bottom of the cup. After 2 minutes, pour the mixture into a second, clean mixing cup. Mix again for 1 additional minute. I used 1 oz of each of the Resin and the Hardener. The 2oz total was enough to cover 5 2″x6″ bookmarks.
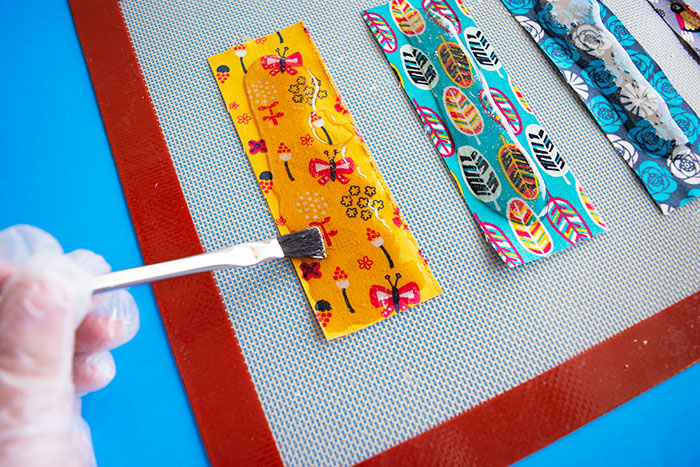
Place your fabric Scraps onto a silicone mat (I use a baking mat that I’ve marked specifically for crafts only). Pour a puddle of resin down the middle of each scrap.
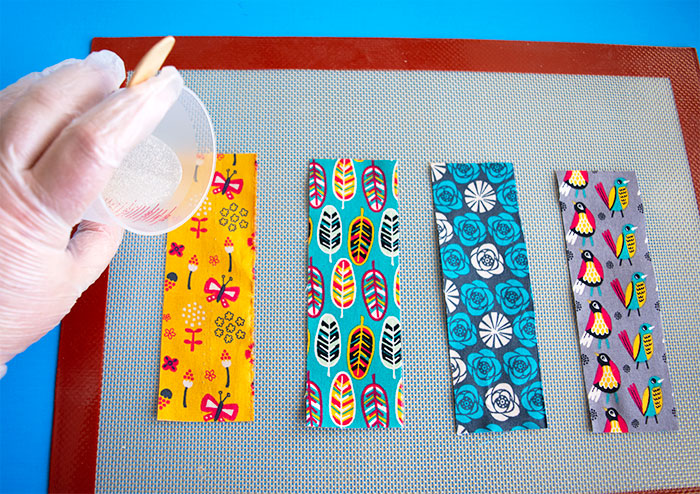
Use a disposable craft brush or paint brush to spread the epoxy carefully over the entire surface of the fabric. Don’t worry if you get some outside the fabric scrap. Use a small butane torch or your own warm breath to remove any bubbles that rise to the surface. Allow the Resin to cure overnight.
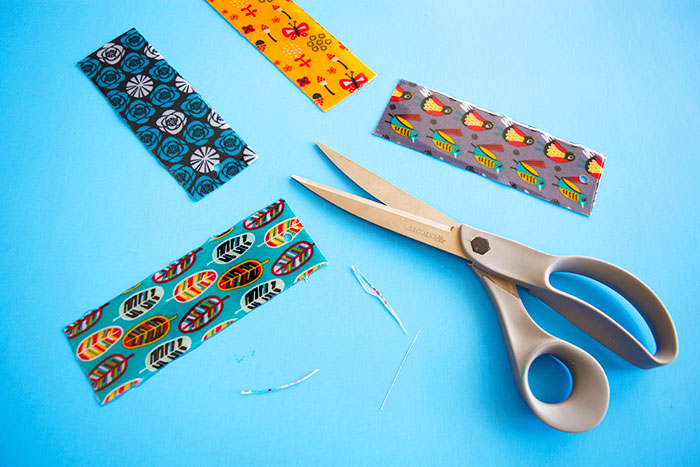
After the Resin has cured completely, peel the bookmarks off of the non-stick mat. Use scissors to trim any epoxy that may have run over the edge. The epoxy is thin enough that a good pair of scissors will work perfectly to do this. Any strings that were loose before you started will get trimmed away here too.
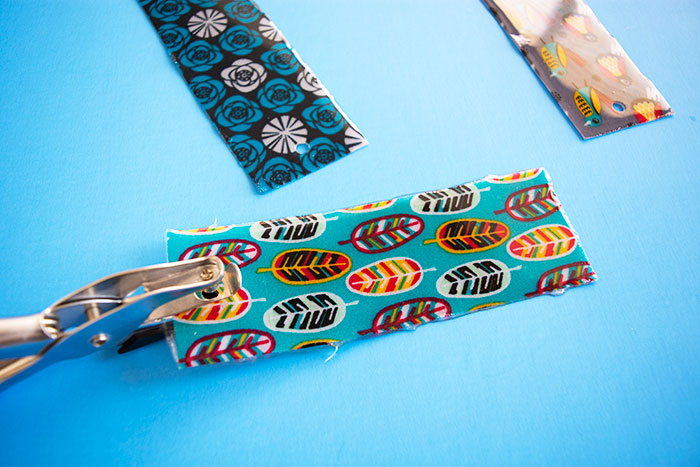
Add a hole to the top of your bookmark with a hole punch. It takes a little bit of force to make it go through but it does work!
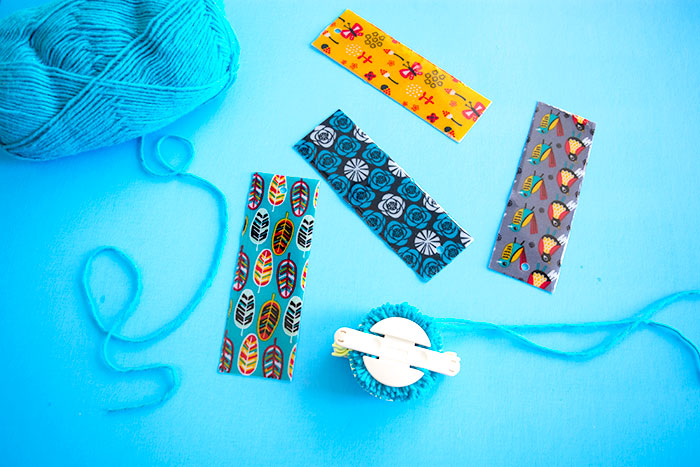
I added fun little yarn pom poms to my bookmarks, but you could also tie a pretty ribbon, or string on some fun charms if you’d rather! The possibilities are endless!
The fabric won’t fray or fall apart now. The bookmarks still bend a little and form nicely to the book pages and I expect they will last a very long time!
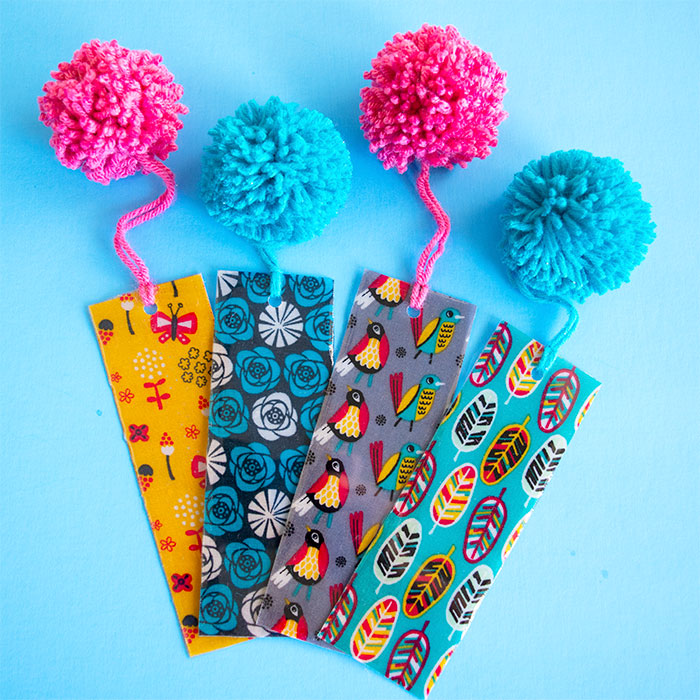
Before I could even pick my favorite my kids have snatched them up to use in their books! How would you finish your cute fabric bookmarks?
After studying Culinary Arts in Portland Oregon, Kelli went back home to the sunny South West where she decided she wanted to do different kinds of Art. This busy mom of three spends all of her available free time creating in her Craft Shack “she shed” where she can be found wood burning, repurposing old stuff, crafting, and painting just about anything she can get her hands on. She loves to learn new craft techniques and frequently finds inspiration in the world around her. Her motto in life is that you should never be too busy to make something pretty!


Fabulous idea! Can’t wait to do this! Thank you so much!
Thank you, Marie!
How cute! I’ll give it a try, thanks for the idea!
Hi so fo these book marks we just have to coat on one side and not the other side?
One another question was I used fabric on wood n cork coasters
For the 1st coaster set I didn’t use any finish or glue just stuck the frantic on colored wood n then pour the resin but it soaked in the fabric giving it some dark patches.
For 2nd time I used decoupage glue to make it stif then cut out n then finished it with decoupage glue n then satin finish, then used the resin still it’s giving me patches.
How to avoid this
Appreciate your help
Hi there! You want to seal both sides before pouring to ensure the color stays true. Try 2 or 3 coats. That should fix that! Enjoy!
Love this idea! Do you only coat the one side though? It seems like you would need to cover both the front and back?? Thanks!
Hi there! Yes we would recommend both sides.
So do we need to let the first side dry completely/overnight before turning the bookmarks over to coat the other side? I am totally new to working with resin.
Hi Barbara! Yes that’s exactly right!