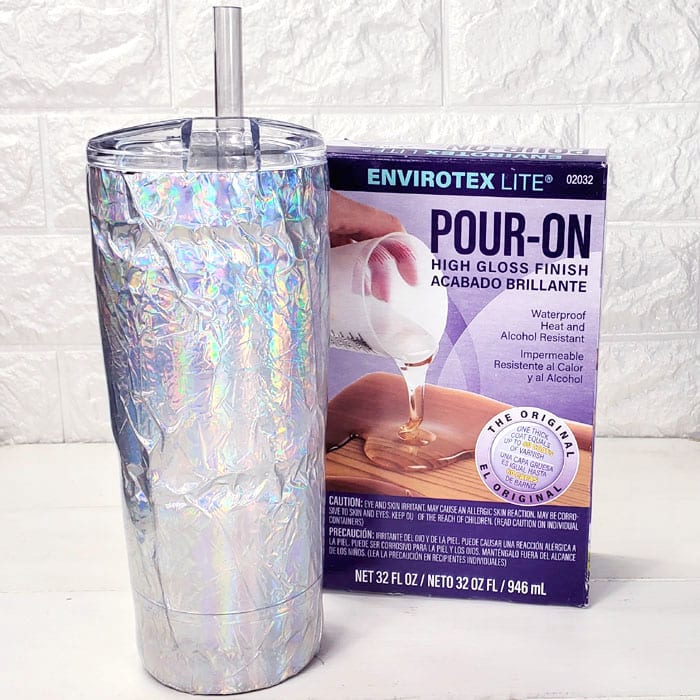
Make the coolest iridescent resin tumbler in just a few minutes, plus drying/curing time! This shiny tumbler is perfect for staying hydrated, mixed drinks or as the perfect handmade gift.
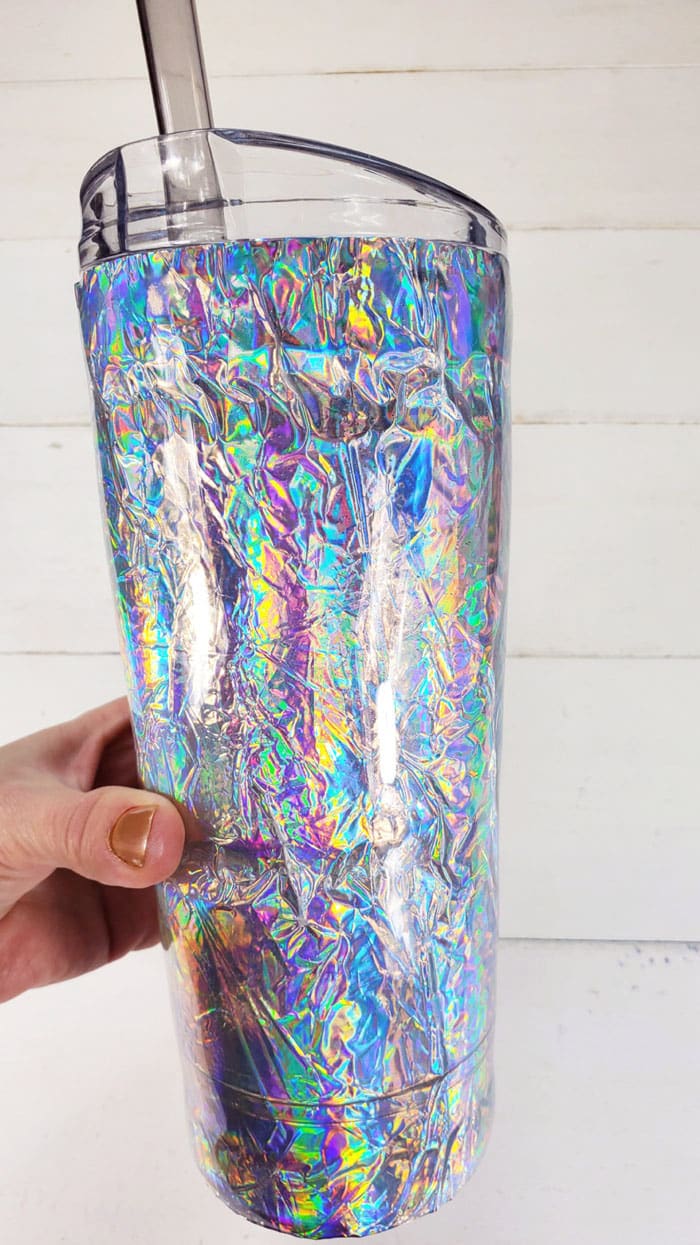
The crinkled iridescent finish is super smooth to the touch, but reflects all kind of shimmery, rainbow light!
Making tumblers is so much fun! They make the perfect gift filled with goodies, gift cards and more. They are easy to customize. Adding glitter, vinyl or any other details to make them extra special is a breeze too.
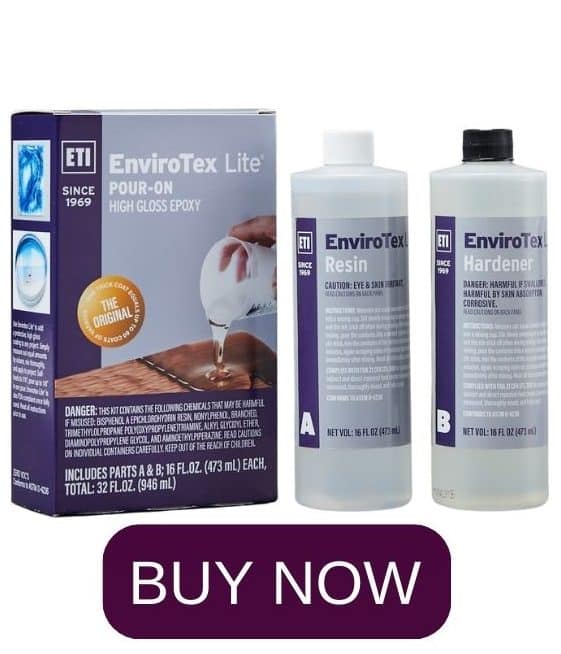
Finished off with a coating in Envirotex Lite High Gloss Finish gives them a super smooth and food safe finish, perfect for lots of drinks!
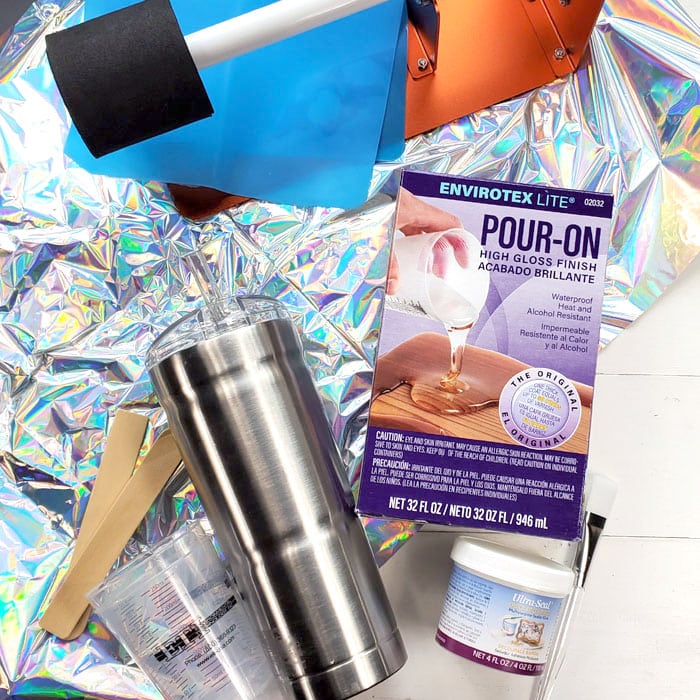
Supplies Needed for Iridescent Resin Tumbler:
- Stainless Steel Tumbler
- Envirotex Lite High Gloss Finish
- Iridescent Table Cloth from Dollar Store
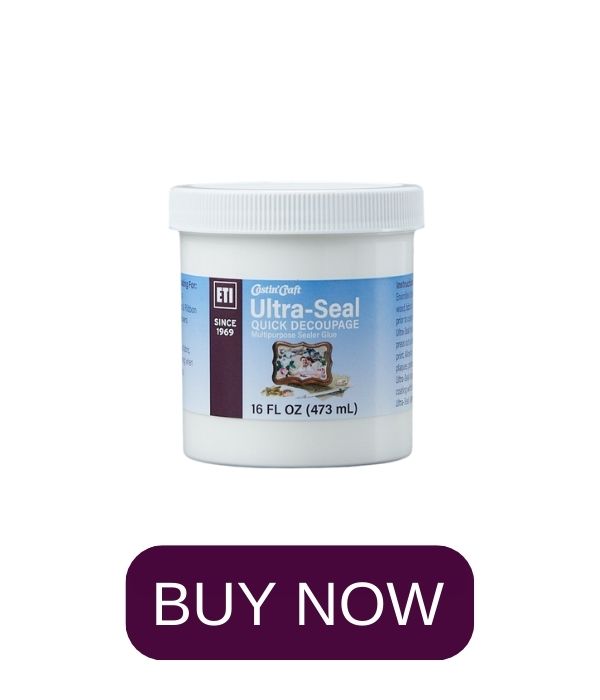
- Ultra Seal
- Paintbrush
- Mixing Cups, Stirring Sticks, Disposable Gloves
- Electric Cup Turner
Step 1: ULTRA SEAL
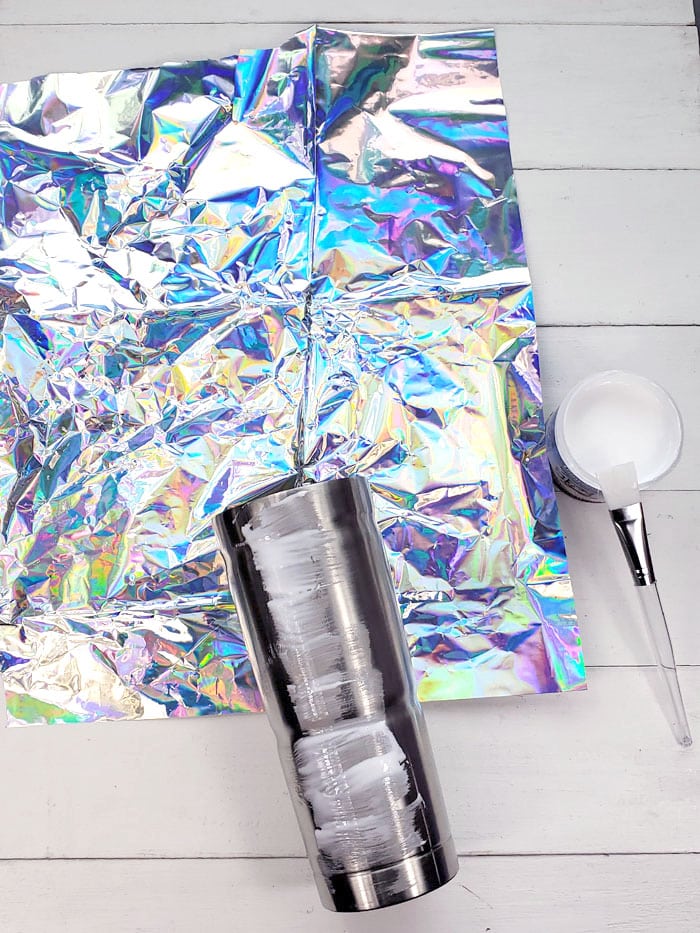
Begin by cutting a piece of the iridescent wrapping to fit around the tumbler. I found this iridescent table cloth at my local dollar store, it’s a plastic tissue paper. I crinkled it up to give it texture and more refractive iridescent surfaces.
Then paint some Ultra Seal to the tumbler.
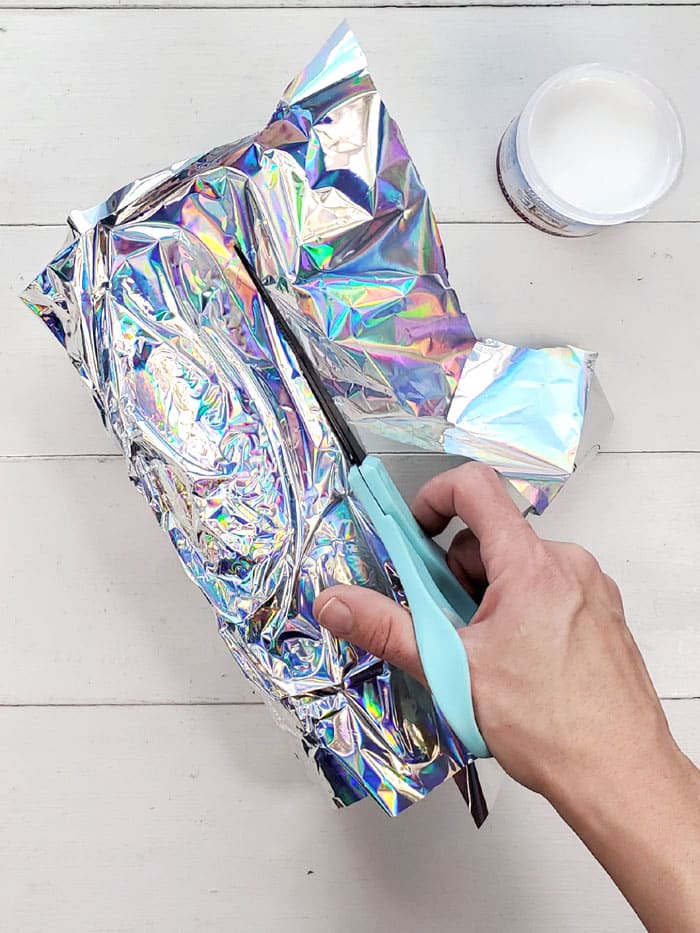
Continue to paint Ultra Seal, scrunch the iridescent wrapping and wrap the tumbler in the iridescent finish. It already looks so fun and shiny!
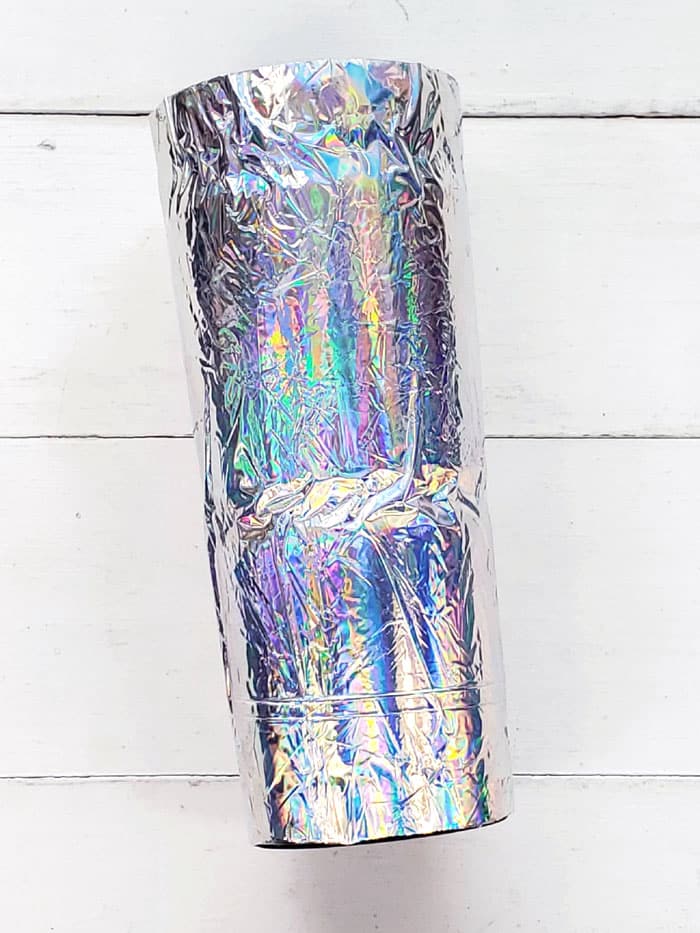
Press the wrapping on the tumbler firmly. Then set the tumbler aside for a few hours for the Ultra Seal to dry completely.
Step 2: MIX RESIN FINISH
Now that the tumbler is coated in an iridescent finish, it’s time for resin. The tumbler at this point feels crinkly and the point is to make it smooth as silk.
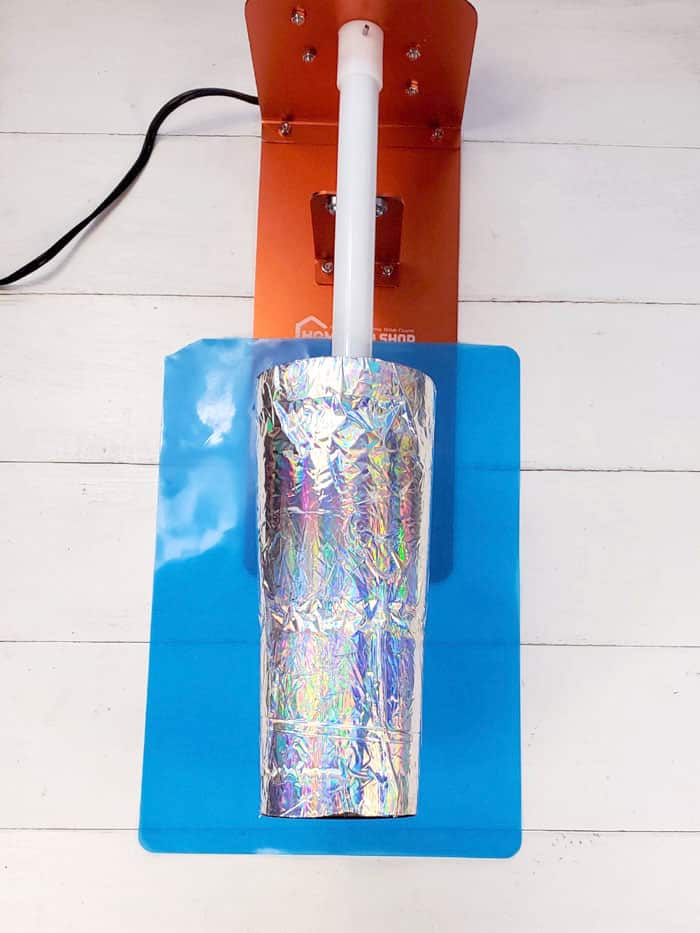
Begin by fitting your tumbler onto the cup turner. This is worth the investment so the resin doesn’t puddle up too thick in one spot. The cup turner continues to turn the cup so the resin can smooth out over the whole surface, leaving it super smooth and level.
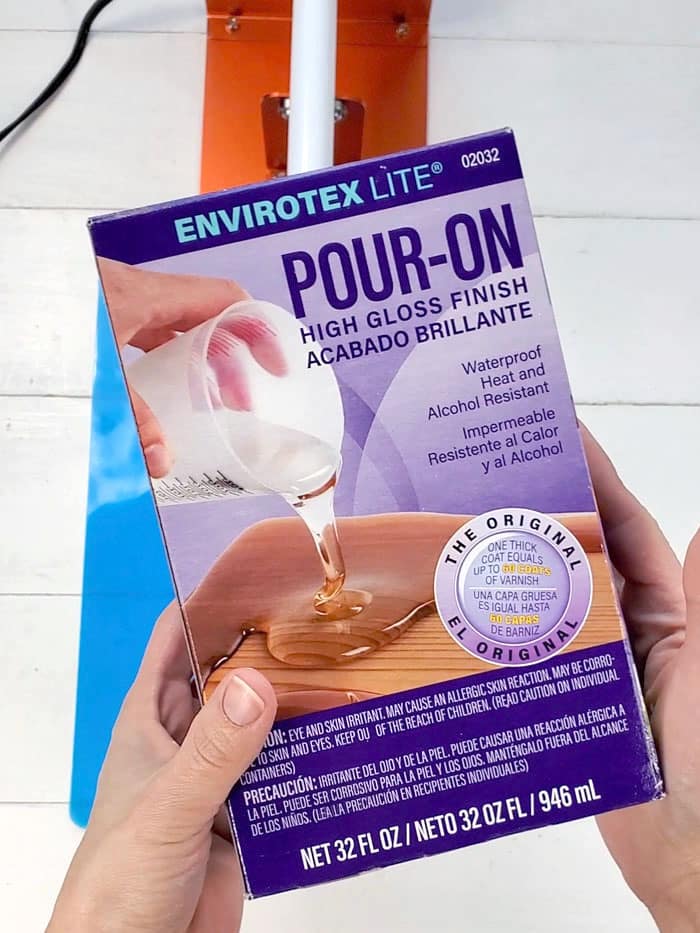
Start the resin process by reading through the resin mixing instructions. It’s super important to mix the resin properly or the tumbler will not harden properly. Resin can be sticky, tacky or goopy if it’s not incorporated correctly. By mixing the resin properly, the epoxy resin tumbler will be food safe.
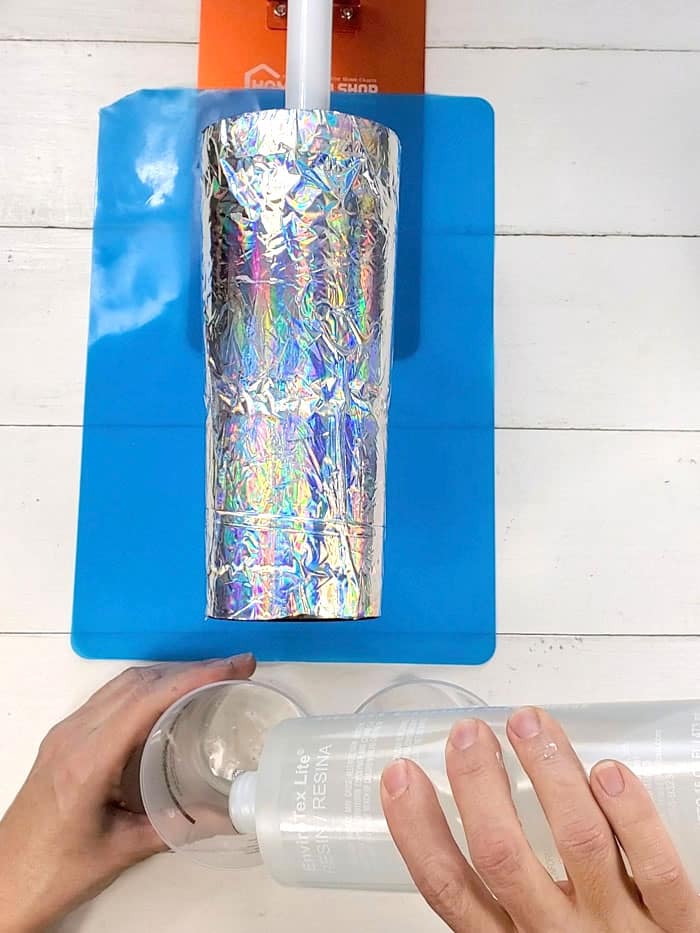
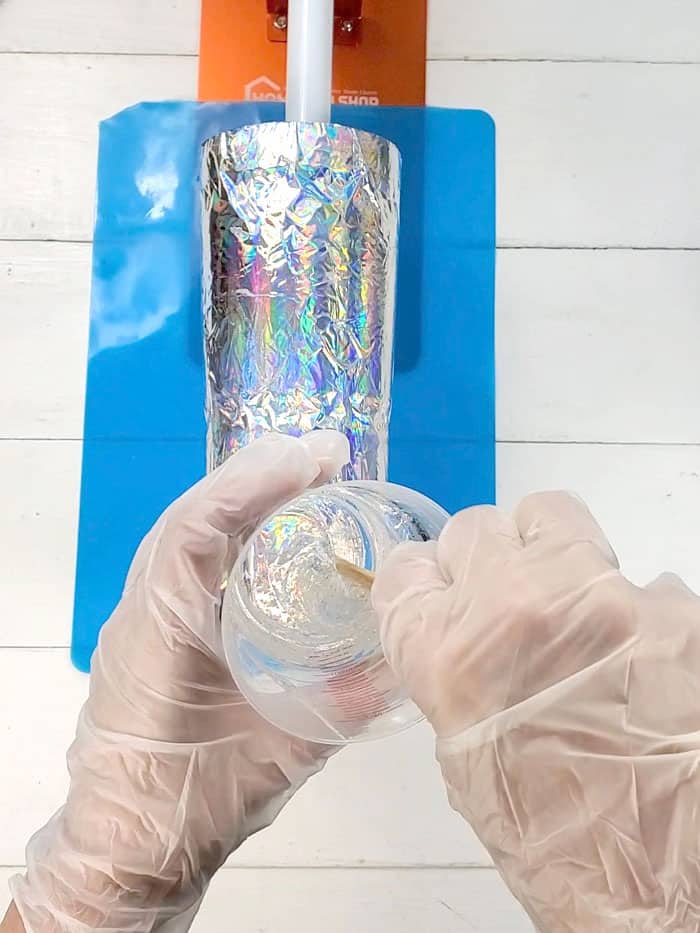
Begin by putting on your disposable gloves and mixing 1/2 ounce of resin with 1/2 ounce of hardener. Then stir gently for 2 full minutes, be sure to scrape the sides and the sticks regularly. Do not mix too fast, or that will whip in excess bubbles.
After mixing for 2 full minutes, pour the resin into a second cup and use a new stick to mix the resin again for 1 full minute.
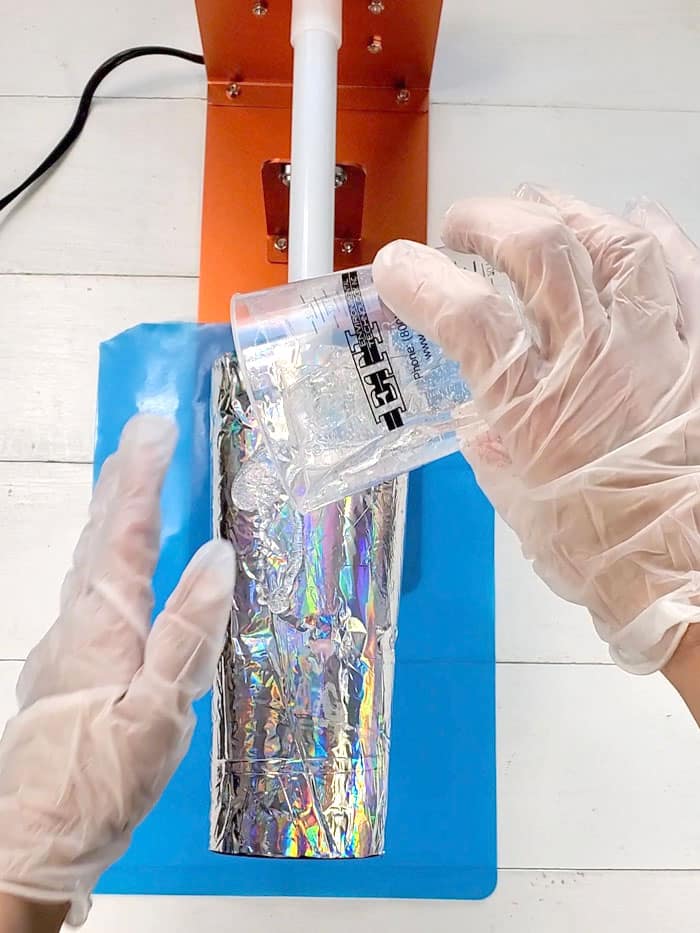
Step 3: POUR RESIN ON IRIDESCENT RESIN TUMBLER
After properly mixing the EnviroTex Lite high gloss finish, turn on the cup turner so it begins moving. Then pour the resin onto the tumbler slowly. Use your other gloved hand to begin spreading the resin all over the tumbler.
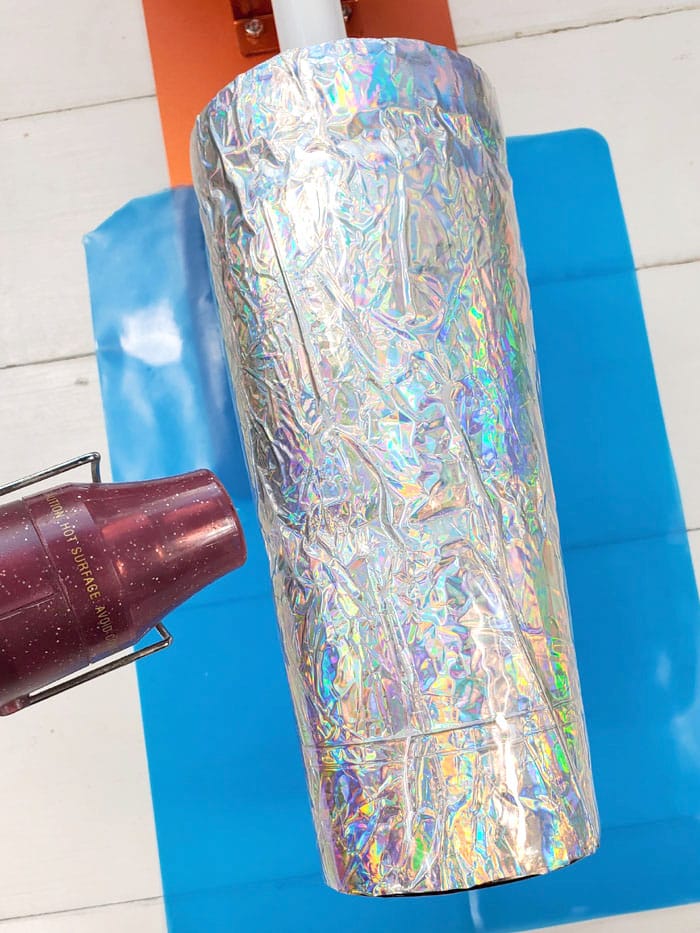
EnviroTex Lite is self-leveling, so it will spread and even out over the course of the drying process. The resin will off-gas and tiny bubbles will appear in the resin. Wait 20 minutes, then use a heat tool to gently pop the bubbles formed in the resin.
Step 4: DRY AND REPEAT
Now let the cup turner rotate that tumbler over night. After 8-12 hours the resin will be dry to the touch!
The crinkled iridescent finish needed 2 more coats of resin to get a super smooth finish. Just mix up an ounce of resin at a time and pour it on the tumbler in the same way as before.
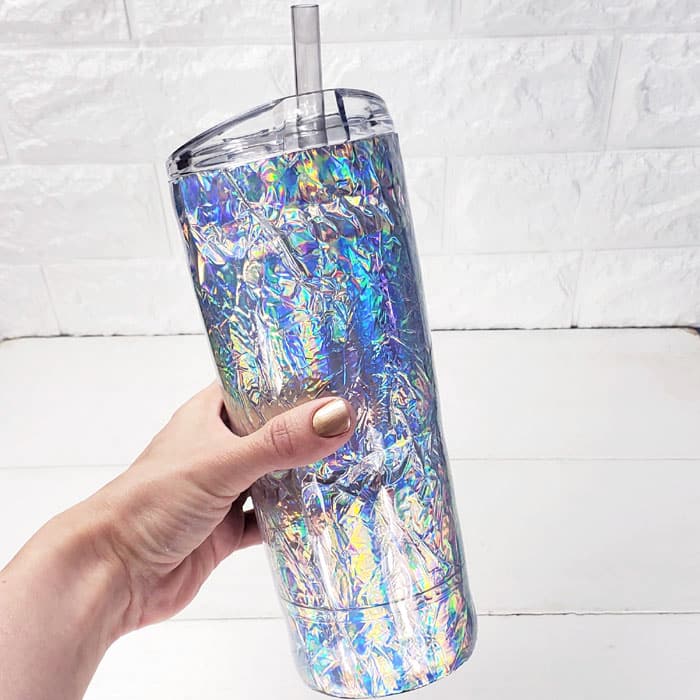
I love seeing the wrinkles, crinkles and bumps in the iridescent finish, but it’s mind blowing how super smooth it is to the touch! It’s amazing how the EnviroTex Lite high gloss finish makes the tumbler look like it’s coated in sparkly glass!The perfect juxtaposition!
The put the lid and straw back on the tumbler and it’s ready to use, gift or enjoy! This iridescent epoxy tumbler will get lots of attention at the beach, pool, office or just on the coffee table as it hydrates you through the day!
Get the supplies to make your own Iridescent Epoxy Resin Tumbler:


Natalie Shaw is a Craft/DIY blogger at Doodlecraftblog.com. She loves sci-fi, fantasy and video game geekery and that comes out in many of her projects. She posts budget conscious DIY’s, crafts, jewelry, kid friendly projects, upcycled treasures and other fun on her blog 5 days a week.


Leave a Reply